


 TL;DR:
Most digital camera malfunctions can be resolved through direct mechanical cleaning, manual setting overrides, system power-cycles, or SD card formatting, though the latter may require subsequent data recovery.
● Fix mechanical lens or shutter obstructions by cleaning the area with an air blower and microfiber cloth, and resolve persistent focus or overexposure errors by switching the lens to manual focus and adjusting the AV +/- exposure compensation button.
● Overcome system freezes or software lock-ups by temporarily removing the battery and SD card for a hard restart, or by navigating to the camera settings menu to completely clear the cache and user app data.
● If a corrupted memory card requires in-camera formatting to resolve read or write failures, use Wondershare Recoverit software via a PC deep scan to retrieve the wiped images and videos across over 1,000 supported file formats.
Ask AI for a summary
 ChatGPT
 Perplexity
 Gemini
 Claude
 Grok
Grok
Like any other technological tool, digital cameras can acquire various types of faults that disrupt their operations as well as your experience in taking photographs. These issues are glitches in the memory cards and lens that are annoying but can be resolved.
Finding the root cause is necessary because it not only saves time but also secures your device, and you will not miss any opportunity to capture important moments. The article is a comprehensive troubleshooter on the most frequently encountered digital camera errors and their remedies.
Secure Data Recovery Expert for All Brands of Camera
Try Recoverit to Perform Camera Data Recovery
 Security Verified. 3,591,664 people have downloaded it.
In this article
-
- Solution 1. Battery Issues (Ensure Batteries Are Fully Charged)
- Solution 2. Memory Card Errors (Format SD Cards)
- Solution 3. Lens Error Or Shutter Problems (Clean The Lens And Shutter Area)
- Solution 4. Blurry/Out-Of-Focus Images (Use A Tripod Or Stabilizer)
- Solution 5. Camera Freezes or Locks Up (Restart or Reset The Device)
- Solution 6. Overexposure Or Underexposure (Adjust Exposure Compensation)
- Solution 7. Autofocus Problems (Switch To Manual Focus)
- Solution 8. White Balance Errors (Set Or Adjust White Balance)
- Solution 9. Software/App Errors (Clear Cache And App Data)

Part 1. The Most Common Digital Camera Errors | Why Digital Camera Errors Happen
Below are some of the most common errors that users have to face while using a digital camera:

- Battery Error: Happens because of low or drained batteries, contaminated contacts, or defective/worn-out battery packs; poor charging practices may cause battery issues as well.
- Memory Card Error: This camera problem is usually brought about by a corrupt, poorly formatted, damaged, or incompatible memory card. It can also be brought about by improper removal or exceeding storage capacity.
- Lens Error: Occurs when the lens barrel is blocked, smeared, broken, or the camera is dropped when the lens is extended/retracting; sand, dust, or force will worsen these issues.
- Shutter Error: The shutter may become stuck because of dirt, wear, and mechanical failure, causing blank or overexposed photos.
- Autofocus Error: This can take place when the camera experiences low contrast, dirty lens contacts, or when the internal focusing mechanism fails.
- Blurry Images: The major causes of these camera errors are due to the shaking of the camera, lack of focus, wrong settings, use of dirty lenses, or low light conditions.
- Overexposed/Underexposed Images: Brought about by metering system failures, incorrect exposure choice, or high contrast images that are difficult to read by the camera.
- White Balance Error: It comes about when the white balance of the camera has not been adjusted appropriately to the lighting environment, resulting in unnatural color casts.
- Camera Freezes or Locks Up: This is caused by firmware bugs, software crashes, incompatible memory cards, or high temperatures.
- Sensor Dust: The sensor or the lens may be loaded with dust or dirt, which may appear as spots in the images. This usually happens when the lenses are changed in dusty conditions or are neglected.
Potential Errors and Their Solutions
Most of the errors that come up while using a digital camera are caused by one initial problem. This is why most eros can be cleared out from the camera through a single solution. To help you quickly fix digital camera through accurate troubleshooting, here is a table for you:
| Errors | Solution | |
|---|---|---|
| Battery Issues | Not Powering On | Charge or replace the battery |
| Sudden Shutdowns | ||
| Low Battery Warning | ||
| Memory Card Errors | Card not detected | Format the card in the camera |
| Card Corrupted | ||
| Write/Read Failure | ||
| Lens/Shutter Problems | Lens Stuck | Gently clean and power-cycle the camera |
| Lens Won’t Retract | ||
| Shutter Won’t Release | ||
| Blurry/Focus Issues | Out-of-Focus Photos | Use a tripod or stabilize the camera |
| Motion Blur | ||
| Soft Images | ||
| Camera Freeze/Lock Up | Unresponsive Button | Restart or reset the camera |
| Stuck on One Screen | ||
| No image display | ||
| Over/Underexposure | Photos too Bright | Adjust exposure compensation |
| Photos too Dark | ||
| High Contrast Blown Out | ||
| Autofocus Problems | Won’t Focus on Subject | Switch to manual focus |
| Slow Focus Response | ||
| Focus Hunts Constantly | ||
| White Balance Errors | Colors Look Unnatural | Set or adjust white balance |
| Blue or Orange Tint | ||
| Mismatched Lighting Tint | ||
| Software/App Errors | Crashes | Clear cache and data/reinstall app |
| Freezes During Import | ||
| Slow Performance |
Part 2. The Most Common Digital Camera Errors and How to Fix Them Professionally
Apart from the above quick solutions, you must be aware of the steps you need to take to fix the error professionally. Here is a guide to 9 different camera problems and their solutions discussed below for your ease:
Solution 1. Battery Issues (Ensure Batteries Are Fully Charged)
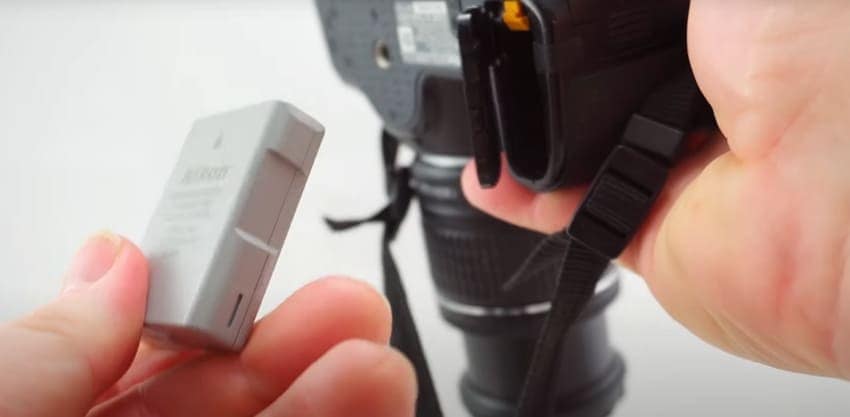
The most helpful tip to prevent power-related inconveniences is to keep your digital camera batteries fully charged. The battery is charged to a considerable extent, so it is not overwhelmed and does not turn off unexpectedly. Consistent charging also aids in maintaining efficiency, enabling the photographers to be confident of capturing moments. The simple steps below will help you understand how to fix my digital camera issues of batteries:
- Turn the camera upside down, open up the battery port of your digital camera, and pull out the battery.
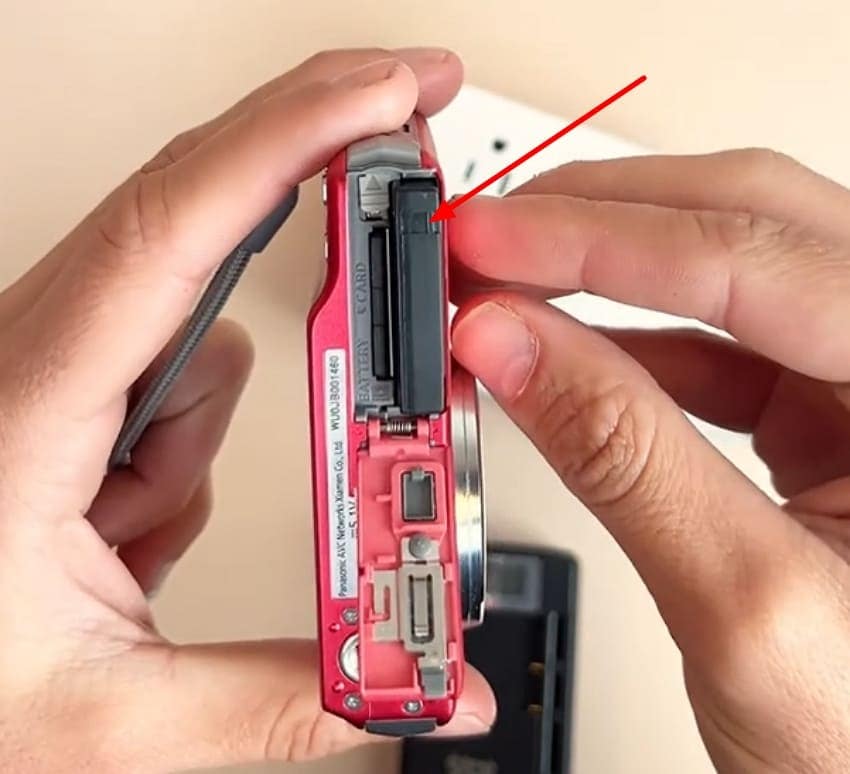
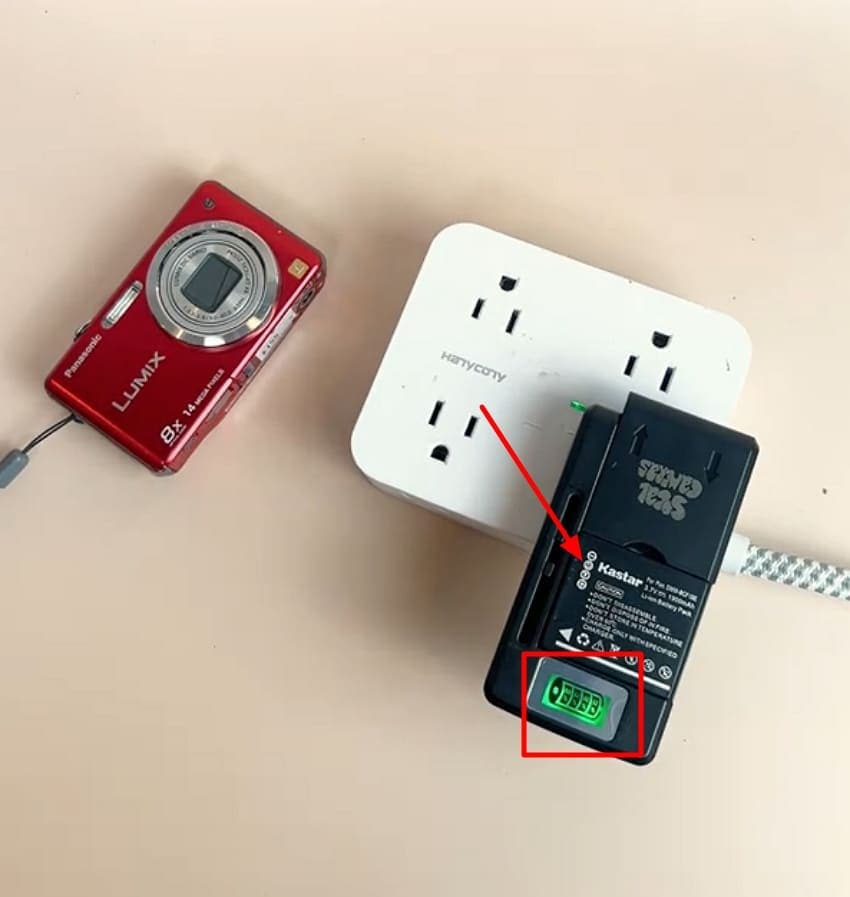
- Pick up your charger, place the camera battery on it, and plug in the charger to a socket to start charging the camera battery.
Solution 2. Memory Card Errors (Format SD Cards)
Formatting your SD card is a good way to erase corrupted information, file system errors, or compatibility camera errors. It will minimize the possibility of losing images by guaranteeing that data is written and stored. You need to make sure that you create a backup to avoid losing data. Dive into the steps below and figure out the best way to clear memory card issues through SD card formatting:
- Start by pressing the “Menu” button on your digital camera.
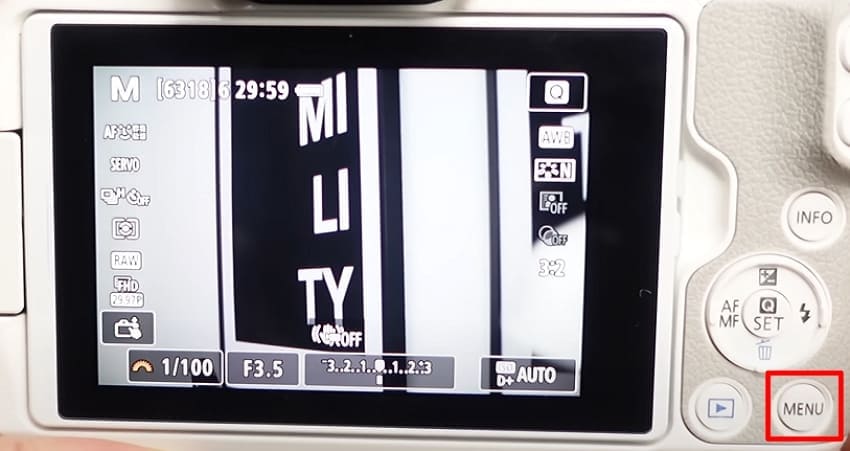
- From the “Tool” icon tab, pick the “Format Card” section and move to the next step.
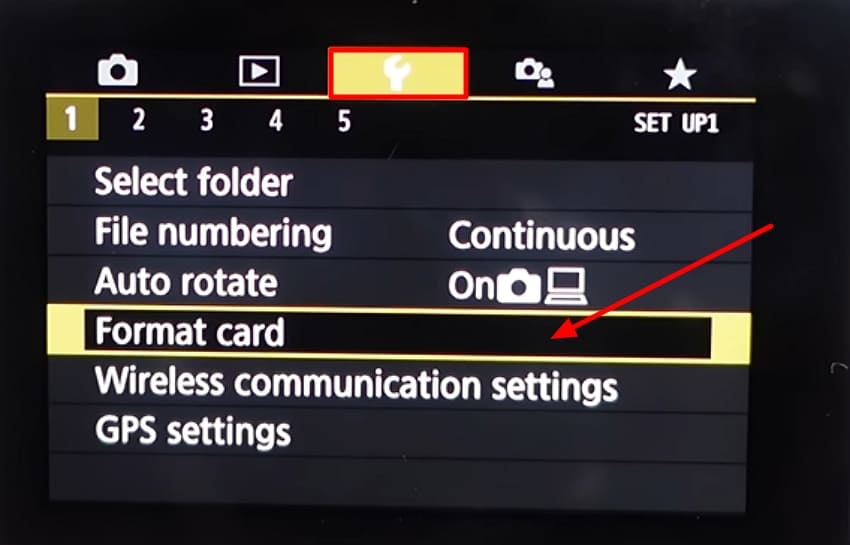
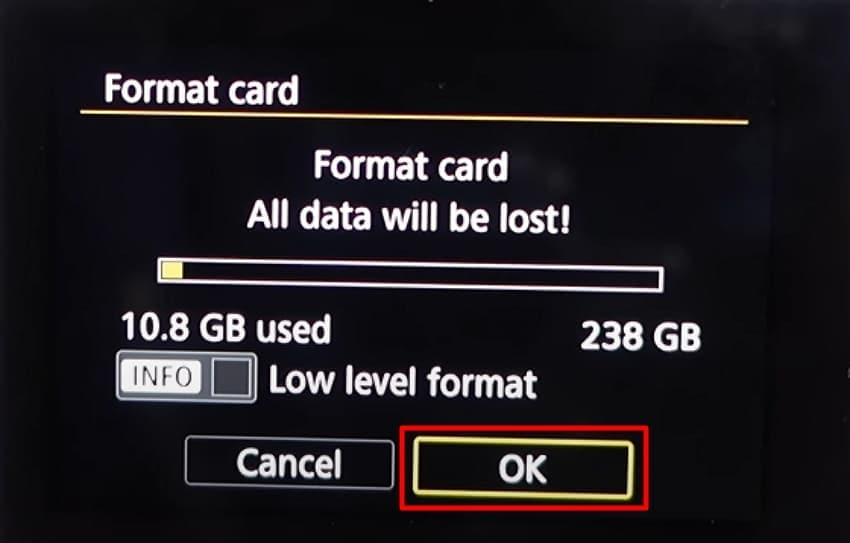
- Confirm that you want to format the card and delete all the data by pressing the “OK” button on the screen.
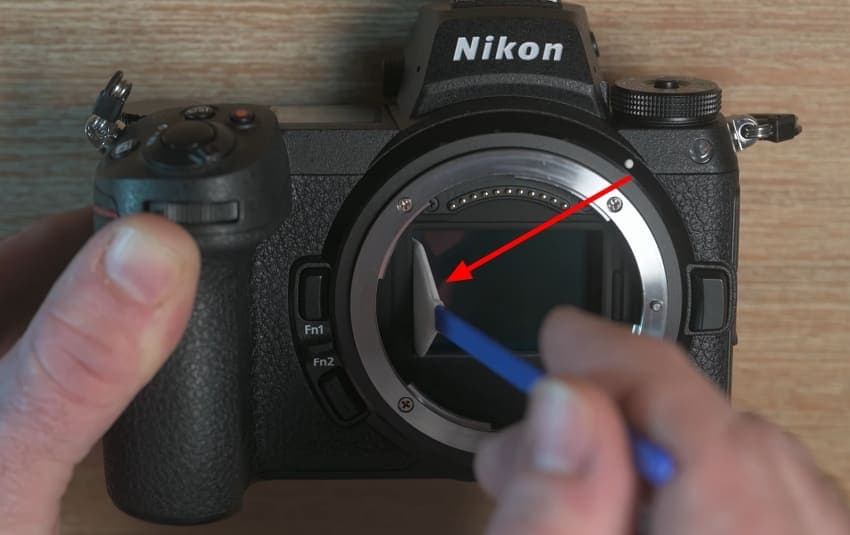
Solution 3. Lens Error Or Shutter Problems (Clean The Lens And Shutter Area)
Cleaning the lens and shutter opening can solve most mechanical or obstruction-related problems. The root cause of malfunctions is often dust and debris, and their presence leads to smooth work and better image quality. Jump to the steps below to figure out the best way to learn how to fix my digital camera lens issues:
- Using an air blower, remove the dust and debris particles from the lens of the camera.
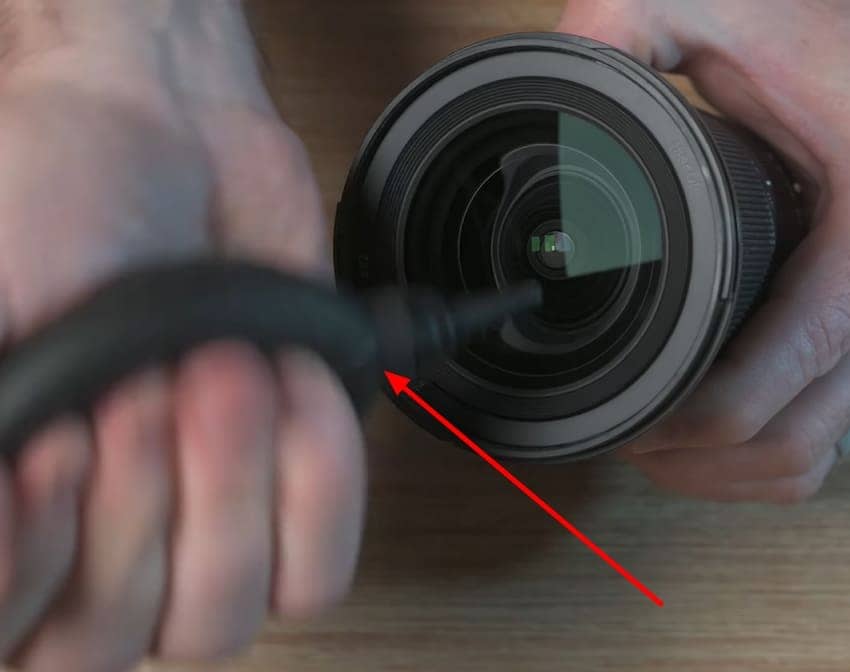
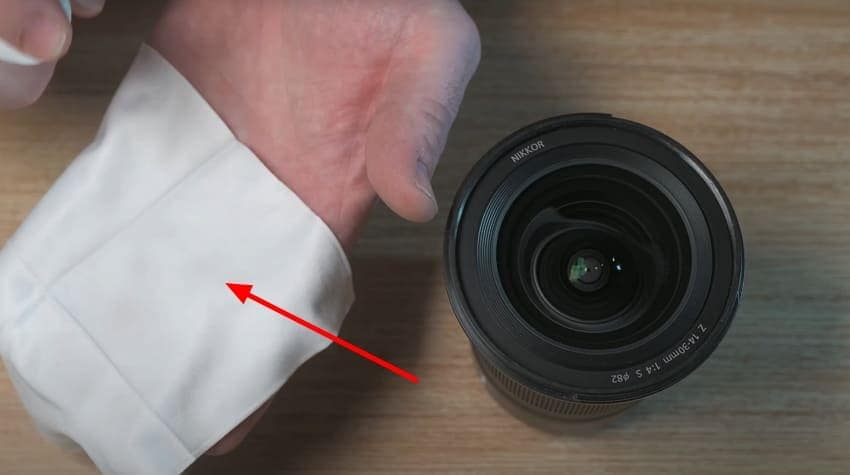
- Use a microfiber cloth and spray it with lens cleaning solution. Next, slightly wipe the camera lens to remove the difficult dust particles stuck.
- Move on to removing the lens of the camera to get to the shutter lens. Spray the sensor swab with lens solution and slightly wipe the shutter lens clean.
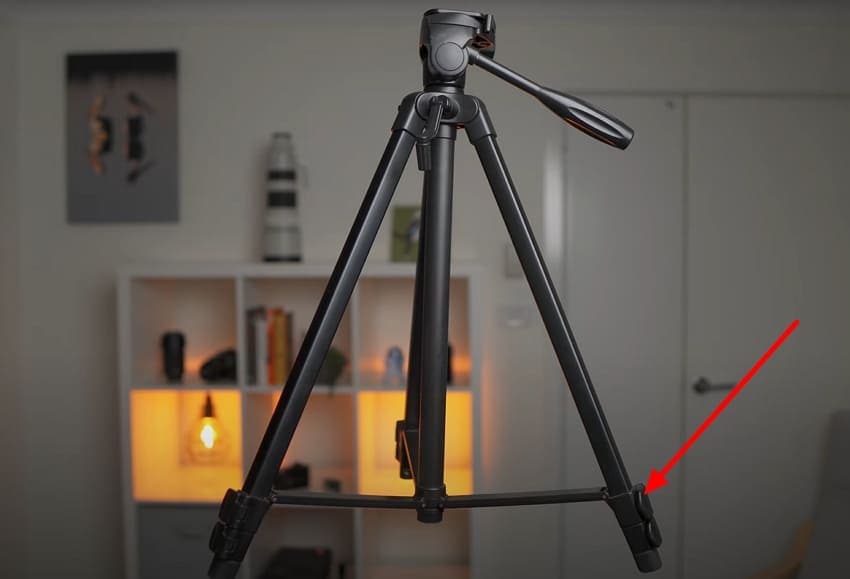
Solution 4. Blurry/Out-Of-Focus Images (Use A Tripod Or Stabilizer)
This solution offers constant support, and the camera is able to take good-quality shots with a lot of sharpness, especially in low-light or long-exposure situations. Through enhanced stability, photographers can attain professional output with more accuracy and consistency when taking pictures. With the help of the steps below, you can fix the camera problems of blurry images:
- Initiate the process by adjusting the clamps of the tripod to set its height based on your requirements.
- Next, screw the mounting plate onto the camera and make sure that it is set straight.
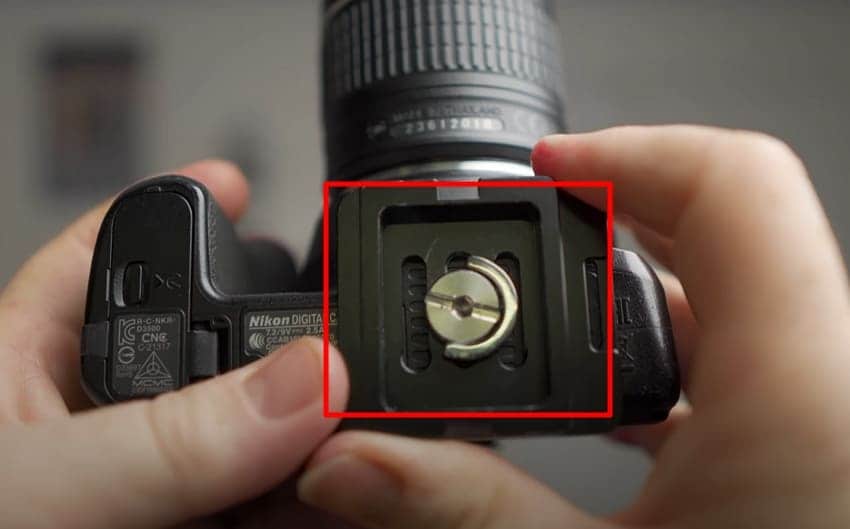
- Slide the camera that is attached to the mount plate and slide it right on the tripod stand and rotate the adjustment to make sure it is straight.
Solution 5. Camera Freezes or Locks Up (Restart or Reset The Device)
A method of correcting system glitches that freeze or cause lock-ups in the camera is to restart or reset the camera. This solution removes momentary errors, and the device resumes normal functioning. Rebooting improves performance and stability, making the shooting experience smoother. Read into the steps below and fix the camera errors of lock-ups or freezes:
Instructions. To restart the digital camera, turn off the camera through the power button. Pull out the battery and the SD card. Wait for a few minutes and then place the battery and SD Card to turn it on again to fix the freeze issue.
Solution 6. Overexposure Or Underexposure (Adjust Exposure Compensation)
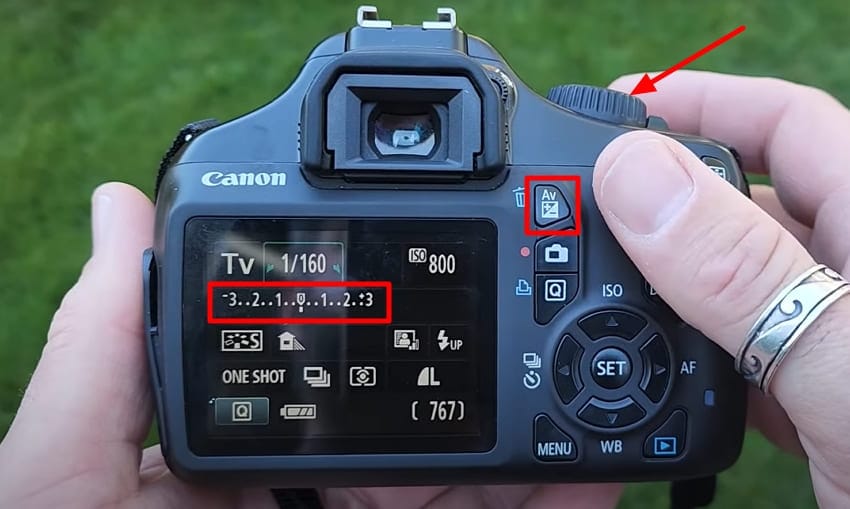
Exposure compensation adjustment helps to balance lighting effects to make the images neither too bright nor too dark. This is the safe solution that enables photographers to adjust the brightness level according to various settings. With minor adjustments, users can have more significant control over their shots. Learn how to fix my digital camera image quality through the steps:
Instructions. Set the “Exposure Compensation” by pressing the “AV +/-” button on the camera and rotating the top left or right to adjust the exposure on the screen accordingly.
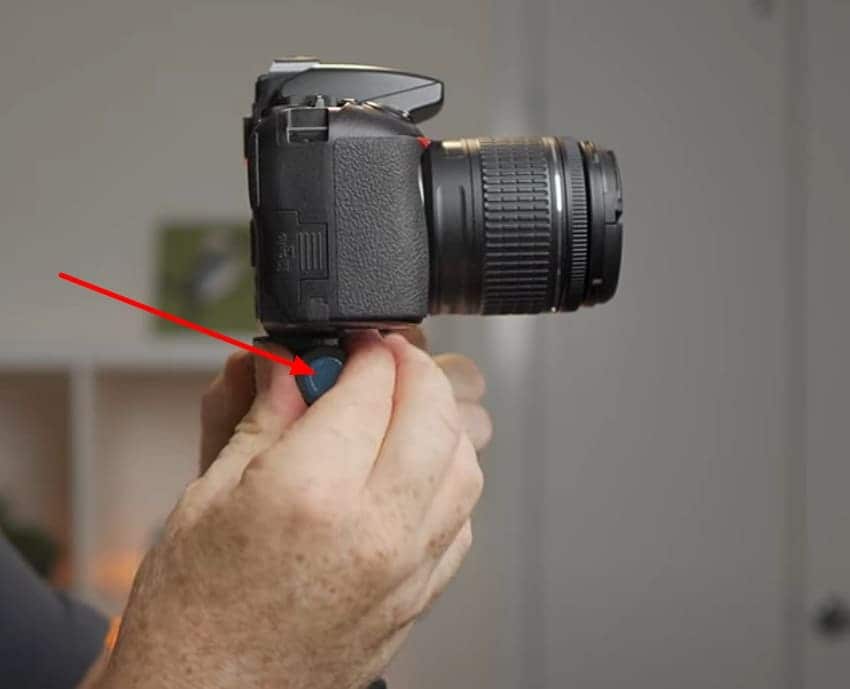
Solution 7. Autofocus Problems (Switch To Manual Focus)
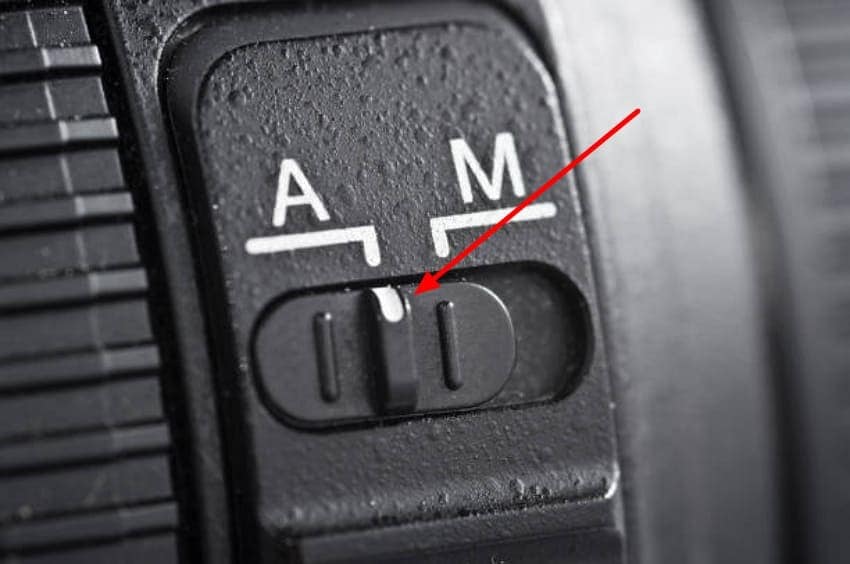
The only practical solution to the failure of autofocus in low light or with complicated subjects is to switch to manual focus. It provides the user with complete dominance over sharpness, thus making the camera accurate, where the automatic system might not be correct. The steps below will help you fix digital camera through manual focus:
Instructions. At the side of the camera, you will see a flip switch button labeled with the letters “A-M.” Flip the switch to “M” to set the Focus to “Manual” and adjust the lens manually to put the focus.
Solution 8. White Balance Errors (Set Or Adjust White Balance)
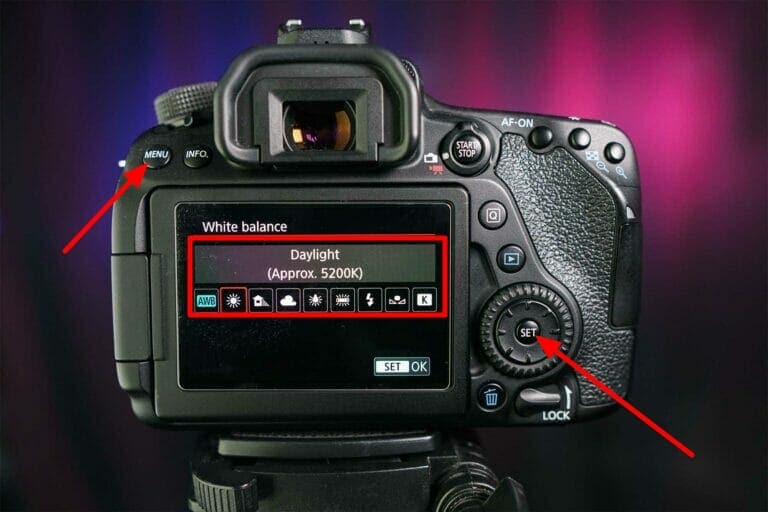
Changing white balance also makes sure that the pictures are not too warm or too cool. It assists photographers in getting images as they appear to the naked eye. With the right balance, users are able to be consistent and professional with their photos, and they do not need to make substantial post-processing changes. Follow the guide below to adjust the white balance and fix the camera problems:
Instructions. Navigate to the “White Balance” settings from the “Menu “button on your digital camera. Then, choose from the different presets available in your camera, and press the “Set” button on the camera to set the white balance error.
Solution 9. Software/App Errors (Clear Cache And App Data)
Deleting cache and application information is a reliable method of solving the performance bugs in the digital camera software. It is helpful to enhance the responsiveness, stability, and overall usability of the digital camera. With the help of the steps, you can fix the camera error by clearing the cache and maintaining a clean software environment:
- Tap on the “Menu” button on your camera and jump to the “Camera User Settings” tab at the “Settings” section.
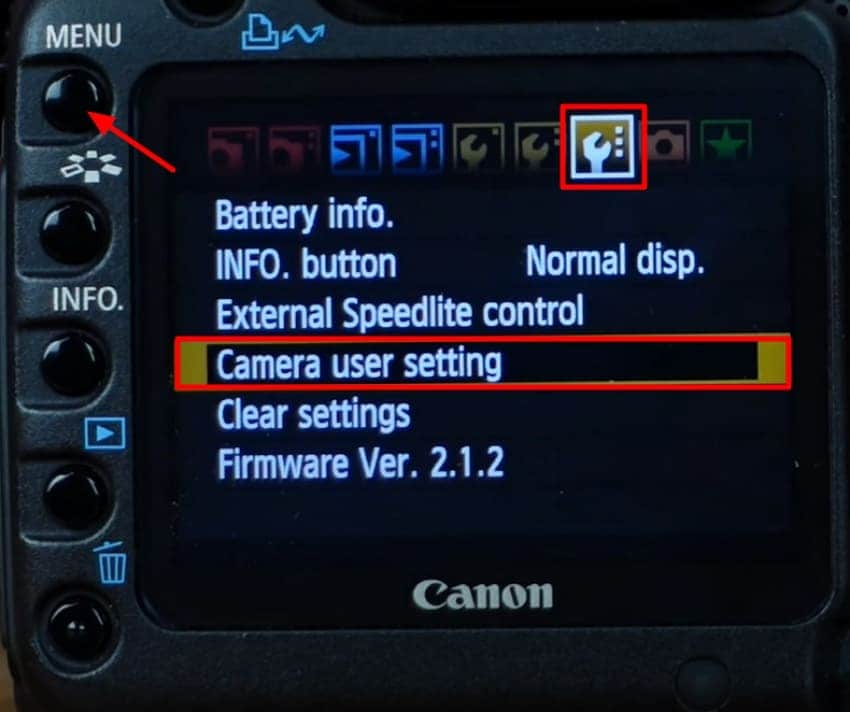
- Choose the “Clear Settings” option and confirm your choice to remove the issues you are facing.
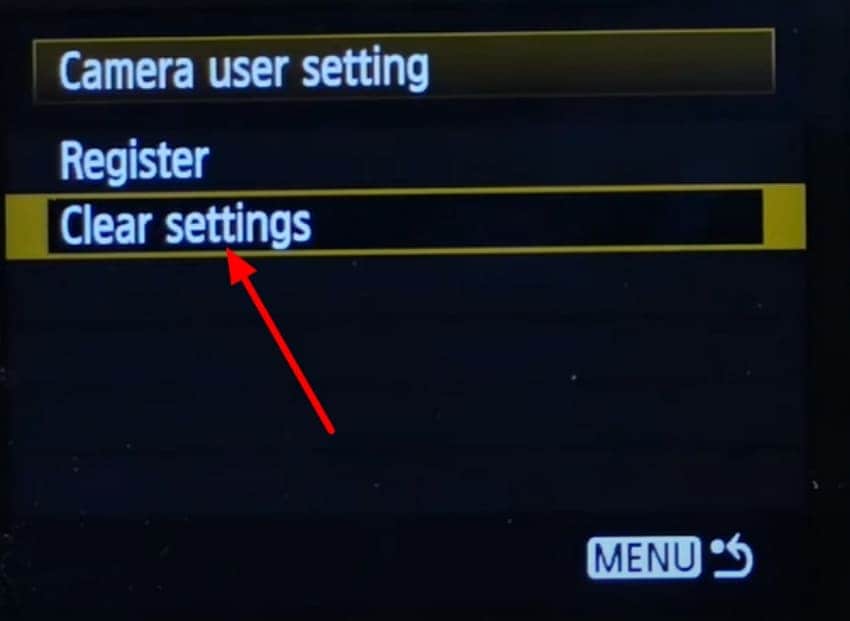
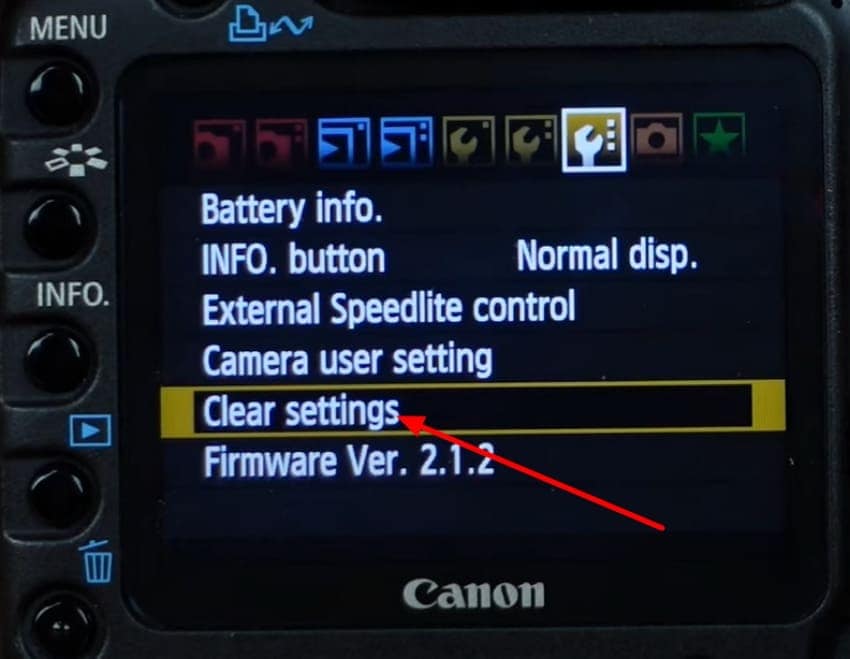
- Press the “Menu” button on the camera again and move to the “Clear Settings” option in the same “Settings” section.
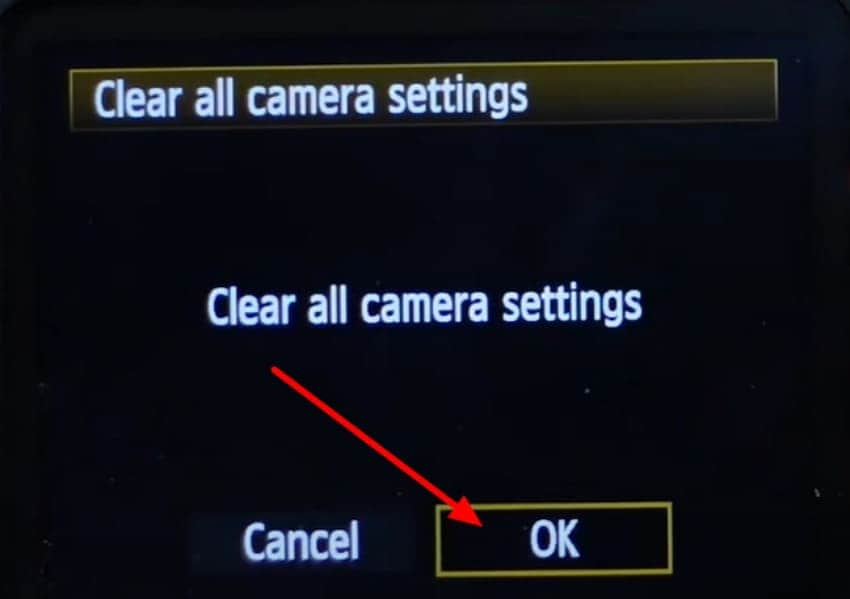
- Finally, hit the “OK” button in the “Clear All Settings” pop-up message box.
Bonus Part. When Camera Errors Lead To Deleted Images | Recovering Lost Photos with Professional Software
While going through these camera errors, we came to the realization that errors like SD Card Formatting can lead to loss of data. This can be troublesome if you do not have a backup created of the images and video you took on your digital camera. To recover the deleted photos, you need to depend on a recovery tool that is effective and reliable, which is Recoverit in this case.
It also serves more than 1 million storage media, such as SD cards from digital cameras. Recoverit also possesses an easy-to-use interface, which enables one to navigate within the software with ease. Even if the data is lost during formatting or deleted by mistake, Recoverit allows you to restore it in under 10000+ different data loss scenarios.
Key Features of Recoverit
- Supported File Formats: Recoverit supports over 1000 file formats to ensure all files are recovered.
- Preview Before Restoring: You can preview the file that you recovered from Recoverit to make sure that the integrity of the images is maintained.
- Filter Files: Recoverit allows you to filter out file types and the path of the folder to ensure you locate the exact missing files.
Walkthrough Guide on How To Recover Deleted Images From a Digital Camera
To get a better understanding of how Recoverit helps recover data that was lost due to camera problems, read the steps below:
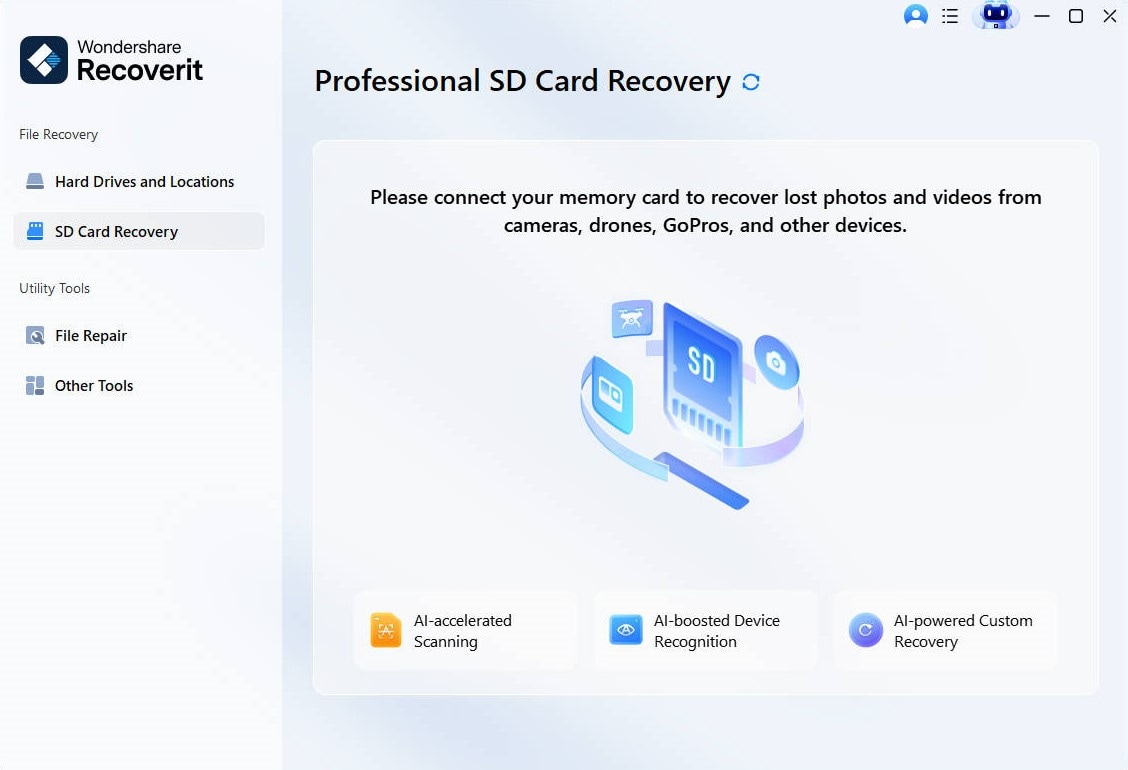
1. Access Recoverit SD Card Recovery and Connect the Card to the Device
Start the process by launching Recoverit, clicking on the “SD Card Recovery” section, and connecting your SD card to the PC.
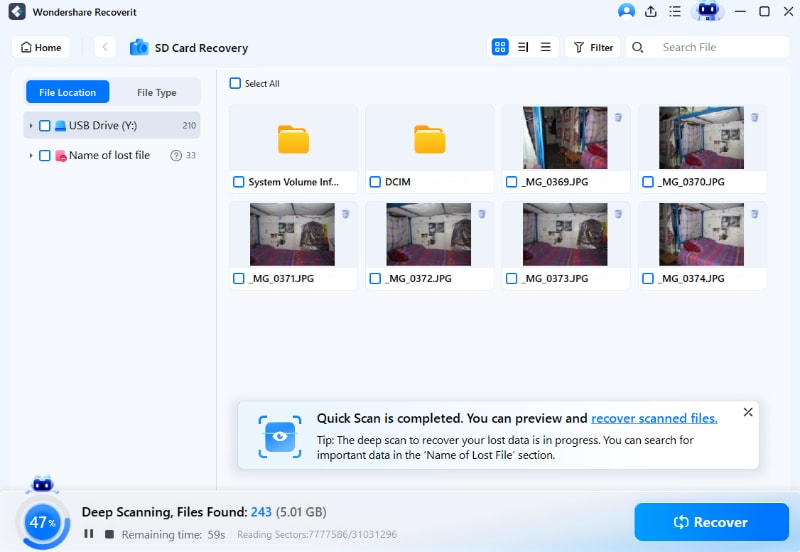
2. Scan the SD Card and Locate the Lost Files
Moving on, start the “Deep Scan” process to locate the missing or deleted files. Hit the “File Location” and “File Type” options to find the missing files and hit the “Recover” button.
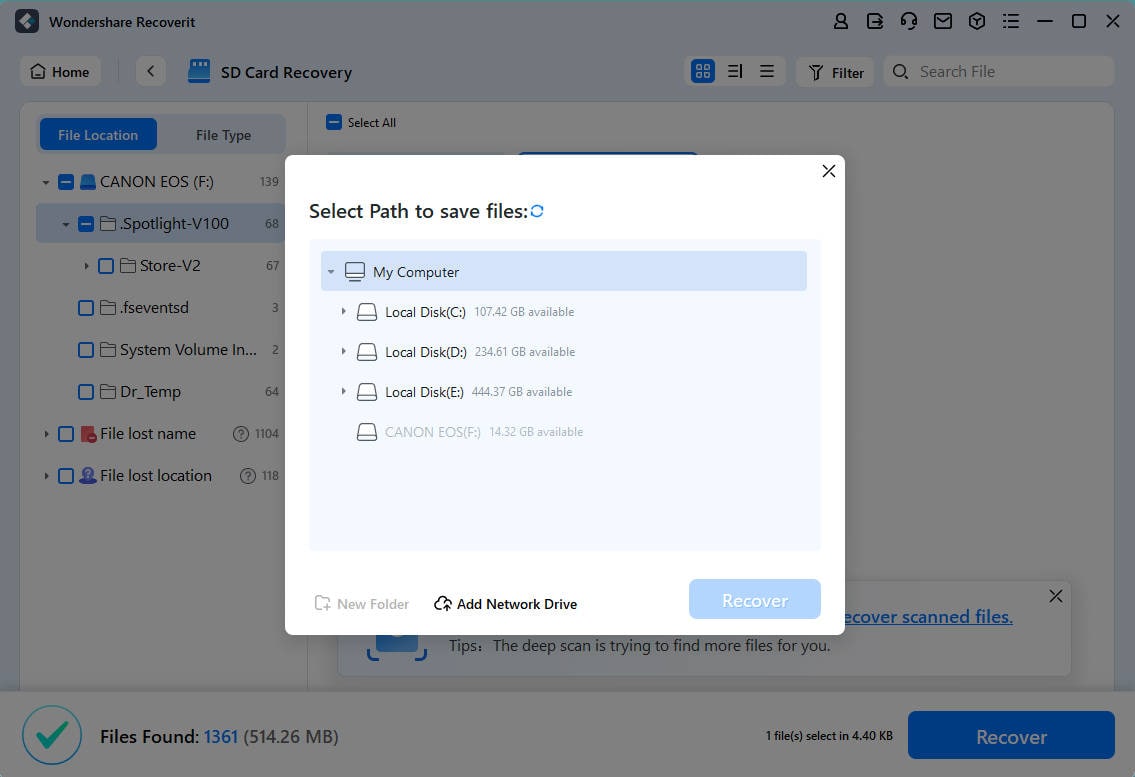
3. Preview and Save the Files to the Original Location
Finally, preview the images from the digital camera and hit the “Recover” button to save them back to their original location.
Conclusion
In conclusion, this article has looked into the most common camera errors that a user has to face while using a digital camera. We have discussed how multiple errors can be dissolved by one solution. We then provided you with different solutions to resolve the errors in your camera. Moreover, we have discussed a solution, Recoverit, for users who experience data loss while facing camera errors.
FAQ
-
1. What causes LCD burn in a digital camera?
LCD burn happens when static images are displayed on the screen for long periods, causing ghost-like marks to remain. It results from uneven pixel usage, where some areas of the screen wear out faster than others. Over time, this reduces screen clarity and affects display quality. -
2. What are reset camera settings?
The reconfiguration of camera settings takes the device back to factory settings, deleting personal preferences. It also corrects some settings such as ISO, white balance and shooting modes to correct misconfigurations. This process is often used when troubleshooting camera problems or restoring optimal performance. -
3. How to fix a Canon lens error?
A Canon lens error often occurs due to dust, obstruction, or misaligned mechanics. Try turning the camera off, removing the battery, and gently cleaning around the lens. If the error persists, professional repair may be necessary to avoid further damage. -
4. How to fix the SD card error?
An SD card error can be caused by corruption, improper formatting, or a loose connection. First, reinsert the card, check it on another device, or format it if needed. If still unreadable, data recovery software or replacing the card may be the best solution.


