Losing track of files after moving them can be a frustrating experience, especially if they contain important data or memories. Whether you've accidentally dragged and dropped a file to an unknown location, or used a file management tool that didn't quite work as expected, the good news is that there are simple methods to help you recover moved files.
By following a few straightforward steps, you can quickly locate and retrieve your misplaced files, minimizing stress and ensuring that your valuable information is back where it belongs. In the following guide, we'll explore easy methods to recover moved files using built-in features of your operating system as well as reliable software solutions. From utilizing file search functions and checking recent activity logs to employing data recovery tools like Recoverit, you'll find practical tips to track down and restore your moved files with ease.
Whether you're looking to recover moved files in Windows 10/11 or recover moved files from an Android phone, these methods will empower you to efficiently manage your files and prevent future mishaps.
In this article
Part 1: Why Am I Unable to Recover Moved Files?
There are several reasons why you might be unable to recover moved files:
- Abrupt System Crash: If your computer crashes unexpectedly while moving files, it can interrupt the transfer process and cause files to go missing, making it difficult to recover moved files.
- Unexpected Power Failure: A sudden power outage can disrupt the file-moving process, leading to incomplete transfers and lost files, complicating efforts to recover moved files.
- Sudden Storage Device Removal: Removing the storage device (like an SD card or USB drive) during the transfer can result in lost files and hinder your ability to recover moved files.
- Improper Windows Pop-Ups: Sometimes, Windows pop-ups or notifications can interfere with the file-moving process, causing files to be misplaced, making it hard to recover moved files in Windows 10/11.
- Hardware Failure: Issues with your storage device or computer hardware can lead to data loss during file transfers, preventing you from recovering moved files.
Understanding these common issues can help you take preventive measures and improve your chances of successfully recovering moved files, whether you need to recover moved files in Windows 10/11 or recover moved files from an Android phone.
Part 2: How To Recover Moved Files In Windows 10/11
Method 1: Use Recoverit to Recover Moved Files (Recommended)
Recoverit is a powerful data recovery tool that can help you recover moved files easily. It is designed to handle various data loss scenarios, including files moved to unknown locations.
Video Tutorial: How to Recover Files on Windows?
With its user-friendly interface and advanced scanning algorithms, Recoverit can locate and restore your files efficiently, even if they have been accidentally moved or deleted. Here’s how to use it to recover moved files on Windows:
Steps:
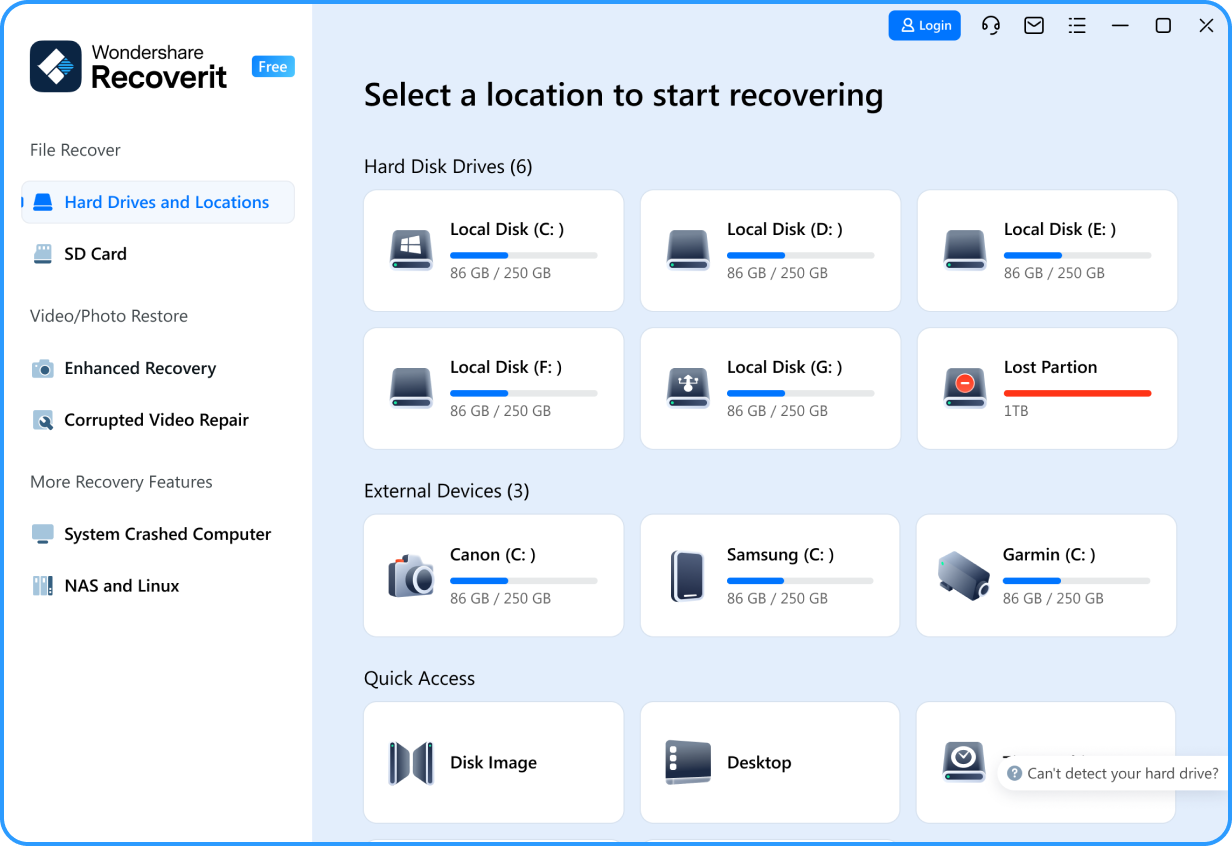
Step 1: Install Recoverit on your computer. Launch the program. Choose the location where the files were originally stored and start the scan.

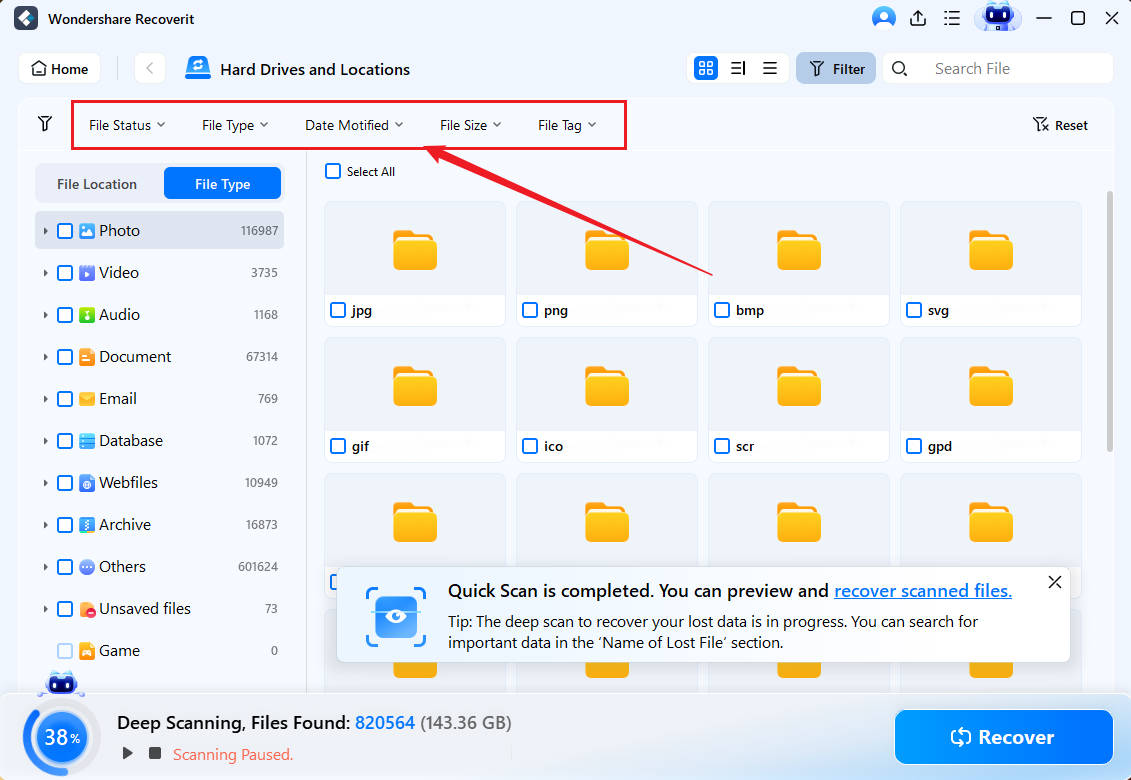
Step 2: Recoverit will scan the selected location and display a list of recoverable files.

Step 3: Preview and select the files you want to recover, then click the "Recover" button to restore them.

Using Recoverit to recover moved files is better than other methods because it offers a comprehensive solution for data recovery. Unlike basic methods like using Ctrl + Z or the Recycle Bin, which are limited to recent and intentional moves, Recoverit can scan your entire drive to locate files that were unintentionally moved, deleted, or even corrupted.
Its advanced algorithms ensure a higher success rate in retrieving lost files, providing a reliable and thorough approach that basic built-in features cannot match. This makes Recoverit an indispensable tool for recovering critical data in various complex scenarios.
Learn more >>:
Why Recoverit is the best SD data recovery software?
Why File History Does Not Recognize This Drive on Windows 10/11
How to Recover Files after Unexpected Shutdown?
How to Check SD Card Health on Windows
Method 2: Cancel the File Transfer with Ctrl + Z
If you’ve just moved a file and realized it immediately, you can undo the move action using the Ctrl + Z shortcut. This method is quick and effective for recent file moves, allowing you to revert the action without using any additional tools or software. By pressing Ctrl + Z right after moving the file, you can cancel the move operation and return the files to their original location.
Steps:
Step 1: Press Ctrl + Z on your keyboard right after moving the file.

Step 2: This will cancel the move operation and return the files to their original location.
Method 3: Restore From Recycle Bin
Sometimes, moved files end up in the Recycle Bin, either intentionally or accidentally. This built-in feature of Windows acts as a temporary storage area for deleted files, giving you a chance to recover them before they are permanently erased. If your moved files are in the Recycle Bin, you can easily restore them with a few clicks.
Steps:
Step 1: Open the Recycle Bin on your desktop. Locate the moved files in the Recycle Bin.

Step 2: Right-click on the files and select "Restore." The files will be moved back to their original location.
Method 4: Use Windows File History
Windows File History is a built-in backup feature that can help you recover moved files if you’ve enabled it. This feature automatically saves copies of your files, allowing you to restore previous versions in case of accidental moves or deletions. It's an excellent tool for ensuring data safety and can be a lifesaver when files are misplaced.
Steps:
Step 1: Open the Control Panel and navigate to "File History." Click on "Restore personal files" on the left-hand side.

Step 2: Browse through the backups to find the files you want to recover. Select the files and click the "Restore" button to recover them to their original location.
These methods should help you recover moved files in Windows 10/11 efficiently.
Part 3: Pro Tips To Get Moved Files Back
Here are some pro tips to help you recover moved files:
- Use Search Functions: Utilize the built-in search functionality of your operating system. On Windows, use the search bar in File Explorer to locate the file by its name or type. This can often pinpoint where the file was moved.
- Check Recent Activity: Look at the "Recent Files" or "Recent Activity" section in your file management tool. This can provide a quick way to identify recently moved files.
- Use Command Prompt: On Windows, you can use Command Prompt to search for files by running commands like dir /s [filename]. This can help locate files in subdirectories where they might have been moved.
- Restore Previous Versions: If you use backup services or Windows File History, you can restore previous versions of folders to retrieve moved files.
- Employ Data Recovery Software: Tools like Recoverit can help recover moved files if they seem lost. These tools can scan your entire drive to locate files that were unintentionally moved.
- Check Cloud Services: If your files are synced with cloud services like OneDrive, Google Drive, or Dropbox, check those platforms for the moved files. They often maintain a history of file changes.
- Inspect Storage Devices: Ensure that external drives or USB sticks are connected if you suspect the file might have been moved there.
- Look in Common Locations: Files can often end up in common directories like Downloads, Documents, or the Desktop. Do a thorough check of these locations.
By following these tips, you can increase your chances of successfully recovering moved files, whether they’re on Windows 10/11 or an Android phone. This can save you time and ensure you retrieve your valuable data with ease.
Conclusion
Investing time in regular SD card health checks and maintenance can save you from potential headaches down the road. By being proactive about your SD card's health, you can ensure that your valuable data is always safe and accessible. Remember, if you encounter any data loss issues, tools like Recoverit are available to help you recover moved files in Windows quickly and efficiently.
Try Wondershare Recoverit to Recover Lost Data

FAQ
-
Q1: How often should I check my SD card health?
It’s recommended to check your SD card health periodically, especially before important data transfers, after using the card in multiple devices, or if you notice any performance issues. Regular checks can help you identify and address potential problems early. -
Q2: Can I recover data from a damaged SD card?
Yes, you can recover data from a damaged SD card using professional recovery software like Recoverit. These tools can scan and retrieve lost files even from corrupted or unmountable SD cards. It's important to act quickly to maximize the chances of successful recovery. -
Q3: Is it necessary to use third-party software for checking SD card health?
While built-in tools like Windows Performance Monitor can provide basic insights, third-party software like Hard Disk Sentinel and CrystalDiskMark offer more detailed information and advanced features for a comprehensive health check. These tools provide deeper diagnostics and can help identify issues that built-in tools might miss.


 ChatGPT
 Perplexity
 Google AI Mode
 Grok
Grok


