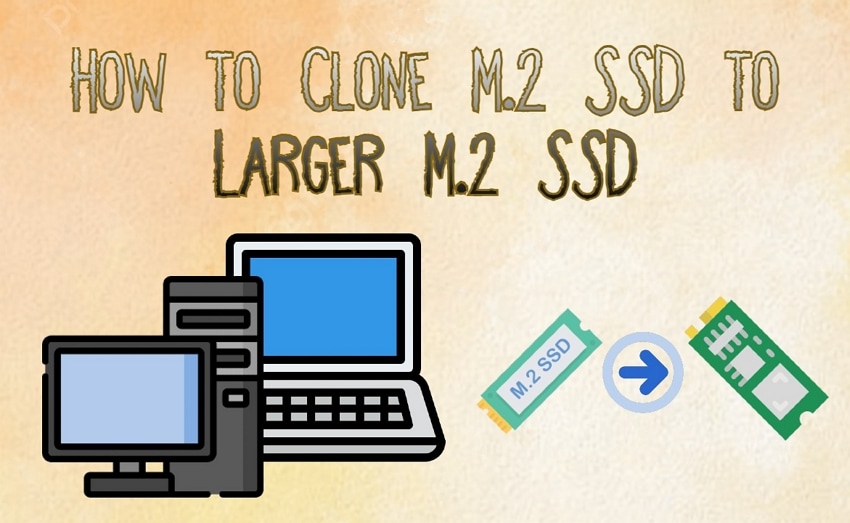


Many users upgrade their storage to handle their growing data needs. While doing so, a common challenge comes when migrating from a smaller M.2 drive to a larger one without losing files. For countering such requirements, you can clone your drive which helps transfer data and other settings with ease. Furthermore, this process calls for careful preparation to copy data and avoid errors.
However, know that factors like compatibility and proper backup measures are important to achieve a smooth migration. Understanding these aspects helps prevent boot failures or missing partitions after the transfer. This guide will provide a detailed guide on how to clone M.2 SSD and what you need to prepare before initiating the process.
Try Recoverit to Perform SSD Data Recovery
 Security Verified. 3,591,664 people have downloaded it.
In this article

Part 1. Is It Possible to Clone the M.2 SSD to a Larger M.2 SSD?
Cloning a smaller M.2 to a larger one is a practical way to upgrade storage without reinstalling everything. Many users wonder if this process is possible and whether the new drive will function properly. With the right approach, you can easily achieve this cloning process. Modern cloning tools allow seamless data transfer, preserving files and the operating system.
However, certain factors influence success that you should keep in mind before going through the process. The motherboard must support the new drive, and the cloning software should handle size differences efficiently. You also should ensure that there is enough unallocated space on the large M.2 SSD to avoid partition issues. With all these factors in mind, you can effectively execute the cloning of M.2 SSD to a larger option.
Part 2. Discussing the Preparations for Cloning M.2 SSD to Larger M.2 SSD
Upon starting the process, you should first know the proper preparation to ensure a smooth transfer. The following section will provide you with a complete guide, including the preparation process and installation of your new SSD:
1. Check the Number of M.2 Slots
You need to ensure your device has enough M.2 slots for both drives before proceeding to the next step. Some motherboard supports multiple slots, while others have only one, which requires an external adapter for migration. If only one slot is available, you may need to use a USB adapter or external enclosure to clone M.2 successfully.
2. Buy a Right M.2 SSD
While you’ve confirmed the slots, choose the right drive for successfully upgrading your device. It should be larger than the existing options and hold compatibility with your motherboard. So, selecting a quality drive helps clone the M.2 SSD efficiently without compatibility issues.
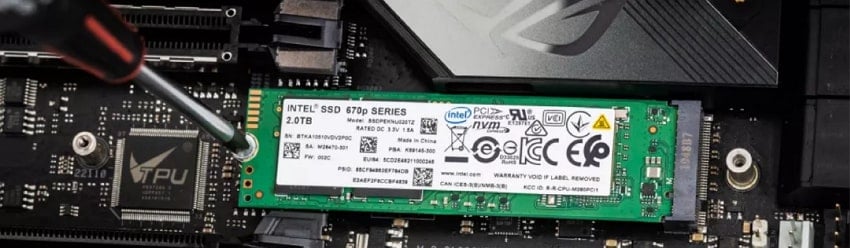
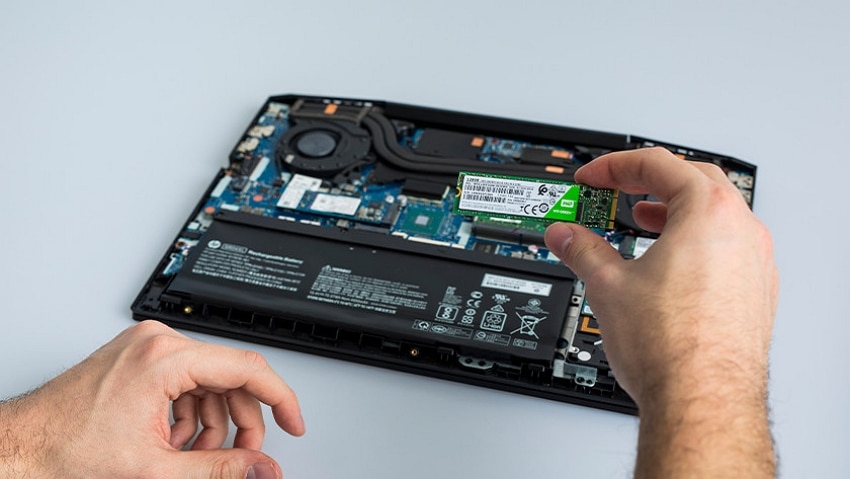
3. Install the New M.2 SSD to the Laptop/PC with One Slot or Multiple Slots
If the device has a single slot, you are bound to use a USB adapter for connecting the new drive. However, for multiple slots, we’ve mentioned the simple steps for both laptop and PC:
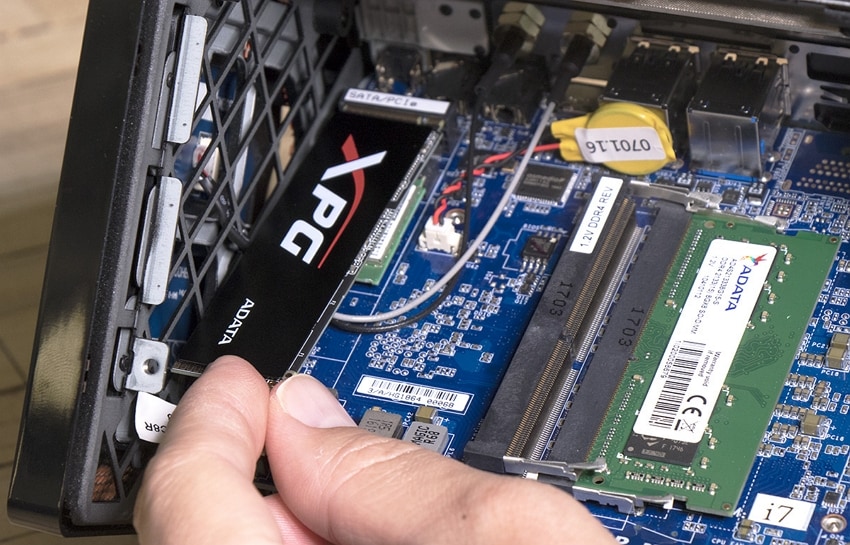
Laptop: Power off the laptop, remove the back cover, and locate the empty slot near the existing storage. Afterward, carefully insert the new drive at a slight angle and secure it with a screw and reassemble the laptop.
Computer: Open your device case after turning off your device and locate an available M.2 connector, usually labeled "PCIe." Afterward, put the new drive in the slot and secure it with the mounting screw. Now, you need to close the case and power the system for the cloning process.
4. Initializing New M.2 SSD
Upon installing the new drive, it must be initialized before use. This step is important to clone the M.2 SSD successfully without errors. Let’s go through the process of initializing the drive to make it ready for cloning:
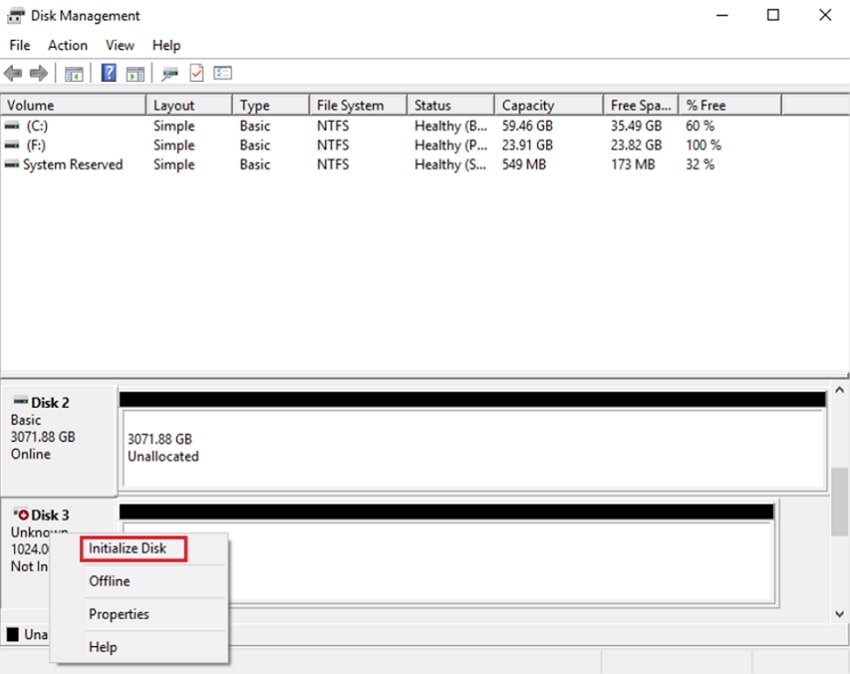
Step 1. Initiate by accessing the “Disk Management” on your device by right-clicking on your “Windows” icon. Locate the newly inserted drive and use the right-click of your mouse to choose the “Initialize Disk” option.
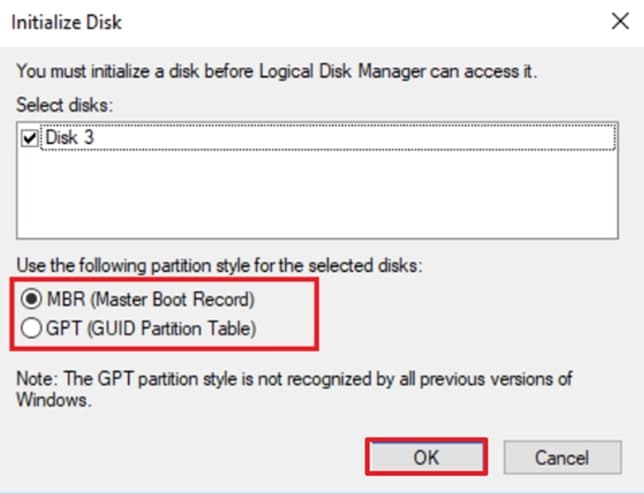
Step 2. Afterward, select the "Partition Style," as same as the source drive has in the newly appeared dialogue box. Next, press the "OK" button to successfully initialize your new M.2 drive.
Part 3. Top Tools To Clone M.2 SSD to Larger M.2 SSD
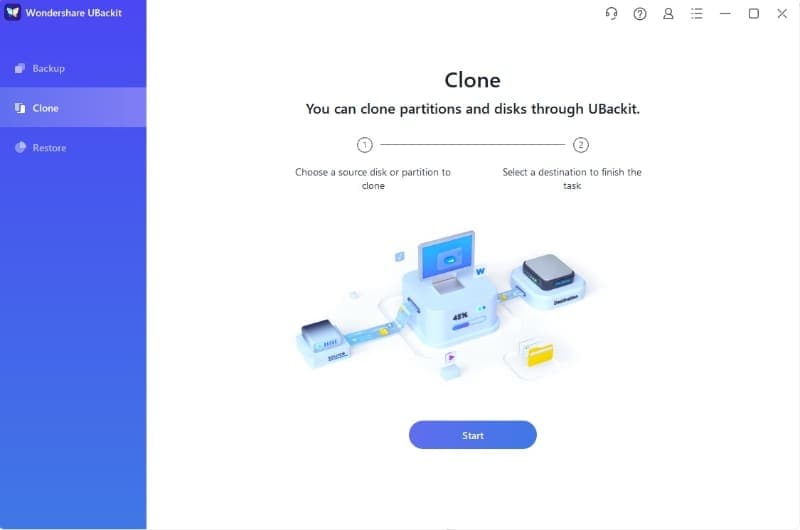
The next important step is to select the right tool for cloning after preparing the new drive. As we know, reliable M.2 cloning software ensures smooth data transfer while minimizing errors. Without the right tool, users may face boot failures or corrupted files after migration. For this need, we highly recommend Wondershare UBackit, which is designed for secure data backup and disk cloning.
The tool allows users to clone entire drives seamlessly to ensure a perfect replica of all files and settings. Plus, it enables backing up specific partitions and helps users protect important data before cloning. The tool also has the ability to secure backups with password protection, which adds an extra layer of safety. Along with that, you can also duplicate faulty disks to avoid additional harm while recovering data.
Bonus Part. Recover Essential Data Lost from Drive With Top Recovery Solution
After learning how to clone M.2 SSD, it is also important to address an unfortunate yet common scenario where you lose your data from your device. If it happens because of accidental deletion or damaged storage device, data loss can cause many issues. With the right tool, you can still recover your data files and get them back on your device.
If you have ever lost your important data, Wondershare Recoverit offers a reliable solution to restore them. With an impressive 99.5% recovery rate, it can retrieve deleted files from over 2000+ storage devices. Along with that, its system crash recovery lets you restore files from non-bootable Windows and Mac devices.
Key Features
- Format Support: The software can restore files in more than 1000 formats, including emails and multimedia files.
- Free Version: Recoverit offers a free version that allows users to recover up to 100MB of data.
- System Crashed Recovery: When a computer fails to boot due to a system crash, Recoverit allows users to create a bootable USB drive.
- NAS Data Recovery: Users can retrieve lost files from NAS devices like Synology, QNAP, and Thecus remotely without unplugging the disks.
Guide to Use Recoverit to Retrieve Lost Data
Follow the detailed steps below to learn how to restore your lost data from your device with the help of this tool:
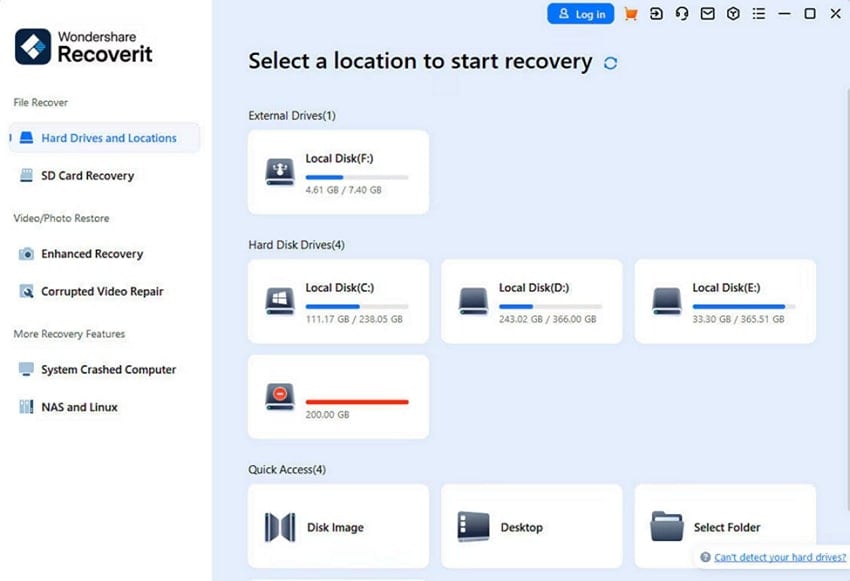
Step 1. Access Recoverit to Restore Your Lost Data
To initiate, open this tool on your desktop and go to the "Hard Disk Devices" tab from the main interface. Next, choose either "Desktop" under "Quick Access" or select a hard disk under the "Hard Disk Drivers" section to start the task.
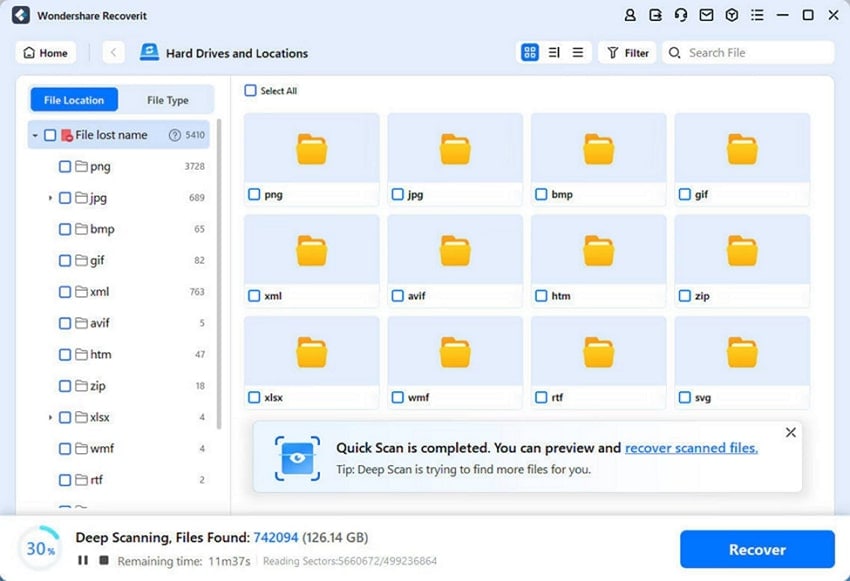
Step 2. Locate Your Lost Files To Recover Them
Afterward, the software will commence an extensive scan to identify all missing and erased files from your selected folder or drive. If the results appear difficult because of the extensive amount of data, you can refine them by applying filters. Upon doing this, you can use the "Search Box" option to find files swiftly by indicating the file type.
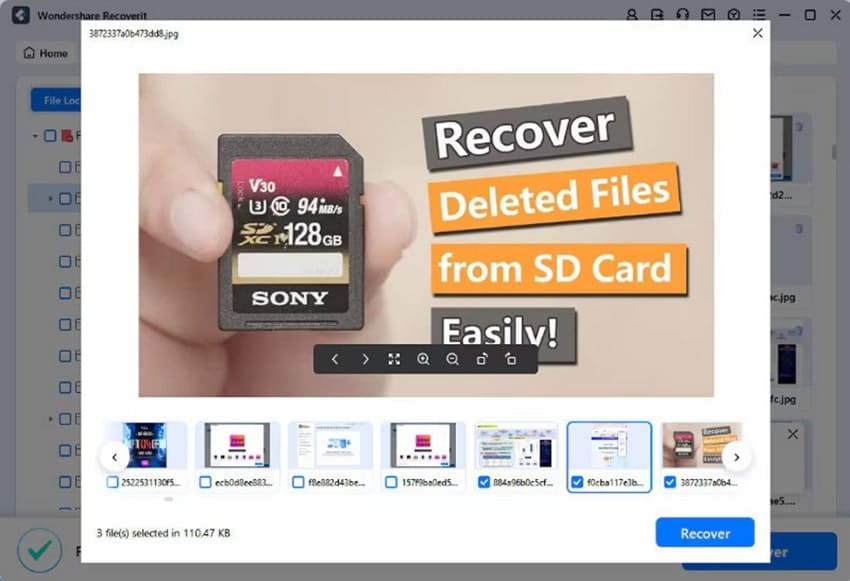
Step 3. Retrieve Your Lost Files To Your Device
Upon examining the files and verifying they are the correct ones, go ahead and retrieve them using the software. Now, click the "Recover" button to retrieve your lost data, and choose a safe place to store the restored files.
Conclusion
To wrap up, cloning a drive is a smart way to upgrade storage without reinstalling the operating system. Whether upgrading to a larger drive or creating a backup, the process ensures smooth system performance. When choosing cloning software, Wondershare UBackit simplifies the process with an intuitive interface and secure data migration. Thus, we have explored a detailed guide on how to clone M.2 SSD and verify the data afterward.
Along with that, in any case, if you lose your important data and want to recover them after cloning, Wondershare Recoverit is highly recommended. It efficiently restores deleted or inaccessible data and ensures peace of mind. So, you must download and try Recoverit today and retrieve your data seamlessly.
FAQ
1. What is the benefit of cloning a smaller drive to a larger one?
Cloning a smaller storage device to a larger one allows users to upgrade without reinstalling the operating system. It helps preserve all files and other settings for a smooth transition. Along with that, you can prevent your data from any loss and save time compared to manually transferring files.2. How do I ensure the new drive is compatible with my device?
Before upgrading, you need to check your motherboard's specifications to confirm compatibility. Make sure the new storage uses the same connection type and interface. Also, verify that the system supports larger storage capacities.3. Is it possible to clone only specific files instead of the entire drive?
Yes, some cloning software, like Wondershare UBackit, allows users to select specific partitions or files. This feature helps in saving storage space and organizing data efficiently. Plus, it is useful when you don’t want to duplicate unnecessary system files.
 ChatGPT
 Perplexity
 Google AI Mode
 Grok
Grok


