
Jul 21, 2026 • Filed to: Take Data Backup • Proven solutions
 TL;DR:
To resolve a frozen Mac Migration Assistant without risking data corruption from a forced restart, bypass the stall by utilizing Target Disk Mode, migrating from a Time Machine backup, or transferring your data without the applications.
● If the progress stalls at "1 minute remaining," wait over an hour before intervening, as the system is processing numerous small cache files and forcing a restart can corrupt the new Mac.
● To use the fastest alternative transfer method, hold the "T" key while booting the old Mac to activate Target Disk Mode, which mounts it as an external hard drive via a Thunderbolt connection.
● For suspected hardware errors on post-2013 Macs, disconnect all peripherals and hold the "D" key during boot to execute an extended testing diagnosis that checks the system for hard drive issues.
Ask AI for a summary
 ChatGPT
 Perplexity
 Gemini
 Claude
 Grok
Grok
Mac Migration Assistant can appear stuck when it is calculating transfer size, copying many small files, moving applications, transferring user accounts, or finishing the final stage. A progress message such as less than a minute remaining does not always mean the process has failed.
Before forcing a restart, check whether the Macs are still active, whether disk or network activity continues, whether either Mac shows an error message, and whether the transfer involves a large user account or many app files. A safe fix starts with waiting, checking connection quality, and reducing transfer complexity before moving to disk repair or hardware diagnostics.
| Official Checkpoint | Why It Matters | Official Source |
| Update macOS on both Macs | Apple recommends making sure macOS is up to date on each Mac before migration. The two Macs do not need to use the same macOS version. | Apple Support: Transfer to a new Mac with Migration Assistant |
| Check Wi-Fi and distance | For wireless transfer, both Macs should have Wi-Fi turned on and be near each other. | Apple Support: Transfer to a new Mac with Migration Assistant |
| Disable VPN, firewall, and antivirus temporarily | Apple recommends turning off antivirus, firewall, or VPN software on either Mac until migration is done. | Apple Support: Transfer to a new Mac with Migration Assistant |
| Expect long transfers | Apple states that large transfers may need hours to complete and may seem to pause occasionally. | Apple Support: Transfer to a new Mac with Migration Assistant |
| Old Mac data stays safe | Migration Assistant transfers documents, apps, user accounts, and settings; it does not delete data from the old Mac or replace macOS on the new Mac. | Apple Support: Transfer to a new Mac with Migration Assistant |
Why Mac Migration Assistant Stuck or Frozen?
| Stuck Symptom | Likely Cause | Best First Action |
| Stuck at less than a minute remaining | Migration Assistant may be finishing many small files, permissions, account data, or application support files. | Wait longer if there is no error message and the Macs are still responsive. |
| Looking for source | The old Mac, Time Machine disk, network, or startup disk is not discoverable. | Check Wi-Fi, cable, power, same network, and Migration Assistant on the source Mac. |
| Preparing transfer for hours | Migration Assistant is calculating data size or scanning a large or damaged user account. | Run Disk Utility First Aid on the old Mac or migrate fewer categories. |
| Transfer freezes midway | Network drop, sleep mode, VPN, firewall, antivirus, external drive issue, or bad cable. | Use a stable wired connection and disable interfering software temporarily. |
| Repeated failures on apps | Old applications, incompatible app files, caches, or damaged application support folders can slow migration. | Migrate users and documents first, then reinstall applications manually. |
Migration Assistant can get stuck for software, storage, account, or connection reasons. The most common causes include unstable Wi-Fi, disconnected Ethernet or Thunderbolt cables, VPN or firewall interference, large transfers, low free storage on the new Mac, damaged files on the old Mac, problematic applications, external drive errors, or a Time Machine backup that cannot be read correctly.
Some stages only look frozen. Apple notes that large transfers can take hours and may appear to pause. This is especially common near the end of migration, when macOS is finalizing user accounts, permissions, applications, and many small support files.
How to Fix Mac Migration Assistant Stuck or Frozen?
You surely are aware of all the reasons behind this problem. Now, you need to know all possible solutions to this dilemma. As every problem comes with a solution, you just need to apply that to your situation. However, you will be given the solution to your problem while mentioning the cause behind it;
1 Use Target Disk Mode on Intel Mac or Share Disk on Apple Silicon Mac
If Migration Assistant keeps freezing, directly connecting the old Mac as a disk can help you copy files or let the new Mac access the source more reliably. The correct method depends on the Mac model.
| Mac Type | Correct Method | Key Steps |
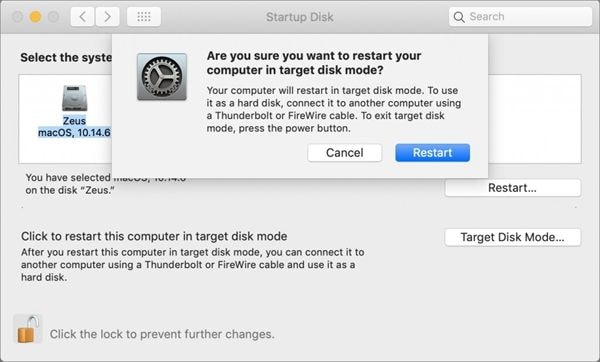
| Intel-based Mac | Target Disk Mode | Connect the Macs with USB, USB-C, or Thunderbolt. If macOS 11 or later is involved, use Thunderbolt. Start the old Intel Mac while holding T, or restart in Target Disk Mode from Startup Disk settings. |
| Mac with Apple silicon | Share Disk in macOS Recovery | Connect the Macs, start the Apple silicon Mac in macOS Recovery, choose Utilities > Share Disk, select the volume, and connect from Finder on the other Mac. |
2 Stabilize the Connection Before Restarting Migration
A frozen transfer is often caused by a weak wireless connection, cable interruption, VPN, firewall, or antivirus software. Fix the connection before rerunning Migration Assistant.
- Connect both Macs to power.
- Keep both Macs awake and near each other if using Wi-Fi.
- Turn off VPN, firewall, and antivirus software temporarily until migration finishes.
- If using Ethernet, unplug and reconnect the cable on both Macs, or test another cable and adapter.
- For faster Mac-to-Mac transfer, use a compatible Thunderbolt cable when supported.
- Restart Migration Assistant and confirm that both Macs show the same security code when prompted.
3 Migrate Users and Documents First, Then Reinstall Apps
Applications, plug-ins, caches, and old support files can slow or freeze migration. If the process keeps failing, reduce the transfer scope.
- Restart Migration Assistant.
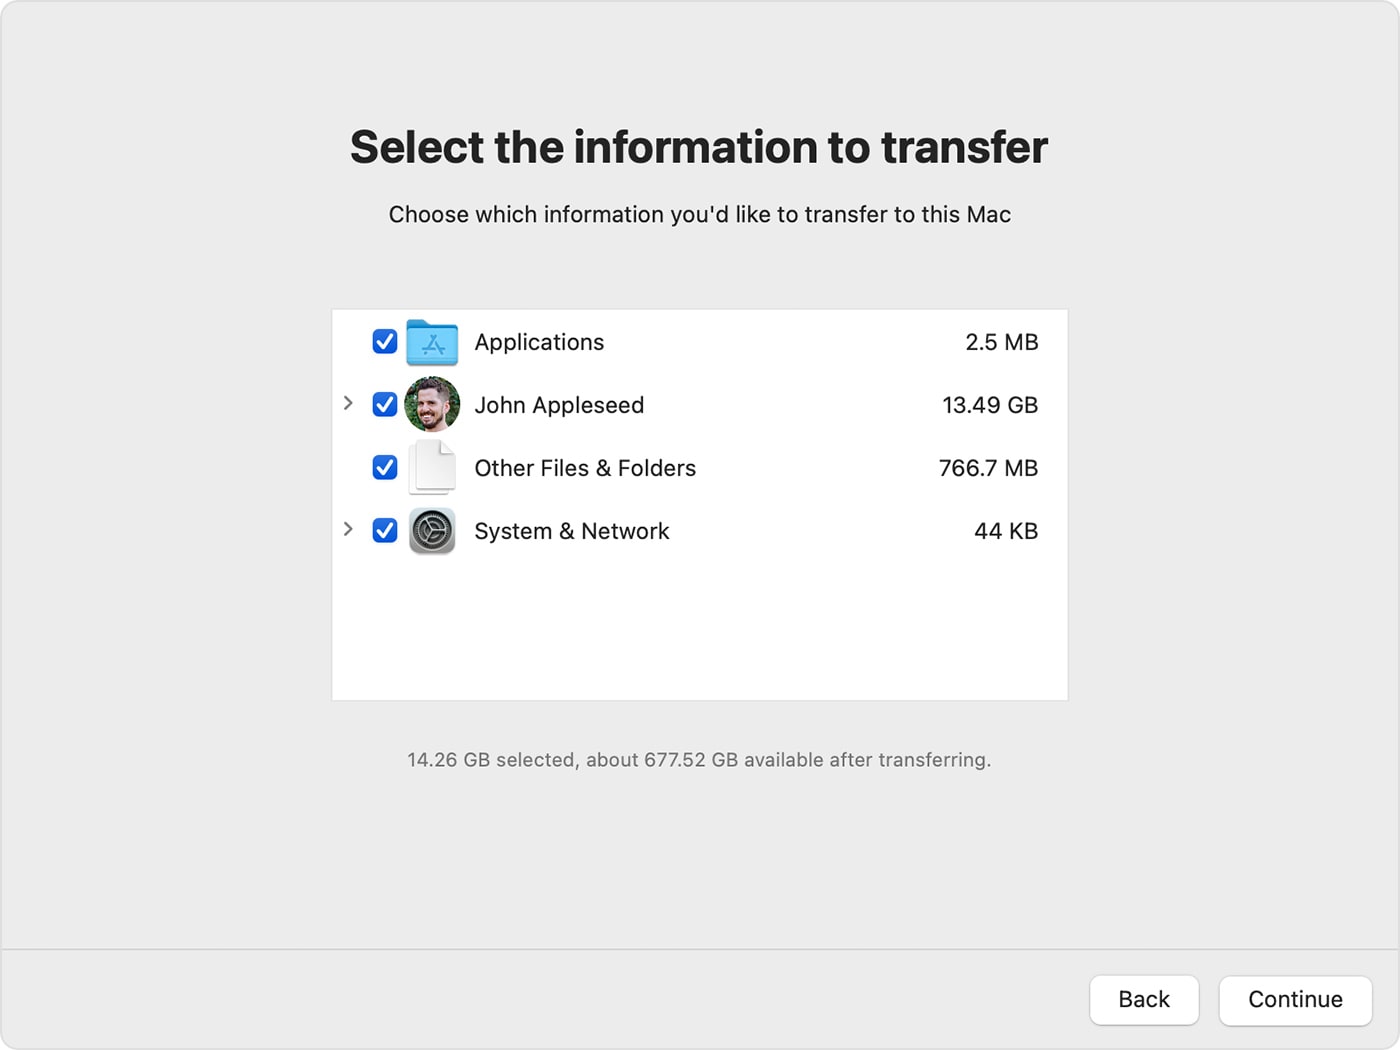
- Select the user account, documents, desktop files, pictures, music, and important folders first.
- Leave applications, system settings, or incompatible old apps unchecked during the first migration.
- After the user data is transferred, install fresh versions of apps from the App Store, developer websites, or original installers.
- Copy missing app data manually only when you know where the app stores its data.
4 Run Disk Utility First Aid and Apple Diagnostics
If Migration Assistant repeatedly freezes while scanning the old Mac, the source disk or hardware may have errors. Check storage first, then hardware.
- On the old Mac, open Disk Utility.
- Choose View > Show All Devices.
- Run First Aid on each volume, then each container, then the storage device itself.
- If Disk Utility reports problems that cannot be repaired, back up as much data as possible before continuing.
- To test hardware, shut down the Mac and disconnect external devices except power, keyboard, mouse, display, and Ethernet if needed.
- On Apple silicon, press and hold the power button until startup options appear, then press and hold Command + D.
- On Intel Mac, turn on the Mac and immediately press and hold D. If that does not work, try Option + D.
5 Migrate from a Time Machine Backup Instead
If Mac-to-Mac migration keeps freezing, a Time Machine backup can be a cleaner source because Migration Assistant can transfer from a backup disk instead of directly from the old Mac.
- Create or update a Time Machine backup of the old Mac if possible.
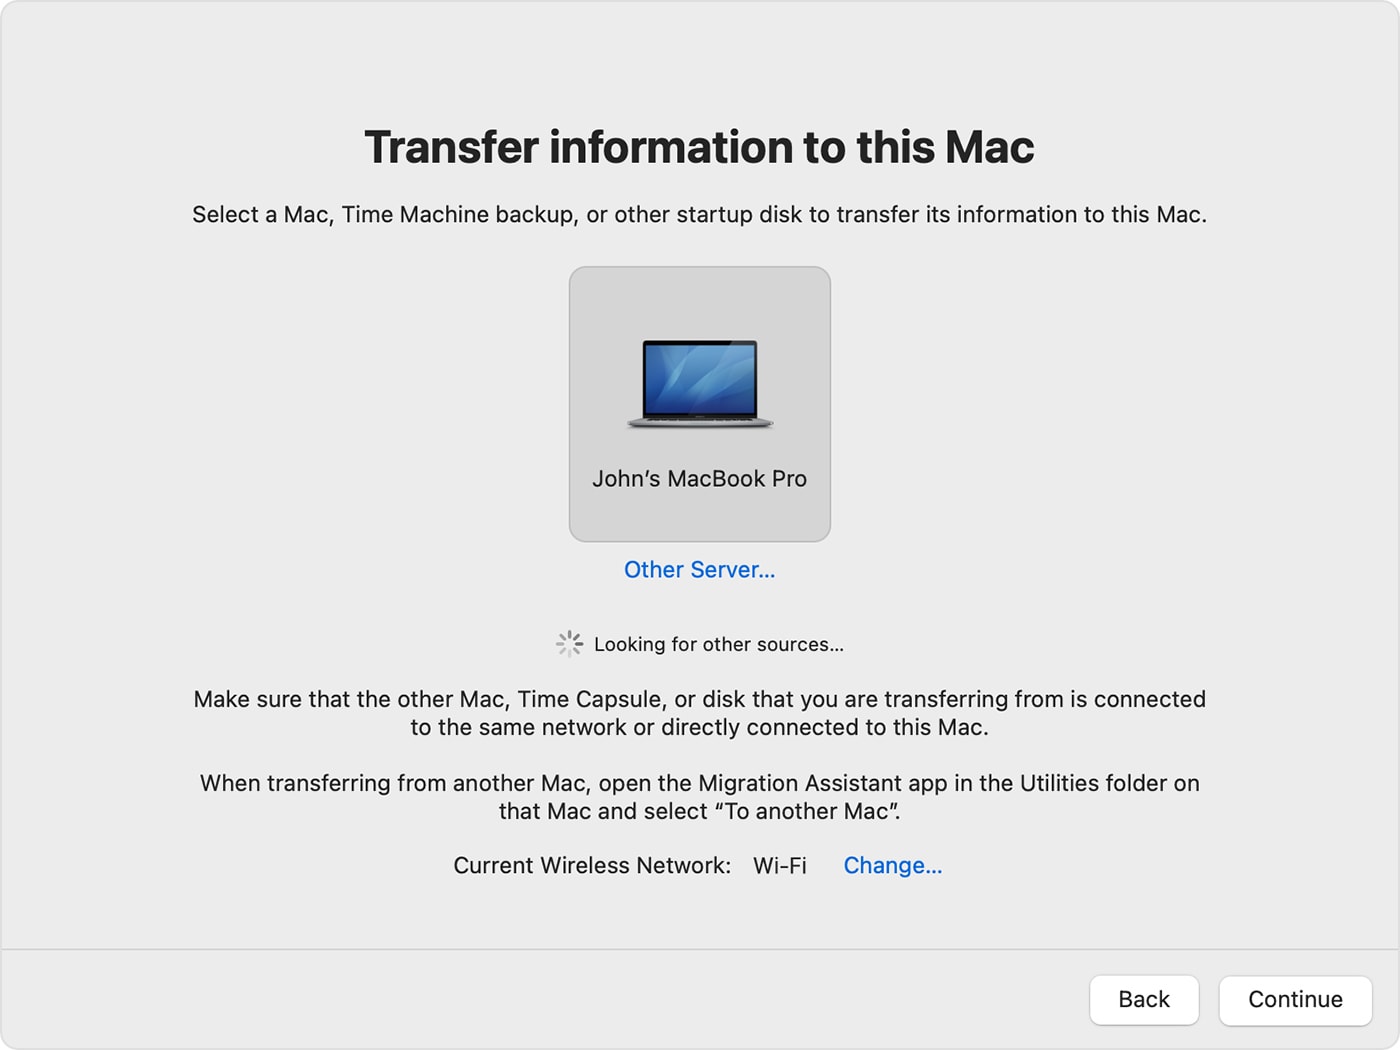
- Connect the Time Machine backup disk to the new Mac.
- Open Migration Assistant on the new Mac.
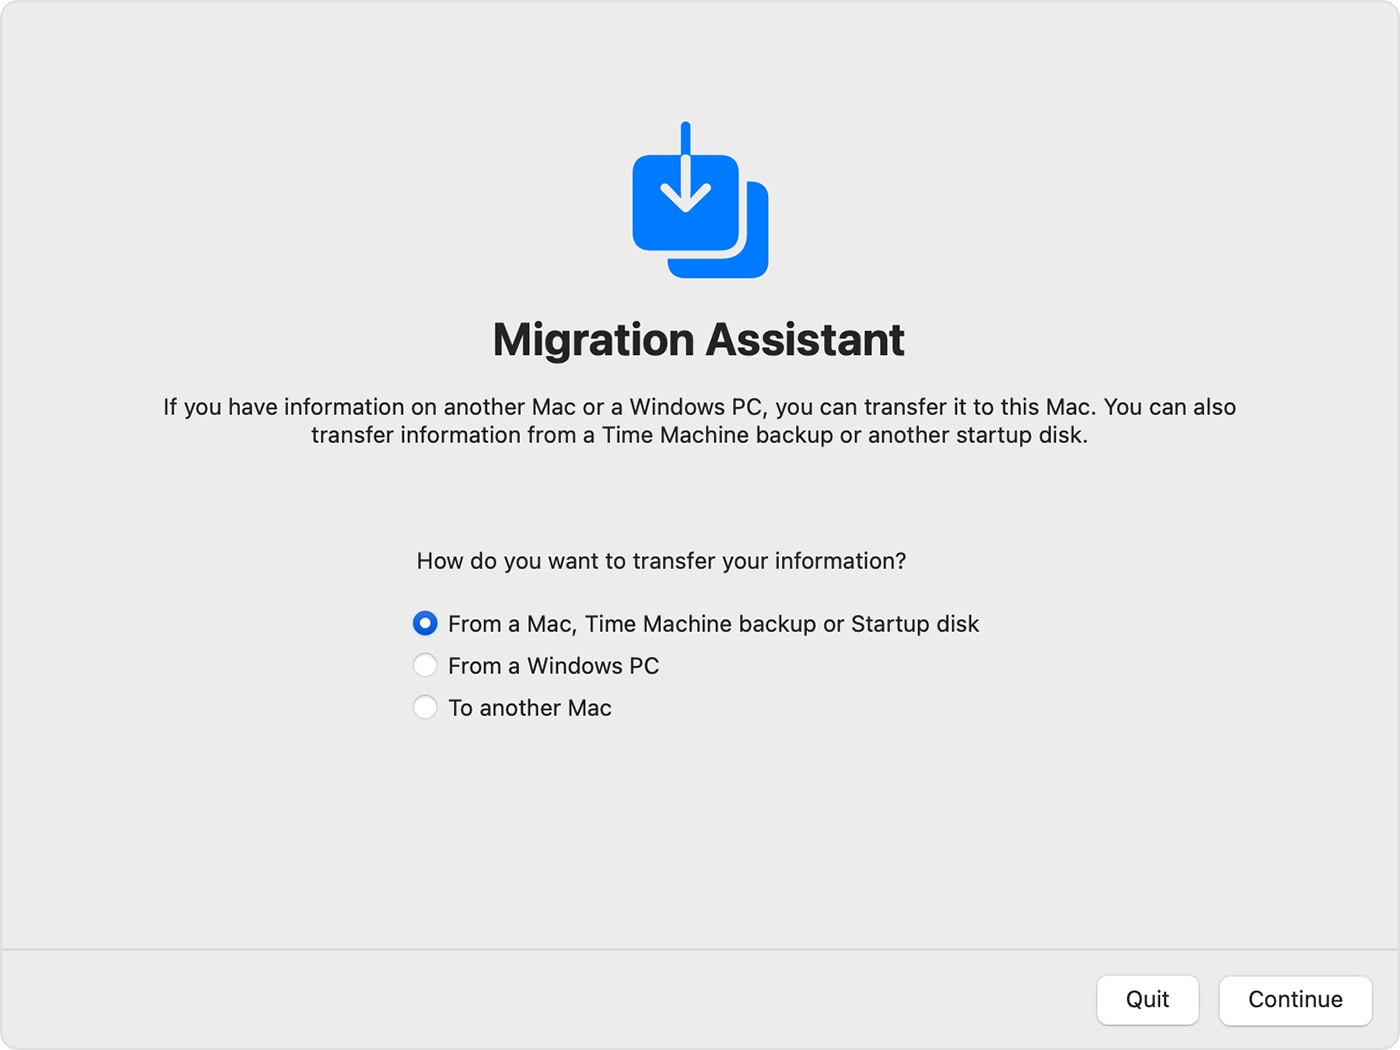
- Select From a Mac, Time Machine backup, or startup disk.
- Choose the Time Machine backup and select the data categories to migrate.
- Start with user accounts and documents first if previous full migrations failed.
Extra Tips on Apple Migration Assistant
- Prepare both Macs: Update macOS, connect power, turn on Wi-Fi if using wireless transfer, keep the Macs close, and turn off VPN, firewall, or antivirus software temporarily.
- Open Migration Assistant on the new Mac: Go to Applications > Utilities > Migration Assistant, or use Setup Assistant if the new Mac has not been set up yet.
- Select the source type: Choose From a Mac, Time Machine backup, or startup disk.
- Open Migration Assistant on the old Mac: Choose the option to transfer to another Mac.
- Verify the security code: If both Macs show a code, confirm that it matches before continuing.
- Select data categories carefully: Choose user accounts, files, folders, applications, and settings. Use disclosure arrows to migrate specific items when needed.
- Handle duplicate accounts: If the new Mac already has an account with the same name, choose whether to replace, keep a copy, or rename the transferred account.
- Verify after migration: Quit Migration Assistant on both Macs, log in to the migrated account, and check Desktop, Documents, Photos, email, apps, and external files.
Recover Files After a Failed Mac Migration
Migration Assistant does not delete information from the old Mac, but data loss can still happen if files are manually deleted, an external drive fails, a disk has errors, a Time Machine disk becomes unreadable, or a forced restart interrupts other file operations.
| Data Loss Situation | Recommended Action |
| Files missing from new Mac after migration | Check the old Mac first, because Migration Assistant should not delete the source data. |
| External drive files deleted | Stop using the drive and scan it with Recoverit before saving new files to it. |
| Time Machine disk unreadable | Run Disk Utility First Aid first. If files are lost from the disk, recover to a different drive. |
| Mac disk shows corruption | Back up as much data as possible before repair, reinstall, or erase operations. |
Conclusion
If Mac Migration Assistant is stuck or frozen, do not force restart immediately. First decide whether it is truly frozen or only processing a large transfer. Check power, Wi-Fi, cable stability, VPN, firewall, and antivirus software. If the issue repeats, migrate fewer categories, skip applications, run Disk Utility First Aid, test the Mac with Apple Diagnostics, or migrate from a Time Machine backup.
Use Target Disk Mode only with Intel-based Macs, and use Share Disk in macOS Recovery for Apple silicon Macs. If files are missing after a failed migration, check the old Mac first and use data recovery software only for local or external storage files that were deleted or lost.
More Related Topic
People Also Ask
-
Why is Migration Assistant stuck at less than a minute remaining?
This final stage can take much longer than the progress text suggests because macOS may still be finalizing user accounts, permissions, applications, and many small files. Wait longer if there is no error message and the Macs remain responsive. -
Is it safe to force restart a Mac during Migration Assistant?
A force restart should be the last resort because it can interrupt file transfer. Try waiting, checking connections, disabling VPN or firewall software, and confirming that there is no activity before forcing a restart. -
Does Migration Assistant delete files from the old Mac?
No. Apple says Migration Assistant transfers documents, apps, user accounts, and settings without deleting information from the old Mac or replacing macOS on the new Mac. -
Can I use Target Disk Mode on Apple silicon Mac?
Target Disk Mode is for Intel-based Macs. On Apple silicon Macs, use macOS Recovery and Share Disk to share the Mac's disk with another Mac. -
What should I do if Migration Assistant keeps freezing?
Update macOS on both Macs, disable VPN and firewall software temporarily, use a wired connection, migrate fewer categories, run Disk Utility First Aid, test hardware with Apple Diagnostics, or migrate from a Time Machine backup. -
Can Recoverit recover files after a failed Mac migration?
Recoverit may help recover deleted files from local or external storage after accidental deletion, disk issues, or failed repair attempts. It cannot fix Migration Assistant or recover files that were overwritten.
Data Backup Services
- Computer Backup
- Windows 10 Backup
- Windows 8 Backup
- Best File Sync Software
- Driver Backup
- SD Card Backup
- Best Incremental Backup
- Onedrive Automatic Backup
- Hard Drive Backup
- Mac Backup
- Cloud Backup


Sue Wayne
staff Editor