


 TL;DR:
Mac Target Disk Mode mounts a non-booting Mac as a high-speed external storage device to a host computer, enabling direct file extraction, large-scale data transfers, and system troubleshooting.
● To establish a functional connection, you must use a 40Gbps Thunderbolt 3, Thunderbolt 4, or USB4 cable bearing the lightning bolt icon; standard USB-C charging cables lack the required data lanes and will fail to mount the target drive.
● The initiation sequence depends strictly on the processor: Apple Silicon (M1-M4) requires holding the Power button to reach Startup Options and selecting "Share Disk," while Intel models require holding the "T" key during the startup process.
● If the target Mac has FileVault enabled, the drive will appear as an "Encrypted Volume" that you must manually mount and unlock in the host Mac's Finder using the admin password before you can access files or run scans with tools like Wondershare Recoverit.
Ask AI for a summary
 ChatGPT
 Perplexity
 Gemini
 Claude
 Grok
Grok
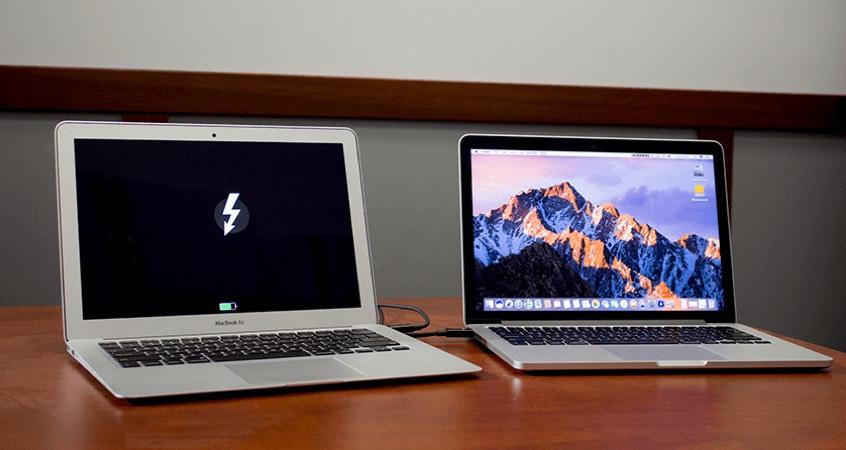
Have you ever found yourself in a situation when your Mac wouldn't boot, yet all of your files were on it? Maybe you're looking to transfer a ton of data fast between two Macs.
Now, enter Mac Target Disk Mode—an oddly powerful feature that can really save your bacon in a wide range of scenarios. It's kind of little-known and buried, like a secret weapon within the utility belt of your Mac troubleshooting: it's a way to get into your Mac's hard drive when the system itself isn't being nice.
In this guide, we are going to explore Mac Drive in Target Disk Mode in detail. We will learn what it is, when to use it, and finally—how to use it to recover your data, transfer your files, or troubleshoot those really knotty Mac issues.
Be you an old-time Mac user or just joining the Apple family, knowledge of target disk mode will save you time, stress, or even your precious data.
Part 1: What is Mac Target Disk Mode?
Mac Target Disk Mode is a boot option that allows you to use your Mac's hard drive as an external storage device. When you put your Mac in target disk mode, it essentially becomes a high-speed external hard drive that can be connected to another Mac.
This feature enables you to access the files on the target disk drive, transfer data between computers, or perform troubleshooting tasks. It's like turning your Mac into a sophisticated external hard drive, giving you direct access to its contents even if the operating system isn't functioning correctly.
| Mac Processor | How to Enter | Connection Type |
| Apple Silicon (M1-M4) | Hold Power > Options > Share Disk | Thunderbolt 3/4 or USB4 |
| Intel (With T2 Chip) | Hold "T" key during startup | Thunderbolt 3 (USB-C) |
| Legacy Intel (Pre-2018) | Hold "T" key during startup | Thunderbolt 2 or FireWire |
Part 2: When Using Target Disk Mode Mac is Helpful?
Target Disk Mode on Mac can be a valuable tool in various situations. Here are some common scenarios where using a Mac target drive can be particularly helpful:
- Data Recovery: When your Mac won't boot normally, but you need to access important files.
- File Transfer: To quickly move large amounts of data between two Macs.
- Troubleshooting: For diagnosing and fixing issues on a non-booting Mac.
- Operating System Installation: To install macOS on a Mac that can't boot from its own drive.
- Disk Repair: To run disk repair utilities on a problematic Mac drive from another Mac.
- Backup Creation: To create a full backup of a Mac that won't start up normally.
- Software Updates: To update software on a Mac that can't connect to the internet on its own.
- Migration: When setting up a new Mac and transferring data from an old one.
Part 3: Prerequisite for Target Disk Mode
Before you can use Mac Target Disk Mode, there are several prerequisites you need to ensure are in place:
Critical Requirement: Data Cable vs. Charging Cable
One of the most common reasons Target Disk Mode fails in 2026 is the use of a standard USB-C charging cable. To move data between two Macs, you must use a high-speed Thunderbolt 4 or USB4 cable. A charging cable (like the one included in the Mac box) lacks the necessary data lanes to mount a target drive. Look for the "lightning bolt" icon on the cable connector to ensure it supports the 40Gbps speeds required for stable disk sharing.
- Compatible Macs: Two Macs with compatible ports (Thunderbolt, FireWire, USB-C).
- Appropriate Cable: Proper connecting cable matching port types.
- Functioning Hardware: Target Mac with functioning logic board and storage.
- Power Source: Power connection to avoid interruptions.
- Compatible Operating Systems: Helpful for accessing files and features.
- Backup (Recommended): Recommended to avoid data loss.
- Sufficient Free Space: Host Mac should have enough storage for the transfer.
By ensuring these prerequisites are met, you'll be well-prepared to use Mac Target Disk Mode effectively and safely.
Part 4: How to Boot Mac into Target Disk Mode?
Using Target Disk Mode on your Mac is a straightforward process, but it's essential to follow the steps carefully to ensure success. Here's a detailed guide on how to use target disk mode:
Step 1: Connect the Macs with a compatible cable (USB, USB-C, or Thunderbolt).
Step 2: On the target Mac:
- If your Mac is on, then turn it off. Press the power button on your Mac. Keep holding until 'Loading Startup Options' appears.
- Choose Options > Continue
- Select your startup disk > Continue
- Log in if asked
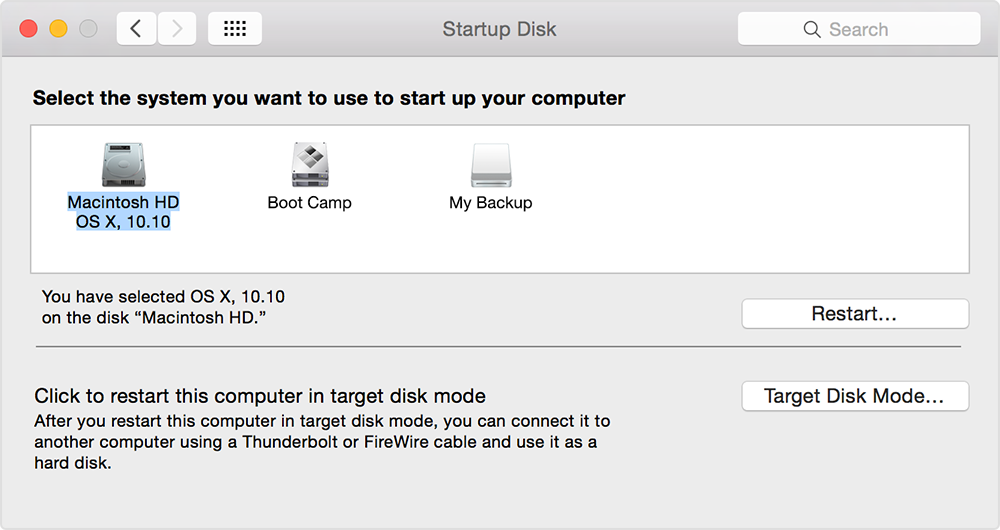
- In Recovery Mode, go to Utilities > Share Disk
- Pick the volume to share > Start Sharing
Step 3: On the other Mac:
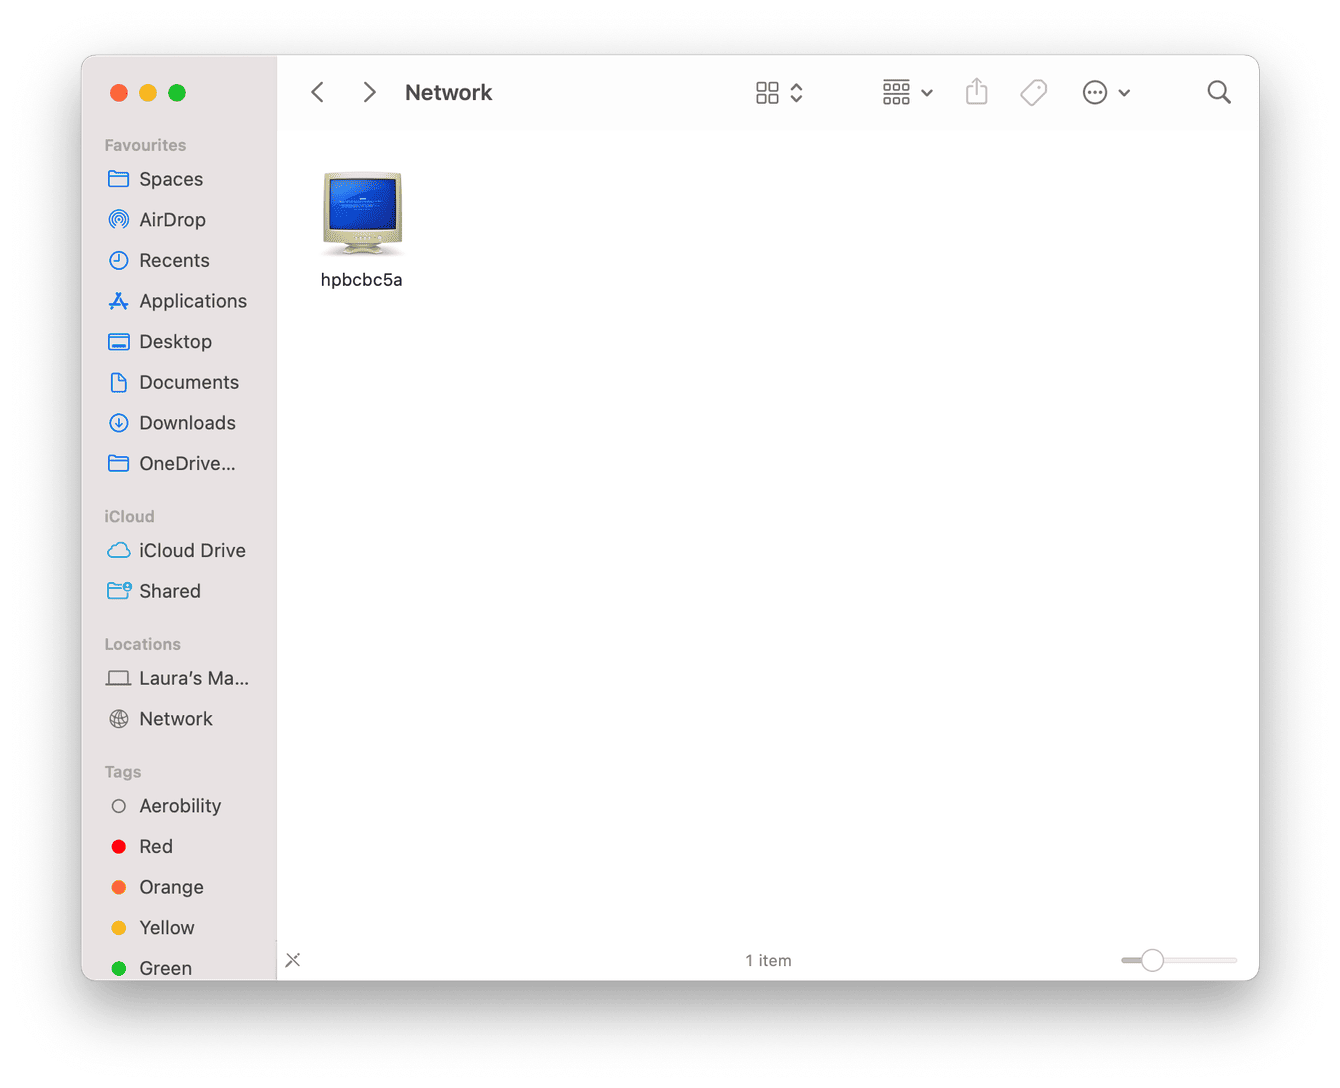
- Open Finder. Go to Network in the sidebar
- Double-click the target Mac
- Connect as Guest
Step 4: When done, click Stop Sharing on the target Mac
Additional Tips for Using Mac Target Disk Mode:
- Drive Not Appearing: Try a different cable or port.
- Older Macs (FireWire): Install FireWire drivers on the host Mac.
- Booting from Target Drive: Hold Option on startup and select the target drive.
- FileVault: Target disk mode bypasses FileVault, so it won’t be active.
Troubleshooting Target Disk Mode:
If you encounter issues with target disk mode, try these troubleshooting steps:
- Restart both Macs and try the process again.
- Check that your cable is properly connected and not damaged.
- Try a different port on either Mac if available.
- Ensure the target Mac's drive is not corrupted by running Disk Utility on the host Mac.
- If the drive is encrypted, make sure you have the correct password.
By following these steps and tips, you should be able to successfully use Mac Target Disk Mode to access your target Mac's drive and perform necessary tasks. Whether you're recovering data, transferring files, or troubleshooting issues, target disk mode can be an invaluable tool in your Mac toolkit.
Part 5: How to Recover Data from Target Mac with Data Recovery Software?
You can have a top-rated data recovery application as your best friend if you're working with a Mac, facing data loss issues, and looking to recover from target disk mode. Recoverit is an extremely powerful tool that can definitely provide a complete solution for recovering deleted or lost files on Macin target disk mode.
Let's explore why Recoverit is an excellent choice for data recovery and how to use it effectively.
Unlocking Encrypted Drives for Recovery
If the target Mac has FileVault enabled, the drive will appear as an "Encrypted Volume" when connected to the host Mac. Before Wondershare Recoverit can begin scanning, you must mount the drive in Finder and enter the target Mac's admin password. Once the volume is unlocked and "mounted," Recoverit can perform a Deep Scan through the encryption layer to find deleted or lost files that standard disk utilities might miss.
Why Choose Recoverit for Mac Target Disk Mode Recovery?
- High Success Recovery Rate: An ultimate success rate of restoring data ensures that you recover your lost data effectively.
- Wide Compatibility: Support 1000+ file types to include documents, BMP photos, MP4 videos, audio files, and emails. That is wide, giving the ability it needs for the varied uses of data recovery.
- Interface User-Friendly: The software is so designed that it can be utilized very easily by any person, whether he is tech-savvy or not. The process of recovery consists of three very easy steps.
- Multi-Scenario Recovery: Recoverit restores the data that is lost in various ways, like accidental deletion, system crashes, virus attacks, etc.
- Target Disk Mode Efficiency: Recoverit enables one to configure or recover data from a damaged or old Mac to another one easily, quickly, and safely by connecting it using target disk mode.
- No Loss of Quality: The software assures that the recovered files are of the same quality as the original files themselves; this is important most especially when it comes to documents and media files.
Now that we understand why Recoverit is an excellent choice let's go through the steps to recover data from a Mac in target disk mode using this software.
Steps to Recover Data Using Recoverit in Mac Target Disk Mode:
Step 1: On your functioning Mac (the host Mac), download Recoverit from the official website. Install the software on your Mac. Follow the steps outlined earlier to boot your target Mac into target disk mode. Ensure the target Mac's drive appears on your host Mac. Open Recoverit on your host Mac. In the main interface, you'll see a list of available drives. Select the drive that corresponds to your target Mac. Click on the "Start" button.

Step 2: Recoverit will perform a thorough scan, which may take some time depending on the drive size.

Step 3: Once the scan is complete, you'll see a list of recoverable files. Use the preview function to check the files you want to recover. Select the files you wish to retrieve. Click on the "Recover" button. Choose a location on your host Mac to save the recovered files. Wait for the recovery process to complete.

And that’s it! Navigate to the location where you saved the recovered files. Open and check the files to ensure they've been recovered successfully.
Additional Tips for Using Recoverit with Mac Target Disk Mode:
- Always recover files to a different drive than the one you're recovering from to prevent potential data overwriting.
- If you can't find specific files after the initial scan, try using Recoverit's "Deep Scan" option for a more thorough search.
- For large amounts of data, ensure your host Mac has enough free space to accommodate the recovered files.
- If recovering from a corrupted drive, consider creating a disk image of the target drive first and then recovering from that image to minimize further damage.
By following these steps and utilizing Recoverit's powerful features, you can effectively recover data from a Mac in target disk mode. Whether you're dealing with accidental deletions, formatting errors, or a non-booting Mac, Recoverit provides a reliable solution for retrieving your valuable data.
Remember, the key to successful data recovery is acting quickly and avoiding writing new data to the drive you're recovering from.
With Recoverit and Mac target disk mode, you have a powerful combination for tackling even the most challenging data recovery scenarios.
Conclusion:
Mac Target Disk Mode is a versatile and powerful feature that can be a real lifesaver in various situations. Whether you're facing a stubborn Mac that won't boot, need to transfer large amounts of data quickly, or find yourself in need of serious troubleshooting, target disk mode provides a straightforward solution. Turning your Mac into a high-speed external drive opens up a world of possibilities for data recovery, file transfer, and system repairs.
Throughout this guide, we've explored the ins and outs of Mac Target Disk Mode, from understanding what it is and when to use it, to the nitty-gritty details of how to implement it effectively. We've also delved into the power of data recovery software like Recoverit, which can be an invaluable tool when combined with target disk mode for retrieving lost or inaccessible files.
Try Wondershare Recoverit to Recover Your Vital Data
 Security Verified. Over 7,302,189 people have downloaded it.
FAQ
-
Can I use Target Disk Mode on any Mac?
Target Disk Mode is available on most Mac models, but the method of entering it and the type of connection used may vary. Older Macs use FireWire, while newer models use Thunderbolt or USB-C. Always check your Mac's specifications to ensure compatibility. -
Is it safe to use Target Disk Mode for data recovery?
Yes, Target Disk Mode is generally safe for data recovery as it allows read-only access by default. However, be cautious when writing data to the target disk to avoid potential data loss. Using reliable data recovery software like Recoverit can further ensure the safety of your data during the recovery process. -
What should I do if my Mac doesn't enter Target Disk Mode?
If your Mac doesn't enter Target Disk Mode, try the following:- Ensure you're using the correct key combination (T key) during startup.
- Check that your connecting cable is properly seated and not damaged.
- Try a different port or cable if available.
- If problems persist, there may be hardware issues with your Mac that require a professional diagnosis.


