How to Fix "The Disk You Inserted Was Not Readable by This Computer" on Mac
Resolve the "disk you inserted was not readable by this computer" error on Mac by repairing the file system with Disk Utility's First Aid, or initialize the disk to recreate the Master Boot Record if the drive is new or severely corrupted.
● If the inserted disk utilizes Windows BitLocker Drive Encryption, macOS cannot read it natively and requires a dedicated BitLocker for Mac driver to unlock and access the encrypted files.
● Initializing an inaccessible disk through the Disk Utility Erase function will re-partition the drive and fix logical errors, but this process will completely erase all existing data stored on the device.
● If built-in repairs fail, you can extract files using Recoverit Mac Data Recovery software across APFS, NTFS, exFAT, and HFS+ file systems, provided you save the restored data to a completely different storage drive.
Ask AI for a summary
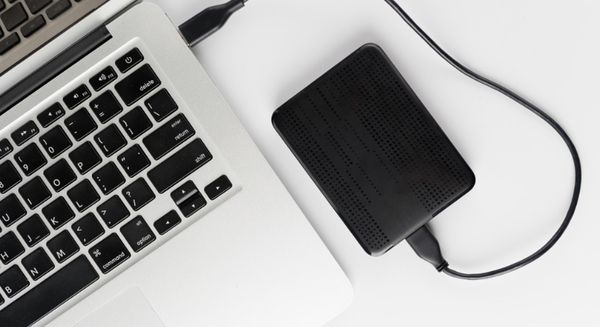
Since last week, my Mac won't read my USB flash drive after connecting it. Is there a practical way to fix "The disk you inserted was not readable by this computer" on Mac. Please help! Most users experience this error message at one point or another. This post explains how you can fix The disk you inserted was not readable by a computer.
Part 1: Why disk was not readable by Mac computer
For Mac OS, you can sometimes come across an error message saying the disk you inserted was not readable by the computer. When Mac alerts you with this message, it means USB flash drive or external hard drive has detected problems.
Overview of the Mac disk not readable error
The only way you can open up your storage devices, such as an SD card, external hard drive, or USB flash drive is by inserting it into a Mac or Windows computer.
However, if the system disk or files are corrupted, you receive error messages that prevent you from accessing the device and data. This can be frustrating considering that you cannot view your precious files like images, documents, videos, and more. Thankfully, there is a solution that can help you fix this problem.
What makes disk not readable by Mac computer
The major reason causing the error message the disk you inserted was not readable is because the Mac operating system cannot read the data located on the disk in an orderly way, or it's failing to access the disk entirely. Below are possible factors that might be causing this problem:
- Disk failure. The disk or the USB interface is likely damaged. This usually happens when it has been plugged and unplugged several times.
- Corrupted file system or partition table. The Mac operating system relies on the file system, partition table, and other partition information to know how the disk organizes data. Therefore, if that information is corrupted, the Mac operating system fails to access your disk.
- A new disk. This error message can also be displayed if you're using a new disk which doesn't have partition information. Such disks are also popularly known as uninitialized disks.
- Viral attacks. If your disk has been attacked by a virus, the disk's data structure is re-written leading to it being unreadable to the Mac operating system.
Part 2: Fix "The disk you inserted was not readable by this computer"
With the message errors such as the "disk, you inserted was not readable by this computer," you are left with little choice. The only way out is to find solutions to fix the problem so that you can access your files. Below are some of the solutions you can use:
Solution 1: Carry out some basic checks
The error message disk not readable mac could also be caused by connection problems between the disk and the Mac computer. Therefore, before you think of fixing the unreadable disk, take the following steps to eliminate some external causes:
Step 1: Re-insert the unreadable disk. Then gently unplug and re-insert it.
Step 2: Try to change a USB cable. Sometimes, it could be a USB cable that might be causing the problem.
Solution 2: Change USB port
Sometimes, a USB port can cause the disk to be unreadable by the Mac computer. In this case, use another USB port, and if the problem is due to it, consider to reset SMC. This is a simple process that varies depending on the type of hardware for your Mac.
Solution 3: Check for the encrypted drive
The idea for encryption is for the plain texts in the files kept in the disk to cipher the texts. Here is the deal, the encrypted text is unreadable until you can decrypt it using a password. Hence when you insert your disk that doesn't have the same format as with Apple technology such as Windows BitLocker Drive Encryption, it will give out an error message. The solution is to use a BitLocker for Mac driver for you to open, read, and write to the disk effortlessly on Mac.
Solution 4: Use First Aid to fix the unreadable disk
First Aid refers to a built-in feature on Mac Disk Utility, that you can use to verify and repair errors on disks, particularly those with file system errors. As mentioned earlier, "The disk inserted was not readable by this computer" error message can be caused by the corruption in the file system.
Therefore, you should use First Aid to verify and repair the corrupted disk's file system to enable your Mac to read the inserted disk. Here is how you can use First Aid to repair the inserted unreadable disk:
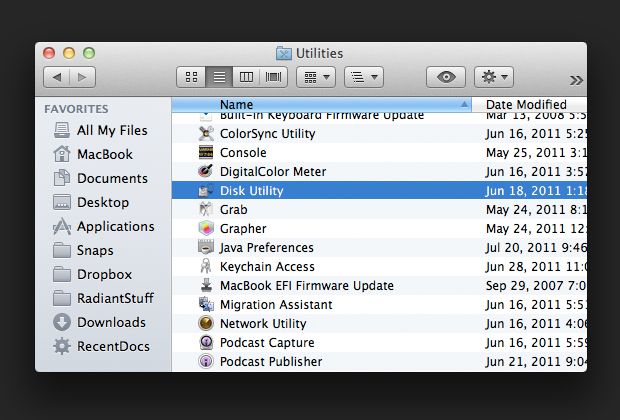
Step 1: Look for Applications to get to Utilities and click Disk Utility to start it.
Step 2: Choose the unreadable disk located on the left sidebar.
Step 3: Click the First Aid button found on the top of the Disk Utility window.
Step 4: A window will appear and ask if you want to run First Aid on the disk. To continue, click Run. But this process might take a couple of minutes to finish.

Step 5: Click Done when the disk has been repaired and safely reject and plug it into your Mac computer.
Solution 5: initialize the unreadable disk
At the start of a partition disk, there is usually a section known as Master Boot Record designed to keep on the information. For a new disk, you should assign information related to logical partitions to enable the operating system to access it properly. Because a used disk has already stored data, you should recreate the MBR if the disk is inaccessible as a result of MBR corruption. This re-building of MBR is known as disk initialization.
Here is what happens with disk initialization. It re-partitions or re-formats the disk so that it can fix any logical errors, which can erase data on your disk. Hence, you should use this solution when you have a new disk or you have its backup copy. The steps below will show you how to initialize the disk:
Step 1: Open applications and go to Utilities and Disk Utility. You can also eject and re-insert the unreadable disk. After that, click initialize… icon to start Disk Utility.
Step 2: Choose the unreadable disk located in the left sidebar.
Step 3: Go and click the Erase icon located on the top of your Disk Utility window.
Step 4: Type and enter the information you are asked, such as name and format. Then, click the Erase feature.
Solution 6: Update the drivers
The unreadable disk can also be due to an outdated driver on your computer. Therefore, check the drivers and update them by taking the following steps:
Step 1: Go to the menu and choose System Preferences.
Step 2: Click on the Software Update.
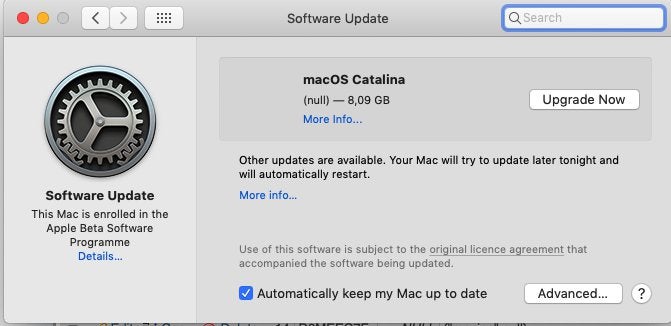
Step 3: Look out for any updates required for your Mac system and applications.
Part 3: Recover unreadable files from disk not readable on Mac
If you have tried out all the above solutions and failed to repair the unreadable disk, it means the disk might have some severe problems, such as bad sectors. In such cases, the best solution is to recover data from the unreadable disk using a professional data recovery tool such as Recoverit Mac Data Recovery software so that you can have access to your files.
The Recoverit Mac Data Recovery software is one of the best data recovery software for recovering deleted or lost files on Windows and Mac. You can use it to recover unreadable data files on hard disks, flash disks, USB disks, memory cards, SD cards, and many more storage devices. With it, you can access again videos, photos, emails, documents, and more files by using an easy click-through process.
Best of all, the tool supports most of the file systems, such as NTFS, HFS+, APFS, exFAT, many others, and you don't have to be tech-savvy to use it. Take the following three simple steps to use it:
Step 1: Connect the USB drive
Firstly, you should connect the flash drive to the Mac system and wait for it to be detected. Then, start the Recoverit Mac Data Recovery software on your Mac system. Remember to choose a location where the tool can scan the storage device.

Therefore, you can find the USB drive which is located in the External Devices section.
Step 2: Wait for the software to complete the scan
Once the recovery software launches the scan, all you have to do is to wait until it completes it.

Thankfully, you can preview the current results while the software is in the process of scanning in the background.
Step 3: Restore your data files
When the Recoverit Mac Data Recovery software completes the scanning process, the extracted data will be placed under various file types and categories. You can preview all your files on the right. For example, you can preview documents, videos, photos, etc.

If you are satisfied with the results, select the files or folders and click on the Recover icon. It's in your best interest to save the restored files to another location of your choice, meaning don't use the same USB drive you just formatted.
Part 4: How to avoid external disk not readable on Mac
In most cases, you usually connect an external hard drive to the computer by plugging it. But this is different when it comes to a Mac computer as you have to format it with a file system of your Mac. This helps the computer to support such an external hard drive.
How to connect external disk on Mac properly
Formatting the external drive means that all the data will be erased on it. However, if the drive has a pre-format like NTFS, which is pretty common with most of the hard drives on the market, the Mac system can only read data derived from it without writing any data on it.
You should always plug the external hard drive into your Mac with the USB cable that came with it. Because many of the hard drives can be connected through a USB cable, your best option is to connect it to an open port on your computer. Most of the Mac computers have one USB port on each of their sides.
Some Mac drives might come with FireWire or Thunderbolt cable. Hence, you can use an adapter if you don't have the required port on your computer or you plug it into the right port if there is one.
If you have a well-formatted drive and connected it correctly, you can view it on the desktop of your Mac as a drive featuring a Thunderbolt or a USB icon. However, the drive icon can sometimes be hidden and invisible on your desktop though there is the right connection. Therefore, go to the Devices heading in the left frame of the Finder window to view the icon.
Tips against the disk you inserted not readable
As you can see, it's possible to have a disk not readable by this computer on your Mac or Windows computers. The good news is that you can fix this problem, but you should make sure to use your computer and data storage drives in the right way. This is the only way you can avoid encountering such problems. Here are some things you can do:
- Eject the external storage device properly. Whether they are SD cards, USB flash drives, memory cards, or any other storage device, they can be corrupted if you eject them improperly. Therefore, you should eject these external devices from Mac safely using Disk Utilities.
- Back up all your data regularly. This is one of the ways to keep your data safe. The Time Machine is a common tool for doing backups on Mac. You can use it to back up all your files, such as photos, apps, documents, and system files.
- Make use of the Advanced File System. It's advisable to use advanced file systems like APFS, NTFS, and HFS+ file systems on Mac to ensure the external file works properly.
Closing words
While there are various solutions to fix the error on an unreadable disk, it can be overwhelming to realize that your data files are damaged or corrupted. In this case, you will be in safe hands using the Recoverit Mac Data Recovery software to restore all your data.
This tool is known for its effectiveness and there is a good chance that you can save all your damaged or corrupted data. It's also easy to use, meaning everyone can use this tool even without having any technical knowledge.
What's Wrong with Mac
- Recover Your Mac
- Fix Your Mac
- Delete Your Mac
- Learn Mac Hacks


 ChatGPT
 Perplexity
 Gemini
 Claude
 Grok
Grok


Sue Wayne
staff Editor