Solved: How to Fix "Insufficient Disk Space" on Mac
While working on your Mac, are you getting an "insufficient disk space" error? It appears when the hard disk is left with a little or no space. You must be wondering how this affects Mac. Well, insufficient disk space Mac results in the slow and unstable performance of your operating system. It can even prevent any application from launching or work properly.

Are you also facing the same issue and thinking how to clean your disk properly? Here is a comprehensive guide for you. In this article, we will cover why you are getting an alert 'your disk is almost full' and how to fix it.
If you have accidentally deleted a necessary file, then you will also learn how to recover it with the Recoverit Data Recovery Software.
Part 1: What Causes Insufficient Disk Space on Mac?
There is no more space on your disk, and you might be wondering why? Well, hard disk space should never go beyond 85% because this will make the system slow and cause errors. If you get this warning, then it's a red flag that you need to free up the storage instantly.
Before identifying what is taking up more space on the disk, reach the hard drive with the below steps:
Step 1: Get the mouse on the Dock at the bottom of the screen and open 'Finder.'
Step 2: Click on it in the menu bar at the top of the screen and then choose "Preferences."
Step 3: In the pop-up window, check "Hard disks."
After performing this step, your system will now show the hard disks on Mac in the form of icons. If you see more than one hard disk icon on your desktop, that means you have got multiple disks on the Mac. For this, you need to perform the steps below:
Step 1: Click on the 'Apple icon' at the top left and then head to System Preferences and then Startup Disk.
Step 2: Again, you will find hard disks, and they are usually named like Main HD or Main SSD. It will also show the OS version. In case you have more than drive, your startup disk should be the one with the latest MAC version.
To confirm what drive is your startup disk, follow the steps below:
Step 1: Click the 'Apple' icon in the menu bar at the top-left of the screen.
Step 2: Choose "About This Mac."

Step 3: Under MAC OS, you will notice a version number. This number should match the number in the Startup Disk section.
Part 2: How to Solve Insufficient Disk Space on Mac?
Wondering how to solve "Startup disk full" or "your disk is almost full" error? Here are the best solutions that help you get rid of this problem.
Method 1: Delete Unnecessary Duplicate Files
One of the simple tricks to get rid of insufficient disk space error is to find and remove duplicate files littering on your computer. It is true if you have been using your system for a very long time.
Plenty of people prefer to eliminate junk files on Mac by hunting in their drive or main directory where they store their files. However, they skip the download section. It has a lot of unnecessary data, mainly the 'disk images.'
To clean up these junk files, follow the steps below:
Step 1: Head to "Finder" and then choose the "Download" folder.
Step 2: Type "disk image" into the search box of the pop-up window.
Step 3: Now pick "Disk Image" beneath the "Kinds header."
Step 4: Search results will show all the DMG files. Delete all of them to save space in your Mac.
Method 2: Uninstall Unused Applications
Unused installed applications are also taking up space. For uninstalling them:
Step 1: Open "Finder" and choose applications that are no longer in use.
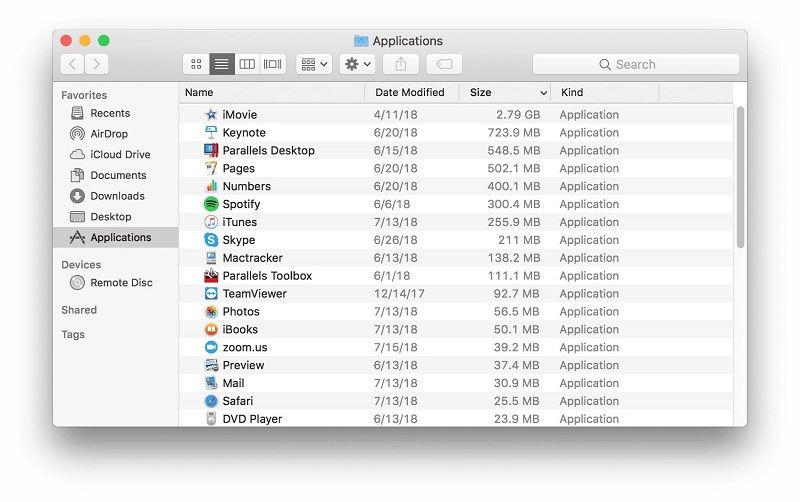
Step 2: Drag and drop the icons to trash.
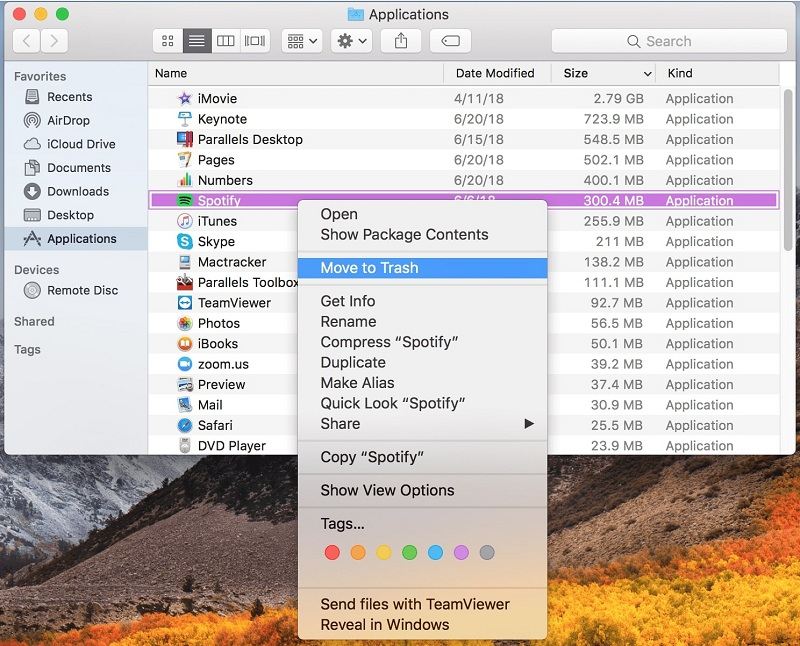
To see which apps are using more space:
Step 1: Open Finder and choose an application.
Step 2: Click icon 'show items in the list' on the toolbar and then click the size to sort them by size.
Method 3: Clean iTunes Backups
If you have massive iTunes data on your iPad, it might also be the reason behind insufficient space on Mac. To delete them manually, go to the path '~/Library/ApplicationSupport/MobileSync/Backup' to open backup folders.
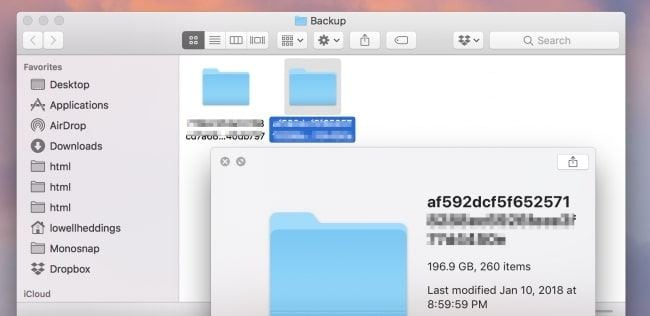
Method 4: Empty Trash
Emptying trash on Mac will completely remove them and free up the disk space. However, Mac OS has multiple trash cans, so you may need to empty more than one.
To empty main trash of your user account:
Step 1: CTRL-Click or right click on the trash icon at the bottom right corner.
Step 2: Now, choose empty trash. It will delete all the files that you have moved to the trash from Finder.

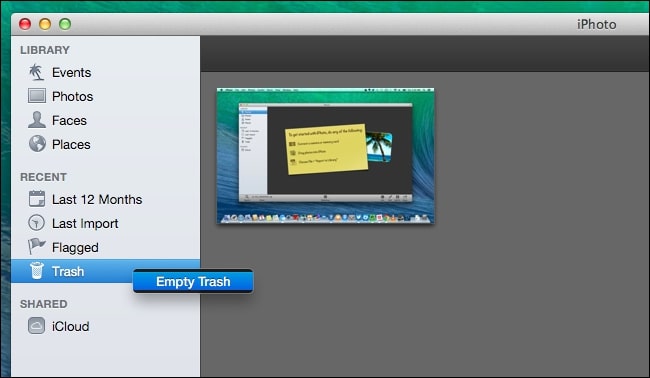
Mail, iMovie, and iPhoto on Mac have their trash cans. If you have deleted files from them, you also need to empty their trash cans. To do this, simply:
Step 1: CTRL+click or right-click the 'Trash option' in that particular application
Step 2: Choose Empty Trash.
If you are unable to find deleted files on Mac trash, use the All-Round Recovery option. It will scan and hunt for more files from trash deeply. Relax and wait for the tool to recover all the data deleted from the trash folder.
Method 5: Remove Temporary Files
MAC temporary files sometimes take up huge disk space. Removing them will not only speed up your system but also free up disk space. There are tons of temporary files that you can check out by opening Finder and then go to Folder using ~/Library/Caches.
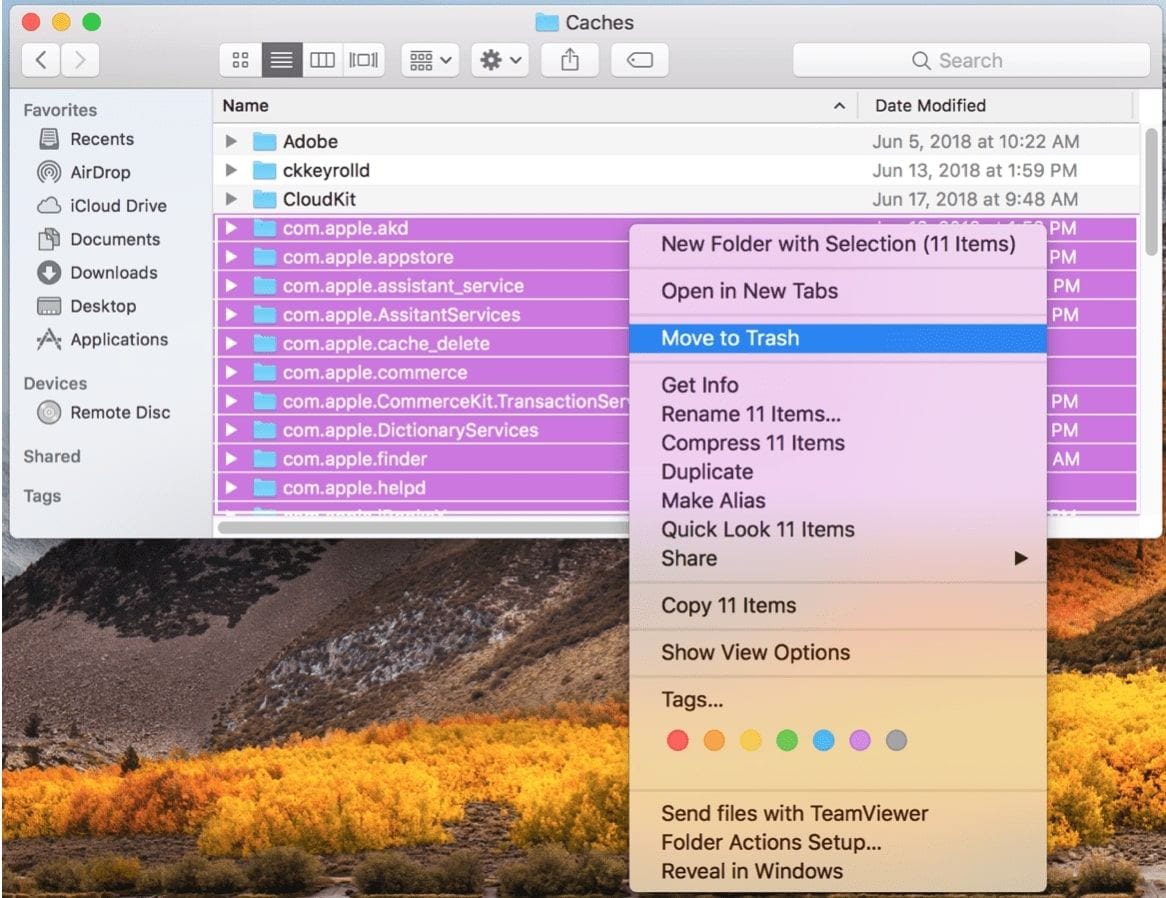
It will open a cache folder that consists of plenty of folders in it. You can choose and delete it manually as per your needs.
Method 6: Get Rid of Language Files
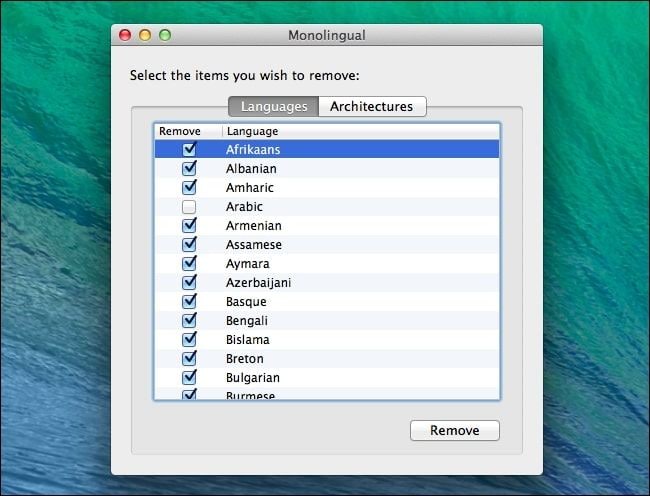
Mac applications have language files for every language. They might be using hundred of megabytes space for no reason. To get rid of language packs manually, perform the following steps:
Step 1: Head to applications and right-click on it.
Step 2: Choose 'show package contents' and click on 'contents'.
Step 3: Now click on 'res' and get rid of the language you don't need on your Mac.
Step 4: Repeat the steps for other applications.
Method 7: Clean your Downloads Folder
Usually, the download folder is full of big files that you do require. To delete all the data from downloads, perform the following steps:
Step 1: Simply open the Finder and go to the Downloads folder.
Step 2: Begin deleting data you don't need.
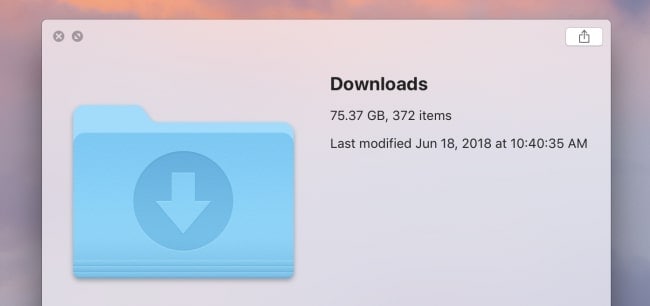
If you want, you can even sort the file size fast. However, don't skip to look at the folders. Remember, every time you open an archive file, it unzips into the folder automatically. And these folders are taking plenty of space on your Mac disk drive.
Method 8: Clean up Bulky Attachments in your Mail
Big Mac mail attachments are taking a lot of space on your drive. Thus, it's a good idea to clean them while checking your drive. You can uncheck 'download attachments automatically' or run a cleanup tool to get rid of them.
In case you are using Gmail, you can set limits on how many messages are synced by default over IMAP.
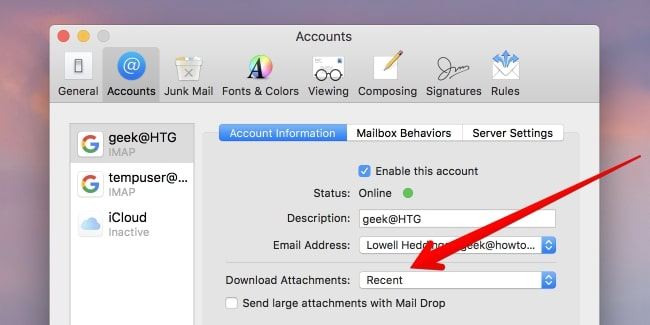
Step 1: Head to Mail > Preferences > Accounts > Account information
Step 2: Change 'Download attachments' to 'None' or 'Recent.'
Method 9: Delete Web Browser Cache
Internet browser creates cache every time you visit any website. However, doing this keeps your browser folder heavy, thereby creating a big problem. Thus, eliminating web browser junk is undoubtedly a priority. For this, perform the following steps:
Step 1: Open web browser and open 'history' tab
Step 2: Tap clear browsing data and choose files that you want to eliminate – cached images, cookies, site data
Step 3: Select from the top menu how far back you need to delete
Step 4: Click button named 'clear browsing data.'
Recover Accidentally Deleted Files WithRecoverit Mac Data Recovery
When cleaning your hard drive, if you accidentally or unintentionally deleted unnecessary files, use Recoverit Mac Data Recovery to recover lost or deleted data. This is an excellent data recovery tool for both Mac and Windows.
It will recover all the data files in a few minutes. The file can be documents, archives, pictures, audios, emails, or anything.
Features of Recoverit Mac Data Recovery tool:
- Recover deleted, corrupted, and lost files on Mac in minutes
- More than 1000+ types and data formats available
- Restore data from emptied trash
- Repair corrupted videos with ease
Here is the step-by-step guide on how to use this software in Mac:
Step 1: Select a Location
Download and launch Recoverit on Mac. Now pick a drive under the 'desktop' tab under the 'select location' tab. If you know the location of your file, choose 'select folder' and click 'start' to proceed.

The tool will begin an all-round scan. However, if you use advanced scanning feature, it will recover all the deleted, lost, and formatted data files of large size.

Step 2: Preview and Recover Files
There is also a 'preview' feature in the software that allows users to preview the recoverable data before heading towards the recovery step. Pick the files that you need and hit the 'recover' button to get all your important files back.

Step 3: Save Mac Files
Pick a different location on your drive to save all the recovered data.

Note: If you have lost all your videos and are not able to find them using the standard recovery method, try using the Advanced Video Recovery option. It will perform an in-depth scan and will allow you to retrieve complicated videos using its advanced splicing algorithm.
Part 3: How to Ensure that Mac Have Enough Disk Space?
If you want to make your MAC run faster and ensure that it has sufficient disk space,
use the following pointers.
1. Get Rid of Heavy Applications Running in the Background
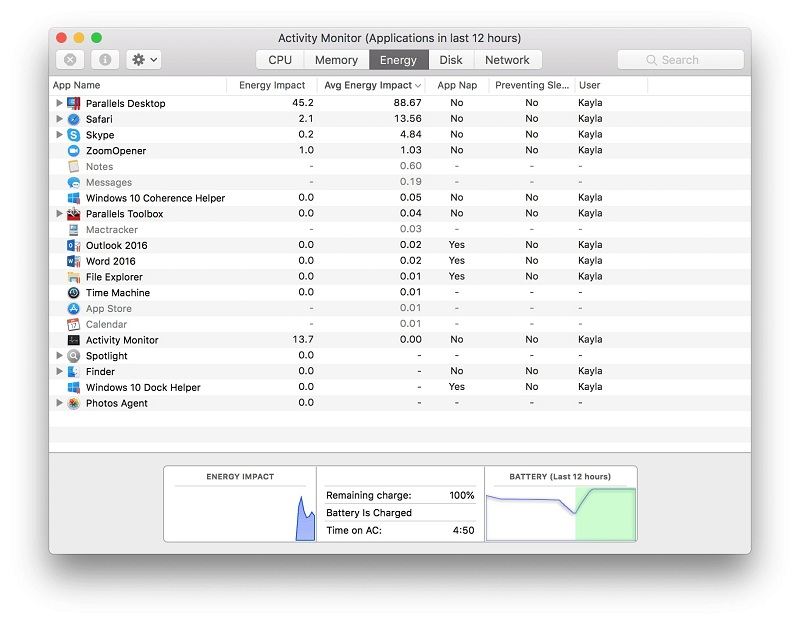
Mac applications drain your system even when you are not using them. However, you can increase the system res, bandwidth, and battery life by merely quitting them. For this, you can use in-built utility that comes with Mac OS – Activity Monitor.
It will help you see the network, CPU, disk activity, memory, network, usage, and individual tasks. You can quickly troubleshoot your Mac using Activity Monitor.
How to Use the Activity Monitor?
Step 1: Go to Finder > Go > Utilities
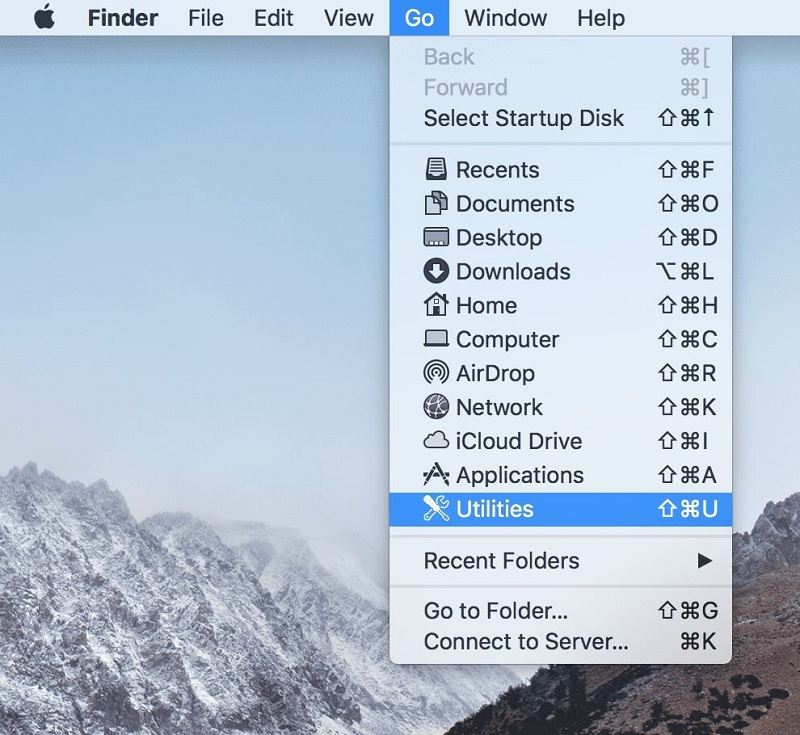
Step 2: Go to Activity Monitor, and it will display the top application in the last twelve hours.
2. Optimize Drive Storage
Running out of space may ruin your mood and your system performance. It can even allow your application to crash. It typically happens when the Mac operating system is continually swapping memory to disk.
Step 1: Go to Apple Logo > About This Mac
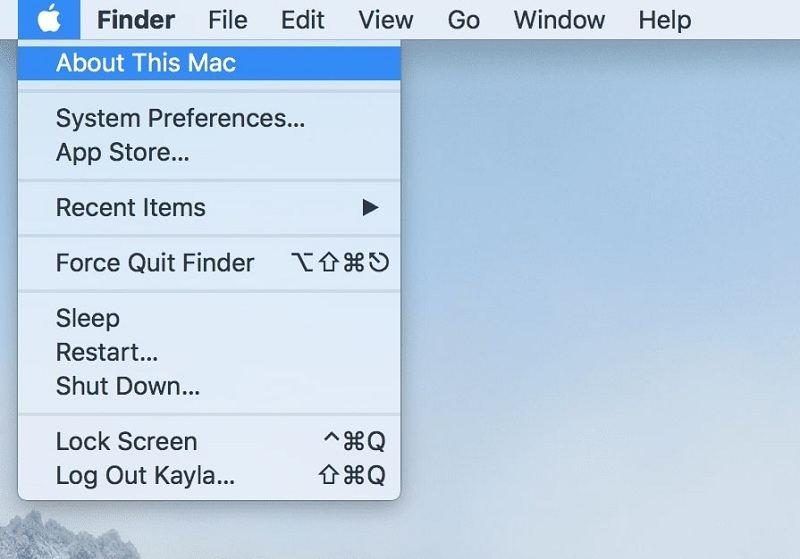
Step 2: Click it and then head to 'overview' to see memory, processor, graphics, serial number, and startup disk.
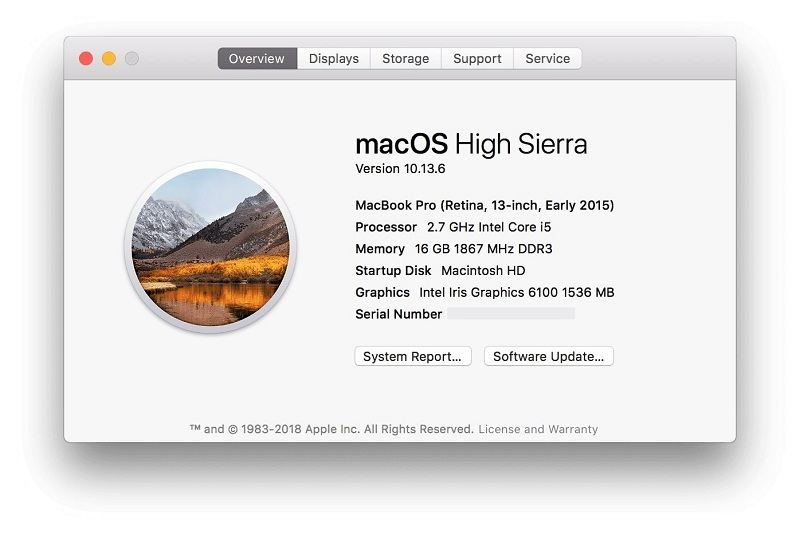
Step 3: Now, choose the 'storage' tab to get more information about the usage of your Macintosh HD storage.
Step 4: Click on the 'manage' button. You will get recommendations for saving your hard disk space automatically.
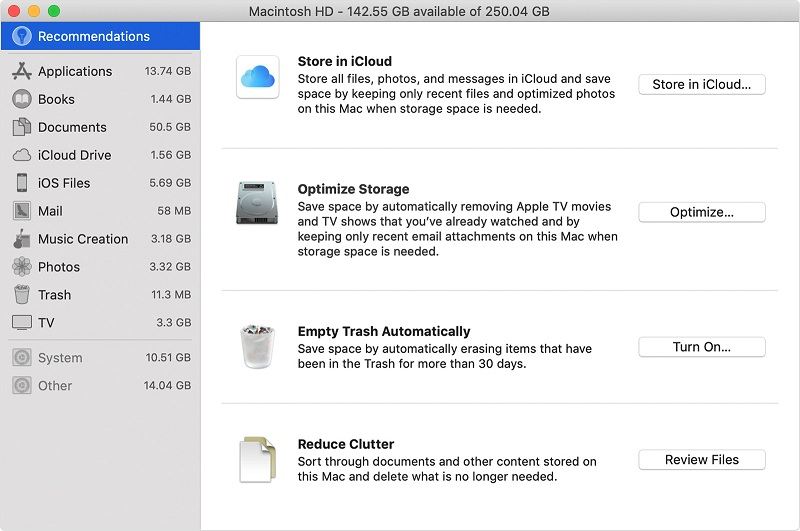
Note: Storing all your important files in iCloud is also a good idea to free up storage space.
3. Check for Hardware Upgrades
Upgrading your hardware and replacing your drive or RAM is the best way to get maximum out of the Mac. You can also reset the parameter random access memory (PRAM). You can reset PRAM by performing the following steps:
Step 1: Restart your Mac.
Step 2: Now press and hold Command+Option+P+R immediately before the grey boot screen appears.
Step 3: Continue holding them until the system restarts.
Step 4: Finally, release the keys to reset PRAM.
However, when it comes to performing a physical hardware RAM upgrade, you will need to identify what kind of RAM your Mac OS use. For this, go to Apple Logo > About this Mac and then Overview.
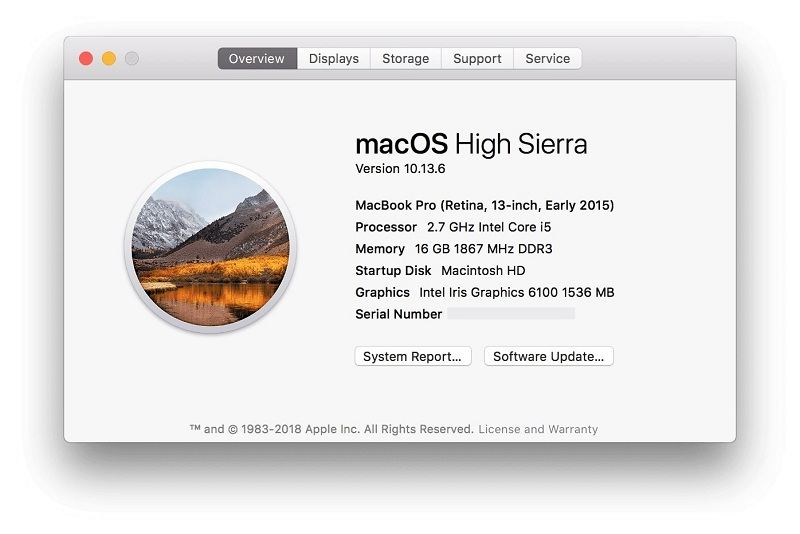
Note: Upgrading the old hard drive of your Mac to a solid-state drive (SSD) will bring a new life into a dying computer.
4. Get Rid of Clutter
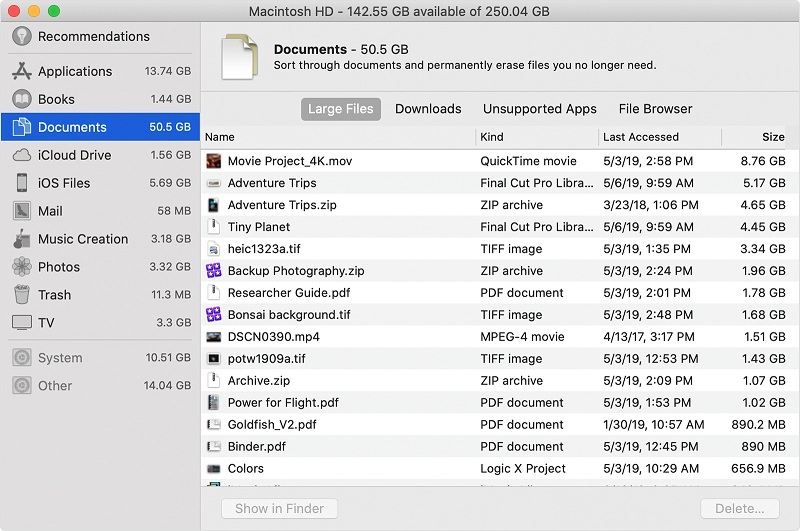
Get rid of clutter by removing big files that you no longer require. Click the 'review files' button and then pick any file category in the sidebar like Trash, Music, Documents, Creation, or Applications. You can delete the data files directly from this window.
Other categories display the total storage space used by the files in every application. You can then open these applications and decide whether to remove data from them.
Wrapping Up:
Macbook's hard drives fill up quickly. Luckily, there are simple methods to free up space on your hard drive and get rid of 'insufficient disk space on Mac' error. We have discussed various solutions with detailed steps in this article.
However, if you have accidentally deleted any of the important files use the Recoverit Mac Data Recovery tool. Its advanced recovery feature will dig a lot deeper into your system and recover files of any size.
Frequently Asked Questions About Insufficient Disk Space
1. Why is my Mac disk full if I don't have many files?
Your Mac's disk might be full due to hidden files in 'System Data,' such as application caches and local Time Machine snapshots. Use Storage Management (About This Mac > Storage) to see what's taking up space. Clearing caches can often safely free up gigabytes.
2. How can I quickly free up disk space on my Mac?
To quickly free up disk space, first empty the Trash. Then, clear your Downloads folder and delete large, unused applications. Enabling macOS's 'Optimize Storage' feature also helps by automatically removing files you don't need locally.
3. I deleted files, but my Mac still says the disk is full. Why?
If you face 'insufficient disk space' on your Mac after deleting files, ensure you've emptied the Trash bin. Your Mac might also be holding onto local Time Machine snapshots, which are temporary backups. These are usually cleared automatically, but a restart often helps.
What's Wrong with Mac
- Recover Your Mac
- Fix Your Mac
- Delete Your Mac
- Learn Mac Hacks



 ChatGPT
 Perplexity
 Google AI Mode
 Grok
Grok


Sue Wayne
staff Editor