Where is the Menu bar on Mac | Proven in 2026
The Mac menu bar is exclusively anchored to the top of the screen and dynamically updates its menus based on the active application to provide direct access to system settings and app-specific controls.
● Toggle automatic hiding via System Preferences > General, or access the menu using the default Ctrl+F2 keyboard shortcut (which requires enabling standard function keys in Keyboard Preferences).
● Rearrange status icons on the menu bar by holding down the Command key while left-clicking and dragging the items to new positions.
● Add hidden system icons by opening Finder, selecting "Go to Folder," navigating the exact path /System/Library/CoreServices/Menu Extras, and double-clicking the desired files.
Ask AI for a summary
The menu bar could be an extremely tricky tool on a Mac device. The menu bar is an important component on the screen of a Mac system. On the other hand, knowing how to access it and use it can help in solving a wide range of problems. The following information is designed for helping you at times when you wonder 'Where is the menu bar on Mac' with an overview of the menu bar on the Mac.
The overview would deal clearly with an introduction to the menu bar and the different components included in it. Furthermore, the discussion would dive into processes for hiding and showing the menu bar, accessing the menu bar with the keyboard, and customization of the menu bar on Mac devices. The interesting factor in this discussion would be the stepwise description of various methods for these processes in order to make it simpler for understanding.
Part 1. Overview of the Menu Bar on Mac
The menu bar can be defined as a graphical control element comprising of drop-down menus. The menu bar is designed for housing application-specific menus on Mac systems. Most importantly, the menu bar provides the facility for accessing different functions such as display of help manuals, opening files, or interacting with an application.
Many people would assume the Mac menu bar missing because of the unique positioning. On the other hand, this is what sets Mac apart from other operating systems and platforms.

In a Mac system, the menu bar appears as a thin bar that is anchored to the top portion of the screen. The Mac Menu Bar is different from that in Microsoft Windows because, in the case of the latter, the menu bar appears in each window. On the contrary, the menu bar on Mac systems is always found at the top of the screen. The menu bar changes according to the application that is selected. The menus and icons in the menu bar can be used for choosing commands, checking the status, and performing tasks. Let us take a look at the contents of the menu bar on Mac in the following section.
- The first element on the menu bar is the "Apple menu." This function is situated at the left corner of the menu bar and can be used for accessing commands for frequent activities. Some of these activities include updating apps, locking the screen, shutting down the Mac system, or opening "System Preferences.
- The next in the Mac menu bar icons includes the "App menus" located right beside the Apple menu. The apps in use are highlighted in bold and also include other menus such as File, Format, Window, or Edit.
- The "Status menus" appear at the right end of the menu bar and include icons. The Status menus can be used for checking the status of the Mac device as well as obtaining quick access to different features. Status menus for volume control and some apps could also be added upon installation.
- The "Spotlight" icon appears as a magnifying glass located next to the status menus. The "Spotlight" feature can be used for searching different files and items on the Mac device.
- The next important feature on the menu bar is Siri. The icon can help in accessing Siri, and you can ask Siri to do certain activities such as opening apps or files or finding things on the Internet or the Mac device. The results from Siri can be stored on the desktop or in the "Notification Centre."
- The "Notification Centre" is the final component located at the right end of the menu bar. The "Notification Centre" icon can provide access to details about the day as well as the notifications you might have missed.
Part 2. Where to Hide and Show the Menu Bar?
The menu bar is definitely a powerful instrument on a Mac device for accessing shortcuts, system functions, and app menus. On the other hand, many people want the menu bar Mac to disappear because of preferences for a minimalist screen.
Now, it is easier to hide and show the menu bar automatically. A simple setting could help in automatically hiding the menu bar, and it can be seen by moving the mouse pointer over the top of the screen. Here is a step-by-step instruction for the same.
- Click on the "Apple menu" to access "System Preferences." This can also be done through "Spotlight."
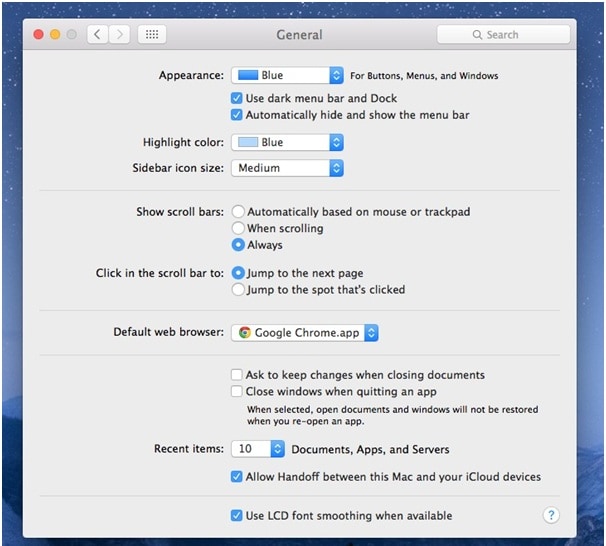
- Click on "General" in the "System Preferences" dialog box.
- Find the option for "Automatically hide and show the menu bar" in the "General" preferences tab. Check the box beside the option and see that the top menu bar disappears on Mac.
- After completing the above-mentioned steps, the menu bar would remain hidden automatically. However, you can find the menu bar by moving the mouse pointer over the top of the screen. This action would bring forth the menu bar and is quite simple to remember.
Part 3. How to access the Menu Bar with Keyboard
The menu bar on a Mac system is highly important for the different functionalities obtained through it. Imagine how difficult it would be with the Mac menu bar icons missing- No information on Wi-Fi status or the clock and even the battery! However, many users prefer to hide the menu bar in order to eliminate unnecessary distractions. The good thing is that the menu bar would not be going anywhere. It remains hidden and can be accessed by moving the mouse pointer over the top of the display. On the other hand, the keyboard could also be used for accessing the menu bar by following the steps mentioned below.
However, many users prefer to hide the menu bar in order to eliminate unnecessary distractions. The good thing is that the menu bar would not be going anywhere. It remains hidden and can be accessed by moving the mouse pointer over the top of the display. On the other hand, the keyboard could also be used for accessing the menu bar by following the steps mentioned below.
- The keyboard can be used for accessing the menu bar by using the default shortcut combination, i.e., "Ctrl+F2". However, the shortcut combination could be changed. Select the "System Preferences" through the Apple menu or the "Spotlight" feature. In the dialog box, find the "Keyboard" and click on it.
- Find the "Shortcuts" tab in the "Keyboard" dialog box.
- In the "Shortcuts' tab, the left pane would include the "Keyboard" option. Click on it for moving towards the next step.
- You have to find that the "Move focus to the menu bar" option in the dialog box opening after selecting "Keyboard" is enabled by checking the box. At the right end of the "Move focus to the menu bar" option, you can find the existing key combination. Click on the key combination and then change it by typing in the new shortcut key combination.
- In order to use function keys as standard function keys, you need to access the "Preferences" dialog box and then click on the "Keyboard" option. In the "Keyboard" dialog box, you can find the "Keyboard" tab. Now, it is recommended to check the box beside the "Use F1, F2, etc. keys as standard function keys" option on the "Keyboard" screen.
- Click on the "X" at the top left corner of the "System Preferences" dialog box to close it. Now you can see the Mac OS X menu bar disappeared and can access it with the keyboard or the mouse.

Part 4. How to Customize Menu bar Mac
The menu bar in Mac devices is a promising tool for improving productivity. However, the need to customize the menu bar Mac can be observed in many cases. Changing the date and time, rearranging the icons, using the battery widgets or the addition of new icons in the menu bar are some of the activities that we shall explore in the following sections.
Rearrange the items in the Menu bar
- Press the "Command" key and hold it down for all the steps mentioned below
- Move the mouse pointer towards the item that has to be moved
- Now you have to hold the left mouse button for dragging the selected items to the chosen positions on the menu bar. Interestingly, the other icons on the menu bar would make space for the new entries.
- After moving all the chosen items into the desired positions, you can let go of the "Command" and left mouse buttons.
Change the Date and Time
- Select the "Apple menu" from the menu bar and then click on "System Preferences."
- Find the "Date &Time" icon in the dialog box and click on it. You can also open the "View" menu for accessing the "Date & Time" tab. In some cases, the padlock at the bottom of the window can be closed. You have to click on it and input the administrator's name and password. If the "Date & Time" tab is not selected then do not delay any more- Do it!

- Click on the option of "Set date & time automatically." This would help in adjusting the date and time in alignment with one of the Network Time Protocol (NTP) servers of Apple.
- Click on the "Time Zone" tab. You may find that the system does not find the location automatically and hence you can manually enter the location. Make sure to uncheck the "Set time zone automatically using current location" option. Now, you can select the time zone region on a world map for completing the process.
Add Icons in the Menu Bar
- The "System Preferences" can be accessed through the menu bar on Mac just like in the process followed when my menu bar is missing on my Mac.
- The preference pane would provide the different system icons that can be put on the menu bar. After selecting the feature in the preference pane, you can click on "Input Sources."
- After clicking on "Input Sources," you have to find the box next to the "Show Input menu in the menu bar." This would put the selected icon on the menu bar.
- Different options such as Clock cannot be found in "System Preferences." This calls for the need to use the System folder for customizing the menu bar display menu, Mac.
- Click on "Finder" and then select "Go" followed by "Go to Folder." All these could be accessed on the menu bar
- Type this path like "/System/Library/CoreServices/Menu Extras
- Double click on a specific icon to place it on the menu bar.
Use the Battery Widgets
- Click on the "Battery" widget to find out two distinct statuses. The first one shows the time remaining before the battery runs out of power. It also indicates the plugged-in status of the battery. The second status shows the programs which are draining power.
- Access the "Show Percentage" option by clicking on it. This would provide numbers about the remaining battery power.
Conclusion
Observing the details illustrated above may clarify doubts on how to keep the menu bar from disappearing on Mac devices. The discussion also reflected on the methods for automatically hiding and showing the menu bar and accessing the menu bar with the keyboard. The overview of different features in the menu bar can also provide further clarification about using the menu bar. Finally, the discussion reflected on the ways for customization of the menu bar on Mac.
What's Wrong with Mac
- Recover Your Mac
- Fix Your Mac
- Delete Your Mac
- Learn Mac Hacks


 ChatGPT
 Perplexity
 Gemini
 Claude
 Grok
Grok


Sue Wayne
staff Editor