Many Mac users face moments when they wish they could turn back time on their computers. Whether it's because of unwanted system changes, software conflicts, or accidentally deleted files, knowing how to restore your Mac to a previous date can be a real lifesaver.
The good news is that macOS offers several built-in tools and third-party options to help you restore your Mac to an earlier date. In this comprehensive guide, we'll explore the most effective methods to restore Mac to precious date and help you choose the right approach for your situation.
In this article
Part 1: Can I Restore Mac to an Earlier Date?
Yes, you can absolutely reset Mac to previous date. Apple has built several recovery options into macOS, with Time Machine being the most powerful and user-friendly tool. This backup system lets you restore your Mac to precious date settings, allowing you to recover from various issues without losing important data.
However, the success of restoring your MacBook to a previous date depends largely on whether you've set up proper backups beforehand. While there are multiple ways to restore Mac to an earlier date, having regular backups through Time Machine or third-party apps gives you the best chances of a successful restoration.
Part 2: Why Restore Mac to Previous Date?
Here are the most common reasons why users need to restore Mac to precious date:
- Unwanted system changes after a macOS update that caused performance issues or compatibility problems.
- Accidental deletion of important files or folders that weren't in the trash.
- Software conflicts after installing new applications that made your Mac unstable.
- Malware or virus infections that compromised your system's security.
- Corrupted system files causing frequent crashes or startup problems.
- Failed software updates that left your Mac in an unusable state.
- Need to recover specific versions of documents from a previous time.
- System configuration changes that negatively impacted your Mac's performance.
Part 3: How to Restore a Mac to Previous Date
Restoring your Mac to a previous date can be a lifesaver when you're facing issues like system crashes or data loss. Whether it's due to a recent software update gone wrong or a sudden malfunction, rolling back your system can help you regain stability.
Here's how you can restore your Mac to a previous date and get things back to normal.
Method 1: Reset Mac to Previous Date Using Time Machine
Time Machine acts as a simple rewind button for your Mac. Think of it as taking snapshots of your computer every hour, day, and week. These snapshots save everything on your Mac - your files, apps, system settings, and even your desktop wallpaper. It's Apple's built-in backup tool, and it's free with your Mac.
What makes Time Machine special is how easy it is to use. You don't need to be tech-savvy to understand it. Just connect an external drive, turn on Time Machine, and it works in the background while you use your Mac. When something goes wrong, you can browse through these snapshots like flipping through pages in a photo album, finding exactly what you need from any point in time.
Best for:
- Complete system restoration when your Mac isn't working right.
- Getting back deleted files that aren't in the trash.
- Fixing problems after a bad software update.
- Moving to a new Mac while keeping all your old stuff.
- Recovering from virus or malware infections.
Steps:
- Click the Apple menu and select "System Settings". Click "General" then "Time Machine". Click "Enter Time Machine" or find the Time Machine icon in the menu bar.

- Utilize the timeline on the right to find your desired date. Choose the files or folders you wish to restore and click "Restore" to recover the selected items. Allow the restoration process to finish.

Method 2: Restore Mac to a Previous Date with Migration Assistant
Migration Assistant wasn't originally designed just for restoring your Mac to an earlier date, it's become a powerful tool for this purpose. Think of it as a bridge between your current Mac's state and any previous backup you have, whether that's from Time Machine or another Mac.
What's special about Migration Assistant is that it gives you more control over what you bring back. Unlike Time Machine, which often restores everything, Migration Assistant lets you pick and choose. Want your old documents but not the applications? No problem. Need your system settings but want to keep your current desktop layout? You can do that too.
This tool is particularly useful when you're setting up a new Mac or want to start fresh while keeping your important stuff. It's also great when you need to restore your Mac to an earlier date but don't have a Time Machine backup. The best part is that it comes free with your Mac and is designed to be straightforward to use.
Best for:
- Moving to a new Mac while keeping everything organized
- Starting fresh but keeping specific files and settings
- Recovering from major system problems
- Combining files from multiple backups
- Setting up a Mac exactly like it was on a specific date
- Getting back to normal after a clean macOS installation
Steps:
- Open "Applications > Utilities > Migration Assistant". Click "Continue" and enter your administrator password.

- Select "From a Mac, Time Machine backup, or startup disk". Choose your backup source. Select the data you want to transfer. Click "Continue".
- Wait for the transfer to complete. Restart your Mac when prompted
Method 3: Restore MacBook to Previous Date with Get Backup Pro App
Get Backup Pro is like having a professional backup manager for your Mac. While Apple's built-in tools are good, Get Backup Pro gives you extra features that power users and professionals love.
What makes Get Backup Pro stand out is its flexibility. You can create different types of backups for different needs. Want to make an exact copy of your Mac that you can start up from if something goes wrong? Get Backup Pro can do that. Need to save specific folders every hour while others backup daily? No problem. The app even lets you compress your backups to save space, something Time Machine doesn't do.
This app is particularly helpful for people who need more control over their backups or who work with lots of important files. It's also great if you want to restore your Mac to precious date settings but need more precision than Time Machine offers. While it's not free like Apple's tools, many users find the extra features worth the investment.
Best for:
- Creating backups that take up less space
- Making exact copies of your Mac that can start up on their own
- Setting up complex backup schedules for different files
- Syncing specific folders between multiple Macs
- Having more control over what gets backed up and how
- Restoring very specific parts of your system without touching others
- Professional users who need reliable, flexible backup options
Steps:
- Download and install Get Backup Pro. Create a new backup project. Select the files and folders to back up. Choose your backup destination. Run the backup.

- Open Get Backup Pro. Select your backup project. Click "Restore". Choose the date you want to restore from. Select the items to restore. Click "Start" to begin the restoration
Part 4: Lost Important Files While Restoring Mac? Use Recoverit
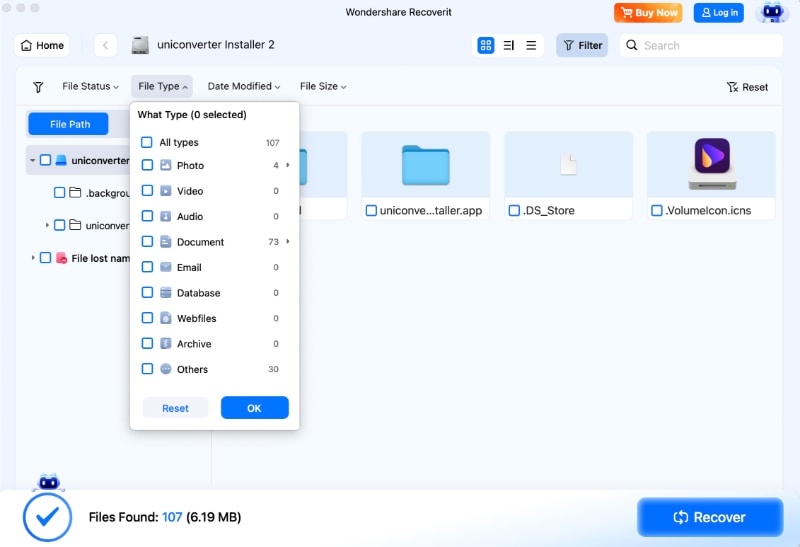
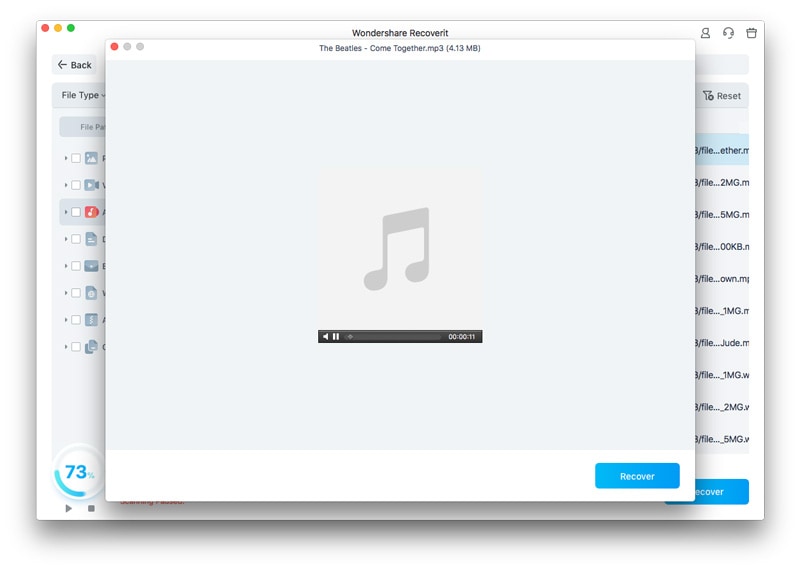
Sometimes, restoring your Mac to an earlier date might result in losing recent files. Recoverit can help recover these lost files:
- Install and launch Recoverit for Mac Select the drive where files were lost. Click "Start".

- Wait for the scanning process.

- Preview and select files to recover. Choose a safe location to save recovered files. Click "Recover" to restore your files.

Learn more >>:
How To Recover Deleted Pages Files On Mac?
Easy Methods to Recover Replaced Files on Mac without Time Machine
Part 5: Do's and Don'ts: Restore Mac to an Earlier Date
Restoring your Mac to an earlier date can help fix various issues and bring back stability to your system. However, it's essential to follow some best practices to ensure a smooth restoration process. Here are the key do's and don'ts to keep in mind.
Do's:
- Always create a fresh backup before attempting any restoration
- Verify your backup integrity regularly
- Keep your Mac plugged in during restoration
- Have enough free space for the restoration process
- Document your current settings before restoring
- Test restored files immediately
Don'ts:
- Don't interrupt the restoration process
- Don't restore to a date when your Mac had problems
- Don't forget to back up current files before restoring
- Don't restore without checking backup completion
- Don't ignore warning messages during restoration
- Don't skip system updates after restoration
Conclusion
Knowing how to restore Mac to a previous date is an essential skill for every Mac user. Whether you're using Time Machine, Migration Assistant, or third-party tools, having a solid backup strategy and understanding the restoration process can save you from data loss and system problems.
Remember that the key to successful restoration is preparation. Regular backups and familiarity with these restoration methods will ensure you can quickly recover from any unexpected issues that arise with your Mac.
FAQ
-
Q: How long does it take to restore Mac to previous date?
The time needed to restore your Mac to a previous date depends on several factors. The biggest factor is how much data you're trying to restore - a full system restore with lots of files (like photos, videos, and applications) typically takes between 1 to 4 hours. However, if you're only restoring specific folders or documents, it might take just 15-30 minutes. The speed of your backup drive also matters a lot. USB 3.0 or Thunderbolt drives work much faster than older USB 2.0 drives. -
Q: Can I restore my Mac without a Time Machine backup?
Yes, you can restore your Mac to an earlier date even without a Time Machine backup, though your options will be more limited. Migration Assistant can help if you have other types of backups, like those made with third-party apps or even a clone of your system. You can also use recovery tools like Disk Utility's First Aid or macOS Recovery to fix system problems. Some third-party apps like Get Backup Pro or Carbon Copy Cloner offer their own backup and restore features. -
Q: Will restoring my Mac delete current files?
When you restore your Mac to precious date settings, it will replace current files with versions from your backup, which means any changes made after the backup date could be lost. Think of it like rewinding a video - everything that happened after the point you rewind to disappears. This is why it's crucial to save any new or changed files to a separate drive or cloud storage before starting the restoration process.


 ChatGPT
 Perplexity
 Google AI Mode
 Grok
Grok


