

 TL;DR:
System Restore allows you to fix sudden Windows crashes, boot loops, and driver conflicts by reverting system configurations to a previously saved state without deleting your personal documents or media.
● Requires existing restore points created before the issue occurred; it removes applications and drivers installed after that snapshot but does not recover deleted personal files, emails, or browser history.
● Use standard System Restore via System Properties for minor bugs, Safe Mode to bypass faulty startup programs, or Recovery Mode and CMD (using the `rstrui.exe` command) if Windows fails to boot to the desktop entirely.
● Since System Restore is not a backup solution and cannot retrieve deleted personal data, dedicated tools like Recoverit are required to recover lost files, archives, or media damaged by system crashes or virus attacks.
Ask AI for a summary
 ChatGPT
 Perplexity
 Gemini
 Claude
 Grok
Grok
Some people face a slow computer or weird errors after installing a new program. Sometimes errors appear, apps stop opening, or the screen freezes without an apparent reason. This causes frustration and lost work every day for regular users. Beginners often fear losing files, time, or settings while fixing common computer issues. Therefore, this guide explains simple steps to learn how to restore computer to earlier date.
Try Recoverit to Perform Data Recovery
 Security Verified. 3,591,664 people have downloaded it.
In this article

Part 1. When and Why You Should Restore Your Computer
Problems can quietly grow when simple fixes stop working, and daily computer use feels disrupted. In this part, you’ll learn when to restore computer to earlier date without risking changes:
- Sudden Errors: Recent installs can cause crashes, freezes, or alerts appearing immediately after finishing setup. Restoring returns the system to a calm state before those changes were added.
- Boot Issues: After updates, the computer may fail to start, loop screens, or stop midway unexpectedly. Restoring to earlier settings can allow normal startup without replacing the whole system.
- Driver Conflicts: New drivers sometimes clash with devices, leading to sound, display, or input failures. Restoring removes the bad driver and returns the previously working one for devices.
- Slow Performance: If speed drops, background changes may be using memory and power constantly. Going back removes heavy additions and brings back smoother, more responsive everyday use.
- Update Problems: Some updates introduce bugs, causing errors, missing tools, or strange behavior for users. A restore reverses the update's impact while keeping personal files safe and intact.
Part 2. Getting to Know System Restore: What It Does and How to Use It
Many users face unexpected issues after updates, software, or driver installs. This section explains the reasons to restore computer to earlier date easily and securely:
What System Restore does
System restore allows you to undo recent system changes by using restore points created. These snapshots save essential files and settings at specific times. By using this feature, you can restore Windows to previous date, fixing errors caused by updates or software installations. Additionally, you can create them manually before risky tweaks like driver swaps.
Difference between System Restore, Backup, and Reset
This section provides a clear comparison table of system options that restore computer to earlier date:
| Aspect | System Restore | Backup | Reset |
|---|---|---|---|
| Main Purpose | Fixes system issues by restoring the previous state | Protects files by keeping extra copies | Reinstalls Windows to repair serious problems |
| Personal Files | Keeps documents and media safe | Saves copies of selected or all files | May delete files depending on the reset option |
| Installed Apps | Removes apps installed after the restore point | Does not affect installed applications | Removes most or all installed applications |
| System Settings | Returns settings to the earlier working state | Does not change system settings | Resets settings to the default Windows state |
| Use Case | Problems after updates, drivers, or software | Protects against accidental file loss | When the system is badly broken or unstable |
| File Recovery | Cannot recover deleted personal files | Designed specifically for file recovery | Not meant for recovering lost files |
What Gets Restored and What Doesn’t
Below is a comparison table showing what System Restore restores and what it does not:
| What Gets Restored | What Doesn’t Get Restored |
|---|---|
| System files and components | Personal documents and media |
| Windows Registry settings | Emails and browser history |
| Installed apps and drivers | Files on unmonitored drives |
| Windows updates and changes | Deleted or lost files |
| System-level configurations | User-created content outside the system |
Part 3. How to Restore Windows Computer to Earlier Date
Minor problems can grow when simple fixes fail and disrupt your computer daily. So, when someone asks, “how to restore my computer to an earlier date,” go through the following methods:
Way 1. Restore Windows Using System Restore
System Restore helps repair Windows by returning system files using built-in restore points. This also allows you to restore Windows to previous date without affecting personal documents or photos. Additionally, it fixes problems caused by recent updates or software changes. That helps fix crashes, update errors, and configuration issues. Thus, adhere to the guide below to restore Windows using System Restore:
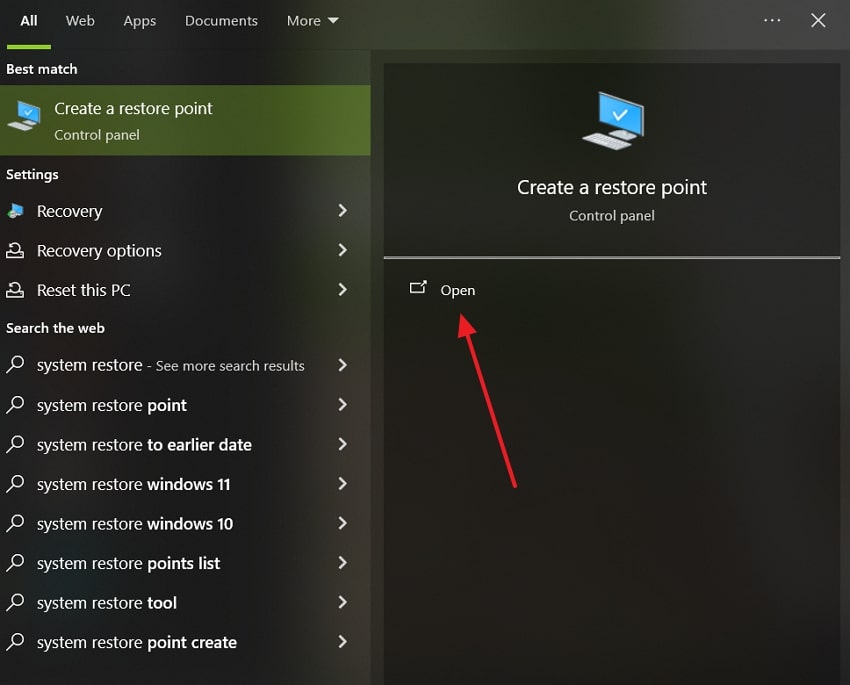
- In the Windows search, type “Create a Restore Point” and open it.
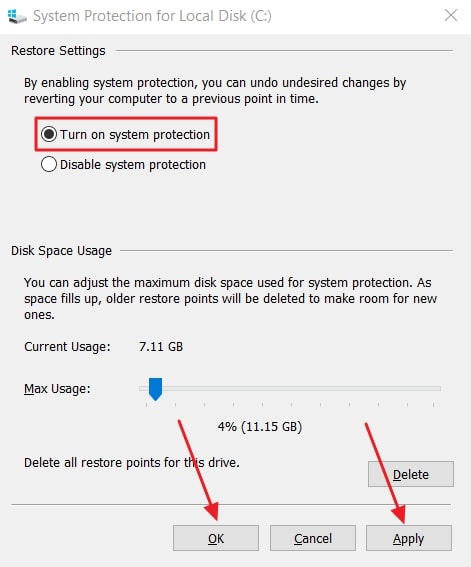
- Upon accessing it, make sure the “C:/ Drive” is selected and then click “Configure.”
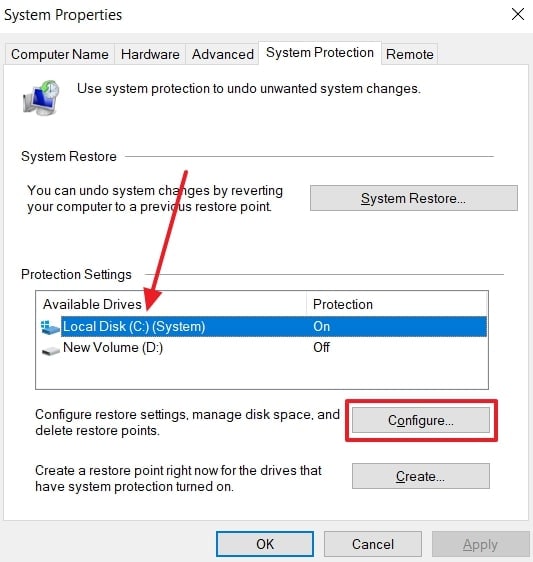
- Next, enable “Turn on System Protection,” first click “Apply,” then press “OK.”
- Afterward, go back to “System Properties” and click the “Create” button.
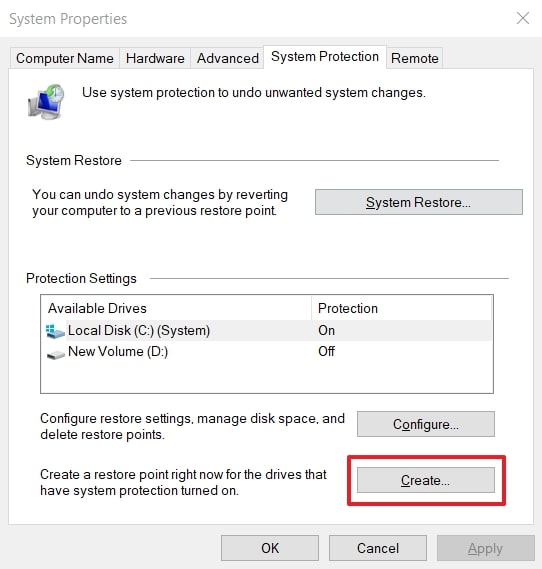
- At last, type a description in the given “Text Box” and hit the “Create” button.

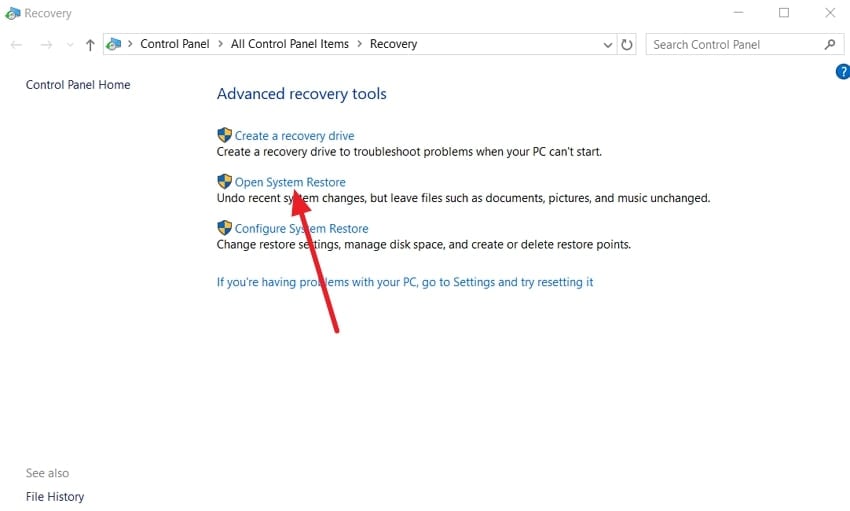
- Once the restore point is created inside the “System Properties,” hit the “System Restore” button.
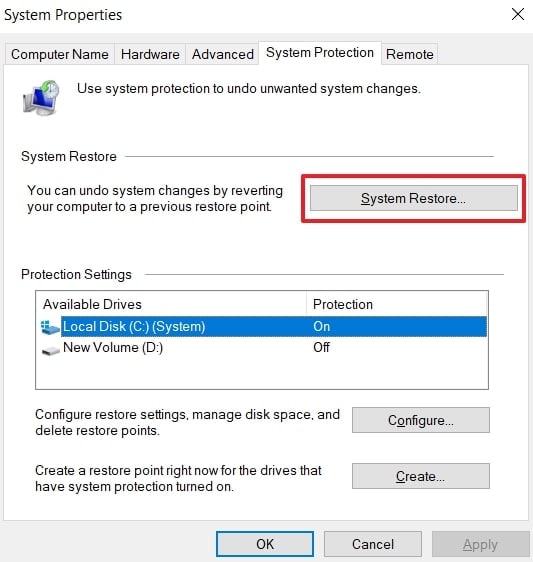
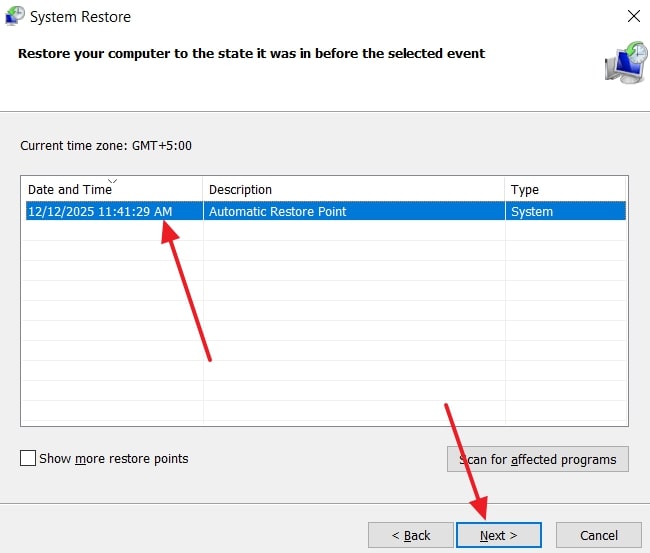
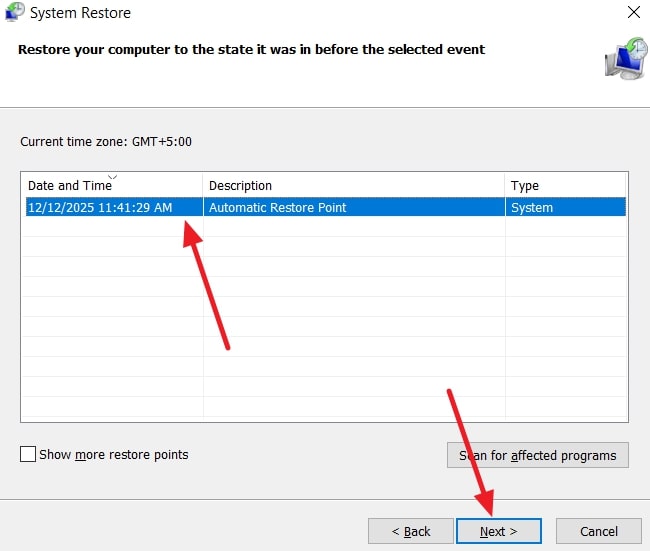
- When you move to the next screen, click “Next” to move forward.
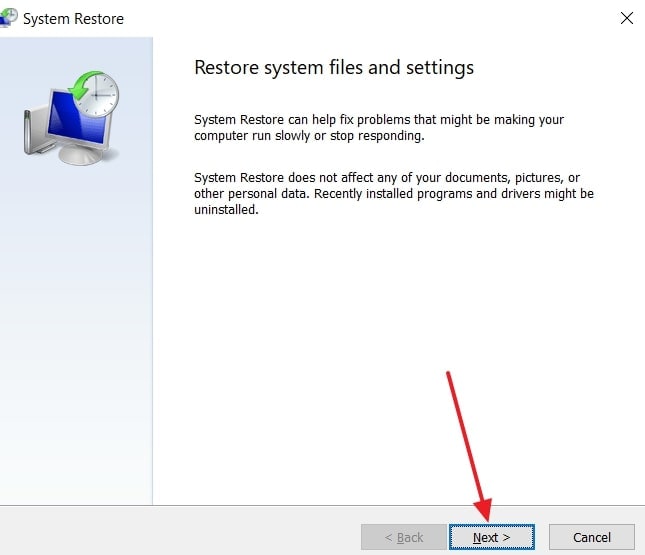
- Afterward, choose the “Restore Point” and click the “Next” button.
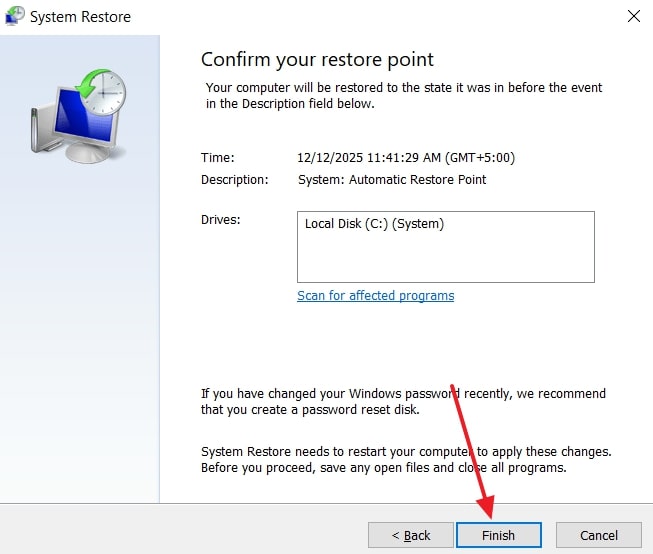
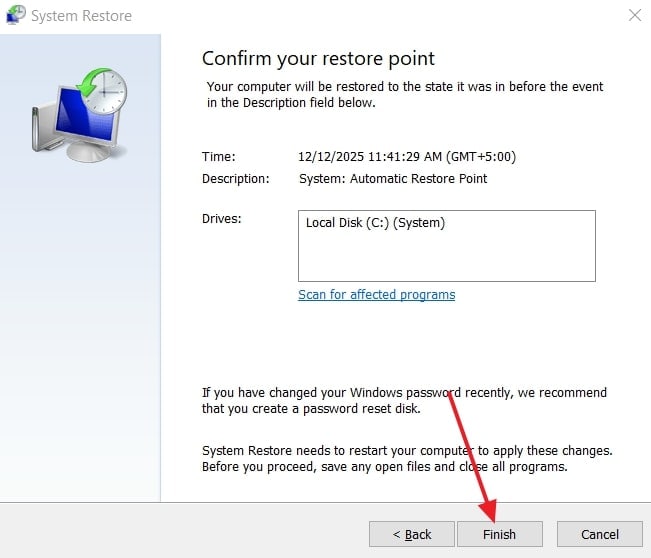
- Lastly, ensure your restore point is verified and press the button, which is labelled “Finish.” As a pop-up is displayed, click “Yes” to continue.
Way 2. Restore in Safe Mode
Restoring in Safe Mode allows Windows to load only essential drivers and reduce software conflicts. This clean state avoids conflicts from faulty drivers or startup programs during restore. Furthermore, it helps when the normal startup fails, the screen stays black, or crashes repeatedly. In this mode, System Restore is more likely to restore computer to earlier date. Take guidance to restore your system data in Safe Mode:
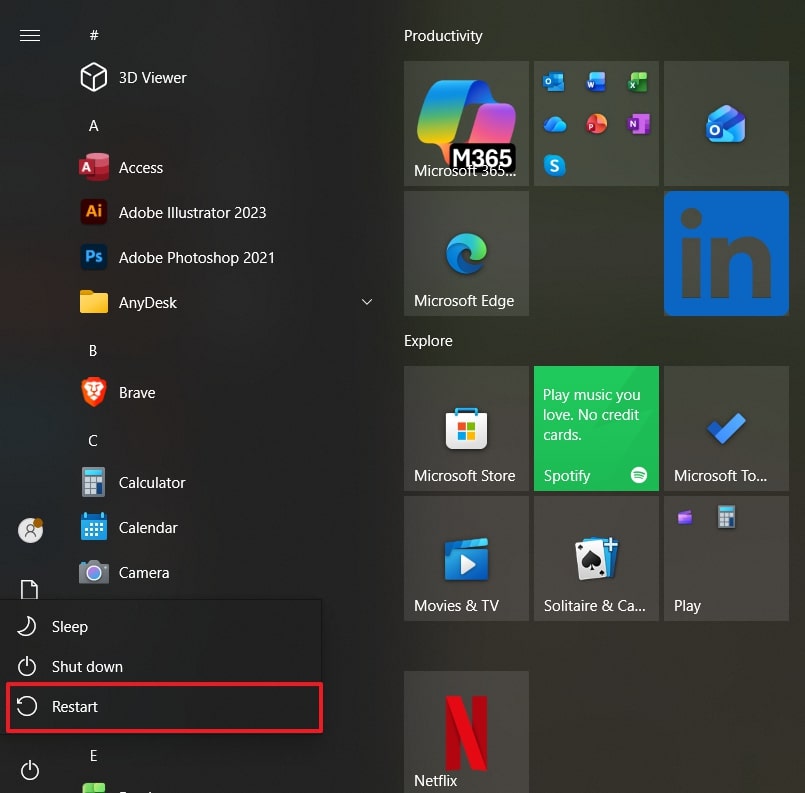
- Click the “Start” menu and select the “Power” button while holding Shift, and choose “Restart.”
- After accessing Safe Mode, click on the “Troubleshoot” option.

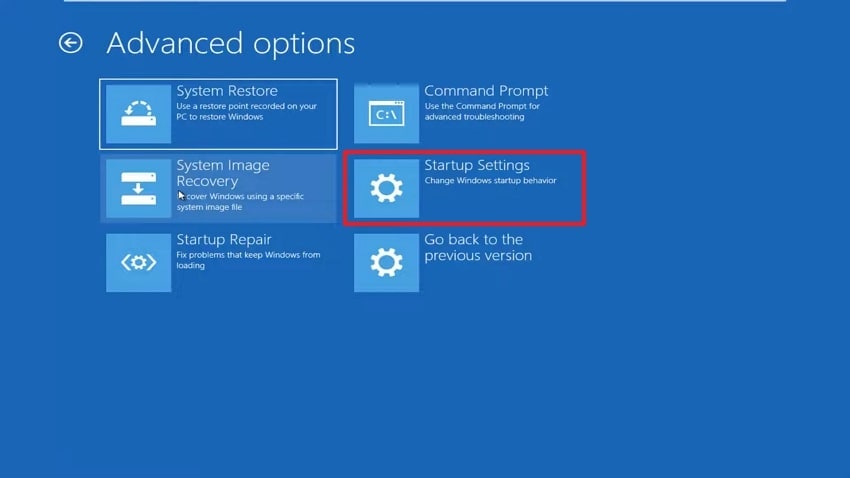
- Later on, select the “Advanced Options” section.

- Upon accessing it, you need to choose the “Startup Settings” option.
- Now, click the “Restart” button. Press the F5 key to enter safe mode after the restart.

- Now, open “System Recovery” through the Start menu and choose the “Open System Restore” option.
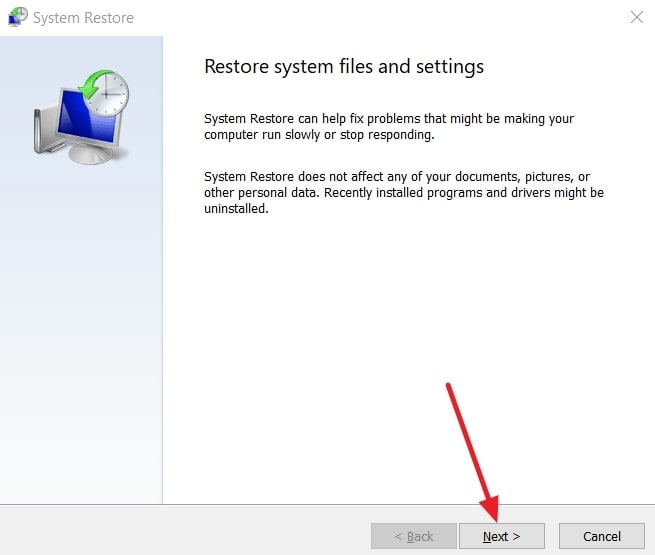
- Upon accessing it, hit the “Next” button to move forward.

- As you see the next screen, choose the “Restore Location” and click the “Next” button
- After all the processes, finally click the “Finish” button. Next, a last pop-up will occur; you need to press the “Yes” button.
Way 3. Restore via Recovery Mode
Recovery mode also restores Windows when it won’t boot normally. This separate repair area unlocks system files blocked during regular starts. It rolls back drivers and settings while leaving personal data untouched. However, it needs existing restore points to restore computer to earlier date. Let’s explore the steps below to restore via Recovery Mode:
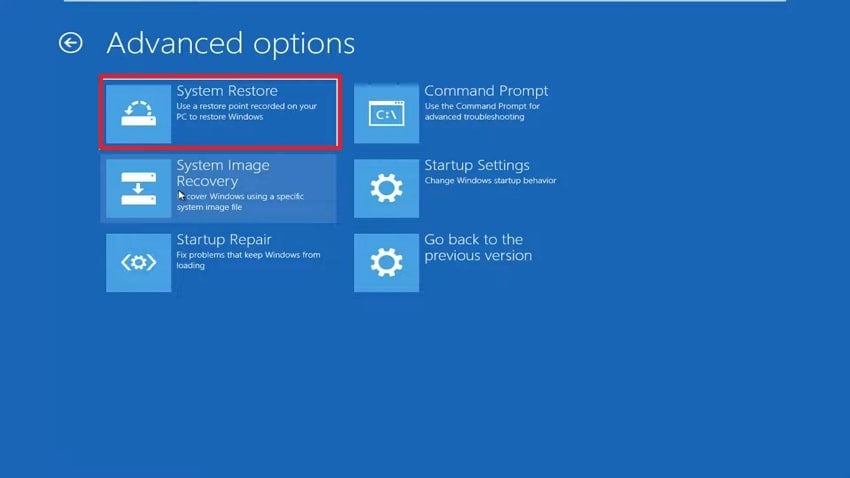
- First, click the “Start” menu and select the Power button while holding Shift, and press “Restart.” Afterward, once the system restarts, click “Troubleshoot” and choose “Advanced Options.” Upon accessing it, go for the “System Restore” option.
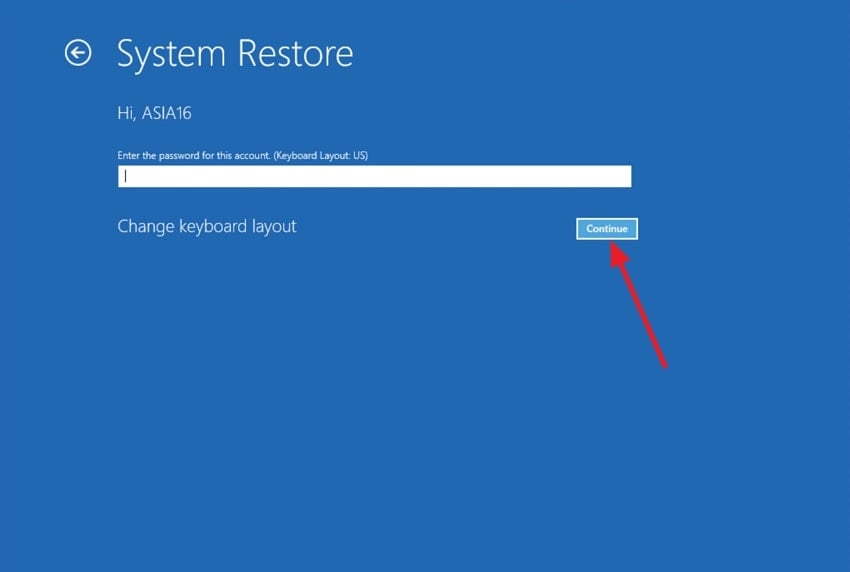
- On the next screen, select your account, type in your password, and click the “Continue” button.
- After that, tap the “Next” button and select your restore point. Finally, complete the restore to return the Windows system to its previous state.
Way 4. Restore Using CMD
CMD restore launches system restore when Windows skips the desktop entirely. It reaches safe mode or WinRE to access the system tools easily. Moreover, it reverts files, programs, and tweaks to prior stable setups without affecting personal files. However, it relies on prior points to restore windows to previous date. User files remain safe, but apps added later may need to be reinstalled. Review the steps to restore via CMD:
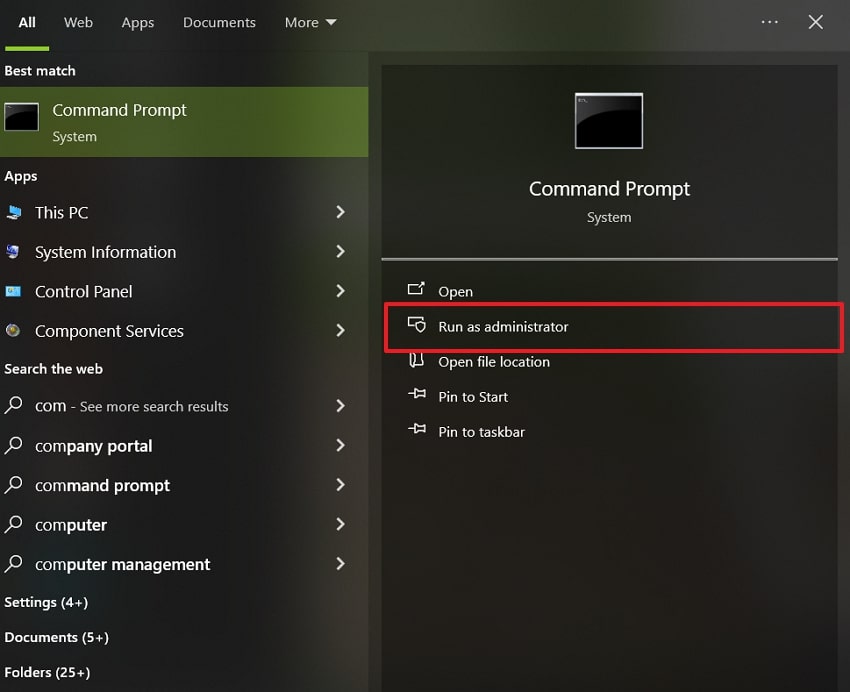
- To initiate, make sure that you create a restore point. Later on, open “Command Prompt” and select “Run As Administrator.”
- Afterward, type “rstrui.exe” in the CMD and press “Enter.” Next, select your restore point and proceed to restore the Windows system.

Pro Tip: Don’t Lose Data: Recoverit Protects Files During Computer Restore
Alongside that, many people lose their important data while they restore computer to earlier date. In case of its loss, you can use Recoverit to recover your vital data. It is an incredible utility capable of restoring 1000+ file types, such as media, documents, and archives. During Windows restoration, data on internal hard drives as well as external storage devices can be restored. In addition, it maintains hardware, software, and hybrid RAID systems on Windows systems.
This tool allows previewing recoverable files before performing final recovery. You are also able to recover your important data without changing the original file name and file format. It is a perfect tool for retrieving information on non-booting Windows computers. Recoverit is also able to restore deleted information on BitLocker-encrypted Windows drives safely.
Key Features
- Quick Scanning: The mean scan time is fulfilled under 5 minutes to retrieve data faster.
- Virus Recovery: Recovers files that were deleted or damaged by a virus or malware attacks.
- System Crash: This is meant to recover the data in case of a Windows system crash or boot failure.
Guide to Restore Your Lost Data via Recoverit
This section provides a detailed guide to recovering lost data via Recoverit:
- Choose the Drive
After opening the tool, select the hard drive where your lost files are located.
- Scanning the Drive
The tool will perform a complete scan of the selected drive. After scanning, choose the files you want and click the “Recover” button.
- Preview and Restore Files
Once scanning finishes, preview all recovered files and select “Recover” to save them to your PC.
Conclusion
In conclusion, restoring your system helps fix errors, crashes, and slow performance without harming personal files. Users can undo recent changes and regain stability by following the correct steps. This guide explained how to restore computer to earlier date using reliable Windows methods. However, System Restore cannot recover deleted files. Therefore, if critical data is lost during the process, you need a dedicated solution in the form of Recoverit.
FAQ
1. Can I restore my computer if it won’t boot normally?
Yes, Recovery Mode or CMD allows restoring Windows when the standard startup fails. These methods safely access system tools to restore Windows to a previous state. However, prior restore points must exist to revert system changes successfully.2. Can System Restore fix blue screen errors?
System Restore can resolve blue screen errors caused by recent drivers or updates. It rolls back system settings to a stable state before the blue screen appeared. However, hardware failures cannot usually be fixed with System Restore alone.3. Should I back up data before restoring Windows?
Although System Restore keeps personal files, unexpected issues can still occur. Backing up ensures complete safety before making any system-level changes. Recoverit can help recover files if unexpected data loss happens during restoration.4. Is it safe to use System Restore on a non-booting computer?
Yes, Recovery Mode allows System Restore even when Windows cannot boot normally. This method accesses protected system files unavailable during standard startup. Ensure restore points exist, or the process will not proceed successfully.


