We all have experienced spending hours or even days on a document and forgetting to save it before closing the app. Although the newer Microsoft Office versions offer AutoSave, you might still need to recover a file because you forgot to turn on AutoSave. Keep reading to learn 5 effective methods for restoring the previous version of Word documents on Mac. These methods also work for recovering an earlier version of MS Excel, PowerPoint, Pages, and other documents or files.
Try Wondershare Recoverit to Perform Mac Document Recovery

In this article
Comparison: Which Method Should You Choose?
| Scenario | Best Method | Success Rate |
| File saved on OneDrive/SharePoint | Browse Version History | High |
| Word crashed before saving | AutoRecovery Folder | Medium |
| Accidentally saved over a file (Local) | Time Machine Backup | High |
| No backups & file overwritten | Recoverit Data Recovery | Depends on data overwrite |
Method 1: Browse Version History in Word for Mac (Office 365/2019)
File History is the best option for restoring documents because it usually saves different versions of files automatically and without involving the Time machine. Let's see how you can use it.
- Open the Word document you need to recover on your Mac computer.
- On the top of your screen, click on File > Browse version history.
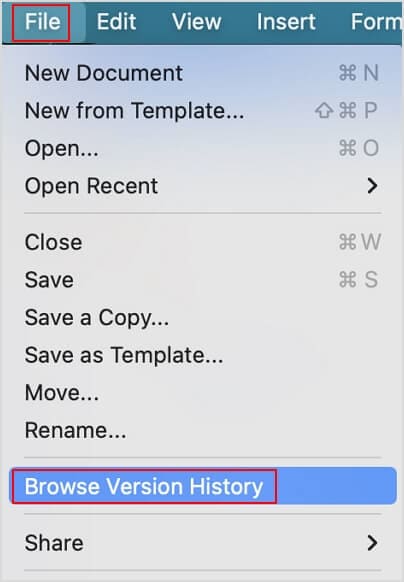
- A new window will appear on the right side; select the version of the file that you want (you can choose according to the time stamp under each version).
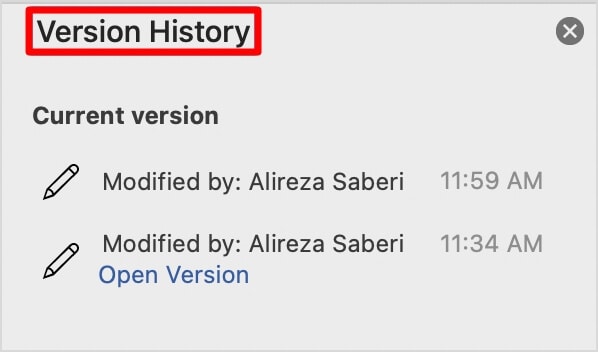
- Restore the desired version of your document by saving it on your device or in the cloud.
Method 2: Recover Previous Version of Word Documents Using AutoRecovery Mac
The auto-recovery feature allows your Mac to automatically save Word documents or other Microsoft Office files in a specific folder so that you can access them whenever you need to. This method is easy to do and doesn't take up much of your time.
- Go to your Mac desktop.
- Click Go > Go to Folder on the top-left corner.
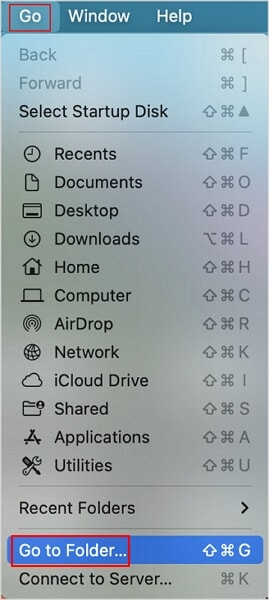
- In the new pop-up window, type in "~/Library/Containers/com.Microsoft.Word/Data/Library/Preferences/AutoRecovery" and press Enter.
- The Auto recovery folder will open. Please search for the document you need and open it with MS Word.
Method 3: Recover Previous Version of Word Documents Using the TemporaryItems Folder
This method requires you to use the Terminal application. If you are unfamiliar with using the Terminal, don't worry, as this section has a step-by-step guide. Let's see how this method is done.
- Press the shortcuts Space + Command to open Spotlight. Search for Terminal and open it.
- Type "open $TMPDIR" in the Terminal and press Enter.

- Open the "TemporaryItems" folder and search for .tmp files.
- Change the .tmp extension to .doc or .docx and open the files with MS Word.
Method 4: Restore Previous Versions of Word Document Using Mac Time Machine
The Time Machine is a built-in program for Mac that automatically backs up all your data. The files it backs up include Word documents, photos, videos, etc. After activating it, the Time machine will back up every document you create into the Time Machine, and you can access them easily on all your Apple products. Let's see how you can use it to recover an earlier version of your Word documents.
- Press the Space + command keys to open Spotlight.
- Type in "time machine" and open the application.
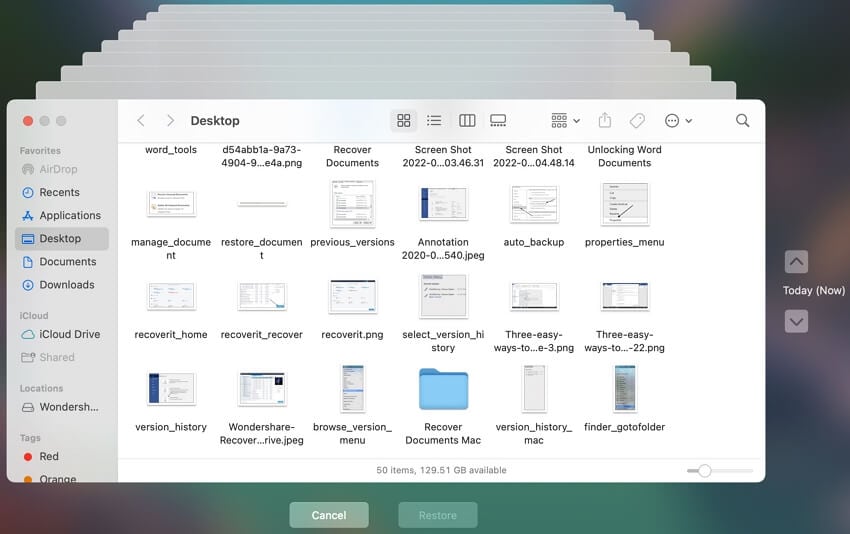
- You can use the timeline on the right side of the screen to find the version of Word document you want to retrieve. Once you find the file, click "Restore" on the bottom of the screen to restore it.
Method 5: Recover Previous Version of Word Documents Using File Recovery Software Mac
Most users don't realize that when you are using a Word document, the system you are using creates two types of files without your knowledge. The first is a .tmp file, which is a backup document of the last version of your file, and a .asd file, which is a backup of your unsaved files. The two files we mentioned are automatically created and saved when you close the MS Word application in the correct way. If the methods you read above did not fix your issues, you could use various recovery software such as Wondershare Recoverit for Mac to restore the missing .tmp or .asd files.It is also effective if you need to recover deleted Word documents that were not backed up.
- Save your accidentally deleted videos, and also repair the broken videos.
- Restore videos from all kinds of storage drives like USB Drive, SD cards, SSDs, HDDs, Floppy Disks, Pen Drive, etc.
- Besides all popular video formats, such as MP4, AVI, MOV, 3GP, 3G2, M4A, etc., corrupted Ultra HD 4K, and 8K videos are scanned, collected, and matched, ensuring that the majority of your videos are recovered.
- Preview files before you recover them.
- Free version to try and paid version to enjoy more.
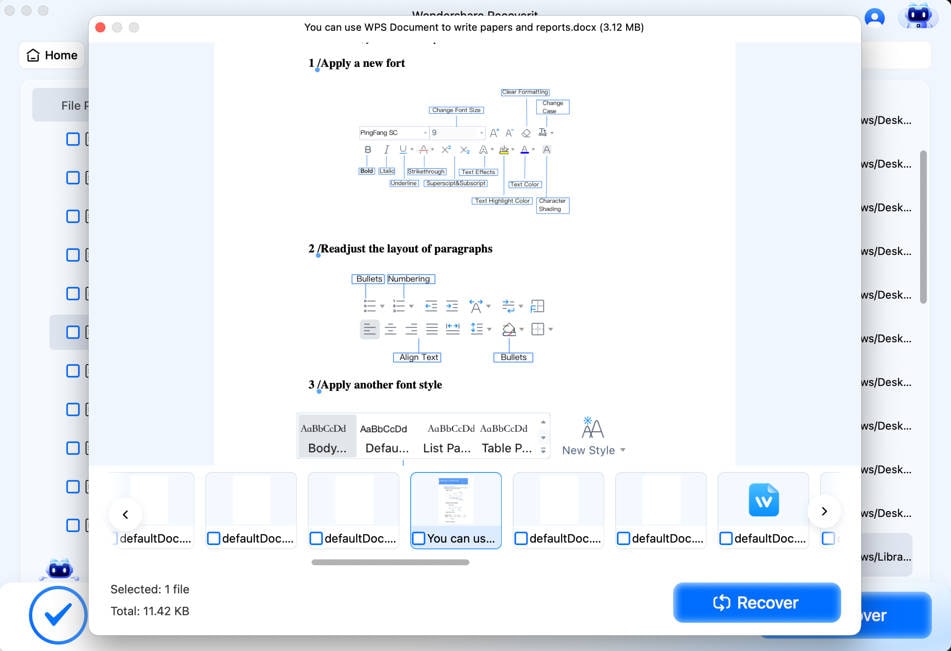
- Run the application after installing. Then, select a drive or folder where you lost the backup file under the Hard Drives and Location tab.

- Click the Start button to begin the scanning process.

- After scanning is completed, you can use the filter feature to find the .tmp or .asd file quickly. Finally, click the Recover button to restore it to a safe location.
Conclusion
You have various methods to recover the previous version of your Word documents on Mac, and they all are very effective. If the methods mentioned above didn't fix your problems, you can always download the recommended software and let it work.
FAQs About Word Document Recovery on Mac
-
Where is the AutoRecovery file location on Mac?
For recent versions of Word, the path is usually:~/Library/Containers/com.Microsoft.Word/Data/Library/Preferences/AutoRecovery. -
Why is "Browse Version History" greyed out on Mac?
This feature usually requires the document to be stored on OneDrive or SharePoint. If you are saving locally without Time Machine, this option might not be available.


 ChatGPT
 Perplexity
 Google AI Mode
 Grok
Grok


