How to Format SD Card for Raspberry Pi on Computers
To use an SD card larger than 32GB on a Raspberry Pi, you must manually reformat it to the FAT32 file system because the device's bootloader strictly requires FAT16 or FAT32 to boot.
● On Windows, tools like Windows Explorer and Disk Management only format cards up to 32GB; 64GB and 128GB SDXC cards require running the format /FS:FAT32 X: command in PowerShell as an administrator, which takes approximately one hour to complete.
● Mac users must format the card using the diskutil eraseDisk command in Terminal, while formatting natively on a Raspberry Pi requires installing the Raspberry Pi Imager and selecting the Erase (Format as FAT32) OS option.
● Initiating any formatting method completely erases the SD card, making data backup a mandatory prerequisite, and the host device must remain connected to power during the process to prevent card corruption from unexpected shutdowns.
Ask AI for a summary
You just got off the computer store with an 8gigabyte Raspberry Pi. You pay no mind to the size because you have a spare 64gigabyte SD card at home. You install the card on the hardware and it has refused to boot. You were not prepared for this, were you? How do you get this SD card to work? What are the special requirements for Raspberry Pi SD cards?
This article will guide you as to why you need to format your SD card, The Raspberry Pi SD card format, Raspberry Pi SD card size and most interestingly, how to format or reformat an SD card for a Raspberry Pi. Let's dive in, shall we?
Part 1. Do You Need to Format SD Card for Raspberry Pi?
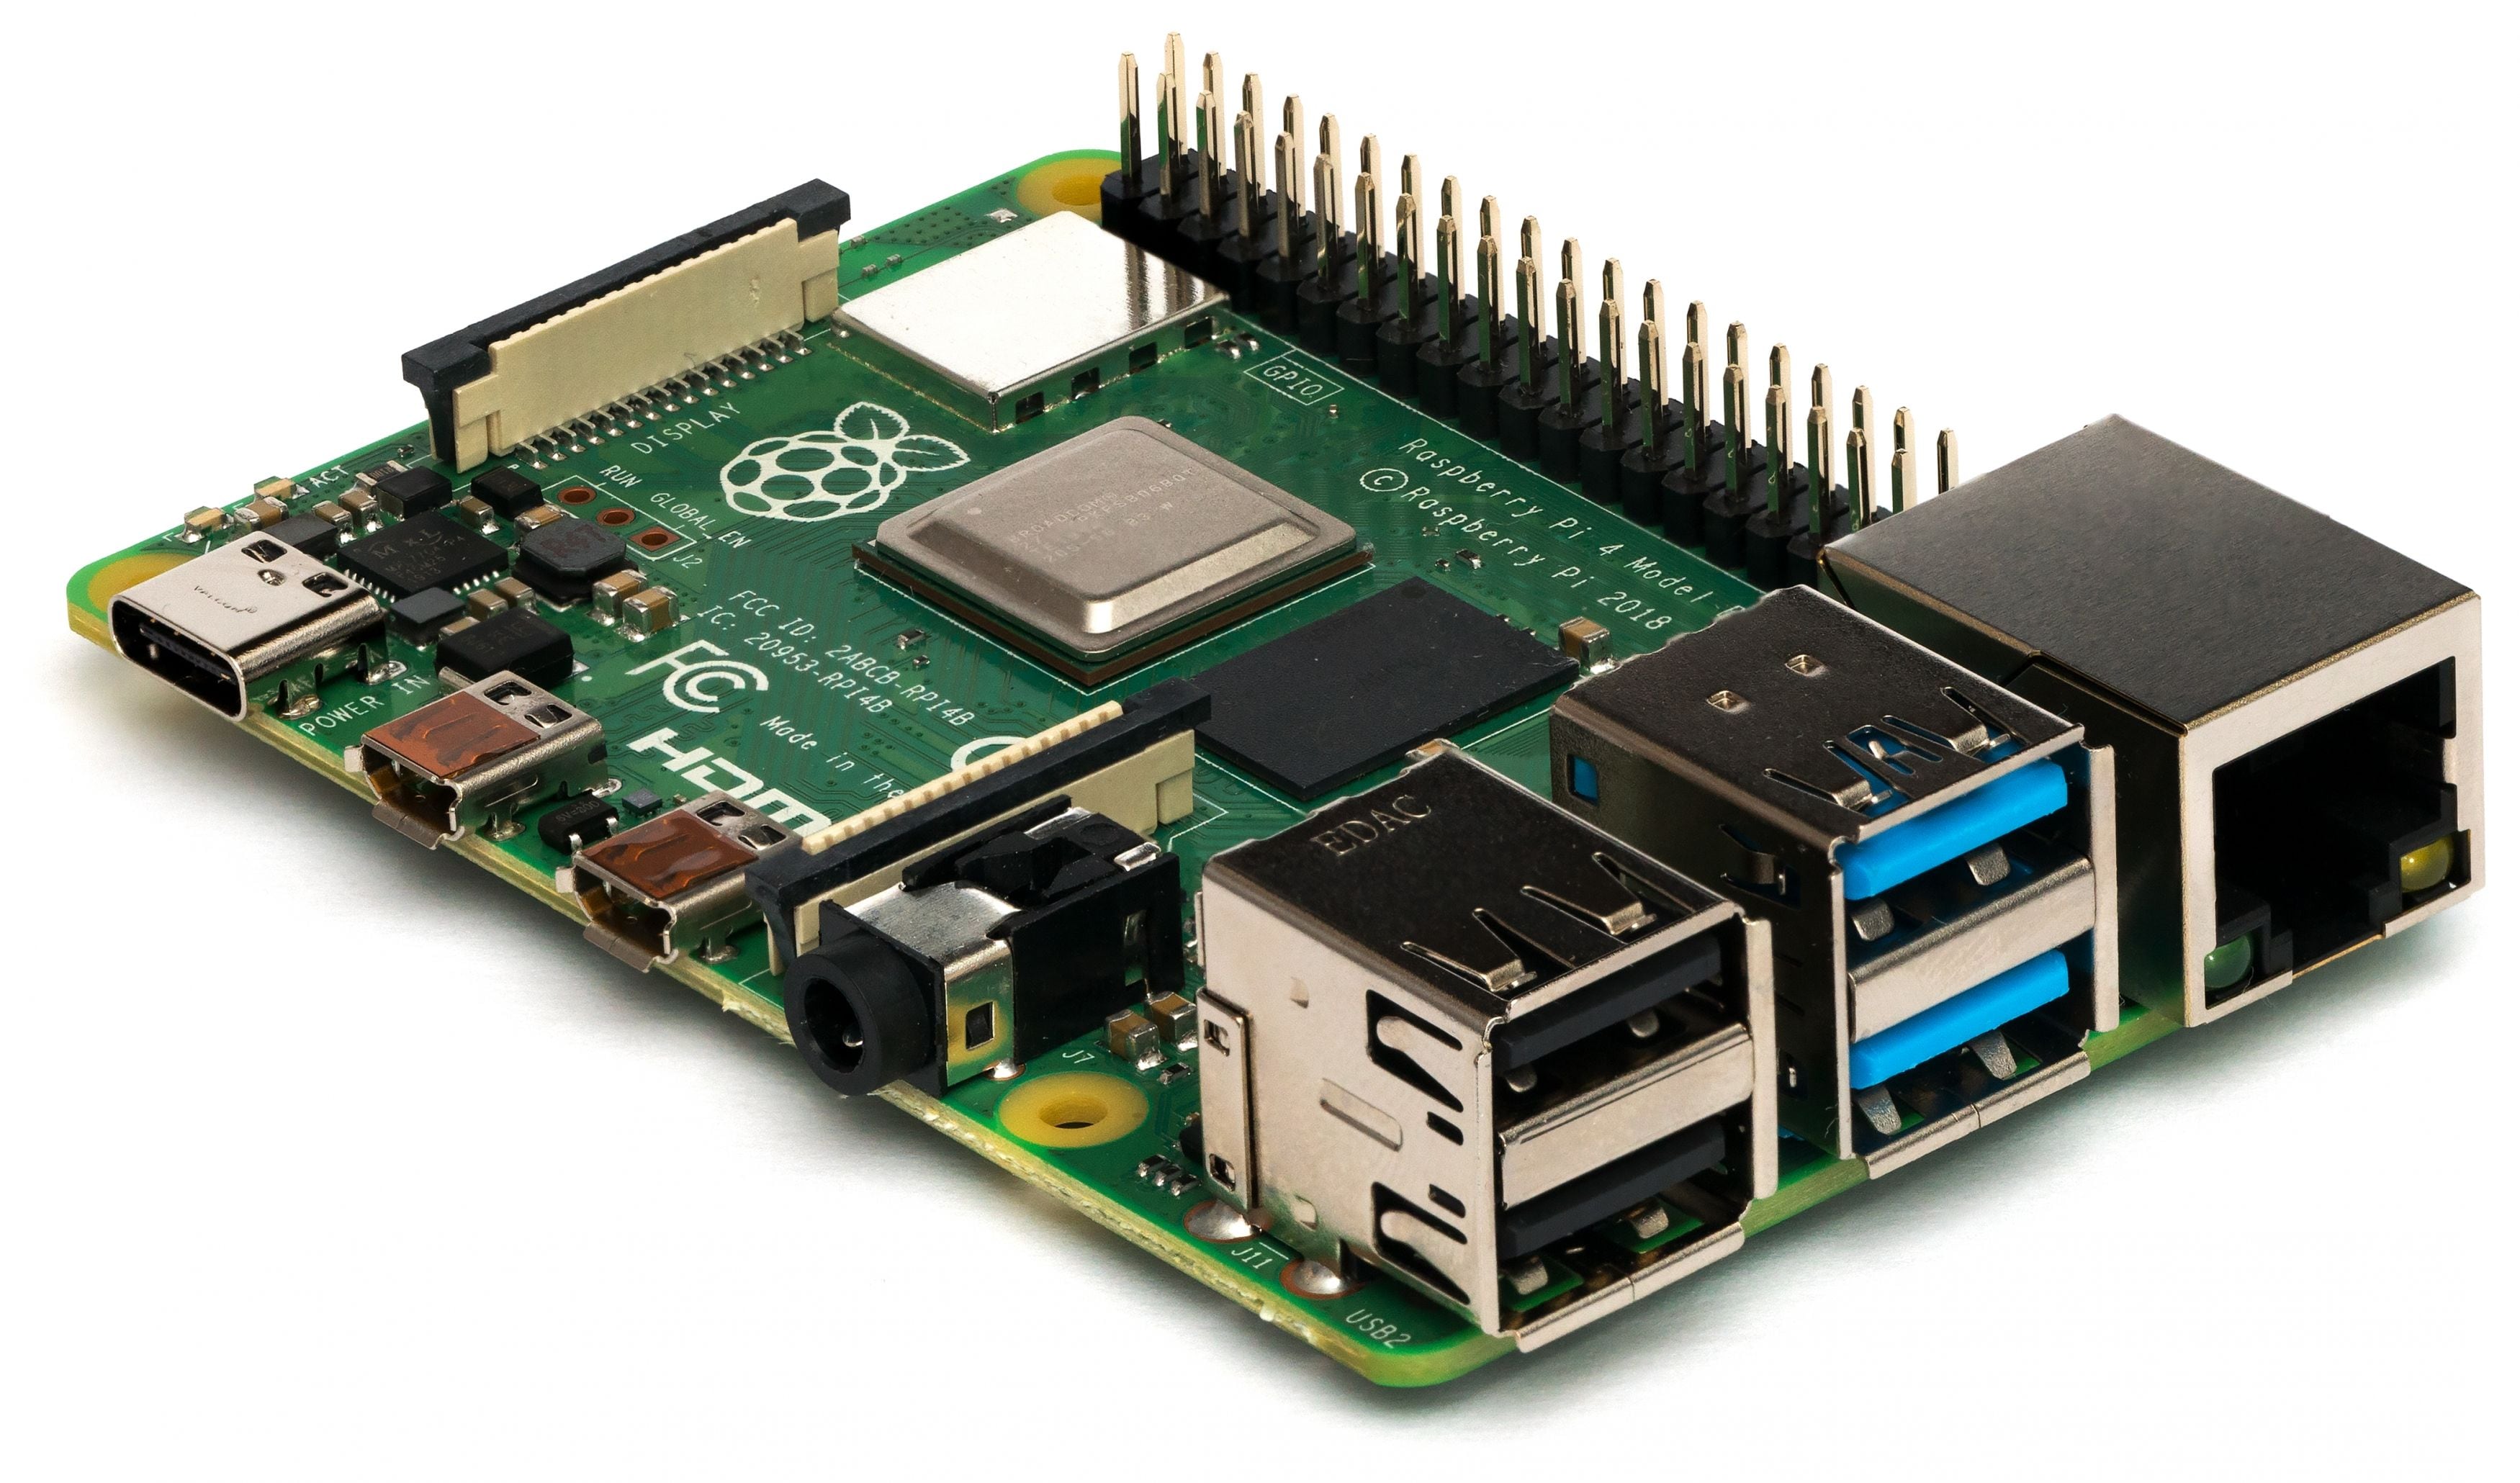
The Raspberry Pi is a group of small boarded computers that were made majorly for teaching basic computer science in learning institutions. They have been in existence since 2012 and have since then gained relevance in other fields such as research, robotics & Artificial Intelligence, and Climatology. The Raspberry Pi became very popular for its portability and because it is inexpensive.
Due to its peculiar nature, it also possesses some special features to make it work. The SD card used in the Raspberry Pi is one of them. These SD cards should be of special formats and sizes to prevent any irregularities in the performance of the machine. We'll look through these special features as we go on below.
Raspberry Pi SD Card Format
Today, there are 3 major formats of SD cards. They are the FAT16, FAT32, and exFAT formats. Each format represents classes of SD cards based on specifications provided by the SD association. The FAT16 format is found in SD cards and their capacities are from 128Mb to 2Gb of data. The FAT32 on the other hand is found in SD High Capacity (SDHC) cards and can take information between 4Gb to 32Gb. The last format, exFAT, is found in SD Extended Capacity (SDXC) cards. These cards can take data ranging from 64Gb to 1Tb.
The Raspberry Pi's bootloader can only read from FAT16 and FAT32 SD cards. Thus, if you have any SD card with capacities higher than 32Gb, you have to format or reformat such SD card to FAT32 before installing on your Raspberry Pi. Now that you know the format, Let's talk about size.
Raspberry Pi SD Card size
SD cards have evolved from time. As we have come of age, we have seen a lot of doubling in sizes and capacities of these cards. Currently, we have SD cards of 128Mb, 256Mb, 512Mb, 1Gb, 2Gb, 4Gb, 8Gb, 16Gb, 32Gb, 64Gb, 128Gb, 256Gb, 512Gb, 1Tb and most recently 2Tb. The earlier sizes (2Gb and below) have lost relevance as requirements for them have reduced over time. The 2Tb SD card is still the most recent one and thus, very scarce.
The Raspberry Pi comes with an 8Gb SD card installed. It's great if you are not a constant user of the computer. If you are, then you'll be getting the "Low Disk Space" warning soon. This is why most Raspberry Pi users use SD cards with a higher capacity. Cards with capacities greater than 32Gb have been found to work fine, if properly formatted (As you'll learn in this article).
Before you go to the next step, it is important to keep a backup of important files and documents on the SD Card before formatting or reformatting the card. RecoverIt is a great tool for recovering lost files on a drive or SD Card.
Part 2. 4 Methods to Format SD Card to FAT32 in Windows for Raspberry Pi
If you use a Windows OS, formatting your SD card to FAT32 is very simple. The methods to format your SD card may vary depending on the size of the SD card.
If your SD card is 32Gb and below, we can use the Windows Explorer method, The Disk Management Method, and the DISKPART method.
Method 1. Windows Explorer to Format SD Card
Follow the steps below to format your SD card using windows explorer.
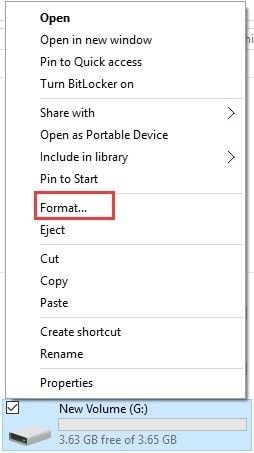
Step 1. Open Windows Explorer and right-click on the SD Card. Select "Format" as shown below.
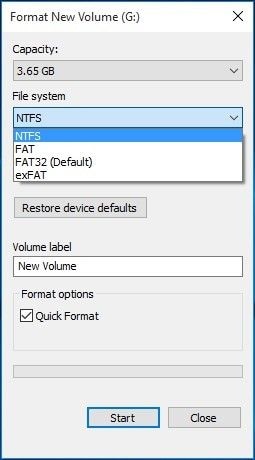
Step 2. Under "File System" choose FAT32 as seen below and click on "START"
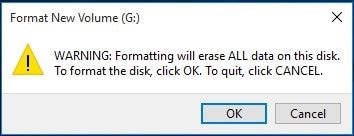
Step 3. A warning message will pop up to seek confirmation for the formatting process. Click on "OK" if you're set and click "Cancel" if you have not backed up your key files and documents.
Once this process is done, your FAT32 SD card is ready for use on your Raspberry Pi.
Method 2. Disk Management
Disk management is a tool on the windows system that helps you to do advanced tasks on storage and disks present on the computer.
To convert your SD Card to FAT32 using this method, follow the following steps.
Step 1. Open Run from the Start menu and type "diskmgmt.msc" into the command box. Right-click on the SD card you want to format and click "format".
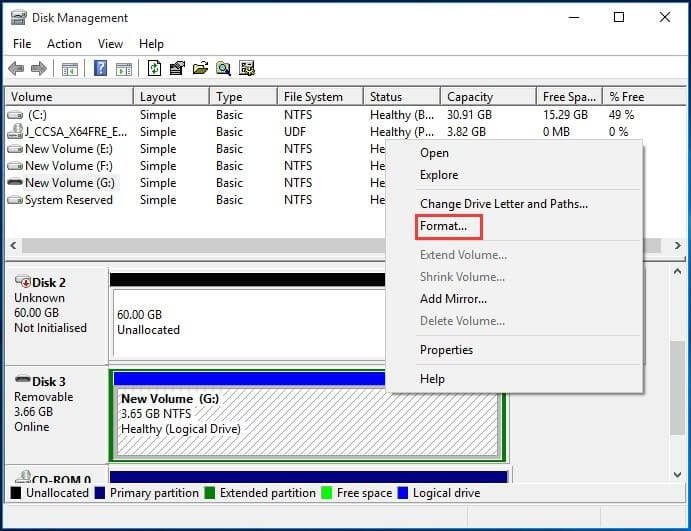
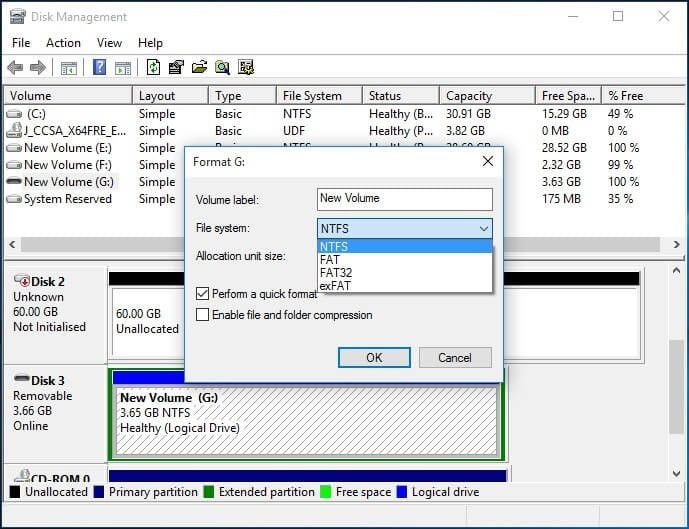
Step 2. Under the file system select "FAT32" and click OK as seen below.
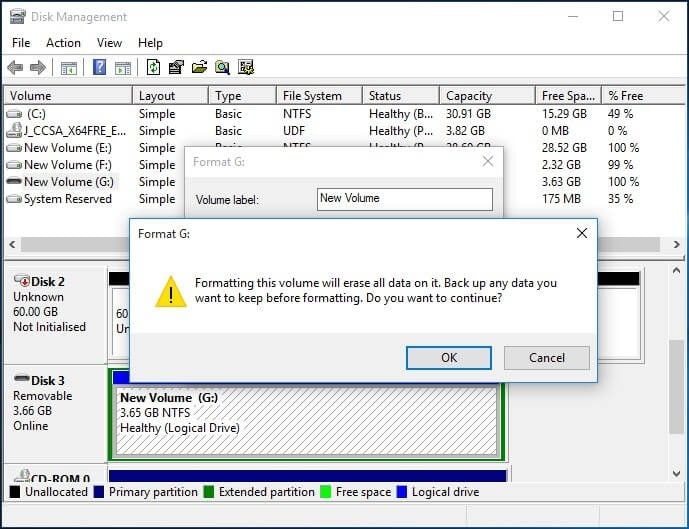
Step 3. A warning message comes up. Ensure to backup any important files before clicking "OK". Select "Cancel" if you are yet to back up important files.
Your FAT32 SD Card is now ready to be used on your Raspberry Pi.
Method 3. Diskpart to Format Your SD Card
DISKPART (short for Disk Partition Tool) is a tool found in windows Operating systems for managing computer drives and partitions.
To use the diskpart method to format your SD card for your Raspberry Pi, follow the steps below.
Step 1. Run Diskpart as administrator. This can be done by opening "Run" from the start menu, typing "diskpart" and clicking "OK".
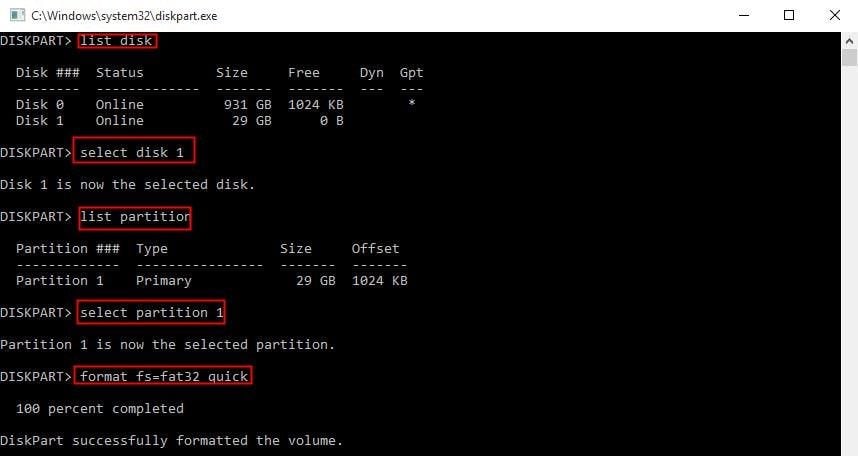
Step 2. Enter "ListDisk" to list disks available on the system
Step 3. Enter "Select disk x" where x is the number corresponding to your disk
Step 4. Enter "List Partition" to create a list partition on the SD Card
Step 5. Enter "select partition x" where x is the same number of the SD card as in step 3
Step 6. Finally, enter "format fs=fat32 quick" and wait for the program to run to 100% completion as seen below.
When the process is complete, the SD Card is ready to be used on a Raspberry Pi.
If your SD Card is higher than 32Gb, you can use the Powershell to format it into the FAT32 type.
Method 4. Powershell Method For 64gb And 128gb SD Cards
This method takes quite some time to complete due to the volume of the cards involved.
To do this, follow the steps below;
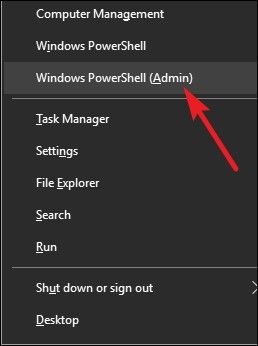
Step 1. Enter the Windows button and "X" simultaneously and click on "Powershell (Admin)" from the menu to run Powershell as an administrator.
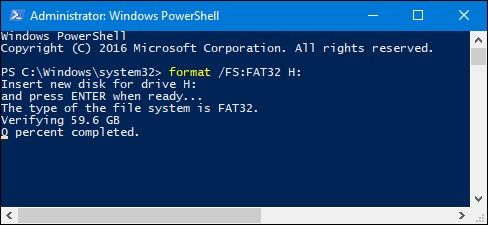
Step 2. Type "format /FS:FAT32 X:" into the command box and press enter. The card begins to be formatted and once completed in an hour or so, the SD Card is ready for use on the Raspberry Pi.
Tutorial Guide about How to Format an SD Card
Part 3. Format SD Card for Raspberry Pi on Mac
If you own a Mac OS system, you are not left out on getting yourself a reformatted SD Card. It is easily done using Mac's inbuilt tool known as "diskutil". Diskutil is similar to the diskpart tool on windows OS. To format your SD card for your Raspberry Pi, follow the steps below.
Step 1. Launch the terminal application on your computer and insert the SD Card also.
Step 2. In the terminal window, enter "diskutil list" to list all connected disks and drives as below

Step 3. To format your disk, enter "sudo diskutil eraseDisk FAT32 YOURNAME MBRFormat /dev/diskX" into the command box. Where x is the number that corresponds to your disk in step 2. The system runs the program as shown below
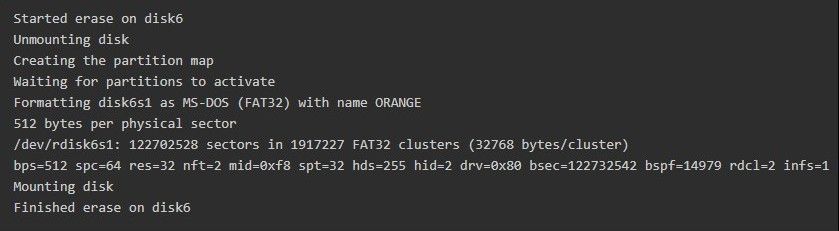
When the process is complete, the SD Card can be installed safely on the Raspberry Pi.
Part 4. Format SD Card on Raspberry Pi
If you do not have access to a Windows or Mac PC, you can also format the SD Card on the Raspberry Pi itself! All you need is a special tool made by the creators of Raspberry Pi. This tool is called the "Raspberry Pi Imager". To use this tool to format your card, follow the steps below.
Step 1. Install the Raspberry Pi imager to your device. It can be installed directly by entering "sudo apt install rpi-imager" in a terminal window or by downloading the files from their website and subsequently moving to the SD Card
Step 2. Once installed, open it and on the "Select OS Option", choose "Erase (Format as FAT32)".
Step 3. Click on "Choose SD Card" and select the SD card you wish to format.
Step 4. Click on Write and wait for the process to complete.
Once this is done, your SD Card is set to be used on your Raspberry Pi.
Part 5. Tips on Making an SD Card for Raspberry Pi
There are some important tips to take note of when making an SD Card for your Raspberry Pi. This is key to prevent loss of data and to ensure that the formatting process is as efficient as possible.
1. Be patient and careful
See all the instructions above, you don't want to make a mistake on any one of them and end up formatting a wrong disk drive. This is why you must not rush when performing any of the processes above. You must also ensure that your computer is well charged or connected to a power source when any formatting process is ongoing. This is to prevent the corruption of the SD Card as a result of the system going off.
2. Always back up your files
If the SD card you're looking to format is a new one, you have little to worry about when it comes to backing up. If it has been in use before now, then you have to pay attention to the files on it. Formatting an SD card will lead to erasing all of the files on it. This is why you should back up by making copies on the cloud, on a separate drive/disk, or on your computer.
3. How to recover lost files
Accidents happen. It could have been an error, or even deliberately but we can end up losing key files. You need not worry. They're not gone forever! Recoverit is a fast, effective, and easy to use Recovery tool that gets your files back in less than 5 minutes!
Your files can be regained in these easy steps;
Step 1. Download Recoverit for your Mac or Windows here. Install and open the application.
Step 2. Insert your SD Card and select it as the location to start recovering files. Click on Start after selecting.

Step 3. Recoverit scans the computer for the files as shown below.

Step 4. Once the scan is complete, you can preview the files and click the ones you want to recover. Once you finish choosing, click on the "Recover" button on the bottom right corner of the screen and like magic, your files are back to their original location.

Closing words
Getting the best out of your Raspberry Pi shouldn't be so daunting. Your computer should work for you without stressing you out. With larger space on your Raspberry Pi, you can enjoy your work and play and no longer get the "low memory" prompt (well at least anytime soon). Enjoy!
Raspberry Pi Users Also Ask
-
1. What is the best size SD card for Raspberry Pi?
The best size SD Card for Raspberry Pi is 32Gb. Some users have used larger card sizes like 64Gb and 128Gb very well. What's important is that you format it to FAT32 before use.
-
2. Does Raspberry Pi have memory?
Yes, it does. The latest models of Raspberry Pi have variants of 2Gb, 4Gb, and 8Gb of RAM. You can make a decision depending on your computing needs and usage.
-
3. Can Raspberry Pi run Windows?
The Raspberry Pi can run a special version of Windows IoT (Internet of Things) Core. It is not as seamless as the regular windows OS but it serves as a great substitute for core Windows users who aren't looking to change their User Interface.
-
4. How do you format a Raspberry Pi?
The Raspberry Pi Imager is a tool that can be used to format a Raspberry Pi. It is available for download on the Raspberry official website.
SD Card Troubleshooting
- Recover Data from SD Card
- Card Repair Solutions


 ChatGPT
 Perplexity
 Gemini
 Claude
 Grok
Grok


Eleanor Reed
staff Editor