
 TL;DR:
You can back up a Raspberry Pi SD card on a Windows PC by manually copying files, generating an image backup with Win32DiskImager, or cloning the exact filesystem and partitions using Wondershare UBackit.
● Avoid performing backups directly on the Raspberry Pi due to its low USB and network speeds; always unmount the SD card and use a computer's card reader for the transfer.
● Standard copying via Windows Explorer only transfers accessible files, while Wondershare UBackit captures hidden metadata and partitions but requires creating a 30-day free trial account.
● Win32DiskImager provides a completely free, lightweight alternative to save the SD card's current state as an image file by selecting the correct drive letter and using the tool's Read function.
Ask AI for a summary
 ChatGPT
 Perplexity
 Gemini
 Claude
 Grok
Grok
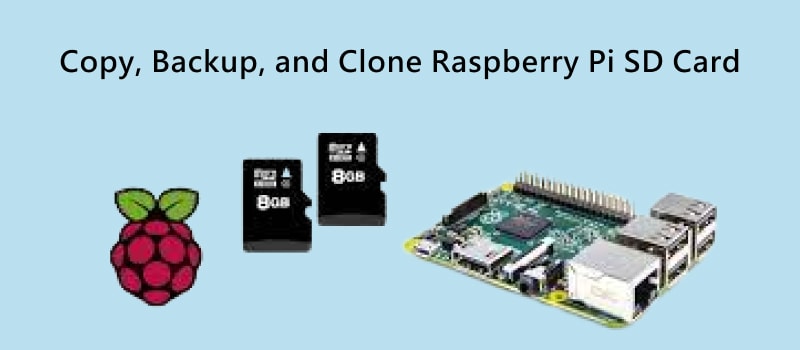
Have you decided to back up a Raspberry Pi SD card but don’t know how? Don’t worry; it’s not difficult once you have a helpful guide.
The best thing about backing up a Raspberry Pi SD card is that you can do it in multiple ways. Here are the three easiest backup and clone methods you can use every time, whether you have a technical background or not.
In this article
Types of Raspberry Pi SD Card Backups You Can Do
Generally speaking, you can keep your Raspberry Pi SD card data safe in three ways. You can copy, clone, or back up your Raspberry Pi SD card. Each of these methods is unique and requires you to know the procedure.
The “copy your Raspberry Pi SD card” procedure is like the standard file copy/pasting method. Win32DiskImager, on the other hand, allows you to back up your SD card data. Unlike the two previous methods, backing up with Wondershare UBackit enables you to clone (make and exact a copy) of the Pi’s SD card, including the filesystem and partitions.
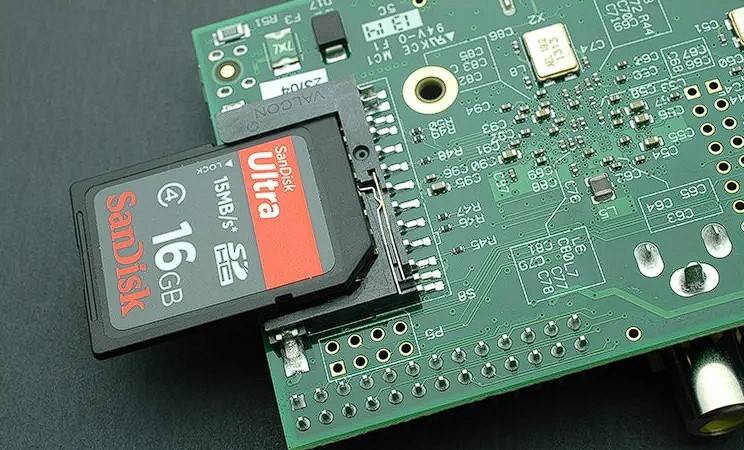
While you can complete them all directly from Raspberry Pi, we don’t recommend doing it. The device has low USB and network speeds. So, instead of putting unnecessary pressure on your Raspberry Pi, you should use an SD card reader and complete backups on your computer.
You may also be interested in: How to Format Raspberry Pi SD Card
Method 1: Clone a Raspberry Pi SD Card With Wondershare UBackit
Firstly, you can clone the Raspberry Pi SD card on Windows using Wondershare UBackit software. This method is the most reliable as it will make an exact copy of your Raspberry Pi SD card, including all stored contents, the filesystem, partitions, and SD card metadata.
Plus, Wondershare UBackit is really intuitive, easy to use, and enables you to directly back up a Raspberry Pi to any storage media such as USB drive, another SD card, SSD, HDD, or even NAS device if that is what you want. Here are the steps you need to complete.
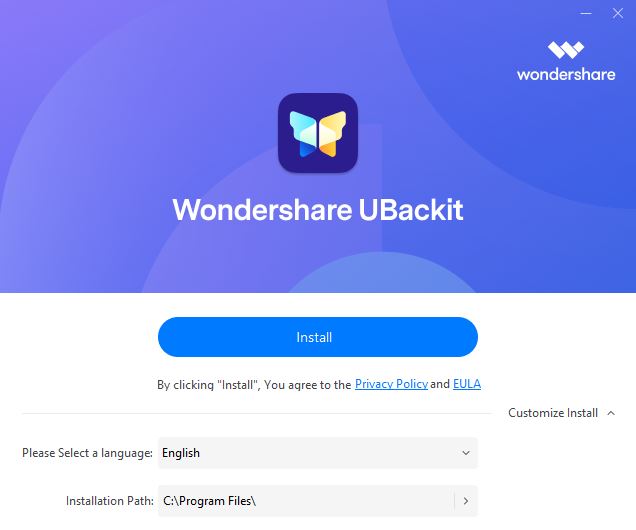
Step 1Download and Install Wondershare UBackit
Wondershare UBackit is lightweight and installs quite fast. After downloading it on your PC, the installation wizard will help you install it. Once the installation is complete, click the Start Now button.
Step 2Create Your Free Trial Account
What's most thrilling is that you can use Ubackit entirely free for 30 days. Once you start the app, create a free trial account. You can easily do it using your Google, Facebook, or Twitter account. Choose the method you find the most convenient.
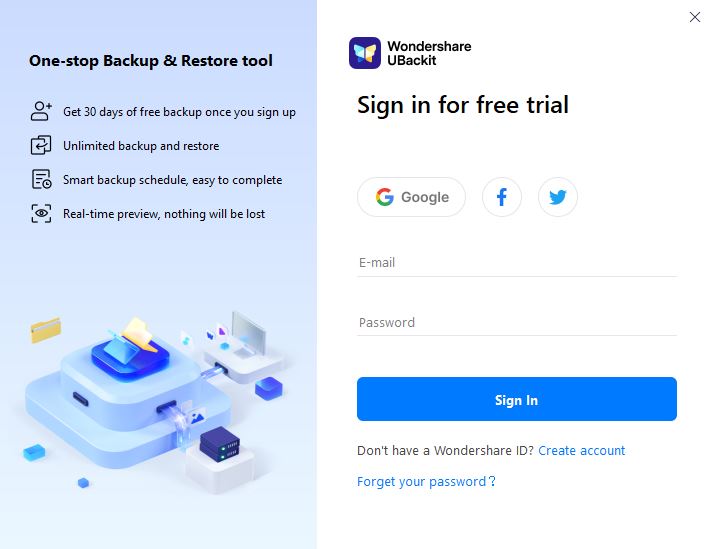
Once you register your account, the app will launch.
Step 3Unmount the SD card Raspberry Pi and Connect It to PC
To clone your Raspberry Pi SD card with Wondershare UBackit, you must unmount and connect it to the PC with a SD card reader.
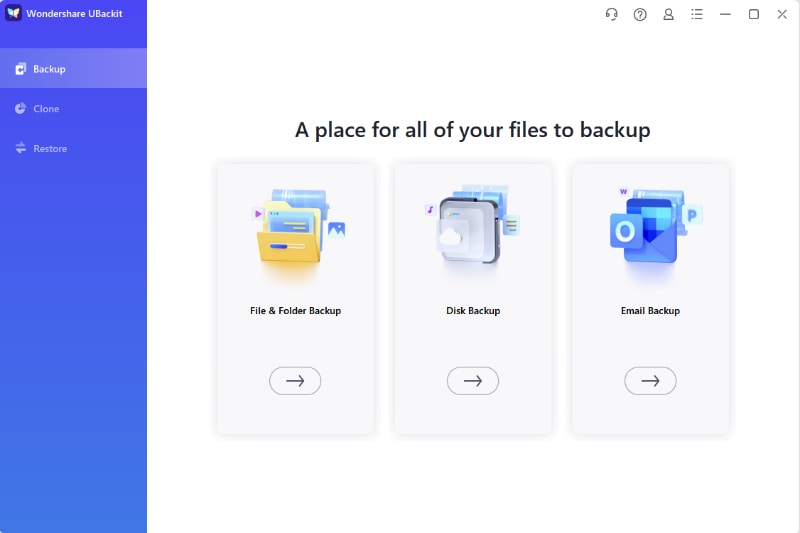
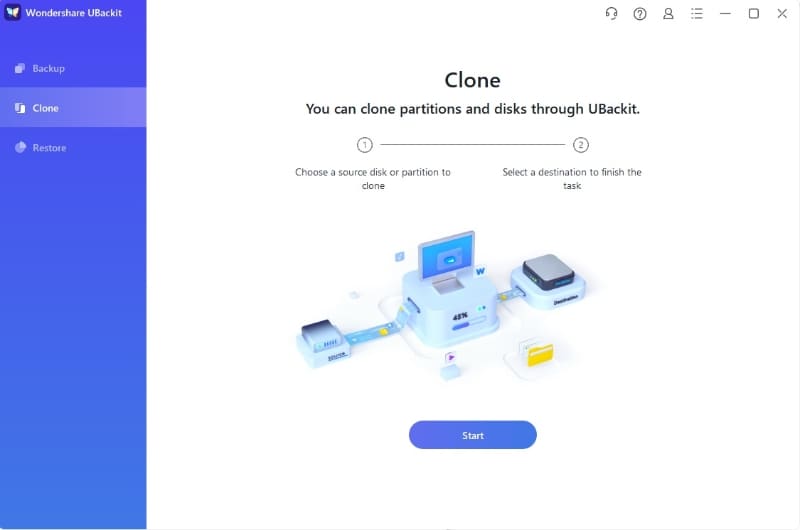
Step 4Initiate the Cloning Process
Select Clone in the left navigation pane of Ubackit and click the Start button in the middle of the screen.
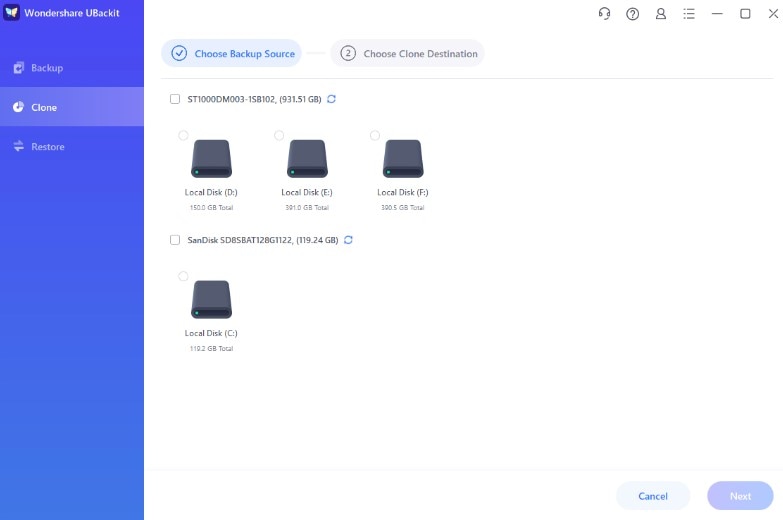
Step 5Choose a Clone Source – Select Your Raspberry Pi SD Card
Wondershare UBackit will list all storage devices you’ve attached to your computer. Select your Raspberry Pi SD card and click Next.
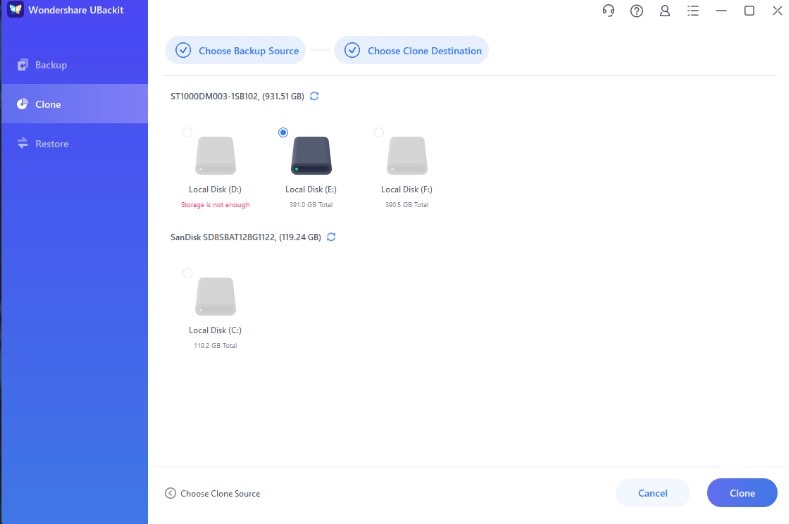
Step 6Choose the Raspberry Pi SD Card Clone Destination
Select the target location where Wondershare UBackit will store the exact copy of your Raspberry Pi SD card. You can select any drive as a clone destination, including a second SD card, a USB flash drive, a partition of your computer’s SSD or HDD. Once you choose the drive, click the Clone button.
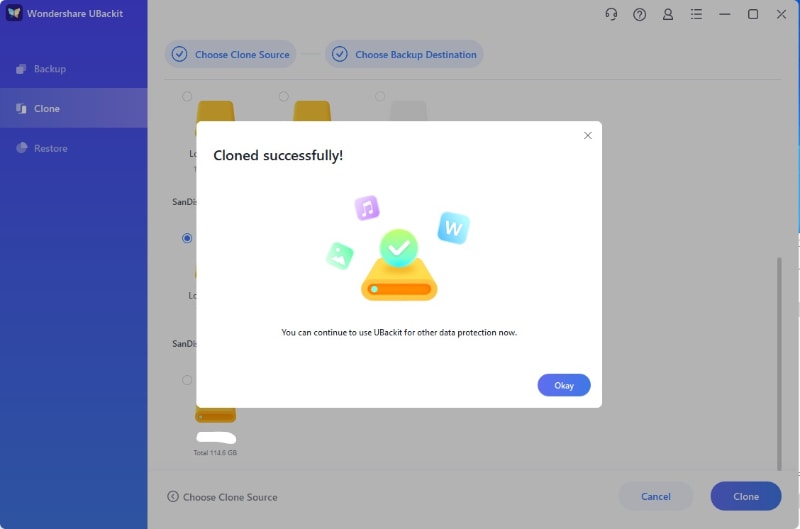
Wait until the app completes the cloning. It may take up to several minutes, depending on how much data you have on the Raspberry Pi SD card.
Method 2: Copying Your Raspberry Pi SD Card
You can copy your Raspberry Pi SD card to your computer hard drive and back it up to a USB. The process is straightforward. Here are the steps you need to complete.
Step 1Unmount the Raspberry Pi SD card and Connect It to PC With a SD Card Reader
To copy Raspberry Pi SD card contents onto your local storage, remove it from your Raspberry Pi first. Once you have inserted the SD card into the card reader, wait for your computer to recognize it as a new storage device.
Step 2Copy Raspberry Pi SD Card Contents
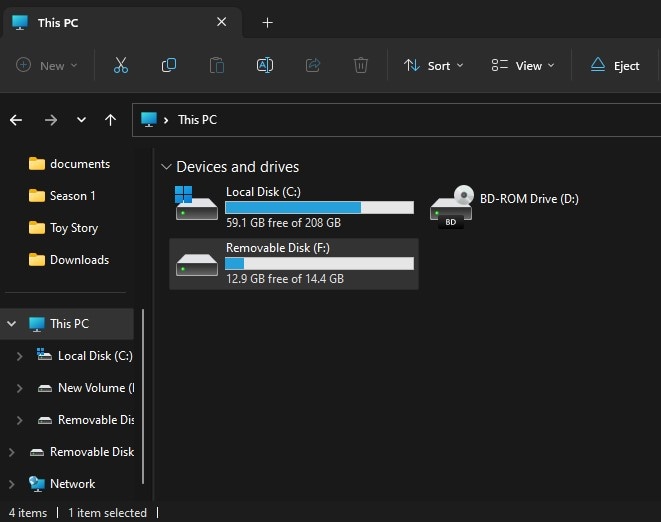
Open Windows Explorer and select This PC on the left side of the window. Double-click the Removable Disk (your drive letter may differ) in the window’s right section to access your SD card’s contents. Select all files and folders and copy them to your local storage.
You may also be interested in: How to Install TrueNAS on Raspberry Pi
Method 3: Backing Up Raspberry Pi Using Win32DiskImager
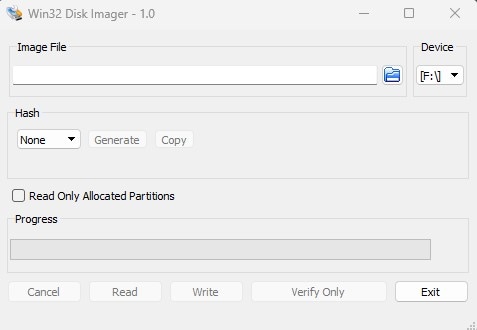
Another way to back up the Raspberry Pi SD card on Windows is to use Win32DiskImager – a lightweight tool for people who want to write or back up images from and to SD cards and USB sticks. Here is what you need to do.
Step 1Run the Installation of Win32DiskImager
Wind32DiskImager is a free tool. Accept the agreement and follow the installation wizard to complete the installation. Once the installation completes, it will launch the Win32DiskImager app.
Step 2Unmount the SD card Raspberry Pi and Insert it Into Your SD Card Reader
Before backing up your Raspberry Pi SD card with Win32DiskImager, you should unmount and insert it into your SD card reader.
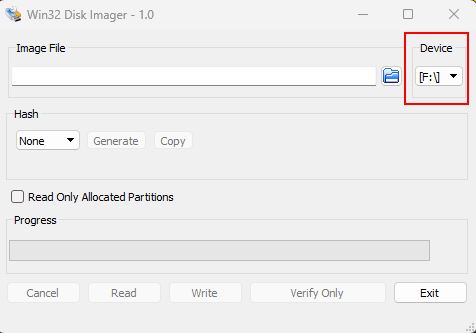
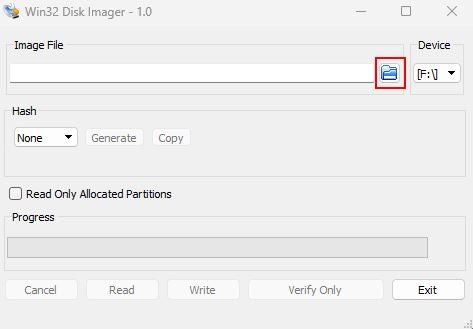
Step 3Select the Correct Drive Letter for Your SD card.
Use the drop-down menu on the right to select the correct drive letter for your SD card.
Step 4Select the Folder and Name Your Backup
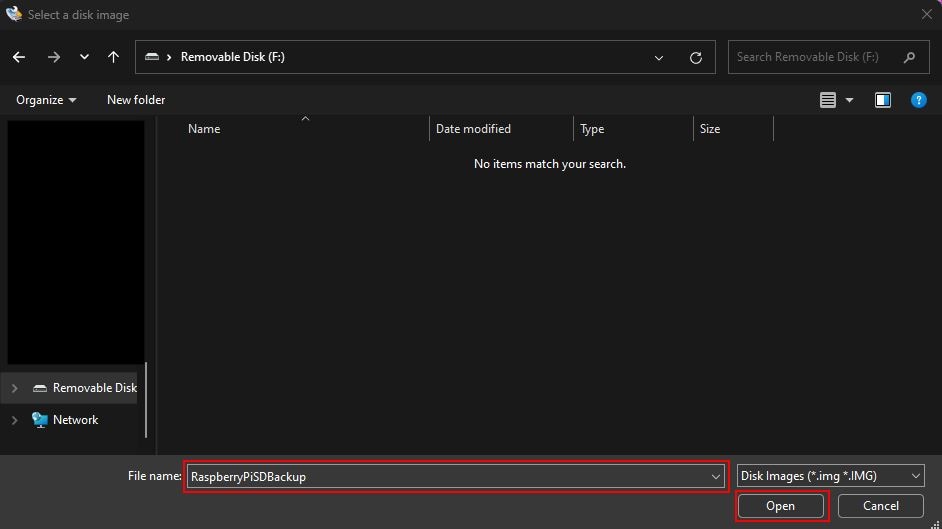
Click the folder icon and navigate to the folder where you want to store your Raspberry Pi SD card backup.
Once you open the folder, type your backup file’s name in the search box and click the Open button.
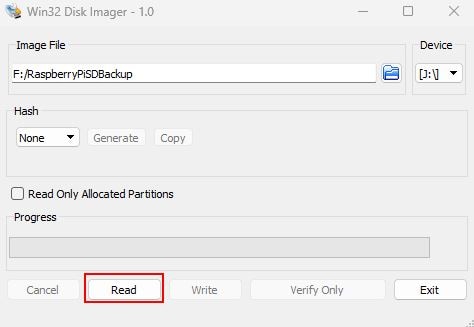
Step 4Create Your Raspberry Pi SD Card Backup
Now you’ve set up everything to create your Raspberry Pi SD card backup. Click the Read button to complete it. Depending on how much storage there is to back up from your SD card, the process may take up to several minutes.
Why Should You Back Up a Raspberry Pi SD Card
Why go through the trouble and back up a Raspberry Pi SD card on Windows? Well, doing regular backups provides you with excellent benefits.
If you are doing a complicated Pi project, you don’t want to lose hours because of something unplanned. Data crashes and corrupt files are often a result of using Raspberry Pi as a gaming station or media center. Backups can help you keep your files intact and ready to restore on demand.
Furthermore, upgrading or tweaking the operating system can result in an unexpected error. Instead of doing everything from scratch, you can roll back to your latest backup and keep working with minimal downtime. You should also consider backing up your data if the SD card is full to delete some files and create additional storage space.
Lastly, you can copy your Raspberry Pi SD card backup to a new SD card to use with a new Raspberry-based setup and avoid doing all the configurations and tweaks.
Conclusion
The only bulletproof way to avoid data loss for various reasons, including data corruption on your Raspberry Pi device, is to create backups regularly. Now you know three methods to do so.
However, if you want to be 100% sure you didn’t miss any hidden files or folders, you should consider using Wondershare UBackit to back up your Raspberry Pi SD card. The app will also list all your backups and enable you to restore them to your SD card in one simple click.


