If you need to download macOS Big Sur, start with Apple's official macOS download guide or the macOS Big Sur listing in the Mac App Store. On a compatible Mac, you can also use Terminal to fetch a full installer that Apple currently offers to your model. Neither method requires an unofficial ISO or DMG.
Before downloading, check whether your Mac can run macOS 11 and back up important files. This guide explains the official installer, how DMG and ISO images differ, ways to install Big Sur, and fixes for common errors. If you need the installer for another Mac, the computer you download it on must also satisfy Apple's availability requirements.
In This Article
Part 1. macOS Big Sur 11 Download Requirements and Compatibility
Big Sur supports selected Intel Macs from 2013 onward and early Apple silicon models. That does not mean any newer Mac can run it: a Mac generally cannot install a macOS version older than the version it originally shipped with. Check the exact model before attempting a download, upgrade, reinstall, or downgrade.
Which Mac Models Support macOS Big Sur 11?
Apple's macOS Big Sur technical specifications list the following hardware families. The model year below describes the earliest supported generation, not a promise that every later model is compatible.
| Mac family | Earliest supported generation | Important compatibility detail |
| MacBook | 2015 | Check the exact model; the 12-inch MacBook line ended in 2017. |
| MacBook Air | 2013 | Includes the M1 MacBook Air (2020), not later models that shipped with Monterey or newer. |
| MacBook Pro | Late 2013 | Includes the 13-inch M1 MacBook Pro (2020); the 14-inch and 16-inch 2021 models shipped with Monterey. |
| Mac mini | 2014 | Includes the M1 Mac mini (2020); check later models individually. |
| iMac | 2014 | Includes the 24-inch M1 iMac (2021), which launched with Big Sur. |
| iMac Pro | 2017 | The iMac Pro line supports Big Sur. |
| Mac Pro | 2013 | Confirm the actual configuration and original operating system. |
A practical example: someone trying to prepare a Big Sur USB for a 2013 MacBook Pro from an M2 MacBook Pro can find that the App Store refuses the download on the newer helper Mac. The problem is the downloading Mac's compatibility, not proof that the older destination Mac is unsupported. A MacOS community discussion describes this exact situation; Apple's own compatibility and download instructions determine the safe solution.
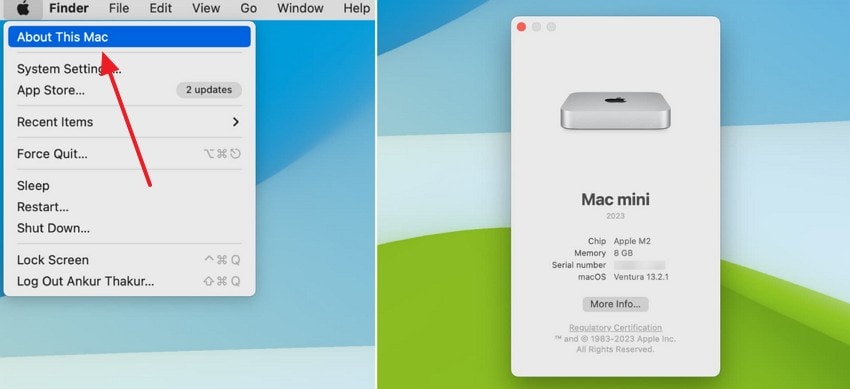
How to check: Open the Apple menu > About This Mac, note your model and chip, and compare it with Apple's list. For example, an older Late 2013 MacBook Pro can run Big Sur, but an M2 MacBook Pro that originally shipped with Monterey or later cannot install Big Sur, even if you only want it to create media for an older Mac.
What Are the Minimum Requirements for macOS Big Sur?
- Memory: At least 4 GB of RAM.
- Starting version: OS X Mavericks 10.9 or later for a supported upgrade path.
- Free disk space: At least 35.5 GB when upgrading from macOS Sierra or later; older supported systems can require up to 44.5 GB. Extra free space is sensible.
- Internet and power: A reliable connection and, for laptops, power during the download and installation.
- Backup: A recent Time Machine backup or independently checked copy of important files, especially before any downgrade or erase.
Is macOS Big Sur Still Safe to Install?
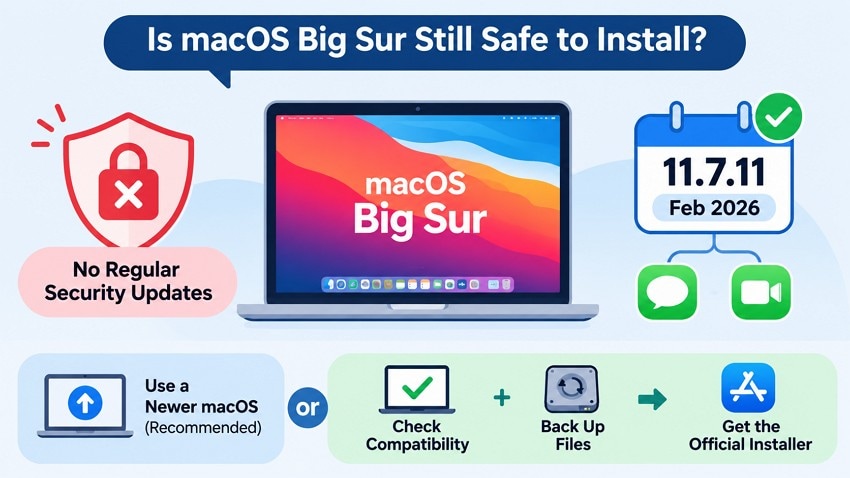
Big Sur is a legacy release and does not receive the same ongoing security coverage as currently supported macOS versions. Apple's macOS version list identifies 11.7.11 as the latest Big Sur system version. Apple says that update extends certificates needed for iMessage, FaceTime and device activation beyond January 2027; it had no published CVE entries in Apple's security log. See Apple's Big Sur update notes. That system version is not proof that the Mac App Store offers a matching full installer. If your Mac supports a more recent macOS version and your apps permit it, that is usually the safer everyday option.
Part 2. How to Download macOS Big Sur From Apple
Apple lists two practical routes for the complete Big Sur installer: the Mac App Store and the built-in softwareupdate command. Both are dependent on what Apple currently offers for the Mac used to download. The finished file is normally Install macOS Big Sur.app in the Applications folder.
Method 1. Download macOS Big Sur From the Mac App Store
Use this method on a Mac that supports Big Sur. The official Apple listing describes an approximately 12.6 GB download; size and available installer build can change.
Step 1. Open Apple's macOS download page in Safari. Under older versions available through the App Store, select macOS Big Sur 11. You can also open the official App Store listing directly.
Step 2. Click Get. If Software Update opens, approve the download. A disabled Get button or an incompatibility message means the download is not currently offered to that Mac; do not assume changing your computer's date or using a random mirror is a safe workaround.
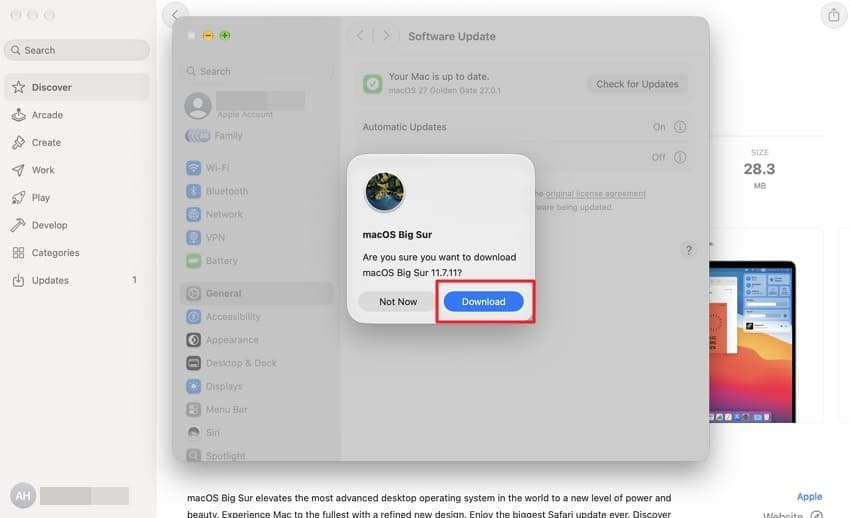
Step 3. After the download, open Applications and check for Install macOS Big Sur.app. If the installer launches, quit it without installing when you only need to save the app or make installation media.
Method 2. Download the macOS Big Sur Full Installer Using Terminal
Apple documents this method for Macs running macOS Catalina 10.15 or later. First list the actual installers available to your Mac; an update version seen in Apple's security release history is not necessarily downloadable as a full installer.
Step 1. Open Applications > Utilities > Terminal and enter:
softwareupdate --list-full-installers
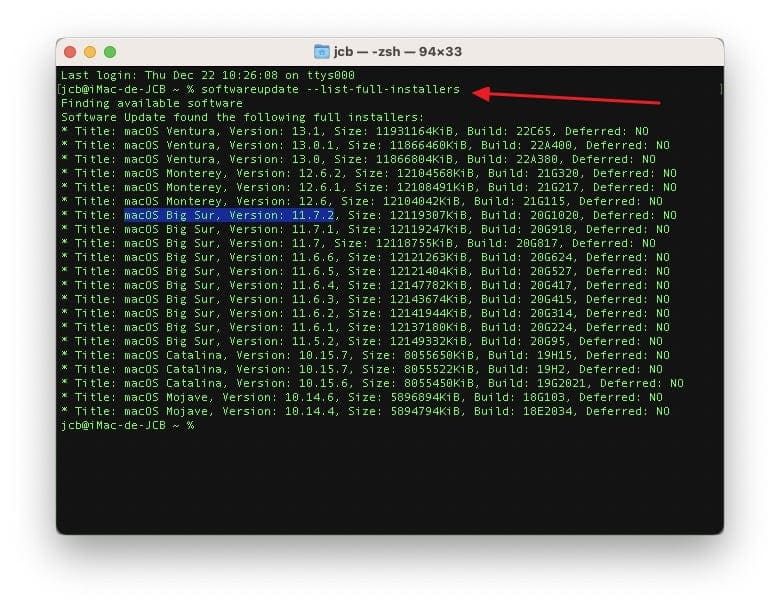
Step 2. Find a Big Sur 11.x entry in the output. Replace the version in the following command with the exact Big Sur full-installer version that your Mac actually lists:
softwareupdate --fetch-full-installer --full-installer-version 11.x.x
Step 3. Wait for the download to complete, then check the Applications folder. If Big Sur is absent from the list or Terminal says update not found, the requested installer is not currently offered for that model. Try Apple's App Store route from a compatible Mac instead of guessing version numbers.
Note: Terminal screenshots in older guides may show a historic 11.x version. The listing on your own Mac is the source of truth.
Part 3. How to Get macOS Big Sur DMG and ISO Files
People searching for a Big Sur DMG download or macOS Big Sur ISO often need an installer for archiving, a bootable drive, or a virtual machine. These formats are not interchangeable, and an ISO is not a standard direct Apple download. Apple's current browser-download DMG links cover older macOS releases; its Big Sur instructions point to the App Store or Terminal.
| Format | What it contains | Best use | Official Big Sur download? |
| Install macOS Big Sur.app | The complete Mac installer application | Install Big Sur or create bootable media | Yes, from Apple's supported channels |
| DMG | A Mac disk-image container, possibly holding the installer app or an installer volume | Archive or transfer the installer | Not a standalone Big Sur DMG on Apple's listed download page |
| ISO | A disc-style image made from a prepared installer volume | Some compatible virtual-machine setups | No Apple-provided ready-made Big Sur ISO |
| Bootable USB | A USB volume created with Apple's createinstallmedia | Install or reinstall on compatible hardware | User-created from Apple's installer |
How to Get a macOS Big Sur DMG File
For a storage or transfer DMG, the simplest approach is to create an image that contains your authentic Install macOS Big Sur.app. The DMG is an archive, not a bootable macOS installation drive.
Step 1. Confirm that the complete Big Sur installer is in Applications. Make sure you have sufficient free storage to hold an additional copy.
Step 2. Create a new folder, such as BigSurInstallerArchive, and copy Install macOS Big Sur.app into that folder. Keep the original application intact.
Step 3. Open Disk Utility and choose File > New Image > Image from Folder. Select the folder you just created.
Step 4. Name the output BigSurInstaller.dmg and choose a read-only or compressed disk-image format. Save it, then mount the DMG and verify that the installer app is present. Apple's Disk Utility guide documents the folder-image workflow.
Note: A DMG made this way preserves a copy of the installer application. It does not automatically create bootable USB media or a bootable VM image.
How to Create a macOS Big Sur ISO File
For advanced virtualization workflows, an ISO can be made from a temporary volume prepared with the authentic Big Sur installer. Apple documents the underlying createinstallmedia utility for installation media, but not this entire ISO conversion sequence as an officially supported Big Sur ISO workflow. Availability, bootability, virtualization software support, and Apple's macOS Big Sur license terms must be checked for the intended Apple hardware.
Step 1. On a Mac with the full installer in Applications, open Terminal. Ensure at least 25 GB of additional space is available. Create a separate, temporary 20 GB disk image rather than pointing any command at your Mac's startup disk:
hdiutil create -o /tmp/MacBigSur -size 20g -volname MacBigSur -layout SPUD -fs HFS+J
Step 2. Mount the image as an isolated temporary volume:
hdiutil attach /tmp/MacBigSur.dmg -noverify -mountpoint /Volumes/MacBigSur
Step 3. Use Apple's Big Sur installer utility to write installation media to that temporary image volume only:
sudo /Applications/Install\ macOS\ Big\ Sur.app/Contents/Resources/createinstallmedia --volume /Volumes/MacBigSur
Warning: This operation erases the target image volume. Check that /Volumes/MacBigSur is the temporary image you created, not a real drive with files. After preparation, the mounted volume may be renamed Install macOS Big Sur.
Step 4. Eject the prepared image volume. If the name differs, check the mounted volumes in Finder or hdiutil info before detaching:
hdiutil detach "/Volumes/Install macOS Big Sur"
Step 5. Convert the detached temporary image into a CD/DVD master image, then change the extension to ISO:
hdiutil convert /tmp/MacBigSur.dmg -format UDTO -o ~/Desktop/MacBigSur.cdr
mv ~/Desktop/MacBigSur.cdr ~/Desktop/BigSur.iso
Check the resulting BigSur.iso in your virtualization software before relying on it. Renaming a file does not magically make an unsuitable DMG bootable, and not all virtualization environments accept this image. If your aim is reinstalling a physical Mac, use the official bootable USB method in Part 4 instead.
Part 4. How to Install macOS Big Sur After Downloading
Back up your files and verify the destination Mac's model before installing. An in-place upgrade is intended for compatible Macs running an older supported system. Installing Big Sur over a newer macOS is not a supported in-place downgrade; a downgrade may involve an erase and can make later-version backups or applications incompatible.
Method 1. Install macOS Big Sur Using the Downloaded Installer
Use this method only when the destination Mac supports Big Sur and the installation does not require downgrading from a newer system.
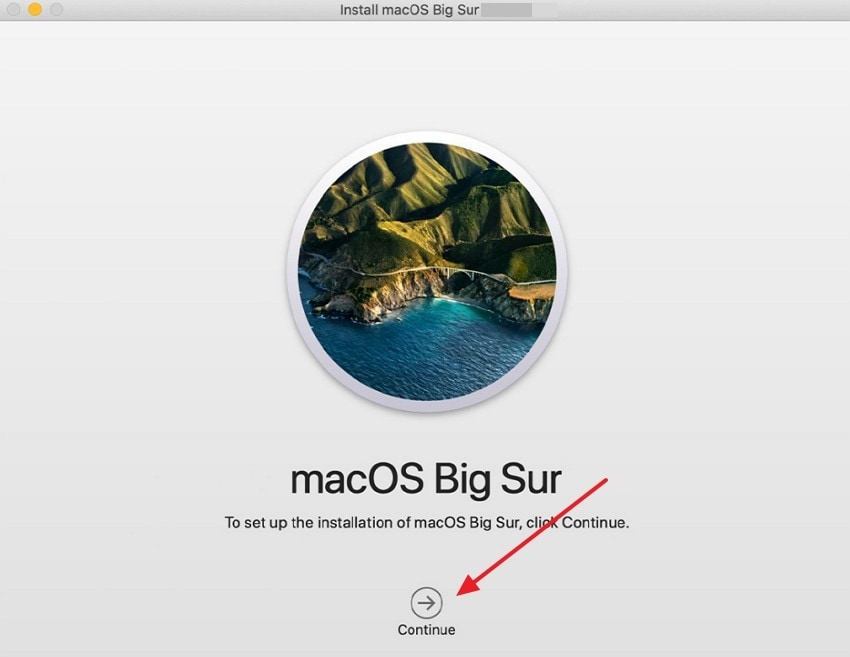
Step 1. Open Applications > Install macOS Big Sur.app and click Continue.
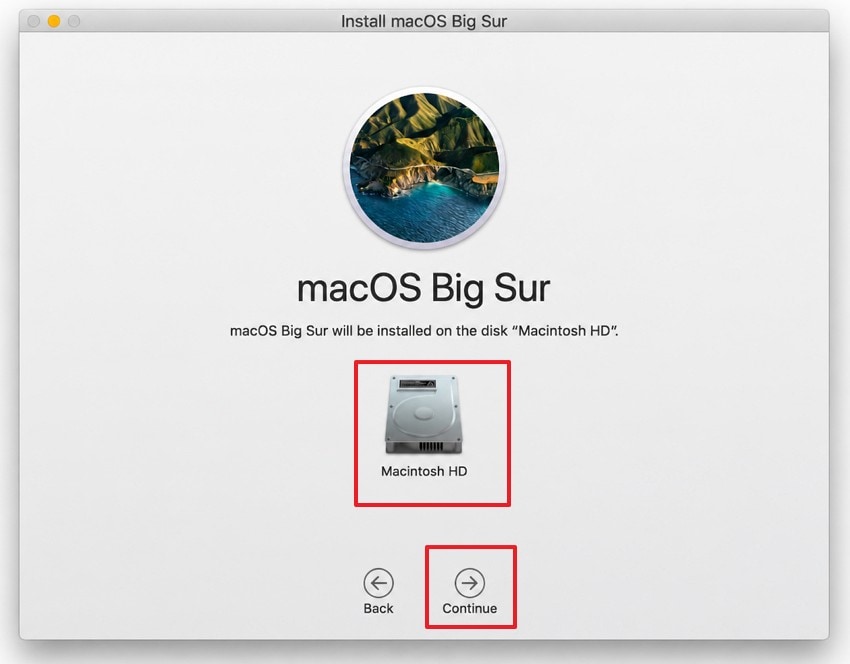
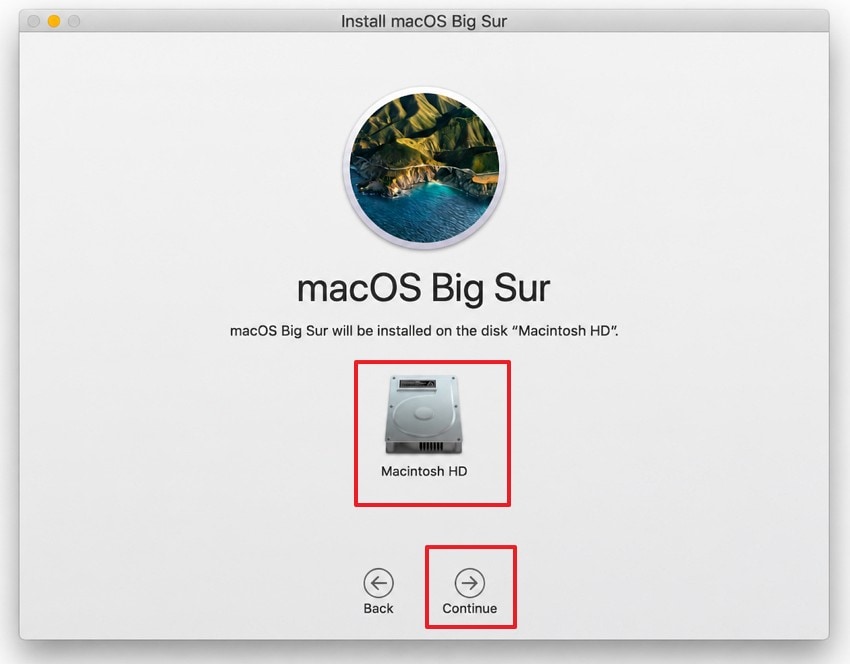
Step 2. Read and accept the license terms. Select the intended startup volume, confirm the destination, and follow the remaining prompts. Keep your Mac connected to power and do not interrupt restarts.
Expected result: Your Mac starts into Big Sur and your existing user files remain available after a supported in-place upgrade. Check your apps and run any available post-install updates. If the installer says the OS is too old for your Mac, do not bypass the compatibility check.
Method 2. Create a Bootable macOS Big Sur USB Installer
Apple recommends an appropriately sized USB drive for bootable media. A 32 GB drive is a safe choice and 16 GB is enough for many older installers. The command below will erase the selected USB volume. A bootable installer does not require erasing the destination Mac unless you separately decide to perform a clean installation.
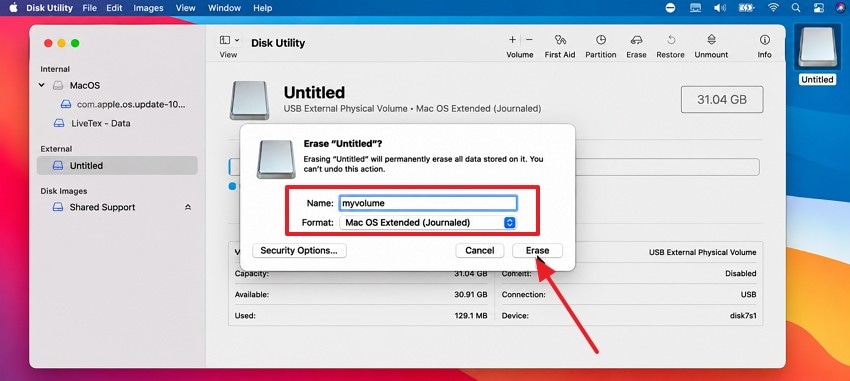
Step 1. Connect an empty or backed-up USB drive. In Disk Utility select the correct external USB device, not your internal Mac disk, and prepare it as Mac OS Extended (Journaled) with GUID Partition Map; name the volume MyVolume. Alternatively, follow Apple's guide to rename a suitable volume and let createinstallmedia erase it.
Step 2. Confirm the full Install macOS Big Sur.app is in Applications. Paste Apple's documented command into Terminal:
sudo /Applications/Install\ macOS\ Big\ Sur.app/Contents/Resources/createinstallmedia --volume /Volumes/MyVolume
Step 3. Enter your administrator password. If prompted, type Y to authorize erasing MyVolume, then wait for the message confirming the bootable installer has been created.
Step 4. Connect the installer to a Big Sur-compatible destination Mac:
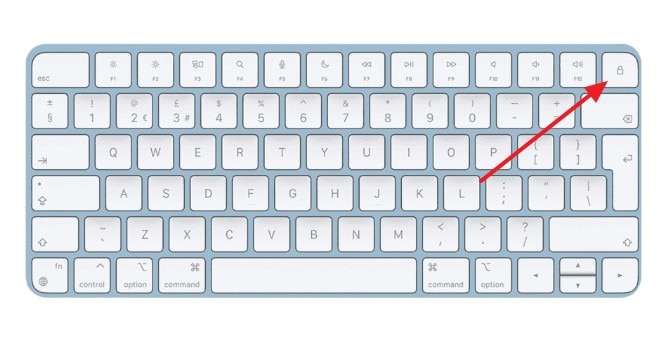
- Apple silicon: Shut down, then hold the power button until startup options appear. Select the installer and click Continue.
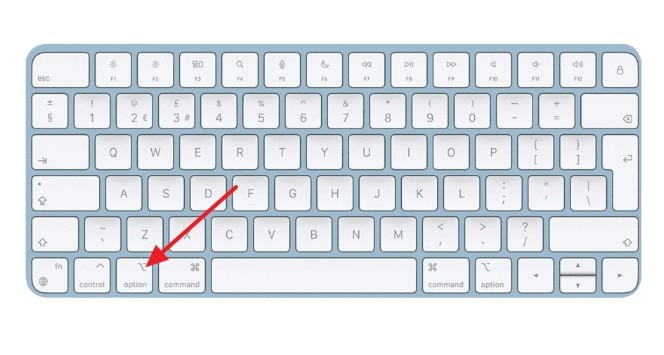
- Intel Mac: Power on while holding the Option key. Select the bootable installer and press Return. On some Intel Macs with the T2 chip, external booting must be permitted in Startup Security Utility.
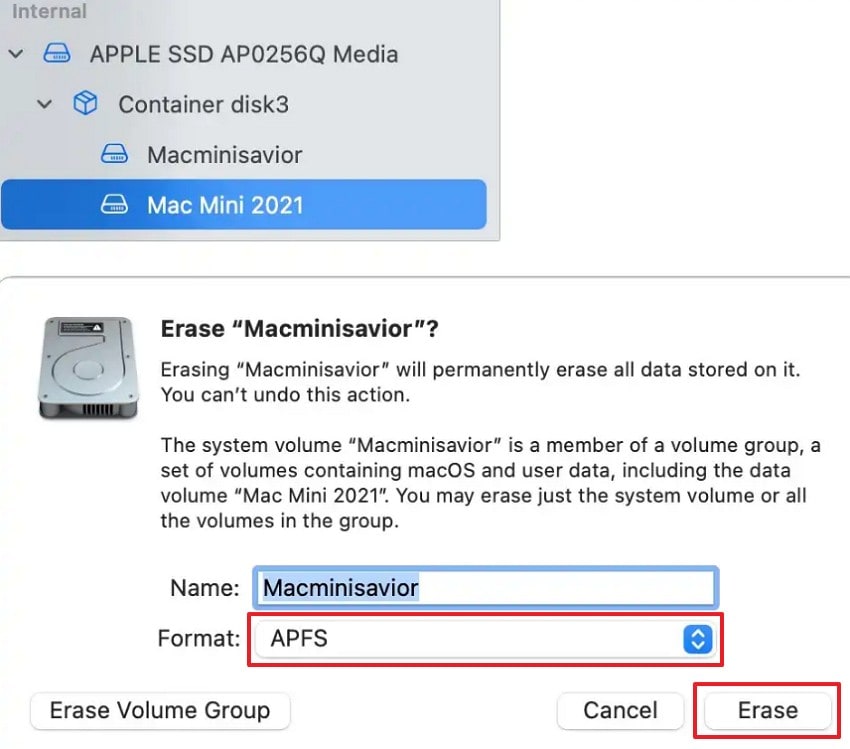
Step 5. For a normal reinstall, choose Install macOS Big Sur and follow the prompts without erasing the startup disk. Only if you have deliberately chosen a clean installation and verified a restorable backup should you consider erasing the correct startup disk in Disk Utility. That erasure permanently deletes the selected volume's contents; Apple's instructions differ between Intel and Apple silicon Macs.
Step 6. Return to the installer, choose the intended disk and complete setup. Keep internet access available because Apple may require model-specific firmware and other information.
Note: For a Mac that already runs a newer macOS, back up and check app and data compatibility before considering a supported downgrade. The USB installer alone cannot override the operating system originally shipped with the Mac.
Part 5. How to Fix macOS Big Sur Download and Installation Errors
When Big Sur refuses to download or install, identify the exact error before changing disks. Many problems are caused by Mac compatibility, installer availability, incomplete downloads, or connectivity rather than a damaged startup volume.
Fix 1. macOS Big Sur Not Available in the App Store
Step 1. Close the App Store, open Apple's macOS download page in Safari, and use its macOS Big Sur 11 link to reach the official listing.
Step 2. Check Apple menu > About This Mac for your exact model. If the Get button is dimmed or unavailable because this Mac is incompatible, move to a compatible Mac to obtain the full installer. Do not attempt to change Apple silicon firmware or bypass hardware restrictions.
Expected result: A supported Mac can access the installer or give a clear availability message. If you are making USB media for a different older Mac, Apple's bootable installer guide says the downloading computer will usually need to be compatible too.
Fix 2. Terminal Shows Update Not Found
A version listed as the latest Big Sur system update is not necessarily an available full installer. Do not hardcode 11.7.11 simply because Apple identifies it as the latest Big Sur system version.
Step 1. Run softwareupdate --list-full-installers and check whether the desired Big Sur installer appears for this Mac.
Step 2. If a compatible 11.x version is listed, use its exact version with --fetch-full-installer --full-installer-version. If none appears, use a compatible Mac and Apple's App Store route. An unsupported model cannot be fixed by repeatedly changing version numbers.
Fix 3. macOS Big Sur Download Is Stuck or Failing
Step 1. Check your connection and free storage. Pause other large downloads, verify that your Mac has enough space for the installer, and keep it connected to power.
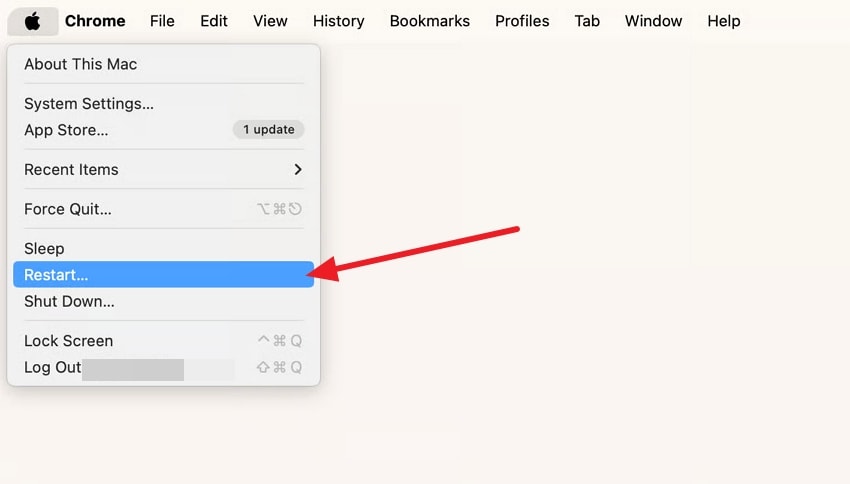
Step 2. If a failed or incomplete Install macOS Big Sur.app is present, remove only that incomplete installer after confirming its identity. Restart the Mac and try a fresh download from Apple.
Expected result: The download completes and a full installer app appears in Applications. If it still fails, check Apple's software availability and network status before altering any startup disk.
Fix 4. macOS Big Sur Installer Is Damaged or Cannot Be Verified
Apple recommends a fresh official download if an existing installer is invalid. The error can also relate to startup-disk problems or installation environment interference; it is not a reason to erase your Mac immediately.
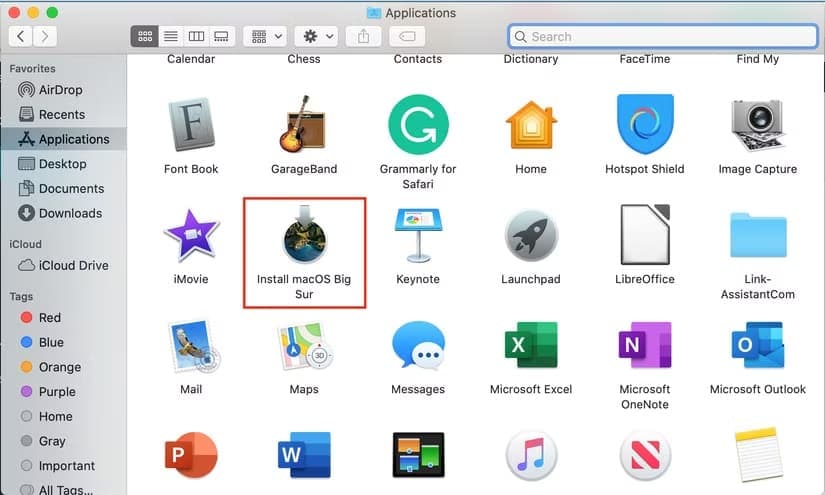
Step 1. Quit the installer. Delete only the invalid Install macOS Big Sur.app copy from Applications, then download a fresh installer from Apple's page.
Step 2. If installation still fails on a compatible Mac, consider trying Safe Mode or macOS Recovery as described in Apple's installation error guide.
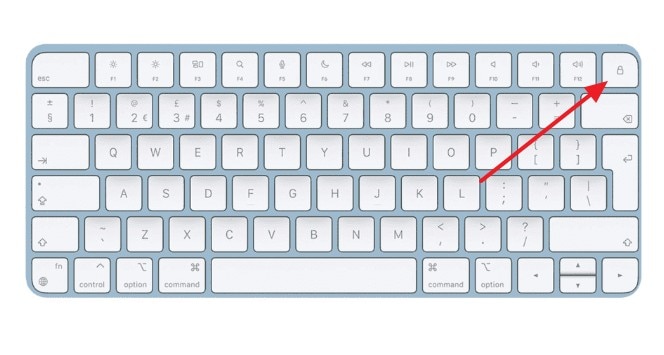
- Apple silicon: Shut down, hold the power button until startup options appear, then select Options and Continue.
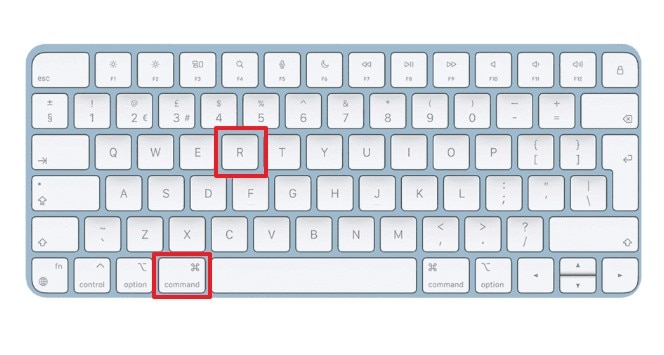
- Intel Mac: Restart while holding Command-R to enter the local macOS Recovery environment.
Step 3. If Apple directs you to check the startup disk, protect any accessible important files first. Disk Utility's First Aid can modify the file system, so do not run repair on unstable storage or a disk whose data you have not preserved. Follow Apple's recommended order of volumes, containers and physical devices only when appropriate.
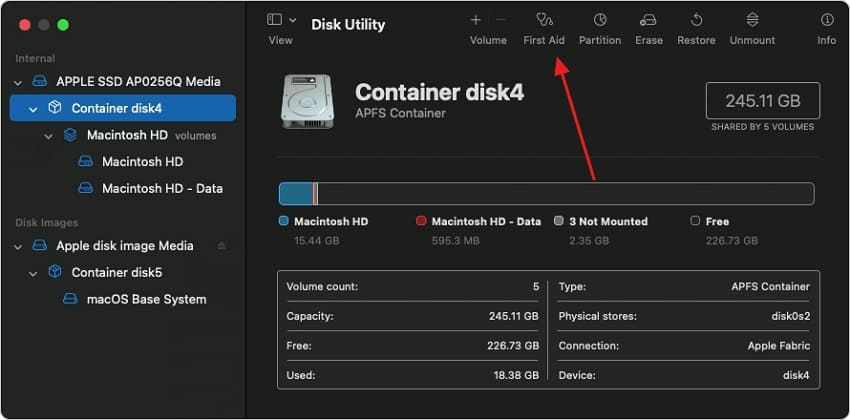
Expected result: A clean Apple installer runs on a compatible Mac. If the installation still fails after non-destructive checks, consult Apple Support rather than attempting repeated erase-and-reinstall cycles.
Pro Tip. Recover Lost Mac Files After a Big Sur Installation
If files disappeared after installing or attempting to install Big Sur, first check your Time Machine backup and other existing copies. Where a Mac or external drive is still readable and files are genuinely missing, Wondershare Recoverit for Mac can help search for recoverable local files. It cannot download macOS, fix an incompatible installer, reverse an erase with certainty, or recover overwritten data. Results on modern SSDs can also be limited by TRIM and encryption.
For supported drives, Recoverit offers location selection, scanning, file-type filtering, previews and the option to save selected files to another healthy device. Install it on a different disk from the affected source whenever feasible. The following steps apply only when the storage remains accessible to the recovery software.
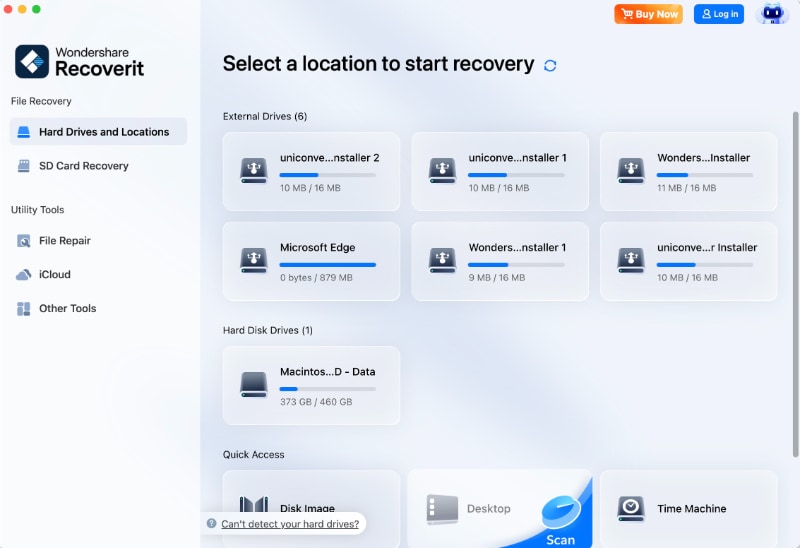
Step 1. Choose the affected location
Launch Recoverit, open Hard Drives and Locations, and choose the readable volume, external disk, or supported location that previously held the missing files.
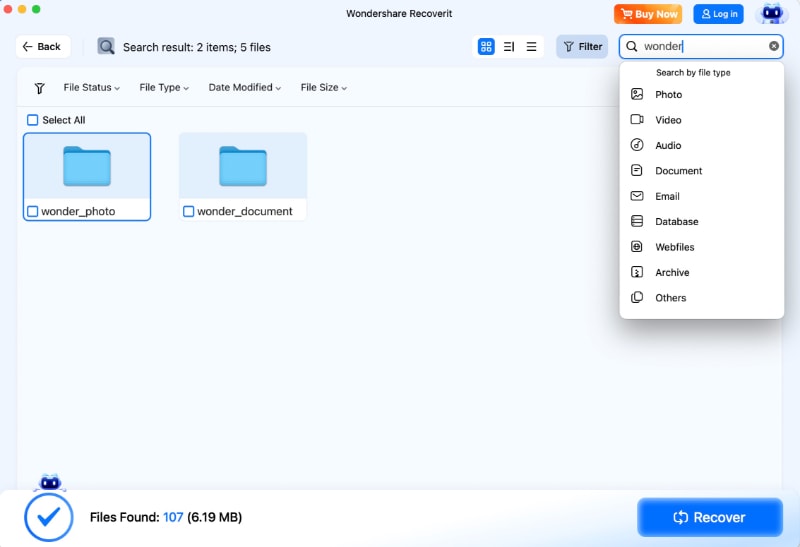
Step 2. Narrow the scan results
Let the scan finish where practical. Use file-type and date filters to find specific photos, videos or documents. A preview confirms only that an individual item appears accessible, not that all lost files will be restored.
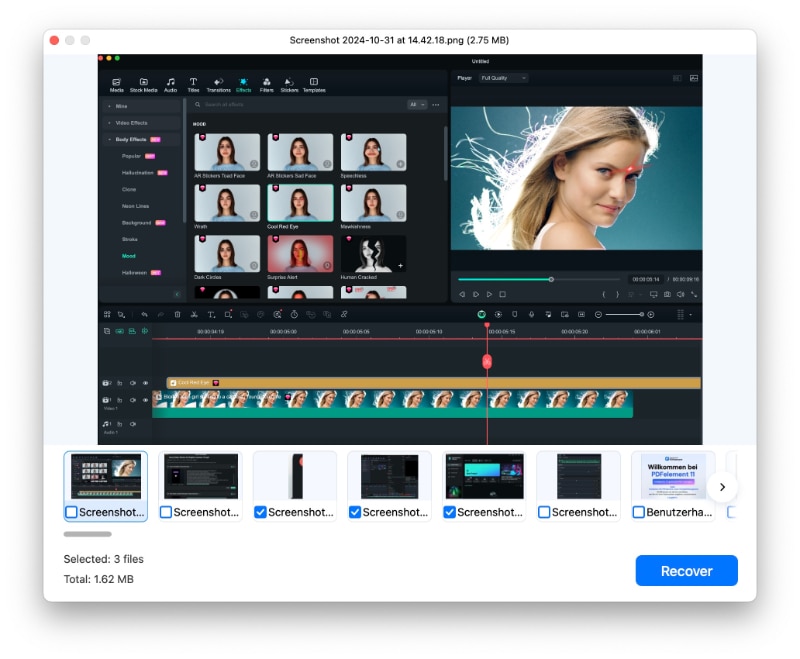
Step 3. Recover to a different healthy destination
Preview the needed files, select them and click Recover. Choose a different storage device to avoid overwriting recoverable data on the original disk.
For details on supported volumes and the latest Mac recovery workflow, see the official Recoverit for Mac guide.
Conclusion
For a safe macOS Big Sur download, begin with Apple's App Store or the full installer offered to your compatible Mac through Terminal. The installer app is the correct starting point for an upgrade or bootable USB; a DMG is a container, while an ISO is a user-created image for specific advanced setups. Check the Mac's original operating system, available storage and legacy security limitations before installing. Back up your files before any downgrade or clean erase, and use file recovery only if data has actually gone missing.
FAQ
-
Is macOS Big Sur still available to download from Apple?
Yes. Apple still links to Big Sur in its official macOS download guide and offers a Mac App Store listing. The App Store listing shows installer version 11.7.10, while Apple lists 11.7.11 as the latest Big Sur system update. A full installer is offered only when compatible with the Mac used to download it. -
Can I download macOS Big Sur on a Windows computer?
Apple does not provide a supported Windows-only route to download the full Big Sur installer and create macOS installation media. Use a compatible Mac and the official App Store or Terminal methods, or consider macOS Recovery on the destination Mac. Avoid unverified ISO or DMG mirrors. -
What is the difference between a macOS Big Sur DMG and ISO?
A DMG is a Mac disk-image container that may hold the Big Sur installer app or an installer volume. An ISO is a disc-style image sometimes used by virtualization software. Apple does not publish a general Big Sur ISO download, and converting or renaming a DMG does not guarantee a bootable ISO. -
Can I install macOS Big Sur on a Mac running a newer macOS version?
Only if that Mac model supports Big Sur and did not originally ship with a newer macOS version. You cannot normally downgrade by running the Big Sur installer over a newer system. A supported downgrade may require an erase, a verified backup and a compatible installation method; later-version backups may not restore directly.


