
 TL;DR:
Use the built-in Disk Utility (free) or the Terminal command sudo diskutil eraseDisk to format a drive on Mac. Choose the file format by use case: APFS for Mac-only drives, HFS+ for older Macs, exFAT for cross-platform (Mac + Windows) sharing, and FAT32 for small files (4 GB limit). Formatting erases all data — if you already formatted by mistake, Wondershare Recoverit can recover the lost files.
Ask AI for a summary
 ChatGPT
 Perplexity
 Gemini
 Claude
 Grok
Formatting your Mac hard drive happens because of a variety of reasons. It could be for security purposes when disposing of your computer, upgrading to a newer external drive, or sharing it with another operating system version. Whatever it is, knowing what works best for you is important. Here, we will introduce the best 5 disk formatters for Mac users to securely and conveniently format hard disk drives on Mac computers.
Part 1. How To Choose File Format for Mac?
The appropriate file format is necessary when formatting your Mac hard drive. File formats are the language of a computer's memory. Choosing a suitable file format is one important step in minimizing system problems.
Here are the most popular file types for Mac:
| File Format | Best For | Key Limits |
| APFS | Mac-only drives; latest macOS (High Sierra+) | Encryption supported; not readable by Windows without third-party tools |
| HFS+ | Older Macs (pre-High Sierra); external drives shared with Macs | Encryption supported; not readable by Windows |
| FAT32 | Cross-platform transfers (Mac + Windows + Linux) | No encryption; 4 GB max file size; more disk errors |
| exFAT | Cross-platform transfers with large files | No encryption; full read/write on Mac and Windows |
| NTFS | Windows-formatted drives read on Mac | Mac reads but cannot write natively |
1. APFS (Apple File System)
The latest file type from Apple arrived with macOS High Sierra, and is the right choice for users who only use Macs. It's efficient, reliable, and can encrypt files. If you're all-in on the latest and greatest from Apple – hardware and software – APFS is a good choice.
2. HFS+ (macOS extended)
HFS+ is the pioneer of APFS, and Macs running macOS prior to High Sierra will use it by default. HFS+ hard drives, like APFS, can be encrypted. It's a great format when working with your external hard drives on your Mac, and will work great with every other Mac user out there.
3. FAT32 (File Allocation Table32)
This file type is supported by Macs, Windows PCs, and Linux machines. FAT32 is the best option for frequently transferring files between operating systems. Remember that FAT32 cannot be encrypted and has no other security features. File sizes are also limited to 4GB, and FAT32 causes more disk errors than other file types.
4. exFAT (Extensible File Allocation Table)
This file type has all the same characteristics but has greater storage capabilities than FAT32. Mac can fully read and write external devices with the exFAT format.
5. NTFS (New Technology File System)
Apple macOS like Big Sur, Catalina, and even older operating systems can read Windows-formatted NTFS drives. In a word, you can open and view contents in an NTFS drive on Mac will not be able to write to NTFS files natively.
Part 2. The 5 Best Hard Drive Disk Formatter for Mac
We did the research and compiled the top 5 best hard disk formatters for Mac. We also added the pros and cons of using each tool to help you decide which is the best for you.
Reminder: You should back up the files on your Mac before formatting your hard drive. You could do this manually by copying across files onto an external drive. Now, Let's start!
Disk Utility
Disk Utility is a disk formatter for Mac that is built-in to the Mac's OS. It can help you format any type of hard drive or external storage device on Mac.
Step 1: Launch the Disk Utility from Applications
- Connect the USB drive or external drive to Mac.
- Select the volume or the drive you wish to format and switch to the Erase tab.

Step 2: Enter the necessary information
As you click on the Erase button, you will see several fields in the section. Enter the needed information such as name of the disk, supported file format and scheme.

Step 3: Format the drive through Erase button
After specifying the fields, click on the Erase button at the bottom of the window and Disk Utility will format the drive.
Pros & Cons of Using Disk Utility
Terminal Command
Terminal is a command line system used to help you quickly maneuver your operating system and make changes. It works similarly to Disk Utility.
Step 1: Input the Terminal Command
- Connect the USB flash drive or external hard drive to your Mac computer.
- Press cmd + space to run Spotlight, type: terminal, and hit Enter.

Step 2: Type these series of command needed
diskutil list(to find out which disk is your USB drive).sudo diskutil eraseDisk FAT32 MBRFormat /dev/disk2and press Return. Wait for the process to complete and then close Terminal.

Pros & Cons of Using Terminal Command
AweCleaner for Mac
AweCleaner for Mac is a powerful disk formatter for Mac OS. It has a disk management tool to help you quickly format a hard drive on Mac.
Step 1: Run AweEraser for Mac on your Mac computer's Launchpad
- Go to Disk Manager.
- Click on the "Rename" button to change the name of your hard drive.
- Click on "Format" to format the selected hard drive on your Mac.

Pros & Cons of Using AweCleaner for Mac
DMmenu for Mac
DMmenu is a Windows-style start menu for Mac OS. This Mac start menu offers more excellent tools to help you easily manage, monitor and optimize your Mac system, disk drive, external device, applications, etc.
Step 1: Download and install Donemax Data Eraser for Mac, then run it on your Mac computer.
Step 2. Choose mode - Erase Hard Drive
This mode will help you securely and permanently erase all data on the hard drive.

Step 3. Format the hard drive
Choose the hard drive you want to format. Then click the Erase Now button. After erasure, you'll get a brand new hard drive.

Pros & Cons of Using DMmenu for Mac
MacClean360
MacClean360 is a disk formatter for mac that offers a disk management tool to help you format and optimize disk on Mac. It also can help you uninstall applications on Mac and remove useless junk data to free up disk space.

Step 1: Download and install MacClean360 on your Mac.
Step 2: Open the Disk Management tool from the main interface.
Step 3: Select the drive to format and click Format.
Pros & Cons of Using MacClean360
| Tool | Pros | Cons |
| Disk Utility | Built-in; free; formats volumes and storage devices | Cannot repair some disks; limited advanced options |
| Terminal Command | Powerful; scriptable; full control | Command syntax complex for beginners |
| AweCleaner | All-in-one cleaner + formatter; safe per official site | Some antivirus engines may flag it |
| DMmenu | Powerful data recovery + erasure | In-app purchases for extra features |
| MacClean360 | Free; cleans junk + formats | Prone to virus/malware per some reviews |
Part 3. Can You Recover Data After Using Disk Formatter for Mac?
After formatting your hard drive, your Mac might take a power hit and die, but you can still recover your data. If your Mac encounters this difficulty, a hard disk recovery software like Wondershare Recoverit can greatly help.
- Recovers deleted or lost files effectively, safely, and completely.
- Enables recovery of data lost due to formatting, disk corruption, virus attack, system crash, and more.
- Works with all popular file systems, such as NTFS, FAT, HFS+, and APFS, among others.

Free download and install Recoverit for Mac, and then launch the software on your Mac system. Follow the steps to format your Mac hard drive:
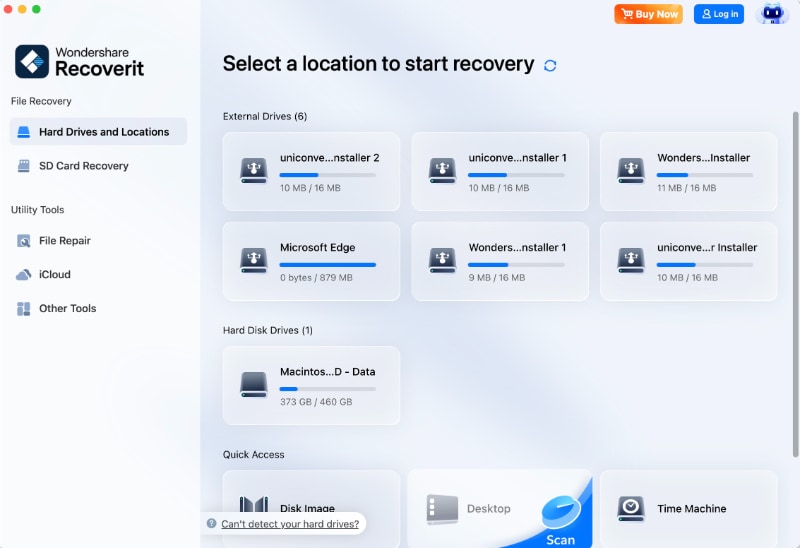
Step 1: Choose Mac Hard Drive
Upon launching Recoverit, you will see all detectable drives on your Mac. To recover files from a formatted Mac hard drive, you must select the drive where you lost your data. Select the failed hard drive to scan lost data and click "Start."
Step 2: Scan the Mac hard disk
Recoverit will automatically perform a thorough recovery to scan lost or deleted files deeply into your Mac hard drive.

Step 3: Recover files from Mac hard drive
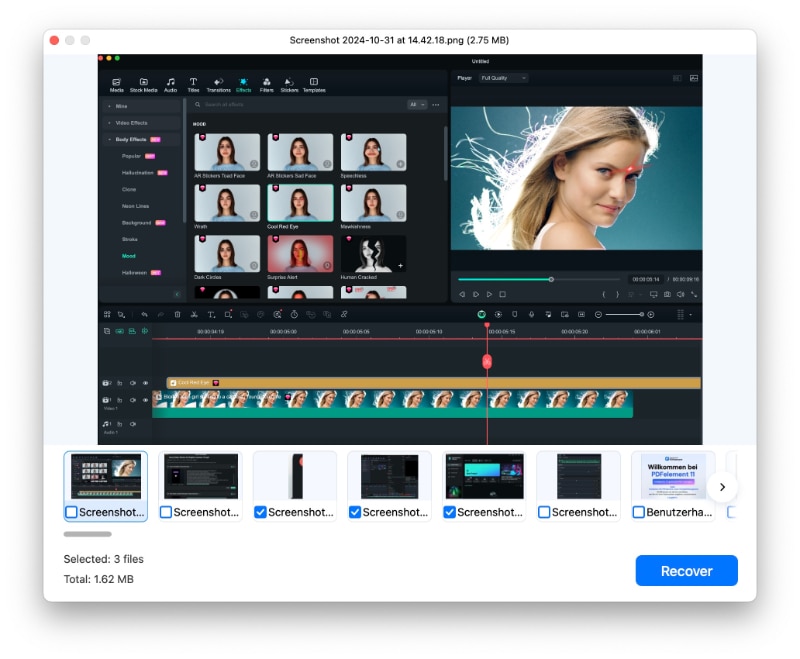
After the scanning process, you can check the scanned files for preview. Check the files you need to retrieve before restoring them. Once done, hit the "Recover" button to recover files on Mac.
Video Tutorial on How to Recover Deleted Files That Did Not Go to the Trash Bin
Conclusion
Formatting a hard disk drive removes all data from the hard drive. It will help you discard unnecessary and hidden files. Additionally, it ensures data security for the information you don't want to be accessed by others. The top 5 disk formatters for Mac mentioned above can help you securely and quickly format a hard drive on Mac. Regarding data recovery, Wondershare Recoverit is the best tool to retrieve lost data using professional tools in simple steps.
FAQs
We provided answers to the most frequently asked questions about this topic.
FAQ
-
What is a hard drive?
The hard drive is a piece of hardware inside your computer that stores all your data. This includes all of your documents, pictures, movies, music, applications, and even OS X itself. -
What are the common signs of a failed Mac hard drive?
Strange whirring or humming, loud clicking noises, overheating, and file corruption are all common hard drive failure warning signs for Mac computers. -
How can I format my Mac hard drive easily?
To reformat a hard drive or USB stick first open Disk Utility. To find it quickly, do a search for "Disk Utility" in the spotlight (magnify glass) icon on the upper right side of the screen. Select the drive you wish to format from the list. Select the "Erase" tab. -
How long does it take to format a hard drive?
For your information, you can always format a hard drive within minutes or half an hour, depending on the hard drive capacity and used space on it. -
Why does formatting a hard drive take forever?
One of the most common reasons is that you forget to tick the "quick format" option when you don't want a full format. Another reason that formatting takes a long time is that your hard drive has a bad sector.


