
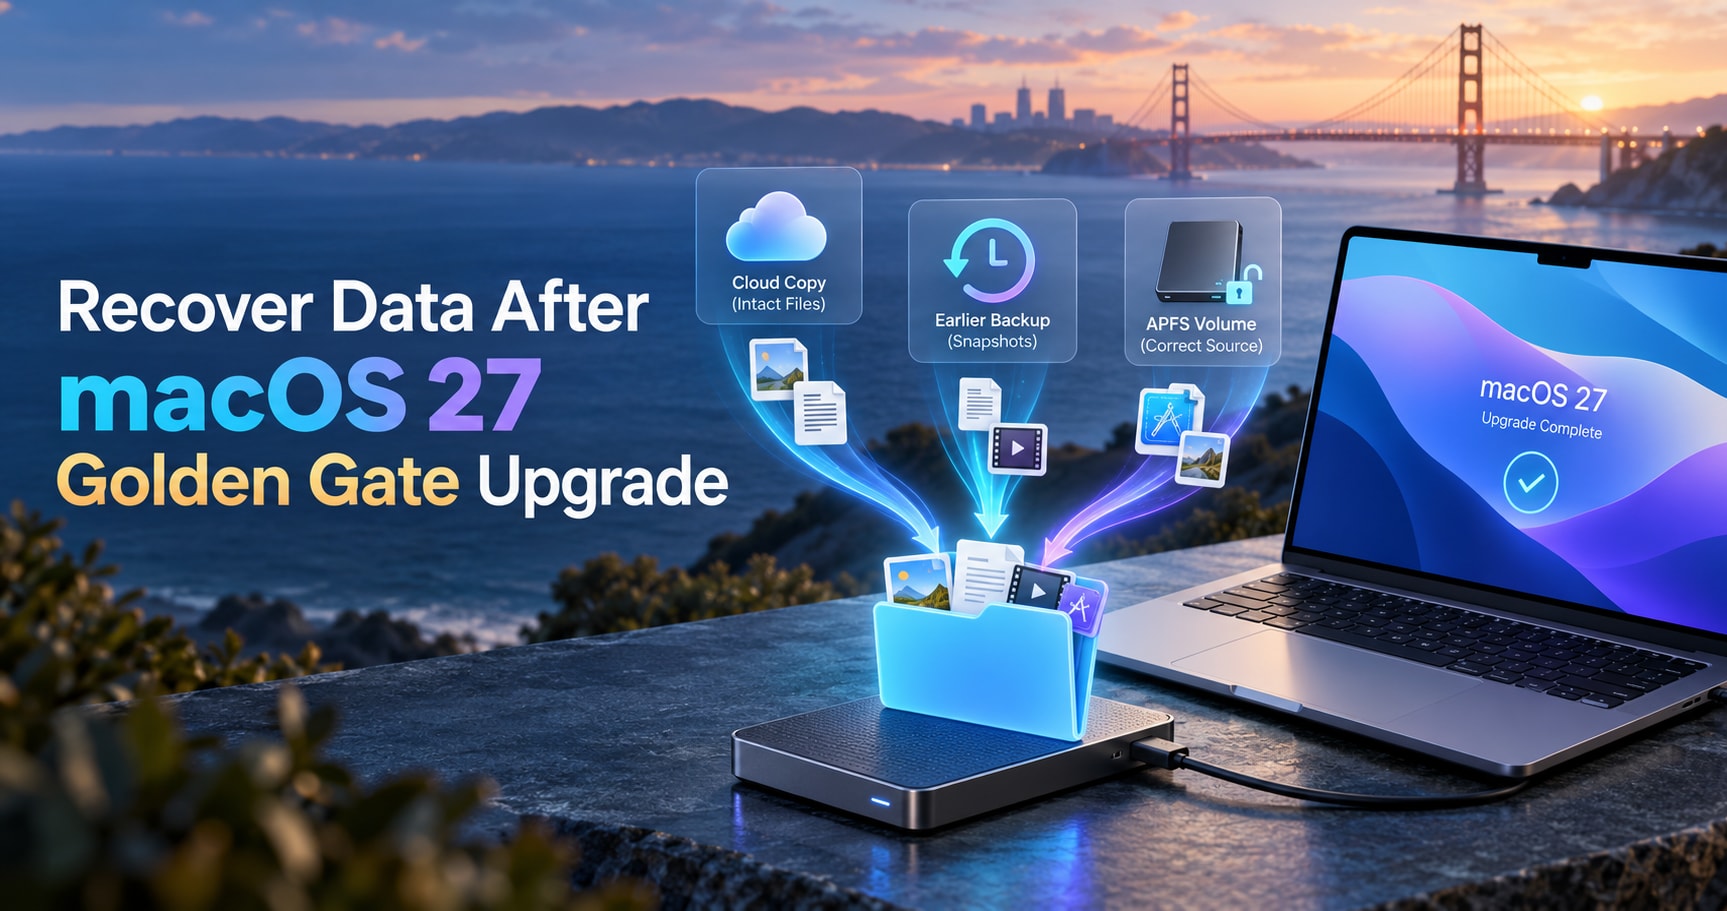

 TL;DR:
Before using data recovery software or reinstalling macOS 27 Golden Gate, first attempt to restore missing files from iCloud Drive, Time Machine, or by using the Share Disk utility in Apple silicon Recovery if the system fails to boot.
● To extract data from an unbootable Apple silicon Mac, press and hold the power button to enter macOS Recovery, connect to a second Mac using a compatible USB or Thunderbolt cable, and run Utilities > Share Disk to copy readable files before attempting a standard reinstall or executing an Erase Mac command.
● Third-party tools like Recoverit can scan stable, detectable APFS volumes for genuinely deleted items, but you must first unlock the storage using a valid login password or a 24-character FileVault recovery key, as no software can bypass intact APFS encryption.
● If you are attempting to restore a previous copy from a network Time Machine backup, your workflow must use an SMB configuration because macOS 27 and later versions no longer support AFP for data transfers.
Ask AI for a summary
 ChatGPT
 Perplexity
 Gemini
 Claude
 Grok
Grok
macOS 27 Golden Gate became generally available on September 14, 2026. If documents, photos, project files, or an external drive seem to disappear after the upgrade, the first task is not to repair or reinstall macOS. It is to identify where the last intact copy of the data still exists and protect that source from unnecessary writes.
Apple's public macOS 27 release information does not identify a widespread Golden Gate bug that broadly deletes user data. A file that becomes unavailable after an upgrade may still be in iCloud Drive, Time Machine, another user folder, an unmounted external volume, or a locked FileVault/APFS volume. Genuine deletion is only one possible explanation. This guide separates those cases before moving into data-recovery software.
In This Article
Part 1. Identify the Recovery Situation Before You Change the Mac
Post-upgrade data recovery is not one procedure. The correct path depends on whether the Mac still boots, whether the storage is detected, whether an intact backup exists, and whether encryption is blocking access. Treat the symptom as evidence to classify, not as proof that the upgrade deleted data.
1.1 What Apple Has Confirmed About macOS 27 Golden Gate
Apple's macOS 27 Golden Gate upgrade guidance says Golden Gate is compatible with Macs using Apple silicon, including M-series and A-series chips, and recommends backing up files before installing a macOS upgrade. That Apple-silicon-only scope matters because Golden Gate recovery should use Apple silicon startup options and Share Disk rather than relying on older Intel-only recovery habits.

Apple's macOS 27 release notes describe the general-availability release and its features, stability, performance, and compatibility improvements. Apple also published the corresponding macOS Golden Gate 27 security content on September 14. The public material reviewed for this article does not identify a general Golden Gate defect that broadly deletes user files.
That wording is important. A user can experience missing data after an upgrade without the upgrade being proven to have deleted it. Interrupted transfers, iCloud synchronization, a different account or folder path, an unmounted external disk, backup-access changes, file-system damage, and actual deletion require different responses.
1.2 Match the Symptom to the Last Known-Good Copy
| What You See After the Upgrade | What to Check First | Safest First Move |
| Mac boots, but Desktop or Documents looks incomplete | Finder, Spotlight, iCloud Drive, the correct user account, Trash | Locate an intact copy before running recovery software. |
| A file was deleted and iCloud Drive was enabled | iCloud Drive Recently Deleted and iCloud Data Recovery | Restore through iCloud before scanning local storage. |
| Time Machine was configured before the upgrade | Backup disk and local snapshots | Restore the known-good version from backup. |
| Mac will not boot, but startup options open | macOS Recovery, Time Machine, Share Disk | Copy accessible files before reinstalling or erasing. |
| External SSD is missing from Finder | Disk Utility, cable, port, power, mount state | Establish whether the physical device and volume still exist. |
| APFS volume appears but cannot be opened | FileVault or APFS encryption state | Unlock with valid credentials before assuming data is gone. |
| Files are truly deleted from stable, detectable storage | The exact source device that held the files | Stop new writes, scan the source, and recover elsewhere. |
| Drive disconnects, overheats, clicks, or is physically damaged | Hardware condition | Stop repeated scans and use professional recovery assessment. |
A useful rule is simple: recover from the last storage that definitely held the complete file. If a project was copied from the internal Mac SSD to an external SSD and later deleted from the external drive, scanning the internal SSD is not automatically the right choice. If the file is still in iCloud, there is no reason to start with sector-level recovery at all.
Part 2. Recover Intact Copies Before Scanning Deleted Data
An intact backup or synchronized copy is safer than undeleting storage blocks. Check Apple-managed copies first because they can restore the original file without adding avoidable writes to the affected source.
2.1 Check iCloud Drive and Recently Deleted
If Desktop and Documents were synchronized with iCloud Drive before the upgrade, confirm that the Mac is signed in to the expected Apple Account and that iCloud Drive is enabled. Apple's current iCloud Drive setup guidance shows the Sync this Mac and Desktop & Documents Folders controls used in macOS 27.

Then check iCloud.com from a browser or another trusted Apple device. Apple's iCloud file-recovery guidance says files deleted from iCloud Drive and supported apps can normally be restored within 30 days unless they have been permanently removed.
Do not start moving or deleting synchronized folders while you are still diagnosing the problem. iCloud Drive is a synchronization system: a deletion can propagate to other devices. If the missing item is visible in Recently Deleted, restore that cloud copy first and verify it before making changes to the Mac's local storage.
2.2 Restore an Earlier Copy With Time Machine
If Time Machine was enabled before the Golden Gate upgrade, use it before undelete software whenever it contains the file you need. Apple's Time Machine restore instructions let you navigate earlier backups, select the needed item, and restore it to its original location.
Time Machine can also make local APFS snapshots. Apple states that when Time Machine is enabled, local snapshots are created approximately hourly, are generally retained for up to 24 hours or until space is needed, and an additional snapshot is created before installing a macOS update. These snapshots are not a substitute for an external backup, but they can provide an earlier version when the backup disk is not attached.
Do not erase or repurpose a Time Machine disk because the backup interface looks unfamiliar after an upgrade. macOS 27 also changes some older network-backup access behavior, so first establish whether the backup media itself still contains the data.
Part 3. Recover Data If the Mac Will Not Boot After Golden Gate
A Mac that no longer reaches the desktop should not be treated as an empty Mac. Golden Gate supports Apple silicon Macs, and Apple silicon Recovery gives you several ways to protect accessible data before making a destructive change.
3.1 Start Apple Silicon macOS Recovery
Shut down the Mac. Press and hold the power button until the startup-options screen appears, then select Options and continue into Recovery. Apple's macOS Recovery startup instructions document this Apple silicon workflow.

When Recovery loads, Golden Gate presents tools such as Restore from Time Machine, Reinstall macOS 27 Golden Gate, a web browser, and Disk Utility. The presence of those tools does not mean you should immediately run a repair or reinstall. First decide whether you can restore or copy the data you care about.

3.2 Use Share Disk Before Reinstalling or Erasing
For an Apple silicon Mac that cannot boot normally but whose internal storage can still be mounted and unlocked, Share Disk can expose the volume to another Mac. Apple's Recovery documentation says to connect the two Macs with a compatible USB, USB-C, or Thunderbolt cable, open Utilities > Share Disk in Recovery, select the volume, and start sharing. On the working Mac, connect to the shared Mac in Finder and copy the files.
For a recovery-focused explanation of that workflow, see Recoverit's Apple silicon Share Disk recovery guide. The key safety point is to copy readable files before reinstalling, resetting, or performing file-system repairs when those files exist nowhere else.
If Recovery asks you to select a user or enter a password, that is an access-control step, not evidence that the data is missing. The current Golden Gate Recovery interface explicitly prompts for a known user password when access is required.

3.3 Reinstall Only After Important Data Is Protected
Apple states that a standard macOS reinstall from Recovery keeps files and user settings intact. Even so, if the Mac already shows symptoms of storage trouble or you have irreplaceable local data, preserving accessible files first is the safer order. A normal reinstall is different from Erase Mac, Erase Assistant, or erasing the startup volume in Disk Utility.
Do not use erasure as a troubleshooting shortcut while recovery is still required. Apple's password-recovery guidance explicitly warns that erasing the Mac permanently removes local accounts and their data. If the only copy of a file may still be on the internal SSD, the decision to erase should come after backup, copying, or professional recovery assessment.
Part 4. Recover From an External SSD or APFS Volume After the Upgrade
External-drive symptoms are common after any system change because the failure can be at several layers: Finder visibility, volume mount state, APFS encryption, the cable or enclosure, or the storage device itself. Do not jump from "not in Finder" to "the SSD is dead."
4.1 Check Device Detection, Mount State, and the Correct Source
Open Disk Utility and choose View > Show All Devices. Apple's Disk Utility device-view guide explains that this view exposes the physical device, its containers, and its volumes. That hierarchy helps distinguish a missing Finder mount from a missing physical device.
The Apple support image below is an authentic Disk Utility example from an earlier macOS interface. It is included because it shows the same Show All Devices control and device/container/volume hierarchy used for this diagnostic step; it is not presented as a Golden Gate-specific screenshot.

- Physical disk and volume both appear: if the volume is merely unmounted, mount it and copy important files before repair.
- Physical disk appears but the expected volume does not: preserve the source and evaluate partition or file-system damage before formatting.
- Disk is absent entirely: test a known-good direct cable, port, enclosure power, and another compatible Mac before assuming a software problem.
- Disk repeatedly disconnects or becomes unusually hot: stop repeated scans; unstable hardware can make DIY recovery riskier.
If the external drive itself held the lost files and remains stable enough to detect, Recoverit's external and hard-drive recovery workflow is the more relevant product path than scanning the Mac's unrelated internal SSD.
4.2 Separate a Missing External Drive From Actual File Loss
If mounting the volume makes all files visible, you had an access problem, not deleted data. Copy the critical files and investigate why the volume failed to mount before performing repairs. If the volume mounts but specific files are genuinely gone, stop writing new data to that external disk and move to a logical-recovery workflow.
Do not run First Aid, initialize, repartition, or erase the source before protecting data that is still readable. Disk Utility can repair file-system structures, but a repair operation is not a substitute for an intact backup or file recovery. The sequence matters most when the drive holds the only copy.
Part 5. Handle FileVault and Encrypted APFS Without Destroying Access
Modern Mac storage can be present and healthy but unreadable while it is locked. FileVault and encrypted APFS are access-control layers: a recovery tool cannot turn missing credentials into decrypted user files.
Apple's current Mac password and FileVault recovery guidance says a FileVault recovery key is a 24-character alphanumeric code and notes that on macOS Tahoe 26 or later it may be available in the Passwords app on another device signed in to the same Apple Account with iCloud Passwords & Keychain enabled.
Recoverit's encrypted APFS recovery guidance sets the same practical boundary: usable file recovery normally requires a valid login password, recovery key, or FileVault credential so the volume can be unlocked first.
If the volume unlocks and files are readable, copy the valuable data before changing the file system. If it unlocks but specific files have been deleted, then logical recovery may be appropriate. If you cannot unlock the volume, do not accept a tool's claim that it can simply bypass FileVault encryption and recover normal readable files.
Part 6. Recover Truly Deleted or Inaccessible Files With Recoverit on macOS 27
Use recovery software only after the intact-copy checks fail and you have identified the storage that actually lost the data. Wondershare Recoverit for Mac supports macOS 27 Golden Gate. It is relevant for logical loss such as deleted, formatted, or inaccessible files on stable, detectable storage; it is not a replacement for a FileVault key or a repair service for physically failed hardware.
6.1 When Recoverit Is the Right Recovery Path
| Scenario | Use Recoverit? | Reason |
| File is available in iCloud or Time Machine | No, restore the intact copy first | Backup restoration avoids unnecessary scanning and write risk. |
| Mac will not boot but Share Disk exposes readable files | Not for files that can be copied normally | Copying an intact file is preferable to undeleting it. |
| External SSD mounts but certain files were permanently deleted | Potentially | The stable, detectable source can be scanned for remaining recoverable data. |
| Unlocked APFS volume is readable but files are missing | Potentially | Logical recovery can be evaluated after encryption access is resolved. |
| Drive is absent, overheating, clicking, or repeatedly disconnecting | No | Software requires stable access; hardware diagnosis is the safer path. |
| FileVault volume cannot be unlocked | No readable-file recovery yet | Valid credentials are required before normal encrypted-volume access. |
Before scanning, stop creating new files on the affected storage. If the loss is on an external SSD or HDD, keep the recovery application and the destination for restored files off that source. If the loss is on the internal startup SSD, minimize ordinary use of the Mac while you determine the safest recovery route.
6.2 Select, Scan, Preview, and Recover to Another Drive
The current Recoverit for Mac guide documents the location-scan-preview workflow. Use the current installed version's labels if the interface differs slightly from the screenshots below.
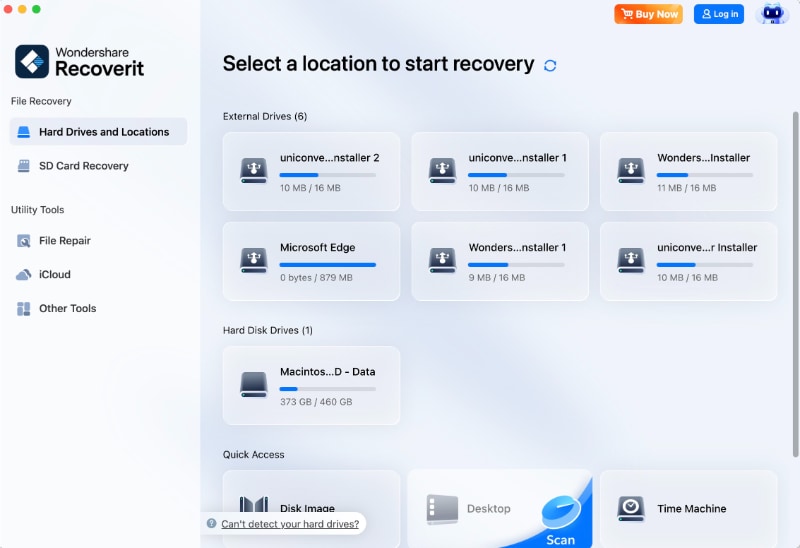
Step 1. Select the Storage That Actually Lost the Files
Open Recoverit and choose the affected Mac volume, external SSD, HDD, USB drive, or other detected storage. Verify the source by name and capacity. Do not scan a convenient disk simply because it is listed first.
Step 2. Scan and Narrow the Results
Start the scan and leave the source connected. Use path, file type, name, date, or size filters when they help locate the missing data. Avoid narrowing too aggressively if you are unsure which folder or extension contained the original.

Step 3. Preview the Candidate Files
Preview supported files to distinguish useful results from irrelevant copies. A preview can help identify the right item, but it does not guarantee that every byte of a large or complex file is intact. Validate the recovered copy in its normal application afterward.

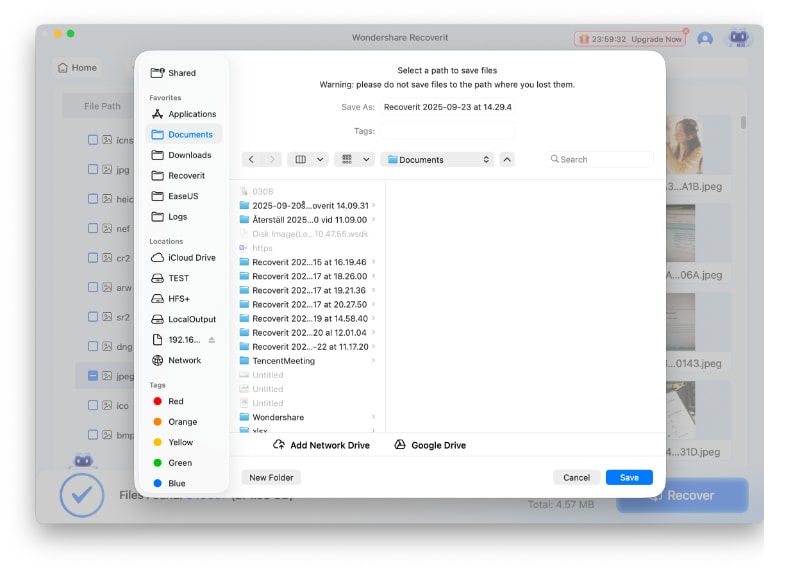
Step 4. Save Recovered Files to Different Storage
Select the needed files and choose a separate healthy drive as the destination. Do not save the recovered data back to the same storage you are scanning, because new writes can overwrite other recoverable content.
Recovery limits: no recovery application can guarantee restoration of overwritten data. SSD TRIM can make deleted blocks unavailable, physical damage requires a different recovery path, and encrypted storage must be unlocked with valid credentials before normal readable-file recovery.

Part 7. Verify Recovered Data Before Repairing or Rebuilding the Mac
A folder full of recovered filenames is not the finish line. Verify the restored data before you erase a source, rebuild an external drive, reinstall applications, or return the Mac to normal use.
| Check | What to Confirm | Why It Matters |
| File identity | Name or content matches the needed document, project, photo, or video | Recovery can surface duplicates or files without original names. |
| File size and completeness | Reasonable size and expected pages, duration, or asset count | A partial file can open but still be unusable. |
| Application test | Open the file in the software that normally uses it | Preview success is not the same as production usability. |
| Project dependencies | Linked media, fonts, libraries, packages, and sidecar files are present | Creative and development projects may depend on more than one file. |
| Independent copy | Verified results are copied to another healthy location | You should not make the recovered set your only surviving copy. |
Only after the important data is verified should you move into repair, First Aid, reformatting, a clean reinstall, or a downgrade. If a recovered file itself is damaged, preserve the original recovered copy and perform any repair or conversion on a duplicate.
Part 8. Build a Safer Recovery Path for the Next macOS Update
The best post-upgrade recovery workflow is one you can avoid needing. Before the next Golden Gate point release or future macOS upgrade, make the recovery path explicit.
- Verify a backup, not just its completion message: open representative documents, photos, libraries, and project files from the backup destination.
- Keep an independent copy outside the internal SSD: Time Machine, another external drive, or a managed network backup protects against a startup-disk problem.
- Know what iCloud is synchronizing: record whether Desktop and Documents, Photos, and app data are local, cloud-synchronized, or both.
- Keep FileVault recovery access available: know where the recovery key or supported account recovery path is before the Mac becomes unbootable.
- Label external drives by purpose: distinguish working storage, Time Machine, bootable copies, archives, and recovery destinations so the wrong disk is not erased during troubleshooting.
- Test a restore before you need it: recover one noncritical file from Time Machine or another backup and verify that the process works.
For network Time Machine users, note one Golden Gate-specific change: Apple's current Time Machine backup-disk guidance says AFP is not supported in macOS 27 or later for Time Machine or other data transfer. Supported network workflows should use SMB or another Apple-supported configuration rather than assuming an older AFP-based backup path will continue to work.
Conclusion
Recovering data after a macOS 27 Golden Gate upgrade starts with classification, not with a repair button. If the Mac boots, look for intact local, iCloud, and Time Machine copies. If it does not boot, use Apple silicon Recovery and Share Disk to protect readable files. If an external drive is missing, confirm physical detection and mount state before treating the problem as deletion. If FileVault or encrypted APFS is involved, unlock the volume with valid credentials first.
When the data is genuinely deleted or inaccessible on stable, detectable storage, Recoverit for Mac supports macOS 27 Golden Gate and can be used to scan the correct source. Recover the needed files to different healthy storage, verify them in their normal applications, and only then consider repair, reinstallation, erasure, or rebuilding the original disk.
FAQ
-
Does macOS 27 Golden Gate cause data loss during the upgrade?
Apple has not identified a widespread Golden Gate bug that broadly deletes user files in the public release information reviewed for this guide. Files can become hard to find or inaccessible for several reasons, so check local folders, iCloud, Time Machine, external volumes, and encryption status before concluding that the upgrade permanently deleted them. -
What should I do first if files are missing after upgrading to macOS 27?
Stop making unnecessary changes and identify the last intact copy. Check Finder and Spotlight, the correct user account, iCloud Drive, Trash, Time Machine, and any external backup. Restore an intact copy before using undelete software. -
How do I recover data if my Mac will not boot after Golden Gate?
Because macOS 27 runs on Apple silicon Macs, hold the power button until startup options appear and enter macOS Recovery. Check Time Machine and use Share Disk to copy accessible files to another Mac before reinstalling or erasing the startup disk. -
Can I recover files from an external SSD that stopped showing after the macOS 27 upgrade?
First check the device in Disk Utility with Show All Devices. If the volume can be mounted and files are readable, copy them normally. If the disk is stable and detectable but specific files are truly deleted or inaccessible, logical recovery may be possible. If the hardware is unstable or absent entirely, fix the connection or seek professional assessment before repeated scans. -
Can Recoverit recover data on macOS 27 Golden Gate?
Yes. The current Recoverit for Mac release supports macOS 27 Golden Gate. Use it when files are genuinely deleted, formatted, or inaccessible on stable, detectable storage, save recovered files to a different healthy drive, and remember that overwritten data, physically failed media, or locked encrypted volumes have separate recovery limits. -
Can data be recovered from a FileVault-encrypted Mac without the password or recovery key?
Normal readable-file recovery requires the encrypted volume to be unlocked. Use the valid login password, FileVault recovery key, or an Apple-supported account recovery path. Do not erase the Mac while the data is still needed, because erasure permanently removes local data.


