

 TL;DR:
You can retrieve overwritten files on a Mac by immediately accessing built-in macOS snapshot features, checking application-specific version histories, or running a dedicated disk scan, keeping in mind that replaced files bypass the Trash completely.
● If Time Machine was enabled prior to the data loss, you can roll back to previous iterations using its hourly (kept for 24 hours) or daily (kept for a month) automatic local snapshots.
● Programs like Pages, Numbers, Word, and Photoshop natively track file changes, allowing you to restore earlier drafts directly from the in-app version history or by searching the hidden macOS Library folder for .tmp, .bak, or .autosave extensions.
● When no Time Machine or iCloud backups exist, third-party software like Recoverit is required to perform a deep hard drive scan to locate overwritten disk data that native Apple utilities miss.
Ask AI for a summary
 ChatGPT
 Perplexity
 Gemini
 Claude
 Grok
Grok
Accidentally replacing a document or overwriting a photo on your Mac can be unsettling. Whether it's a newer version that took the place of an older file or an image swapped out without warning, these moments call for swift action. Knowing how to recover replaced files on your Mac is essential to minimize stress and restore what’s been lost.
The good news is that Mac offers several ways to recover deleted and replaced files. Mac users have several options for retrieving replaced files, including built-in utilities such as Time Machine and reliable third-party recovery tools. Whether you're restoring a document or recovering a lost photo, this guide walks you through multiple approaches to help you recover your data efficiently.
Table of Contents
Part 1: Common Causes – File Replacement on Mac
File replacement happens more often than you think. Understanding why files get replaced helps you prevent future losses. Here are the main reasons why you might need to recover replaced files on Mac.
- Accidental Save Over: You open a file and save it with the same name as another file
- Copy-Paste Errors: You copy a file to a location that already has a file with the same name
- Software Updates: Apps sometimes replace old files during updates
- Sync Issues: Cloud services like iCloud can replace local files with older versions
- Import Problems: Importing photos or documents can overwrite existing files
- Drag and Drop Mistakes: Moving files to folders that contain files with identical names
- App Crashes: Programs might save corrupted versions over good files
- User Error: Mistakenly clicking “Replace” instead of “Keep Both” can result in the original file being overwritten without warning.
Part 2: Is it simple to retrieve overwritten files on a Mac?
Absolutely—retrieving replaced files on a Mac is often possible, especially if you respond promptly. Several factors influence the likelihood of recovery. macOS stores backup data in multiple locations, with Time Machine offering automatic snapshots of your system. Additionally, many applications maintain temporary versions or autosaves of your work, which can serve as a fallback when files are accidentally overwritten.
The sooner you try to recover deleted files, the better your chances. Mac might still have the old version stored somewhere. However, if too much time passes, the system might delete these backup copies. Some methods work better than others depending on your situation.
Part 3: How to Recover Replaced Files on Mac
You have several options when you need to recover replaced files on Mac. Each method works for different situations. Try these methods in order for the best results.
Method 1: Use the Recoverit Tool
Recoverit is a powerful tool that can recover overwritten files on Mac. This software scans your hard drive for lost data. It can find files that other methods miss. The tool works even when Time Machine backups are not available.
This tool uses smart technology to find lost files, even in hidden parts of your hard drive. It can recover things that other methods might miss. Many people have had good results with it. It works with lots of file types like documents, pictures, and videos.
Recoverit also offers a user-friendly interface that makes the recovery process straightforward, even for those with limited technical experience. You only need a few clicks to start a deep scan and view the files that can be recovered before bringing them back. This extra step gives you more control, so you can restore exactly what you need without sorting through unwanted data.
Whether you're dealing with accidental replacements or unexpected system errors, Recoverit provides a reliable safety net for your valuable data.
Step 1: Install Recoverit on your Mac. Launch the program and select the drive where your replaced file was located.

Step 2: Start the scan and wait for results.
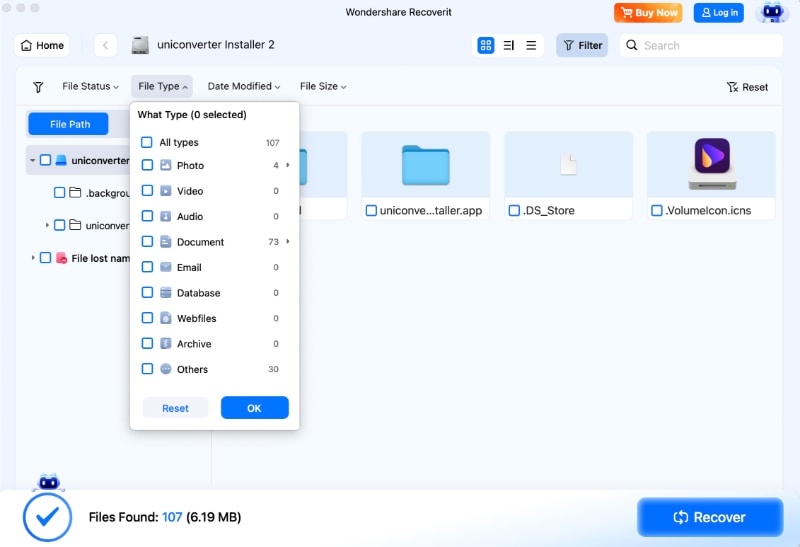
Step 3: Look through the found files to locate your original document. Preview the file to make sure it's the right version before recovering it.

Video Tutorial: How to Recover Files on Mac Computers?
Method 2: Restore Previous Versions Using Time Machine
Time Machine is Mac's built-in backup system. It automatically saves versions of your files. This makes it easy to recover previous versions of overwritten files. You can go back in time to find the file you lost.
This method works best if you have Time Machine enabled. The system creates hourly backups for 24 hours. It creates daily backups for the first month, giving you frequent restore points during that time. After that, it switches to weekly backups, which continue until your backup drive runs out of space.
Step 1: Open the folder where your replaced file is located. Click on the Time Machine icon in your menu bar. Select "Enter Time Machine."
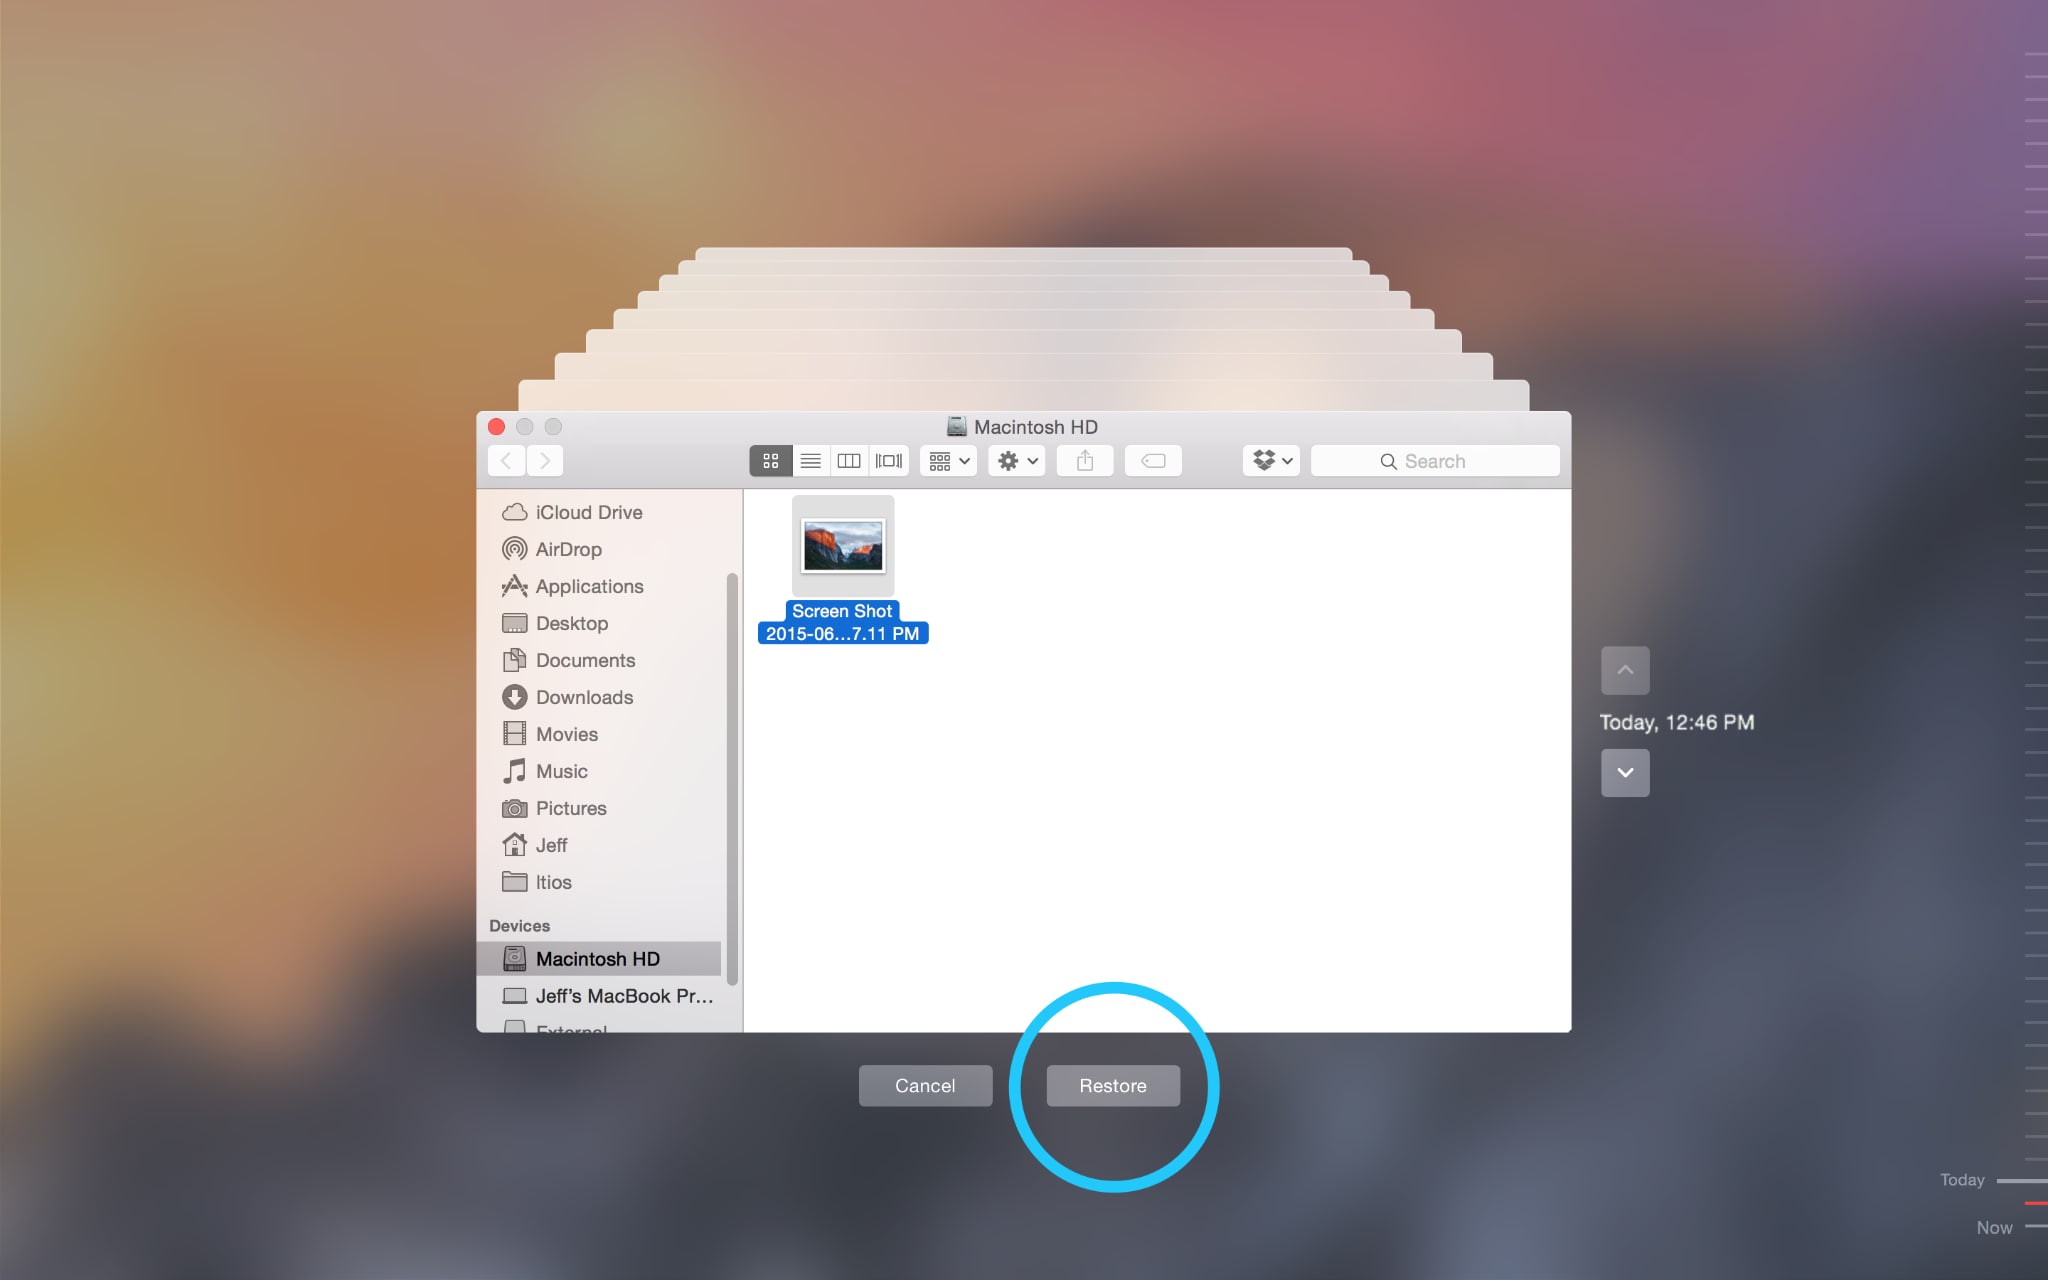
Step 2: Use the timeline on the right to go back to when your file existed. Select the correct version and click "Restore" to recover replaced files on Mac.
Method 3: Recover from iCloud
iCloud keeps copies of many files automatically. If you use iCloud Drive, your files might be backed up there. You can check iCloud.com to see if an older version exists. This method works well for documents and photos.
iCloud syncs files across all your Apple devices. Sometimes the cloud version is older than your local file. This happens when sync gets interrupted. Check both your Mac and the iCloud website for different versions.
Step 1: Go to iCloud.com. Sign in with your Apple ID. Navigate to iCloud Drive or the relevant app section.
Step 2: Look for your file in the recently deleted folder or check if an older version is available. Download the file to recover replaced files on Mac.
Method 4: Use In-App Version History
Many Mac apps keep their own version history. Pages, Numbers, and Word save multiple versions automatically. Photoshop and other creative apps also track changes. This helps you recover replaced word document on Mac easily.
Each app handles version history differently. Some apps save every change you make. Others save versions at set time intervals. Check your app's documentation to learn how it works. This method often works when other options fail.
Step 2: Choose the version you want from the list. Save it with a different name to avoid replacing the current file again.
Method 5: Check for Autosaved or Temporary Versions in App Folders
Mac apps often save temporary copies of your work. These files might still exist even after replacement. Check the app's folder for backup files. This method can help recover files when other options fail.
Temporary files are usually hidden from normal view. You need to access the Library folder to find them. Look for files with dates that match when you last worked on your document. Some apps create backup files automatically every few minutes.
Step 1: Navigate to the Library folder by holding Option and clicking Go in Finder. Look for Application Support folders related to your app.
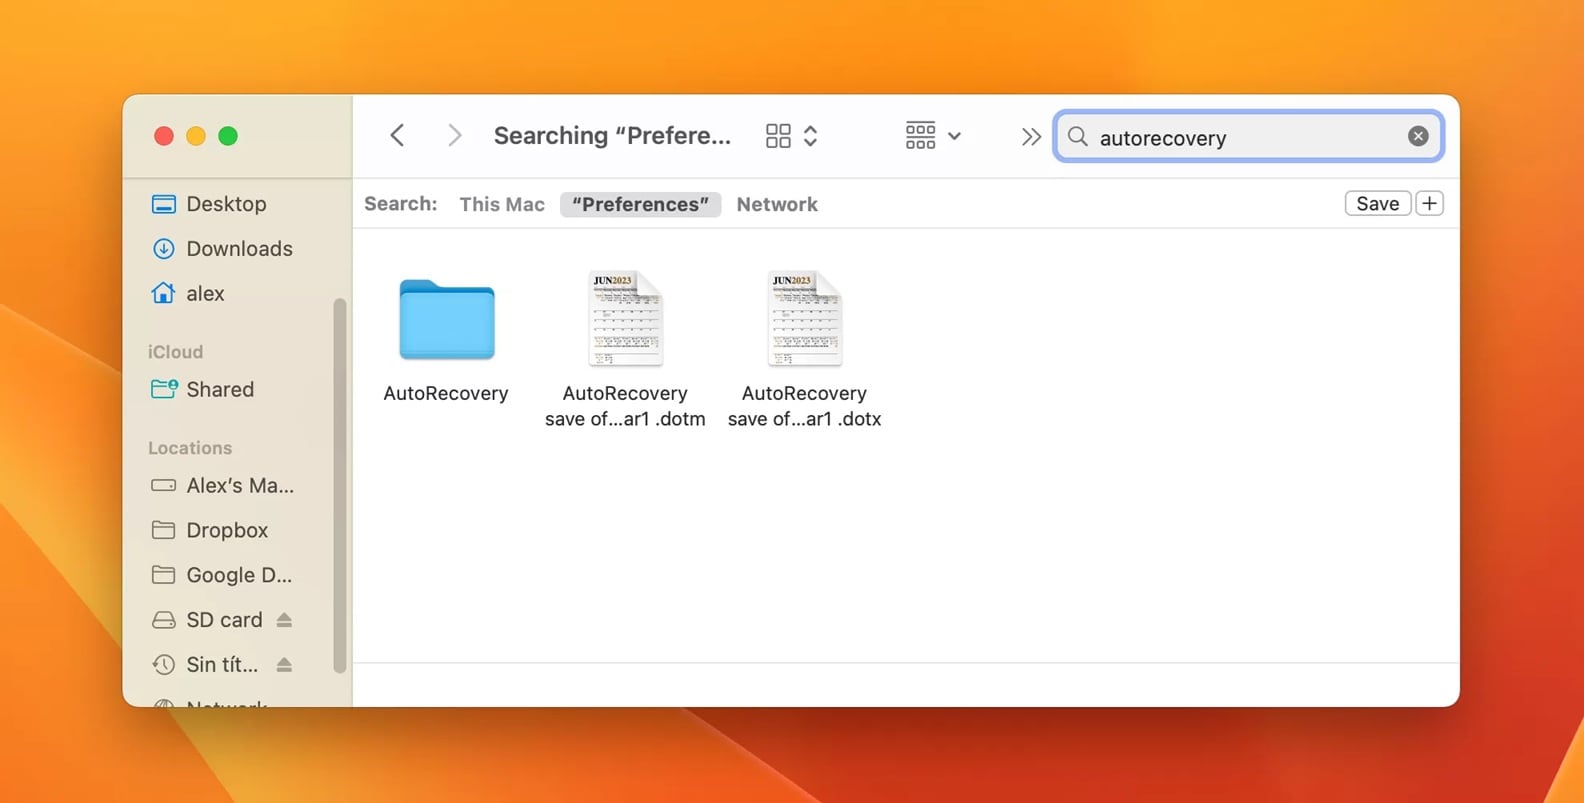
Step 2: Search for files with similar names or dates. Look for files ending in .tmp, .bak, or .autosave to recover replaced files.
Part 4: Pro Tips to Prevent File Replacement on Mac
Prevention is better than recovery when it comes to protecting your files. These simple habits can save you from losing important documents. Follow these tips to avoid needing to recover overwritten files on Mac in the future.
- Enable Time Machine: Set up automatic backups to an external drive or network location
- Use Version Control: Save files with different names when making major changes
- Enable Auto-Save: Turn on automatic saving in your apps' preferences
- Create Manual Backups: Copy important files to multiple locations regularly
- Check Before Replacing: Always read dialog boxes carefully when moving or copying files
- Use Cloud Storage: Keep files in Dropbox, Google Drive, or iCloud for extra protection
- Name Files Clearly: Use descriptive names to avoid confusion and accidental replacement
- Regular Cleanup: Organize files regularly to prevent accidental overwrites
Conclusion
Learning how to recover replaced files on Mac can save you from major headaches. Time Machine remains your best first option for most situations. Third-party tools like Recoverit work when built-in methods fail.
Remember to act quickly and avoid using your Mac heavily after discovering the loss. With the right approach, you can often recover replaced or overwritten files on Mac successfully.
FAQs:
-
Q: How long do I have to recover replaced files on Mac?
The sooner you act, the better your chances become. Time Machine keeps hourly backups for 24 hours and daily backups for a month. After that, it keeps weekly backups until your backup drive fills up. For best results, try to recover files within a few days of replacement. -
Q: Can I recover replaced files on Mac without Time Machine?
Yes, you can still recover replaced files even without Time Machine backups. Try using third-party recovery tools like Recoverit. Check iCloud backups if you use cloud storage. Many apps also keep their own version histories that you can access through the File menu. -
Q: Why can't I find my replaced file in the Trash?
Replaced files don't go to the Trash because they're overwritten, not deleted. The new file takes the same location and name as the old one. This is why you need special methods to recover previous versions of overwritten files rather than just checking the Trash.


