

 TL;DR:
You can recover unsaved Word documents on a Mac using built-in temporary caches or AutoRecovery, while permanently deleted files require restoring from pre-configured system backups or specialized recovery software.
● Retrieve unsaved progress caused by crashes by pasting `~/Library/Containers/com.Microsoft.Word/Data/Library/Preferences/AutoRecovery` into Finder, executing `open $TMPDIR` in Terminal, or using Word's Version History if the document was saved at least once before.
● Restore permanently deleted or formatted `.doc/.docx` files through pre-enabled Time Machine or iCloud backups, or utilize third-party applications like Wondershare Recoverit if native system backups are unavailable.
● If you accidentally clicked "Don't Save", you must search the Terminal temporary folder immediately before the system clears the cache, whereas recovering data from physically damaged Mac storage drives requires expensive professional cleanroom services.
Ask AI for a summary
 ChatGPT
 Perplexity
 Gemini
 Claude
 Grok
Grok
We've all been there. Your Microsoft Word crashes, or you accidentally close it down, only to realize you haven't saved the latest changes or the file itself. Even worse, you mistakenly delete a file you still need.
Don't feel bad, though. These disheartening scenarios happen to thousands of Office users daily, but there is good news to share about such situations. In most cases, it's possible to recover Word documents on Mac, regardless of whether you're dealing with deleted or unsaved items.
Today's guide will explore these Mac Word recovery methods. By the end of this article, you'll know exactly how to find and retrieve lost Word documents on a Mac.
In this article
Get Back Deleted/Lost/Damaged Word Files Fast!

Ways Your Word Files Can Get Lost
To help you master the unsaved Word document recovery on Mac devices, we've compiled a list of the most plausible file loss scenarios, including their causes and respective solution methods. You can find it below and use it to match your specific data loss situation with a possible solution.
| Data Loss Scenario | Cause | Solution |
| Accidentally Deleting a .doc/.docx File or Formatting an HDD/SSD | – You mistakenly deleted the Word files you still need. – Formatting the Mac's internal or external disk with .doc/.docx files. |
Way 1: Recover Deleted Word Documents Using Recoverit Way 2: Retrieve a Deleted Word Document From the Trash Bin Way 3: Restore Deleted Word Documents Using Time Machine Way 4: Use iCloud Backups |
| Malware and Viruses | – Infection through suspicious emails, Image names, and downloaded apps. | Way 1: Recover Deleted Word Documents Using Recoverit Way 3: Restore Deleted Word Documents Using Time Machine Way 4: Use iCloud Backups |
| Corrupted Word Files | – Mac's HDD/SSD sector failure. – Older or unused external disk drives. |
Way 1: Recover Deleted Word Documents Using Recoverit Way 3: Restore Deleted Word Documents Using Time Machine Way 4: Use iCloud Backups |
| Accidentally Closing a Word Document Without Saving | – Exiting without saving progress. – Power loss. |
Method 1: Use Word's Version History Method 2: Use Word's AutoRecovery Feature Method 3: Use Terminal |
| Microsoft Word and macOS Crashes | – Memory leak. – Overheating the device. – Opening a massive Word file. – Power loss. |
Method 1: Use Word's Version History Method 2: Use Word's AutoRecovery Feature Method 3: Use Terminal Method 4: Contact a Data Recovery Service |
| Physically damaged storage device | – Failing Mac HDD/SSD. | Method 4: Contact a Data Recovery Service |
How to Find Unsaved Word Documents From Mac
While recovering deleted Word documents on Mac requires dedicated data recovery tools, Time Machine or iCloud backups, and luck finding these files in the Mac's Trash Bin, things are different regarding Word documents that haven't been saved. As a result, unsaved Word document recovery on Mac uses the following solutions.
Method 1: Use Word's Version History
Mac users have more luck with unsaved files, as many apps automatically save versions when being worked on, opened, saved, duplicated, locked, renamed, etc. These file versions can be used to recover unsaved Word files on Mac, and here's how:
- Launch the Microsoft Word app and open a recent version of a file you need to recover.
- Navigate to File > Browse Version History.

- Browse the panel that holds the previously saved versions to find the one you need.

- Select a version of the file, open it, and tap Restore to revert your unsaved Word document to this version.

Method 2: Use Word's AutoRecovery Feature
Over the years, Microsoft has noticed the frustration of users who accidentally exit the app without saving or frequently lose files because of app and system crashes. That's why the company developed a fantastic tool to prevent this—the AutoRecovery feature.
Thankfully, it's enabled by default and saves a copy of your Word file every 10 minutes. You can use that copy to restore your unsaved file:
- Launch Finder and type “AutoRecovery” in the window's Search bar, ensuring you select This Mac to search the entire device.
- You should see Word documents like “AutoRecovery save of…”

- Double-click such a Word file and open it through Microsoft's app.
- If it's the file you want, save it to a safe location. If it isn't, check the other AutoRecovery items.

As it uses Microsoft Word's AutoRecovery feature, this method only works for files opened or worked on during an app or system crash.
Command + Shift + G in Finder and paste this path to find your unsaved files:~/Library/Containers/com.Microsoft.Word/Data/Library/Preferences/AutoRecoveryMethod 3: Use Terminal
While slim, there's a chance that you can recover unsaved Word documents on a Mac with Terminal. To reach it, you can follow these steps:
- Launch Terminal by tapping on Launchpad and searching for this utility.
- Type in the following command and press Enter.
open $TMPDIR
- Browse the folder and locate temporary Word files.

- Open the file and save it to a safe location.
Navigating the temporary folder can be challenging, so searching for the file's exact name is best.
Method 4: Contact a Data Recovery Service
When all else fails, or you can't recover unsaved Word documents on a Mac by yourself, it might be time to contact the professionals. Utilizing a data recovery service can be expensive, but the experts working in state-of-the-art recovery cleanrooms can get your files back, even if your physical storage device is damaged.
How to Recover Lost Word Documents on Mac
Now that we know about the various Word data loss situations and the culprits behind these issues, we can immediately explore the top solutions and show you how to recover deleted Word documents on a Mac. Below are the four most common methods, so let's dive right in.
Way 1: Recover Deleted Word Documents Using Recoverit
Utilizing a dedicated data recovery tool is your best bet for quick and efficient file restoration operations. Here, an app like Wondershare Recoverit emerges as a fantastic solution, providing highly effective search and recovery algorithms in a beginner-friendly and remarkably straightforward user interface.
Using it for Mac Word recovery is effortless, and here are the detailed how-to steps with pictures:
- Open the app, select Hard Drives and Locations on the left, and choose your Mac's partition.

- The intelligent data recovery app will automatically scan the selected partition thoroughly.

- You can adjust multiple file filters to search for specific data and instruct the app to search for Word documents.
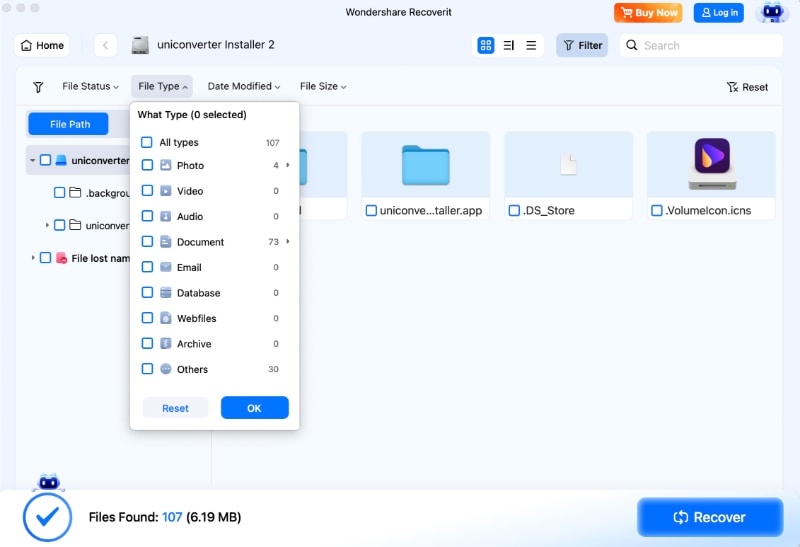
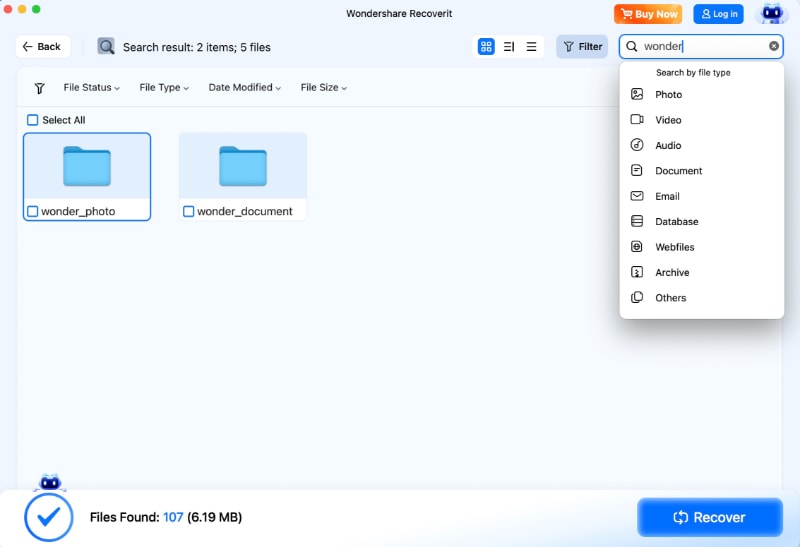
- You can also add keywords to search for Word documents by their name.
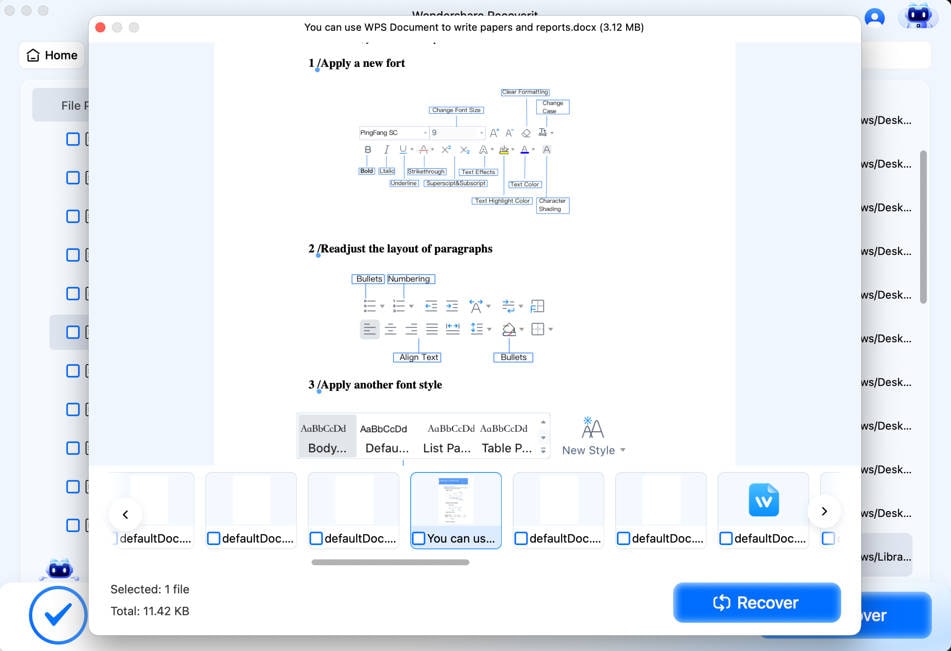
- After locating deleted Word documents, tap the Preview button to verify their integrity before clicking Recover to save them.
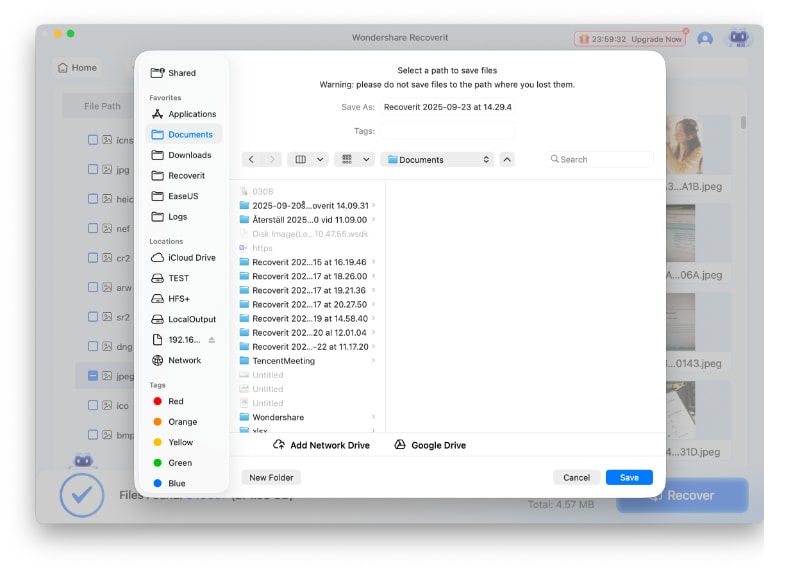
- If you're satisfied with the preview and the discovered data, select the files and hit Recover. Then, choose a location and tap Save to get the items to a safe location on your Mac.
That's everything you'll need to do regarding Wondershare Recoverit Mac Word recovery. These effortless steps make the app indispensable for all data loss situations.
In addition, it can retrieve deleted data from over 2,000 storage devices, including internal disk drives, external devices, USBs, NAS servers, RAID configurations, etc. The app is also available for Windows users.
Way 2: Retrieve a Deleted Word Document From the Trash Bin
There's always a chance that your Word documents have only been deleted from a folder they're usually saved in. If that's the case, you might be able to find them in the Mac's Trash Bin, so let's immediately see how you can restore them in such an unlikely scenario.
- Locate the Trash Bin on your Mac's dock and open it.

- Search for your Word documents. You can use Mac's Search tool in the top right corner.
- Right-click on a deleted Word file and tap the Put Back option to return it to its usual folder.

While undoubtedly an effortless Mac Word recovery method, the chances of finding a deleted file in Mac's Trash Bin are slim.
Way 3: Restore Deleted Word Documents Using Time Machine
Users who've remembered to turn on their Time Machine backups can also use this method to recover deleted Word documents on a Mac:
- Connect the external storage drive that holds your Time Machine backups.
- Open the folder that usually houses your Word documents and launch the Time Machine by clicking its icon in the top right and selecting Browse Time Machine Backups.

- Using the Arrow keys, browse the backups and find the Word file you want to restore.
- Select the Word file and tap the Restore button underneath it to retrieve it.

Way 4: Use iCloud Backups
Users who haven't set up their Time Machine can still use backups to recover deleted Word files on a Mac, as iCloud offers another built-in backup option you can use. Here's how:
- Open a browser and navigate to your iCloud account.
- Tap the Menu button in the top right corner and click on Data Recovery.

- Click the Restore Files option.

- Select your deleted Word documents and tap Restore.

Like with Time Machine, this method is only usable if you've turned on automatic iCloud backups.
How to Avoid Losing/Deleting Word Documents in the Future
Preventing Word data loss is far better than looking into various recovery methods. That's why we've compiled a list of tips that can help you avoid similar situations in the future. Let's dig into it.
Use AutoRecovery
Although it should be enabled by default, you should also manually check the functionality of Microsoft's AutoRecovery feature in your Office apps. This built-in tool can usually be found by navigating to Preferences > Save > AutoRecover in any Microsoft Office app, but it might depend on a specific version of Office. Here, you can adjust the feature's timing settings and save location.
Get a Surge Protection System
Sudden power losses are one of the main culprits behind data loss, especially for desktop computers like iMacs and Mac Pros. That's why investing in a reputable surge protection system is highly recommended, as it can save your electronic devices and prevent data loss caused by sudden power surges.

Use a Reliable Antivirus
Contrary to popular belief, Macs can be infected by viruses. That's why using reliable antivirus software is advised. Most such apps have real-time protection shields to prevent data loss, including losing Word files on a Mac device.
Use a Backup Tool
You can opt for external device backups with Time Machine, cloud-based backups with Apple's iCloud, or third-party apps that can create quick backups on a USB stick.
Don't Empty the Trash Instantly
Most of us usually right-click the Trash Bin and tap Empty Trash immediately upon deleting a file or folder, which isn't a great habit. By avoiding these actions, you can save yourself a lot of trouble, as you leave room for effortless recovery in case you need any of the deleted files back.
Manage Your File Correctly
Correct file management goes a long way in keeping your vital data safe. It includes uninterrupted file transfers, safe external disk drive/USB ejection practices, and frequent saving. It would also help to practice using multiple backup locations and avoid force-closing any apps to prevent data loss.
Conclusion
While deleted and unsaved Word documents are a nuisance, all Mac users experience them at least once in their lifetime. These files often get accidentally deleted, formatted, infected, and corrupted, while the Word app and macOS can crash due to HDD/SSD failures, overheating, memory leaks, and power loss.
Fortunately, solutions exist for most of these data loss scenarios. For deleted Word documents, recovery solutions include Time Machine and iCloud backups, file recovery from Mac's Trash Bin, and data recovery apps like Wondershare Recoverit, arguably the top solution for most data loss scenarios.
For unsaved Word data, Mac users can utilize the Word app's Version History and AutoRecovery features or use Terminal to dig the file out of the temporary folder. A professional data recovery service is also an option, but due to its cost, it should only be used for physically damaged storage devices.
FAQ
-
How do you recover unsaved Word documents on a Mac without AutoRecovery?
If, for whatever reason, your Word app's AutoRecovery feature is turned off, you won't be able to find copies or versions of your document anywhere on your Mac. Instead, you'll have to rely on Wondershare Recoverit, a dedicated data recovery tool that can quickly and efficiently retrieve files in many data loss situations. -
How do I recover a permanently deleted Word document on a Mac?
While permanently deleted Word documents aren't as easy to deal with as unsaved files, they can be recovered through Time Machine and iCloud backups. If you don't have those, you must use a professional data recovery service like Wondershare Recoverit. Of course, you can also take your Mac to a data recovery center, but remember: these services are expensive. -
Can I recover an unsaved Word document if I clicked "Don't Save"?
Yes, it is possible. If you clicked "Don't Save" on Mac, immediately check the Temporary Items folder via Terminal (open $TMPDIR) or look for AutoRecovery files. However, success depends on how quickly you act before the temporary cache is cleared.


