How to Use OneDrive and Fix OneDrive Issues on Mac
Microsoft OneDrive provides seamless cloud storage integration for Mac users, and most sync failures or app crashes can be directly resolved by executing the hidden reset script, managing file size limits, or modifying Office upload settings.
● To fix persistent sync issues or a damaged app, force a reset by right-clicking the OneDrive application, navigating to Contents > Resources, and running the "ResetOneDriveApp.command" script.
● Prevent common upload errors by ensuring individual files remain under 15GB, keeping file paths strictly under 255 characters, and unchecking the "Use Office 2016 to sync Office files" preference.
● If local and cloud copies of your files are accidentally deleted, you can scan your Mac's original storage drive using Wondershare Recoverit Mac Data Recovery to retrieve the lost data.
Ask AI for a summary
With the influx of cloud-based storage services like MEGA, Google Drive, iCloud, and pCloud over the years, choosing the right one can be daunting. Many claim to be the best, but a common issue like "OneDrive is damaged on Mac" can turn users away.
File safety and affordability remain priorities, which is why we focus on Mac OneDrive. Whether you're dealing with "OneDrive not opening on Mac" or wondering "how to refresh OneDrive on Mac," this guide will walk you through everything you need to know.
Before closing this page, you'll understand Microsoft's proprietary storage service better. OneDrive now works seamlessly on your Mac, making it an excellent choice for secure, reliable cloud storage.
What Is OneDrive?
OneDrive is a storage service developed by Microsoft for storing or hosting files in the cloud (online). This means as long as you have a computer with an internet connection, be it Windows or Mac, you can easily access your files from wherever you are. Terribly convenient, isn't it?
How does it work, you ask? The process is simple: You only need a Microsoft account, an internet connection and a little bit of patience; or rather, a lot of it, if your files are on the larger side.
Here's what happens: The Microsoft account will enable you to access One Drive; then an internet connection will serve as a bridge to those files; then patience as the process is carried out because the upload of files, regardless of internet speed and strength, takes longer than downloading them.
How to Use OneDrive on Mac?
It's always such a pleasant surprise when applications developed by Microsoft end up with Apple. The rivalry between the two companies makes it seem unlikely they would shake hands and develop apps that complement both their individual operating systems. But OneDrive is proof that the needs of both their customers outweighs anything else.
With that out of the way, is using Mac OneDrive easy and convenient? Yes. Using it is really little different from using any folder on your Mac. The only real difference is the data you store in your local OneDrive folder is also stored on OneDrive servers.
The default folders in OneDrive are Pictures, Documents, and Public, but you can add and name as many as you want. Copying files into OneDrive couldn't have been easier too: Just copy or drag and dump everything into the folder and it will seamlessly be uploaded to the cloud.
Accessing the floating files in the cloud is even easier because you can do so from any computer or device via the OneDrive web interface; some devices even have versions of the OneDrive app, negating the need to access the web interface.
Solution 1: How to Download and Install OneDrive on Mac
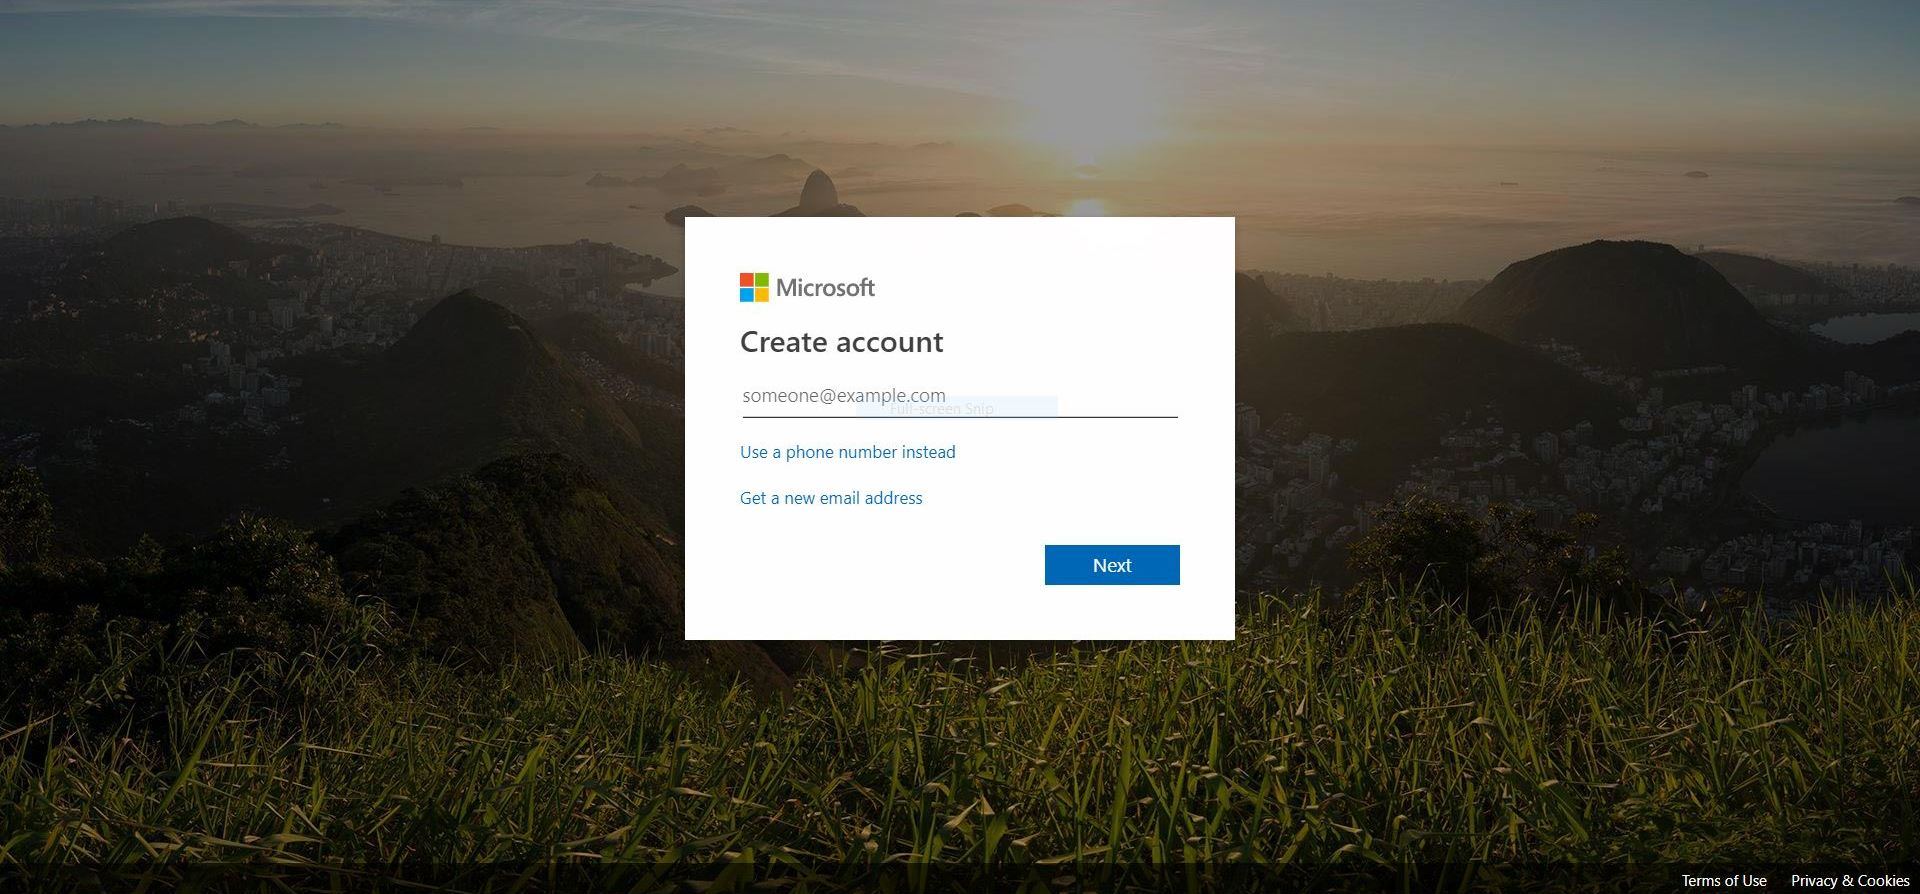
1. If you don't have a Microsoft Live ID, the first step is to create it. Follow this link to do that: https://signup.live.com/
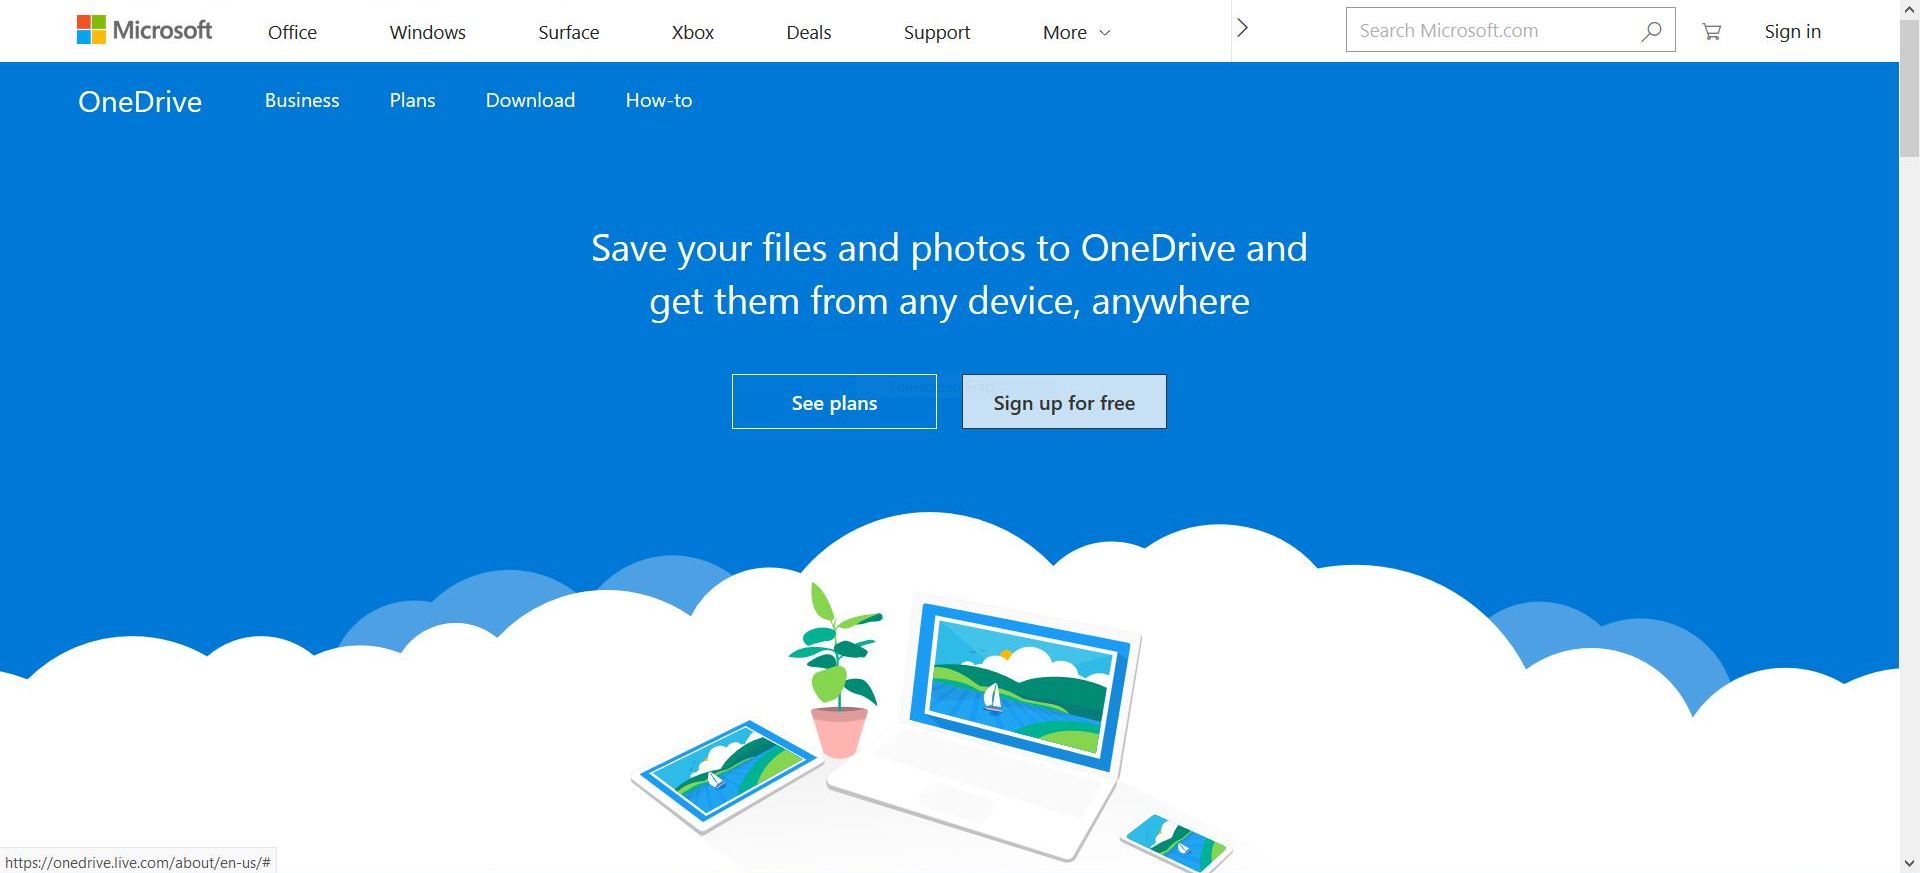
2. Once you're done with that, go to this website https://onedrive.live.com/
3. Logged in to the website above with your newly-created Microsoft Live ID by clicking on "Sign In". It's located at the top-right part of the window.
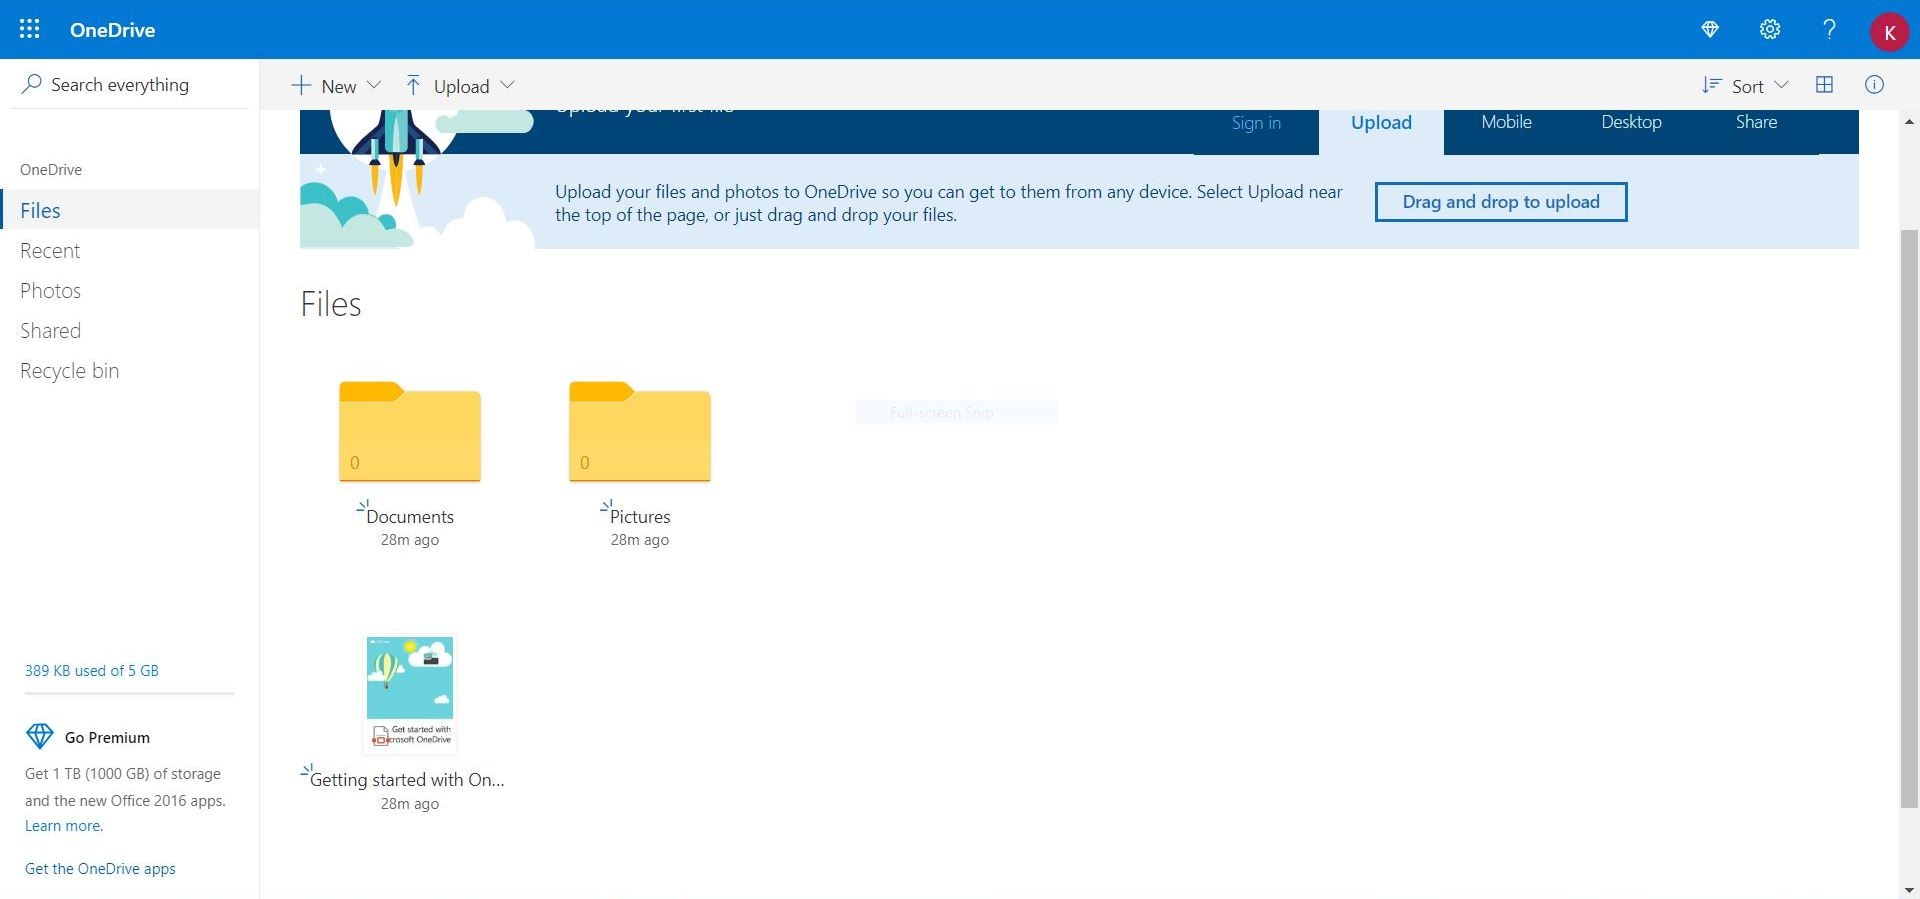
4. Despite the type of web browser you are using, the next window to open up you will show you the default configuration for the OneDrive folder. At the bottom-left of the sidebar, you will see "Get the OneDrive apps". Click on it.
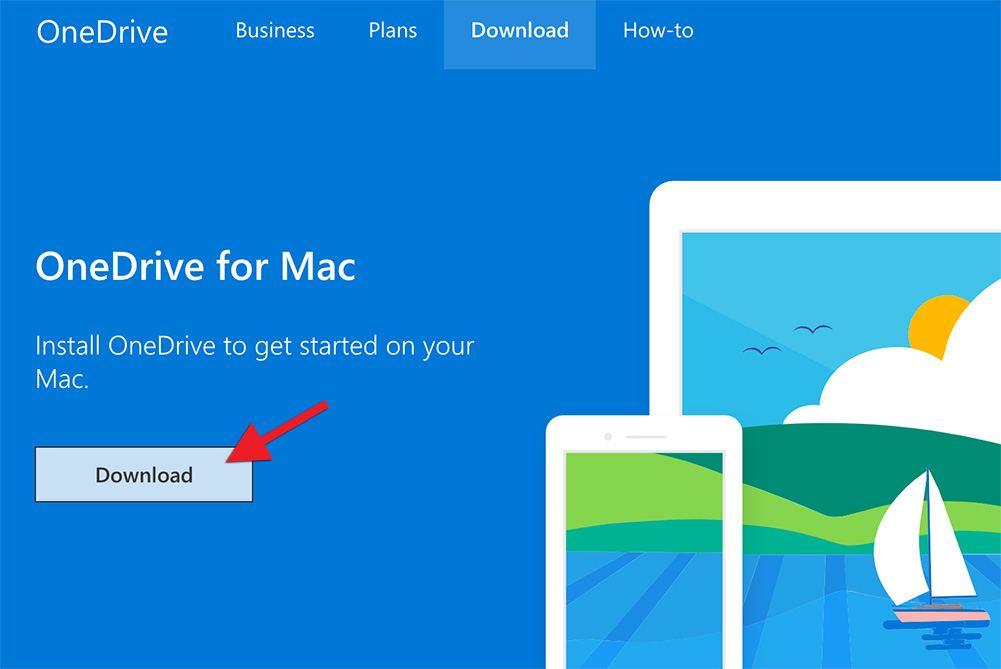
5. It will open up a new window. Click on "Download."
6. Once it's done, open up your Mac's downloads folder.
7. You will see "OneDrive.pkg" in the folder. Double-click it.
8. A set of instructions will guide you towards the OneDrive installation. Follow them appropriately.
That's one way to download and install OneDrive, but you can also download it via your Mac App Store.
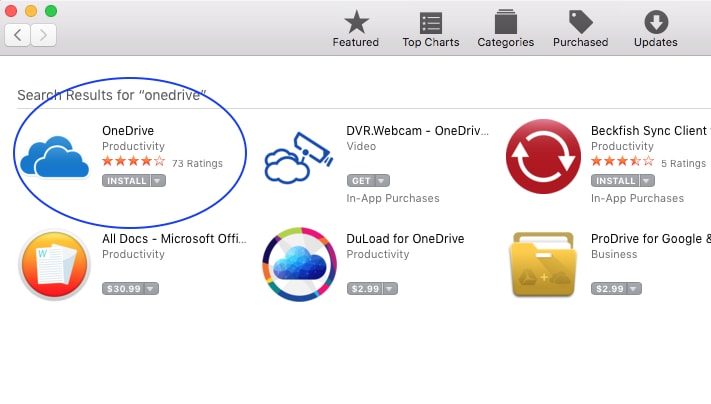
1. Open up your Mac App Store.
2. Type "OneDrive" in the search field at the upper right section of the window.
3. Once you find it, click on "Install" below the OneDrive icon.
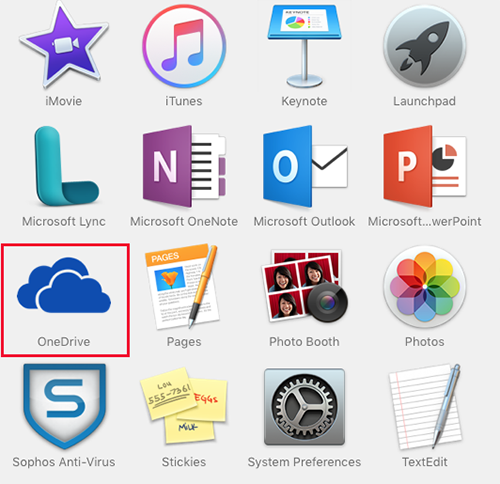
4. Once that's done, you only need to go to your Mac's "Applications" folder and click on the OneDrive icon (two blue clouds) to open it up. There are other ways you can launch the app but this method is quite convenient.
Solution 2: How to Set Up and Reset OneDrive on Mac
Setting OneDrive up can be done two ways, and they are dependent on whether you have an account signed in to OneDrive or not.
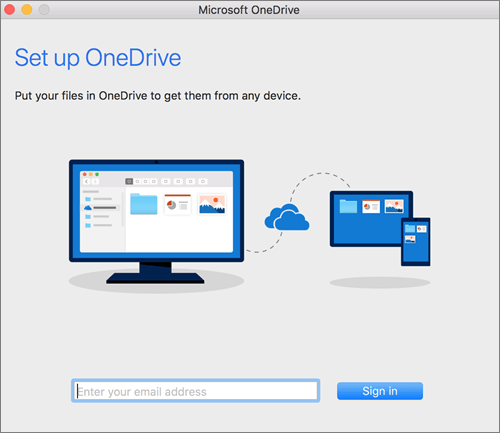
Set Up OneDrive
First Method (No Accounts Signed into OneDrive)
1. Press these keys, "cmd" + "Space", to start a Spotlight query.
2. Type "OneDrive" in it and the "OneDrive Setup" will begin
3. Type in your school or work account and choose "Sign In."
Second Method (Personal Account Already Signed into OneDrive)
1. On your Mac's Menu bar, you should be able to see the "OneDrive" icon. Click on it.
2. Click the 3 dots you see to launch the menu.
3. Choose "Preferences."

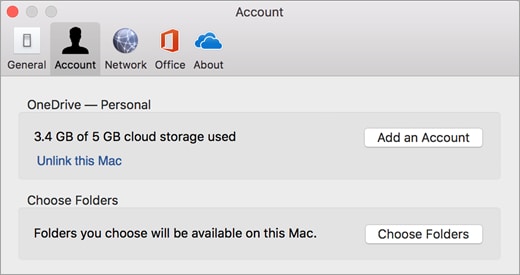
4. Click on "Account."
5. Choose "Add Account." That will start up OneDrive.
6. Type in your school or work account.
7. Click on "Sign In."

Reset OneDrive
There could be instances where OneDrive on your Mac might fail sync properly with your cloud storage. To break this down, it means all the files you've saved in your OneDrive folder on your Mac won't sync with the real OneDrive in the cloud; or perhaps your other devices. Fortunately for you, this is neither a rare nor difficult problem to deal with. Fixing it just requires you to reset your OneDrive app. Then again, for someone who has never done something that, could prove to be quite the challenge. A little help should do you some good, don't you think?
There are several ways you can reset OneDrive on Mac but three methods take priority over all others: Kill OneDrive processes, access and delete the OneDrive keys, and utilize the covert reset OneDrive script.
Note: the solutions introduced below may cause OneDrive re-sync the files stored on your computer.
Kill OneDrive Processes
1. Open up your "Utilities" folder.
2. Launch "Activity Monitor."
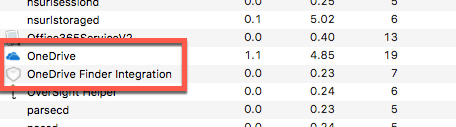
3. Sort the column alphabetically by clicking on "Process Name."
4. Scroll down with your cursor and you'll eventually see "OneDrive" among the list of active processes. There will most likely be two OneDrive items for you to kill: "OneDrive Finder Integration" and "OneDrive."
If you see more than one item with the name "OneDrive", you will need to kill the others too. This is mostly the case if your Mac is running both the Personal and Business version of OneDrive.
5. Highlight the items mentioned above to kill them (so much killing going on here).
6. Click on the "X" icon at the top of the window.
7. You will see a prompt asking you to "Quit" or "Force Quit" the highlighted items. Click on "Quit", but if it fails to close the items, try "Force Quit."
Access and Delete the OneDrive keys
1. Open up "Utilities."
2. Launch the "Keychain Access" utility.
3. Type "OneDrive" in its search panel.
4. In the search results, you will see several items, but only highlight or select those related to OneDrive.

5. Press the "Delete" key.
6. Close "Keychain Access."
Utilize the Covert Reset OneDrive Script
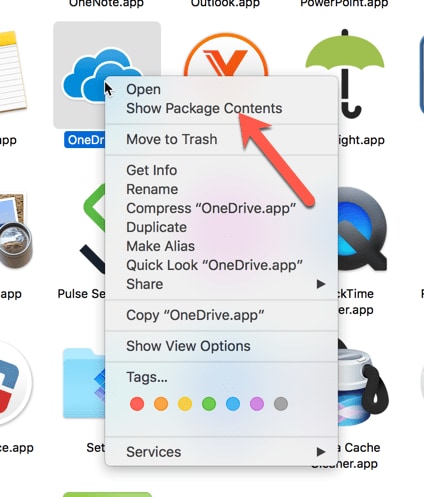
1. Go to "OneDrive" in your Applications folder.
2. Control-click on it.
3. In the menu you see, click "Show Package Contents."
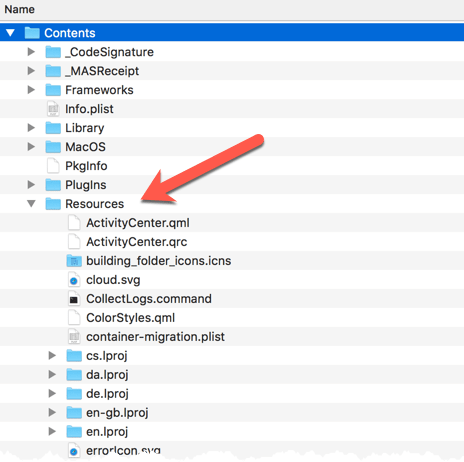
4. Several folders will open up. Click on the "Contents" folder.
5. Click on "Resources."
6. Look for "ResetOneDriveApp.command" and double-click it to run the script. Mind you, it's not an application. If you're prompted to authenticate as an administrator, do so.
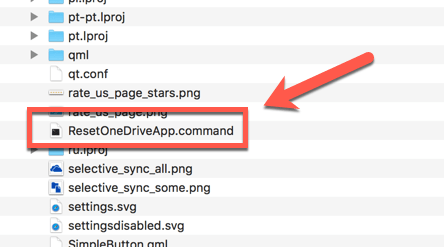
7. Once you run the script, "Terminal" should open up automatically. It will run through some options and close once it's done.

Once you take these 3 steps and launch OneDrive, it will run as if it's a fresh install. You'll have to type your login details and set OneDrive up again, but you've already been taught how to do that, haven't you?
Solution 3: How to Add a Folder to OneDrive on Mac
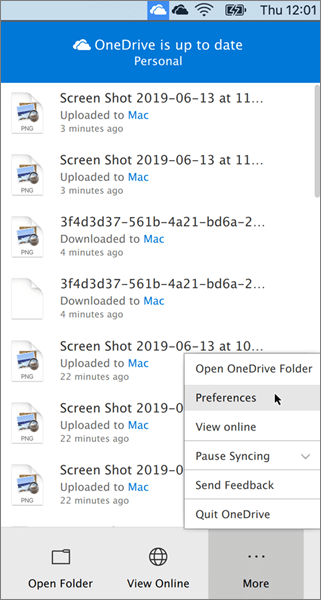
1. Navigate to your Mac's taskbar notification area and choose "OneDrive" from it.

2. Click "More."
3. Click "Preferences."

4. Choose "Accounts."
5. Select "Choose Folders."
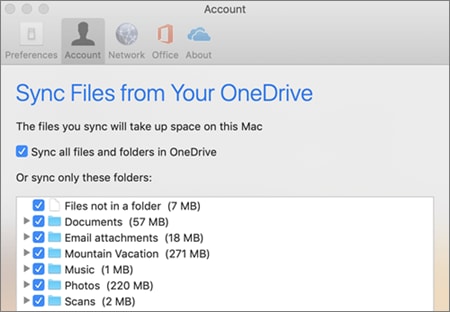
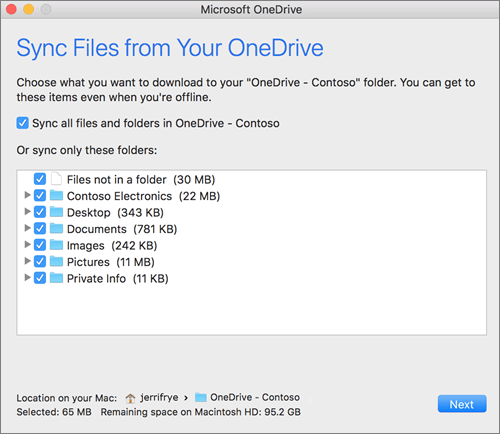
6. A "Sync files from your OneDrive" dialogue box will open up. Untick all the folders you don't want to be added to your Mac. The folders you don't untick have automatically been added to OneDrive.
7. Click on "OK."
Solution 4: How to Change OneDrive Location on Mac
1. Start "OneDrive" from your Applications folder.
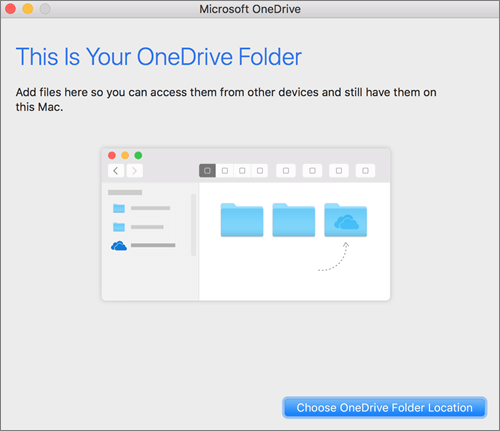
2. On the OneDrive window, click on "Choose OneDrive Folder Location."
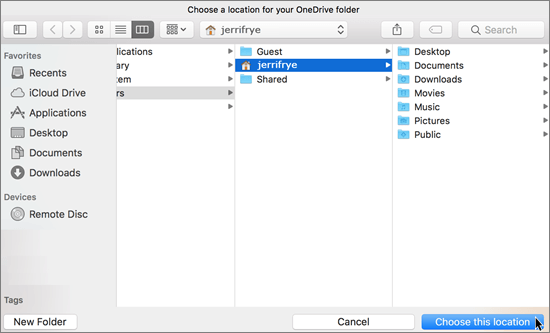
3. You can now choose a particular folder on your Mac to be the default directory for storing and syncing folders and files to OneDrive.
To do that, just click on the chosen folder. Doing that will change the default directory set by OneDrive to the one you chose.
4. Click on "Choose this location." The app will create a new folder in the default folder you selected and name it "OneDrive."
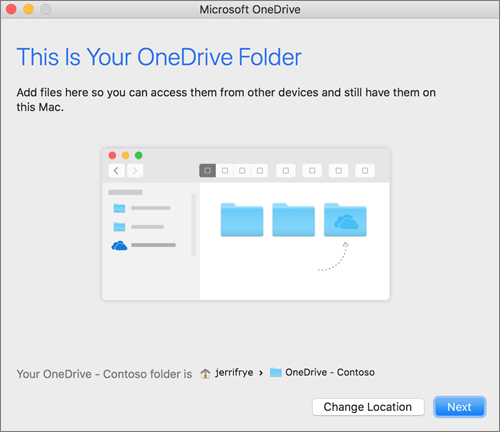
5. A "This is your OneDrive Folder" page will open up. Click on "Change Location."
6. File Explorer will open up with a list of folders on your Mac. Choose the one you want and it will be the new location for your OneDrive, effectively changing your OneDrive main folder.
Solution 5: How to Sync Folder on Mac OneDrive
1. Launch "OneDrive."
2. On the welcome window of the app, you will see "Choose OneDrive Folder Location" to the bottom right. Click on it.

3. You can now select any folder on your Mac and designate it as the primary folder for storing and syncing other files and folders to OneDrive. Once you decide on a folder in the file explorer window, simply click on it.
4. Click "Choose this location." A new folder titled "OneDrive" will then be created in the main folder you chose.

5. A window called "This is your OneDrive Folder" will open up. Click "Next."

6. This will show you a list of subfolders that can also be synced between OneDrive and your Mac.
7. Tick any, all or none of them.
8. Click "Next" again to confirm.
Solution 6: How to Download and Share Files from OneDrive
Download Files
1. Go to this website: https://onedrive.live.com
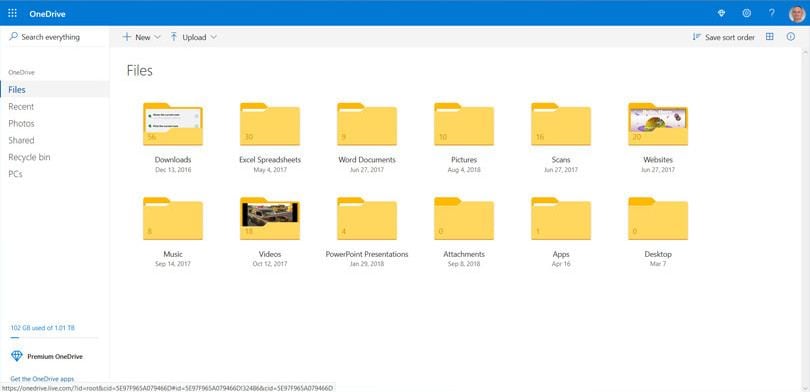
2. Sign in to your account. All your folders will be on the first page you see.
3. Move your mouse cursor over to the particular folder or file you wish to download. A checkbox will appear at the top-right corner of the file or folder.
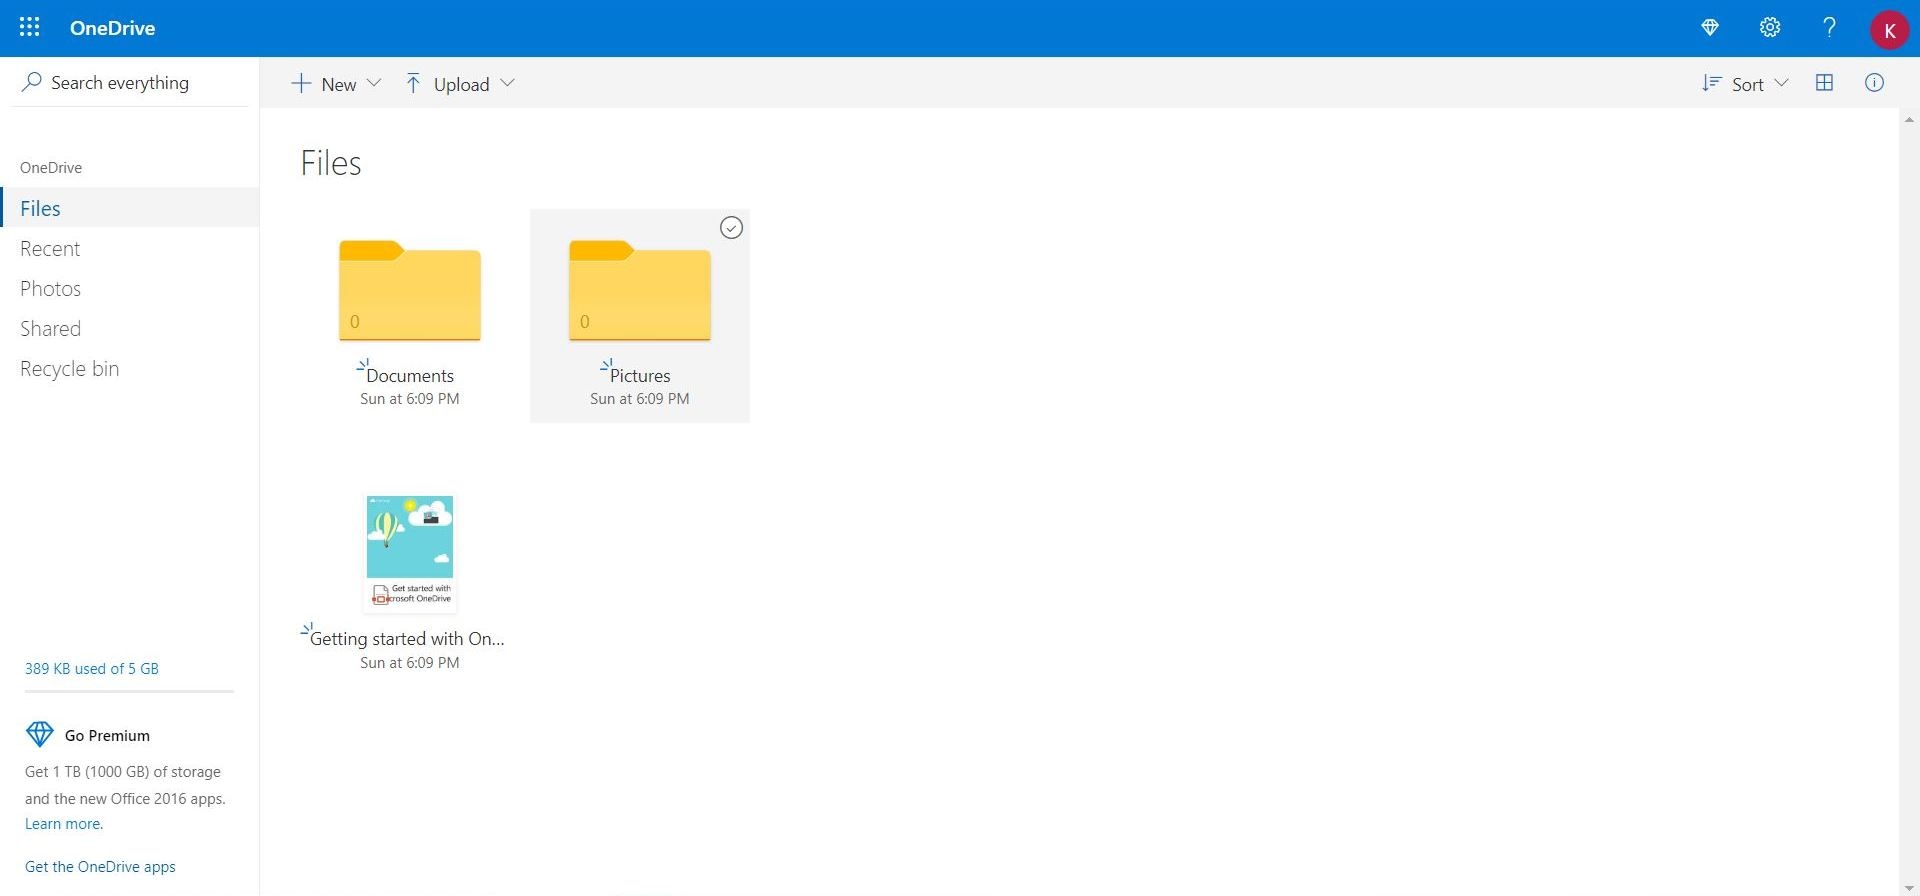
4. Tick on the checkbox of the file or folder and it will turn blue, meaning it has been selected.
5. To download the selected files, click on the "Download" button located on the menu bar at the top. Alternatively, you can right-click the file and click on "Download" in the menu you see.

6. You might be asked to save the download in zip format. Select a location to save it to and the files will then be downloaded. The time it takes for them to be downloaded depends on size and internet speed, of course.
Share Files
1. Open up your browser and go this site: https://onedrive.live.com
2. Sign in to your OneDrive. Your folders should be visible on the first page you see.
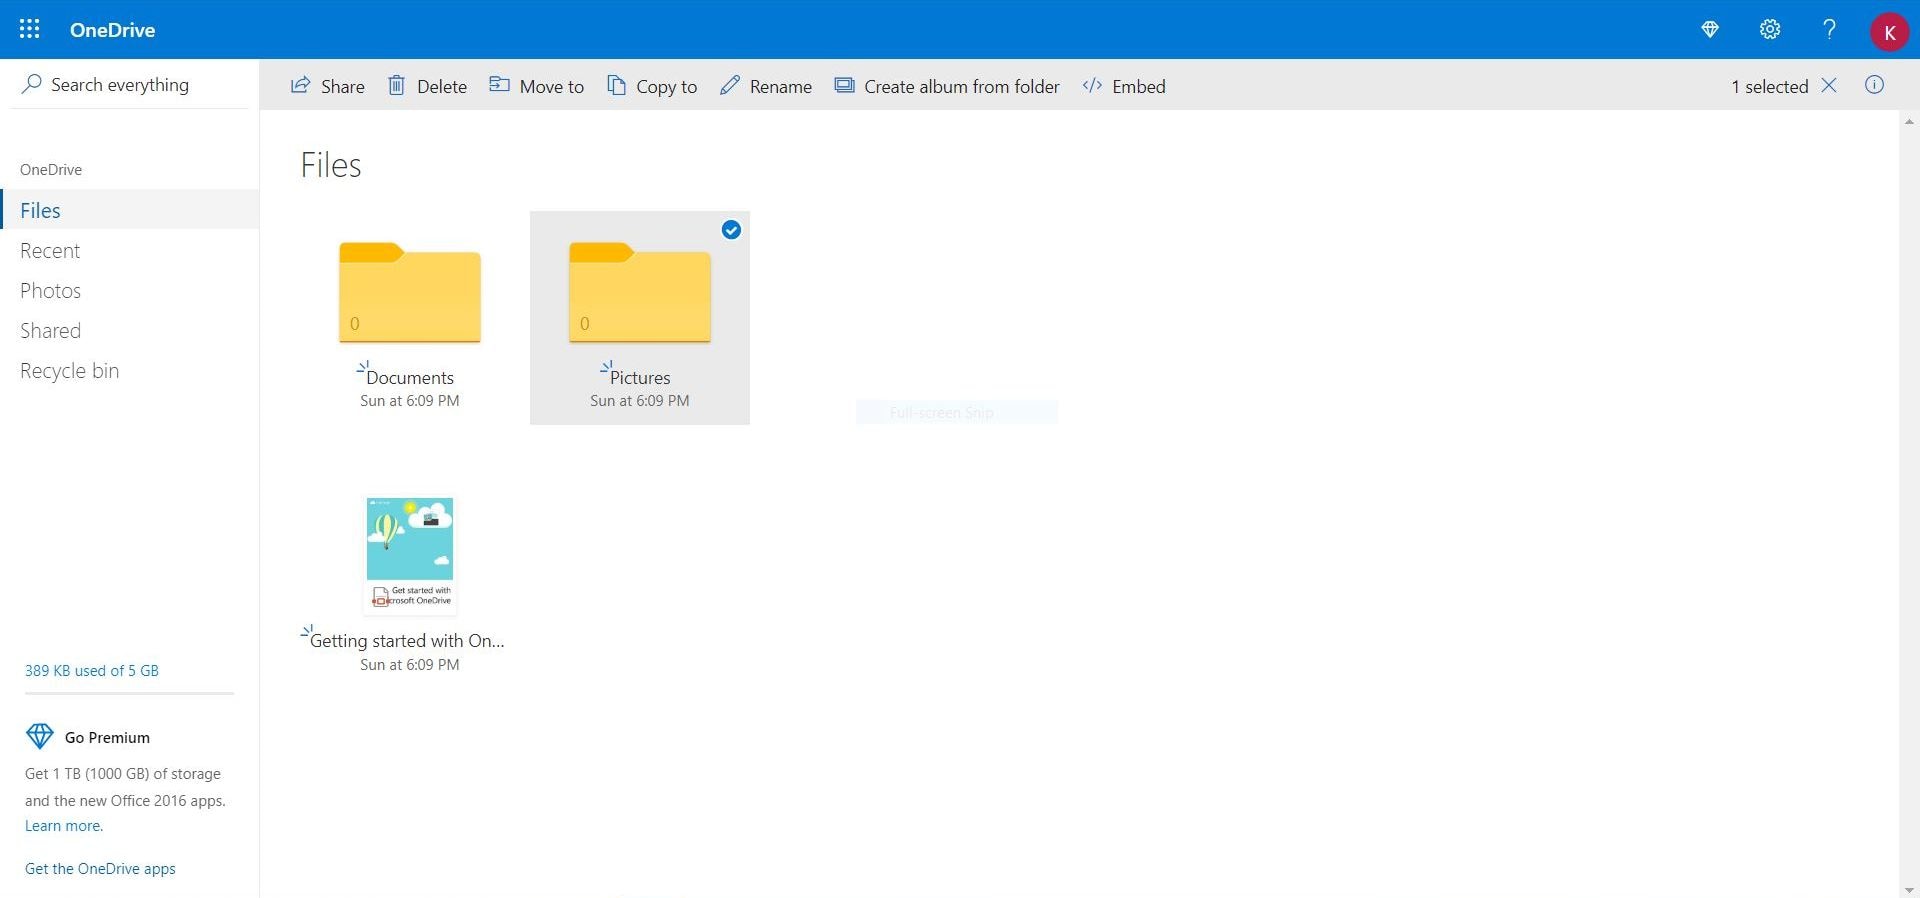
3. Tick the checkbox of any file or folder you want to share and click on "Share" at the top-left section of the screen.
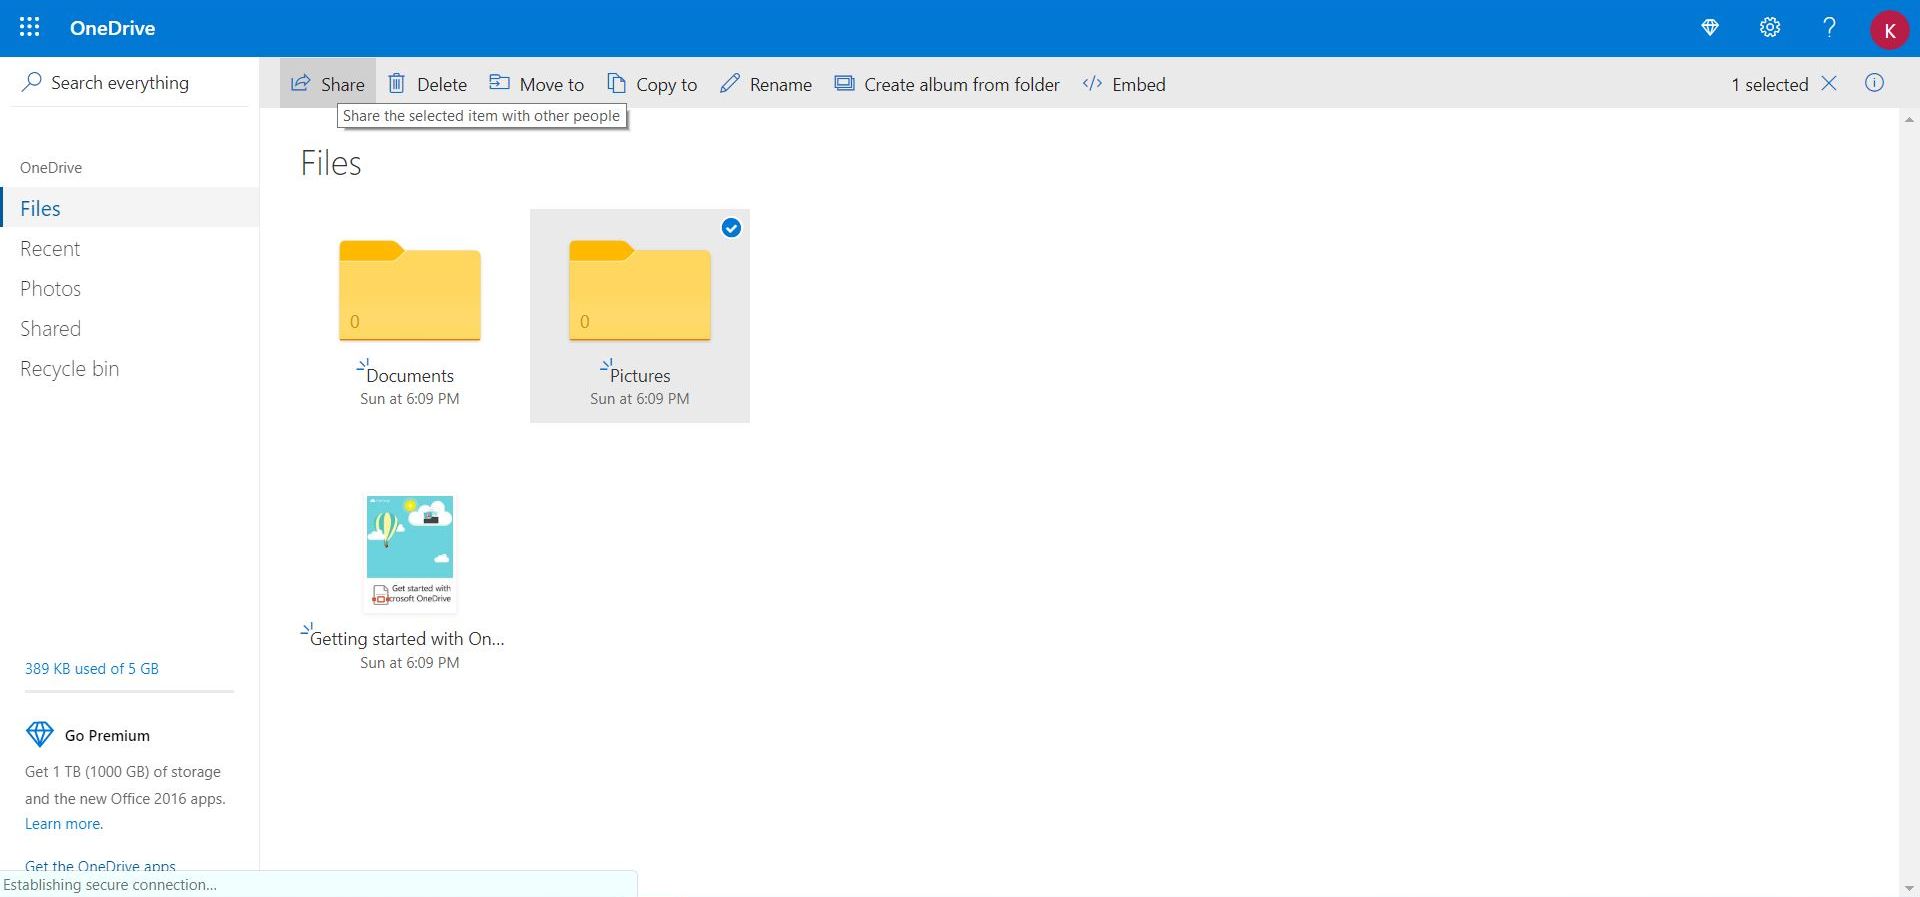
4. A "Send Link" box will open where you will be asked for the name or email address of the person to receive the file or files. Do that and proceed to the next step.
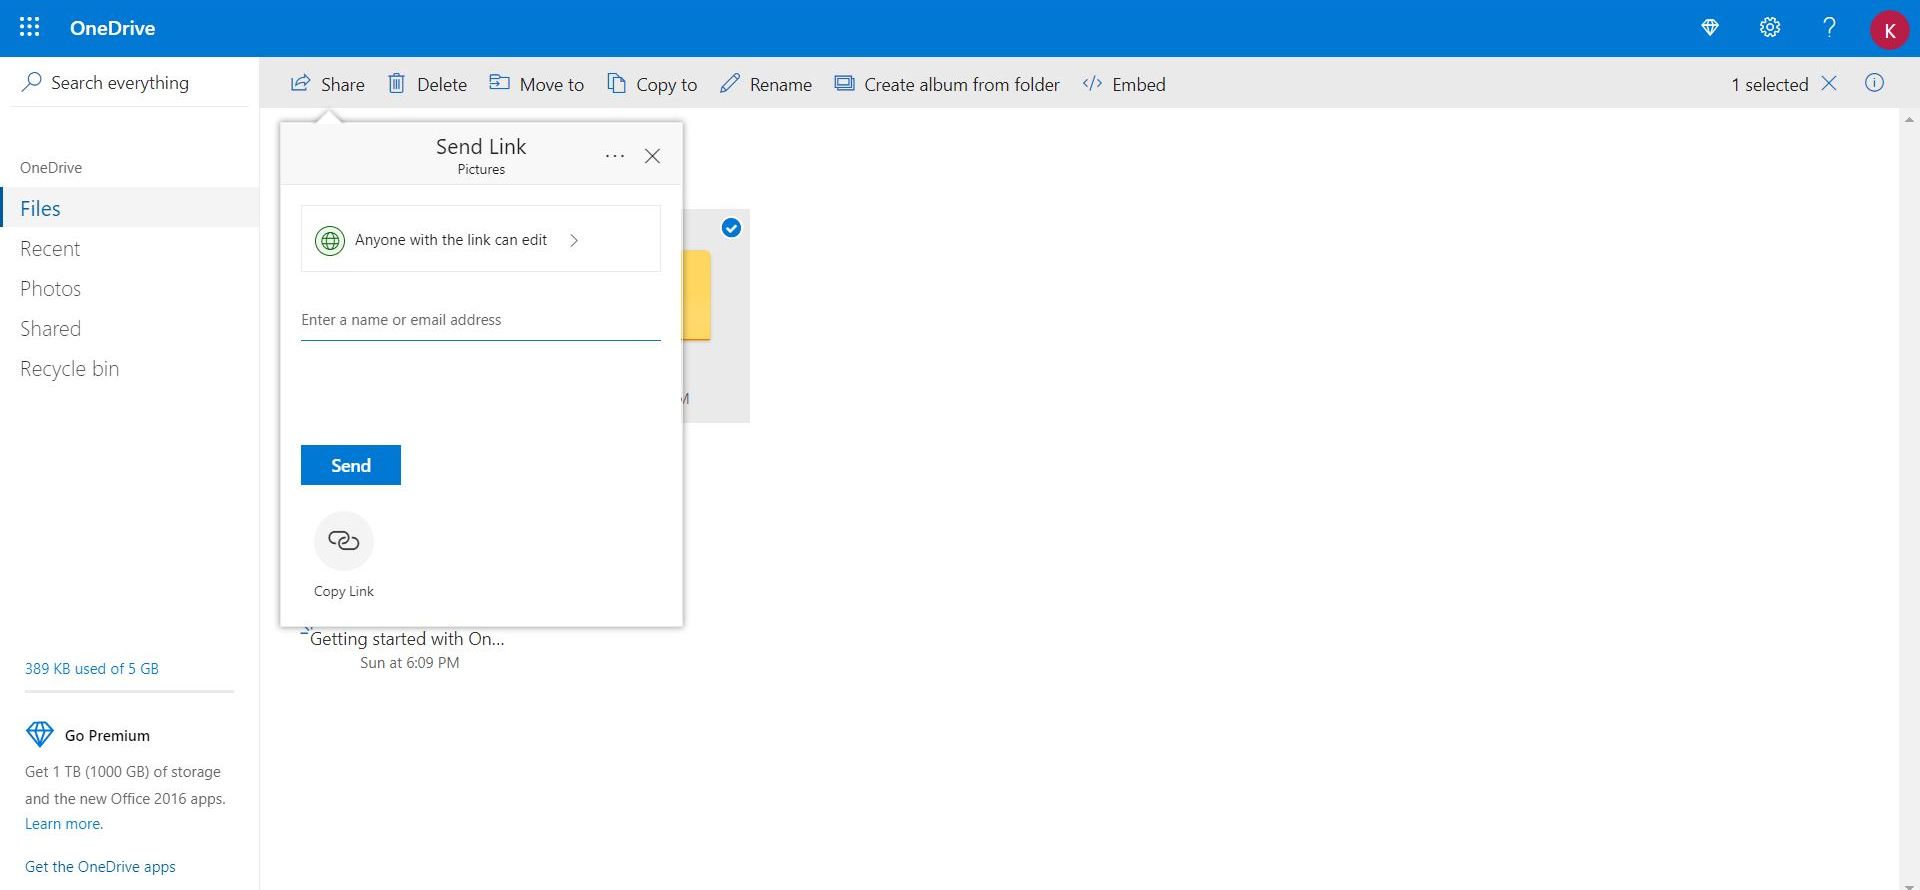
5. Click on "Anyone with the link can edit" and a "Share" box will appear. This is where you set an expiration date and a password if you so wish.
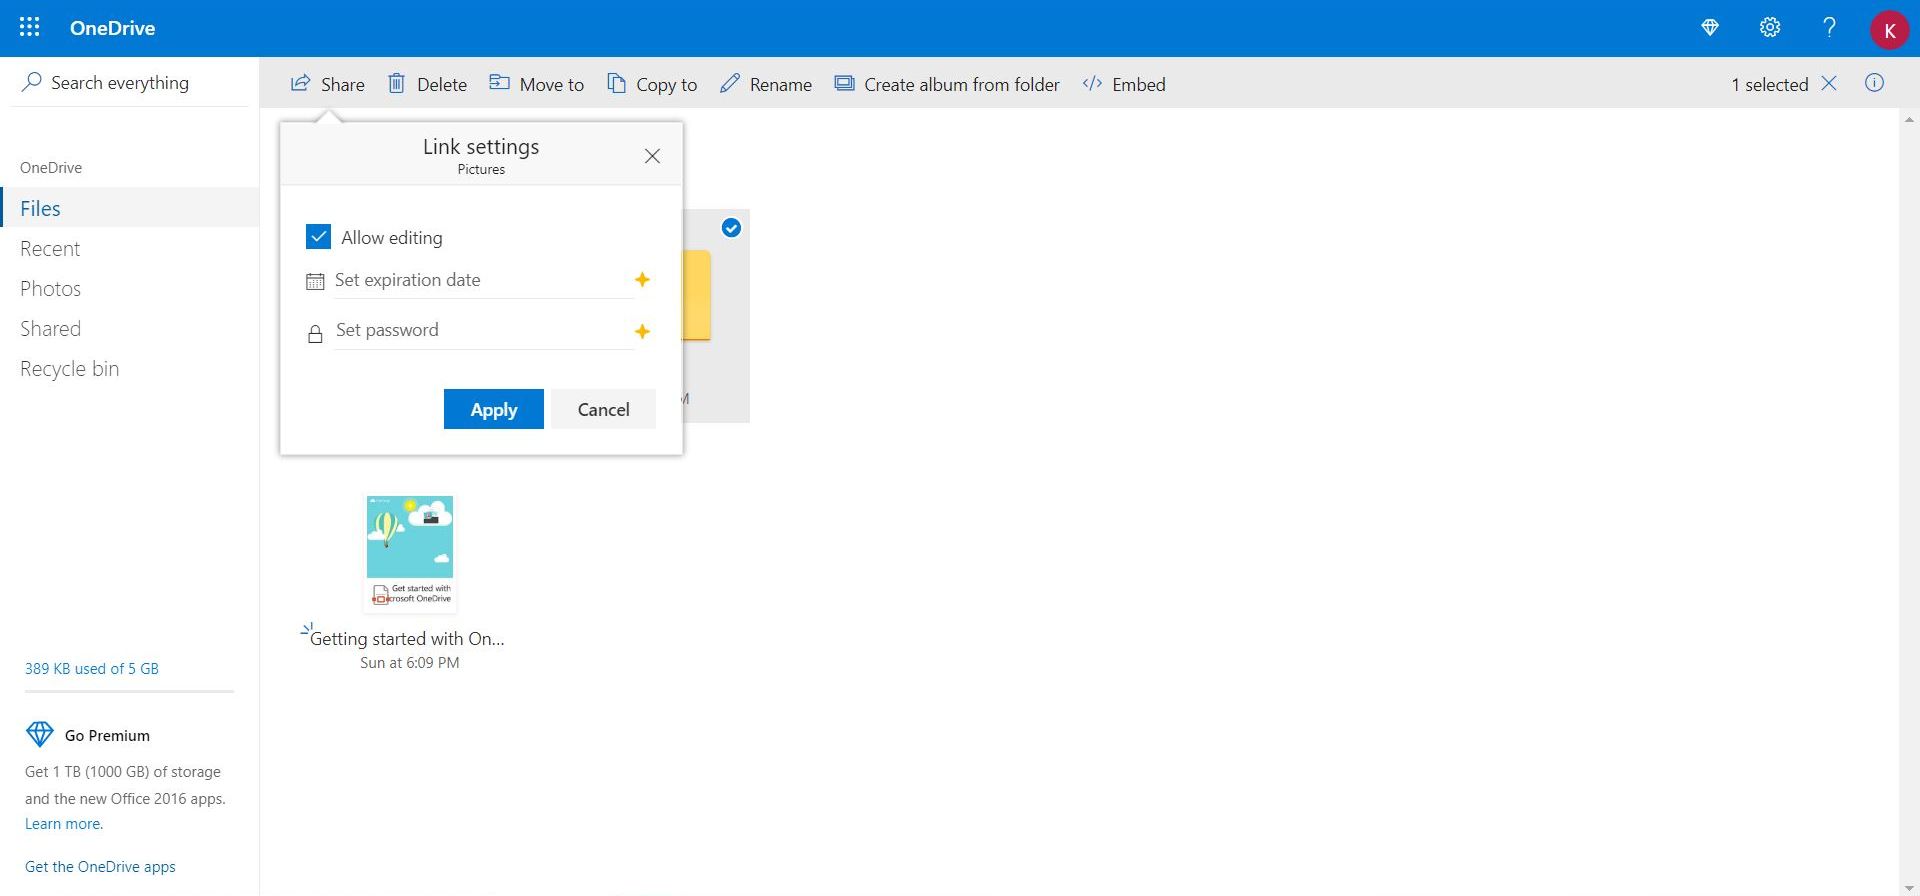
6. Click "Apply."
7. The "Send Link" box will appear again. Click "Send" and the files will be shared.
Solution 7: How to Remove OneDrive on Mac
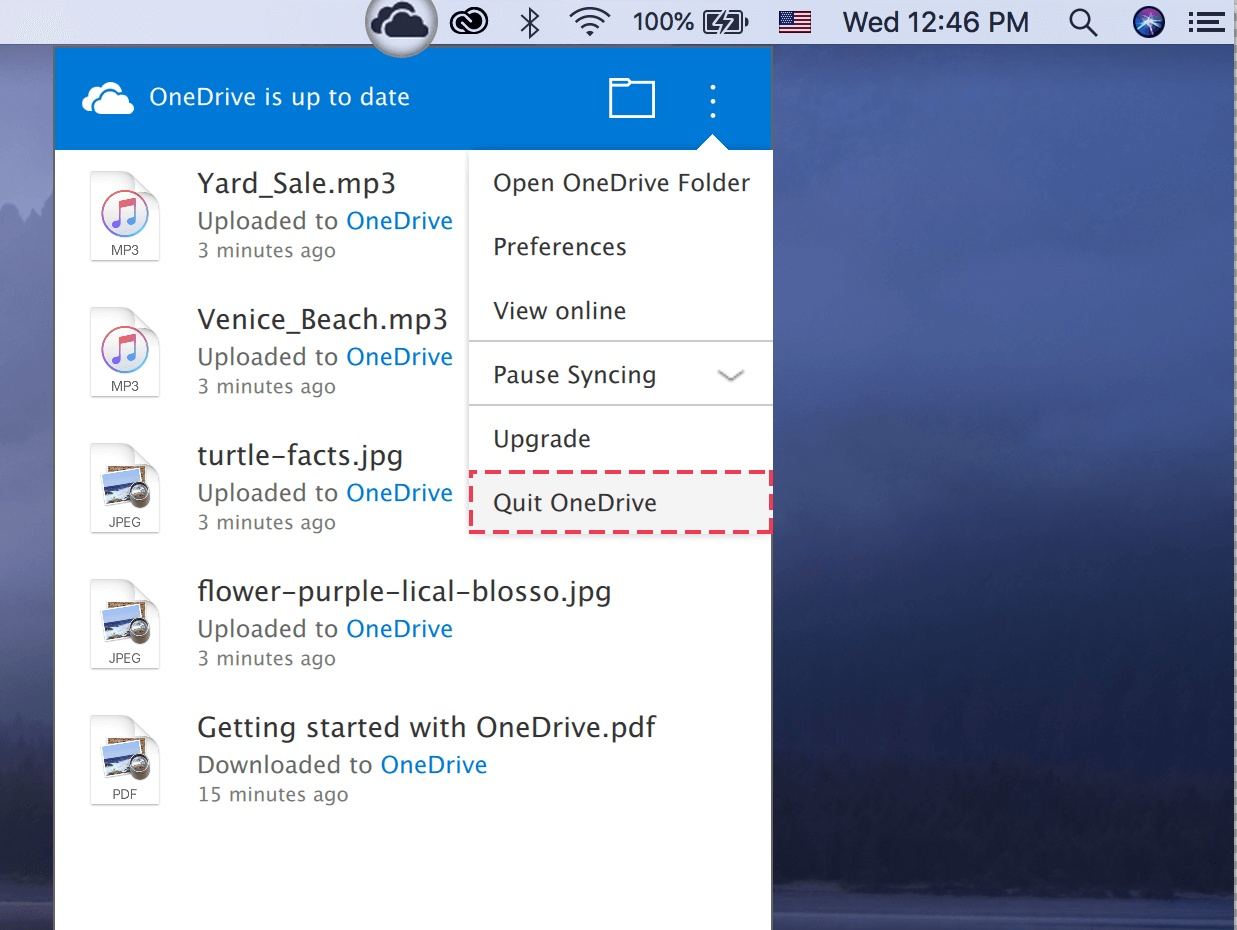
1. You have to close the OneDrive app first. Go to your Mac's toolbar.
2. Click the "OneDrive" icon.
3. Click "Settings."
4. Chose "Quit OneDrive."
5. Next, you have to delete the executable file of the OneDrive. Go to your "Applications" folder.
6. Locate "OneDrive" and right-click on it.
7. Choose "Move to Trash."

8. Alternatively, you can just drag the OneDrive icon-if it's on your desktop-to your Trash.
Solution 8: How to Update OneDrive on Mac
1. Launch "Mac App Store."
2. Click on "Update" in the toolbar. If there's an update for your OneDrive, you'll see it here.
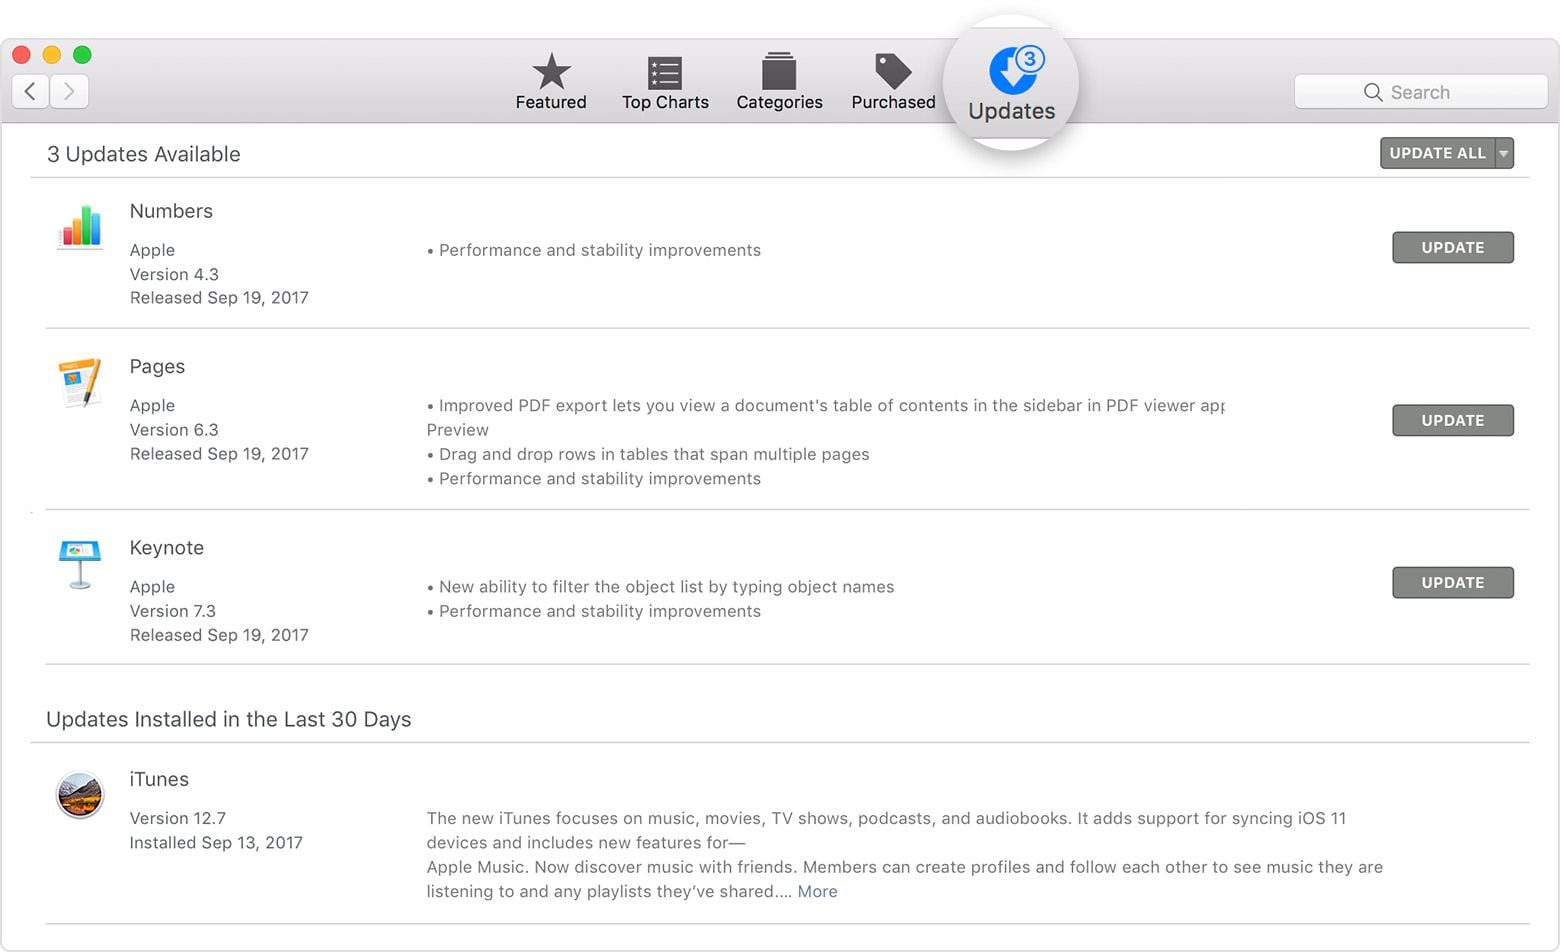
3. Alternatively, you can launch the OneDrive app itself and see if there is an "Update" button you can click.
OneDrive Won't Sync? Fix OneDrive Sync Issues
You don't have to worry much about your OneDrive breaking down in mid-use, but there's a possibility that could still happen for any number of reasons. There are steps you can take to get it back in top shape again, though, and they've been listed out for you below. Happy reading.
Solution 1 (Rectify "Upload Blocked" Error)
1. This error message entails problems when you try to sync Office files. Click on the "OneDrive" cloud icon you see on your Mac's menu bar.
2. Click on the three dots to open it up.
3. Choose "Preferences."
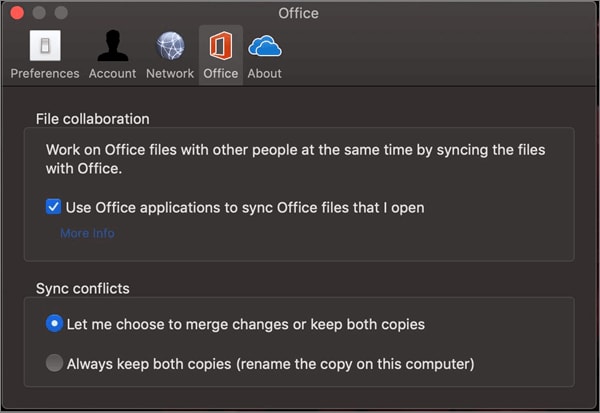
4. Choose the "Office" tab.
5. Untick "Use Office 2016 to sync Office files that I open." There, that should do it. The Office Upload cache system will no longer give your OneDrive sync any more trouble; it was the initial cause of the error, anyway.
Solution 2 (Fix Internet Connection)
OneDrive needs an internet connection to sync files and work properly, obviously, so any drop in internet connection could lead to an error of sorts.
Solution 3 (Reduce File Size)
Try to compress or reduce your OneDrive files to be less than 15GB. Anything larger than that could culminate in errors when syncing files and folders
Solution 4 (Ascertain the OneDrive Process is Still Running)
Open up "Activity Monitor" and select the "CPU" tab. Check the "Process Column" to see if OneDrive is there. For all you know, it might not even be running, hence leading to errors.
Solution 5 (Shorten the File Path)
Any file path that contains more than 255 characters is likely to give errors, so shorten the name of your files, folders, and sub-folders in OneDrive
How to Recover Downloaded OneDrive Files
Once you put your files in OneDrive, their safety is guaranteed because they are stored in the cloud; inaccessible to anyone else but you. And you have copies of the files on your Mac too, so even if you lose either of them, it's safe to assume you still have the files either on your Mac or OneDrive servers, isn't it?
Wait, you don't have copies of the files? And you deleted both the ones on your Mac and in your OneDrive? That's not a very smart thing to do, is it?
No worries. You can save yourself the trouble of installing and uninstalling different recovery apps because all you need is one: Wondershare Recoverit Mac Data Recovery.
Recoverit won't break a sweat in recovering your deleted OneDrive files. The cavalry is here, so chill. Look below and do as instructed. Everything should turn out fine in the end.
Step 1: Choose a Location
- Open Recoverit from your Applications folder.
- Click on one hard disk from "Devices". It should be the disk with the deleted OneDrive files.
- Click "Start."

Step 2: Scan the Location
- Make use of filters "File Type" and "File Path" to speed up the scan process so it takes even fewer minutes to conclude. Stop or pause the scan if necessary; it will neither affect nor tamper with the state of your files once they've been recovered.
- Recoverit will show you the deleted OneDrive files in a preview window of sorts once the scan is complete.

Step 3: Preview & Recover Downloaded Onedrive Files
- Do you see the little square checkboxes to the left of the Recoverit window? Those are your OneDrive files. Check the ones you want; tick all of them, if that's what you prefer,
- Click the "Recover" button and wait for some minutes for the software to work its magic and recover your files back to your drive and where they should be. Save all the recovered files on the secondary drive in your Mac. And you're all done.

Wondershare has done it again. The brains behind it have developed a software that's capable of effectively recovering data which was lost in different ways, with special emphasis on accidental data loss and formatting.
It's arguable if anyone can truly explore the full potential of Recoverit because it has so much going for it. Give it a go and see what all the hype is about. You'll be glad you did.
Closing Words
Using OneDrive is easy if you follow the appropriate steps. Is there any marked difference in how efficient OneDrive is between the Windows and Mac versions? No, none whatsoever at all. OneDrive for Mac comes with all the benefits of its Windows counterpart.
You have free 5GB of storage space, which can be upgraded if the need arises. The tool is also compatible with your Mac's native cloud storage service, iCloud. Likewise, you can use it with other storage platforms, so it's as versatile as it is simple to use.
And if in the event you delete your OneDrive files, you can recover them by clicking on that little blue "Recoverit" icon on your Mac's desktop. The software gets everything back without missing a beat, so what are you waiting for?
FAQ: Fix OneDrive Issues on Mac
- Q1: What should I do if OneDrive is damaged on my Mac?
A: If you see a "OneDrive is damaged Mac" error, uninstall OneDrive, remove related files from Applications and Library, then reinstall the latest version from the official site.
- Q2: How can I refresh OneDrive on Mac to fix sync issues?
A: To refresh OneDrive on Mac, quit the app, restart your Mac, and reopen OneDrive. If issues persist, use the "ResetOneDriveApp.command" script found in the app's package contents.
- Q3: Why is OneDrive not opening on my Mac and how can I fix it?
A: OneDrive not opening on Mac may be due to outdated software or corrupted files. Update macOS, reinstall OneDrive, and ensure all system updates are applied for compatibility.
- Q4: How do I resolve OneDrive not syncing files on Mac?
A: If OneDrive is not syncing, check your internet connection, shorten file paths, and ensure file sizes are under 15GB. Restart OneDrive or reset the app if syncing still fails.
What's Wrong with Mac
- Recover Your Mac
- Fix Your Mac
- Delete Your Mac
- Learn Mac Hacks


 ChatGPT
 Perplexity
 Gemini
 Claude
 Grok
Grok


Sue Wayne
staff Editor