
 TL;DR:
To install Home Assistant on a Synology NAS, you must install the Docker package from the Package Center and execute a user-defined installation script via the Task Scheduler.
● Create a new folder named homeassistant in all lowercase letters inside the Docker directory using File Station prior to setting up the script.
● Configure the scheduled task to run as the root user and ensure you replace the default time zone with your local time zone within the Docker run command code.
● Access the Home Assistant interface by navigating to https://synology-ip-address:8123 in your web browser to finalize account creation and discover local network devices.
Ask AI for a summary
 ChatGPT
 Perplexity
 Gemini
 Claude
 Grok
Grok
Accidentally deleted important files on Synology NAS?
No worries. Recoverit NAS Data Recovery can get back your lost files within 3 steps. The ultimate and professional NAS data recovery software is totally reliable and 100% safe.
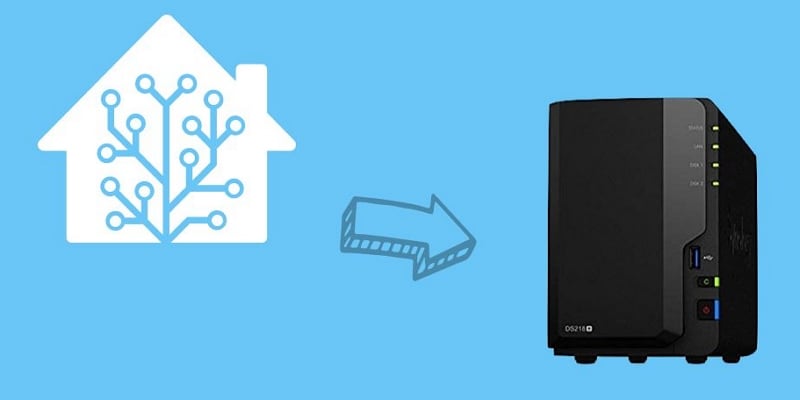
While Synology NAS does provide many benefits and streamlines centralized data storage on a network, it has more capabilities. You can unlock some of these capabilities by installing additional software. Such is the case with the Home Assistant for Synology.
However, if you’ve never used Home Assistant for NAS, you probably don’t know where to start. Before we start, let’s see what Home Assistant is and what benefits it can offer to you.
In this article
What Is Home Assistant?
Simply put, Synology NAS Home Assistant is a piece of software. No worries, it’s not a premium software solution for Synology NAS. It’s open-source software that enables and streamlines home automation. Its primary focus is on enhanced privacy and superior local control.
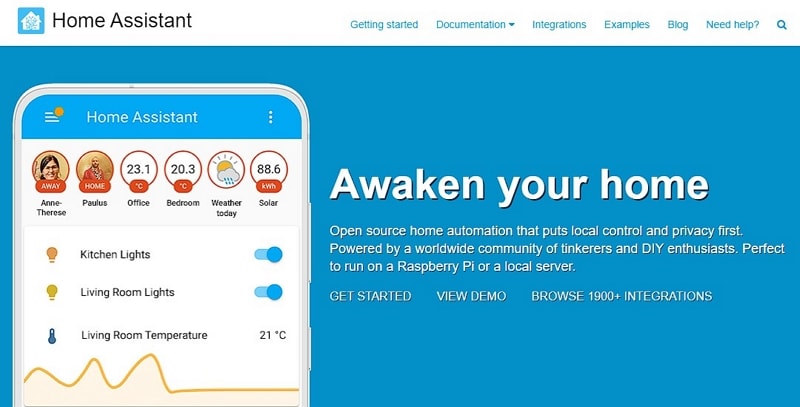
Home Assistant can help you turn your Synology NAS into a central control system for home automation or if you prefer, a smart home hub. The entire software is written in Python and is free for anyone who wants to install and use it. It can help you have all your devices on a local network in a single place. You can create your own rules and automate your home, thus making managing all your IoT and smart home devices hassle-free.
Why Use Home Assistant on Synology NAS
The most obvious benefit of using Home Assistant on Synology NAS is that it will help you have a Synology-enabled smart home. You can manage all your smart home devices in a centralized location.
Furthermore, Synology NAS Home Assistant is a popular open-source software. That means that the community is vast, and you have access to hundreds of integrations. You can integrate Alexa and Google Nest right out of the box.
If you like to customize things around your home, installing this tool on your Sunology unit will benefit you. You can version different home automation configurations via the GitHub repository and use them at your convenience.
That means that you can have a separate dashboard for every occasion. You can set up those dashboards to control multiple devices or display different information.
Finally, Home Assistant is super light and easy to use. You can run it on your Synology NAS unit without worrying about the massive uptake of your processing power and RAM. You can install and run it in a Docker container, which Synology NAS supports by default.
How To Install Home Assistant on Synology NAS?
If you like the sound of using Home Assistant with your Synology-based home setup, you must install it properly. Here is everything you need to do, step by step, to install Home Assistant and automate your smart home.
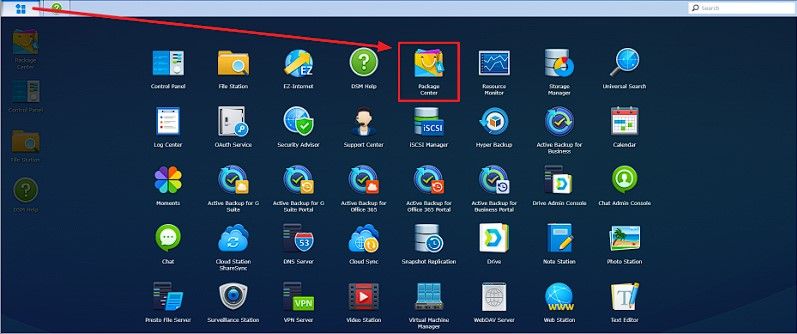
Step 1Go to the Synology Package Center
Whenever you want to install something on your Synology, you need to access the Package Center. You can find it in the main menu screen of your Synology device. You can access it by clicking on the Main Menu button in the upper left corner and selecting Package Center from the grid of offered services. Check the picture below.
Step 2Install Docker Package
The previous action will open Package Center where you can browse through or search for all available apps and services available to Synology users. The next step is to install Docker because Home Assistant Synology requires this app to run. Type “Docker” in the Package Center search box, just like in the image below.
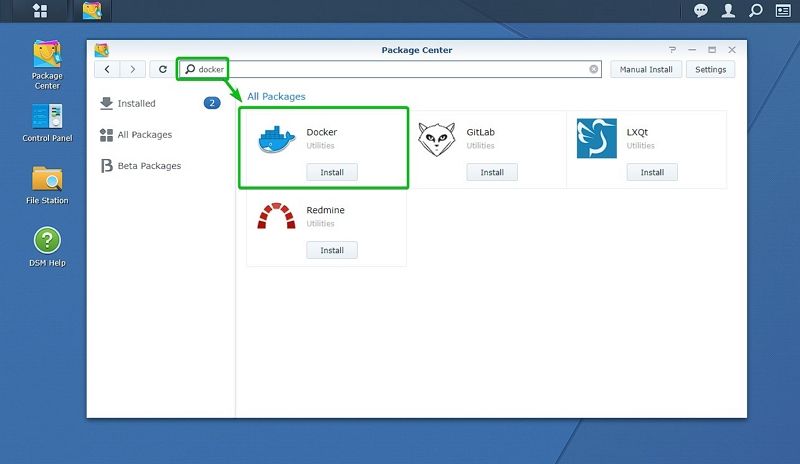
Next, you want to click Install to install the Home Assistant Docker Synology package.

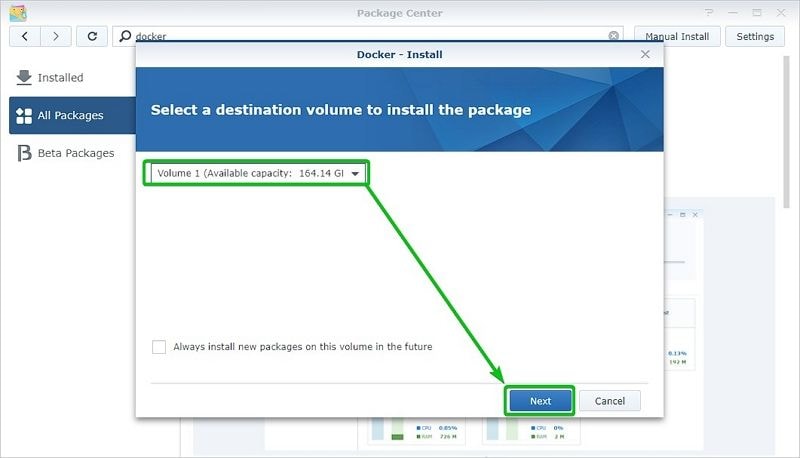
This step will open a pop-up Docker – Install window. Use the drop-down menu to select the volume you want to install Docker and keep data. After you choose the volume, click the Next button.
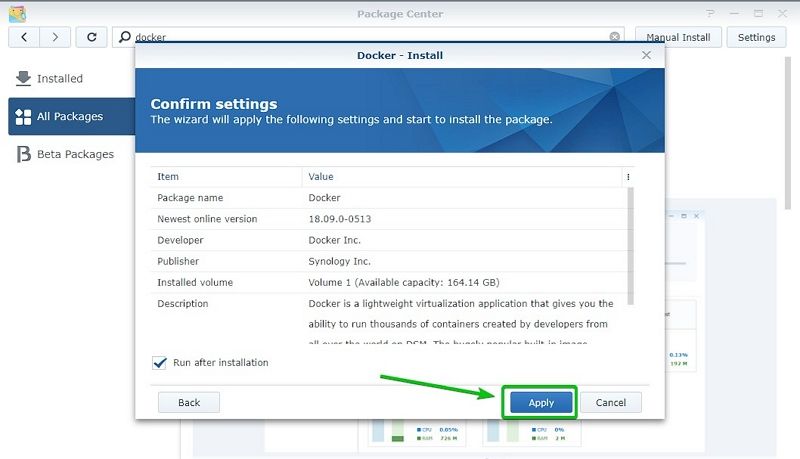
The next step is to confirm your installation settings by clicking the Apply button. That will complete the Docker installation.
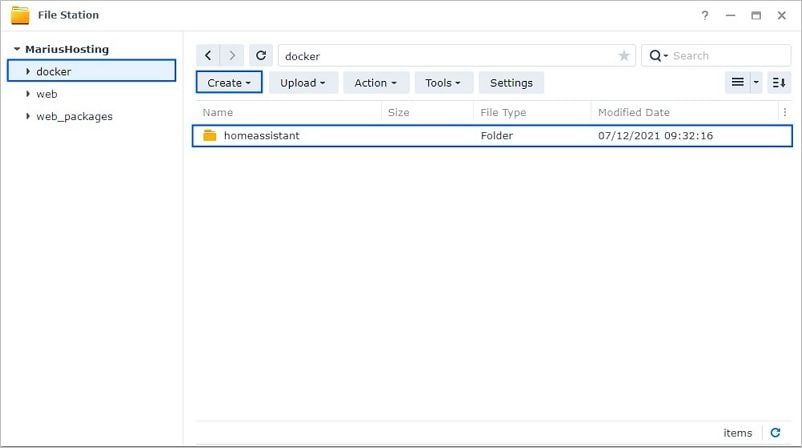
Step 3Go to File Station and Create a “homeassistant” Folder
Now that you’ve installed Docker on your Synology NAS, you are ready to set everything up. Go to the File Station and select the Docker folder on the left section of the window. You will see the action buttons in the middle of the File Station window. Click Create to create a new folder inside the docker folder. Name the new folder “homeassistant” using lowercase letters.
Step 4Create a User-Defined Script
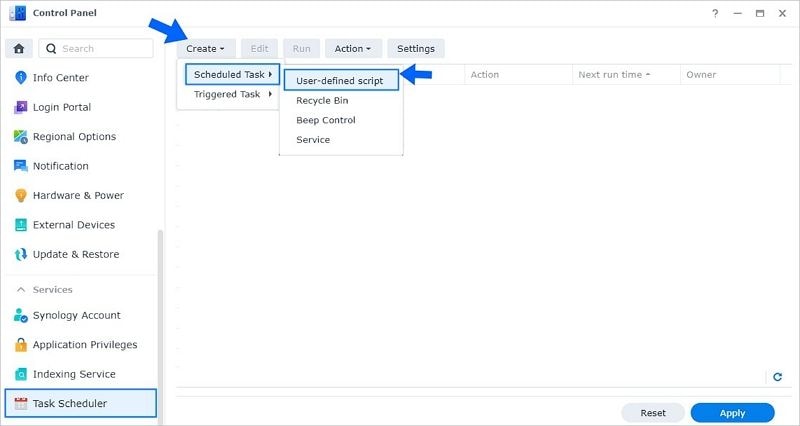
Now you need to create a User-defined script. Access the Control Panel of your Synology unit. Select Task Scheduler in the left-side menu. Click the Create drop-down menu, mouse over Scheduled Task, and select the User-defined script option.
Step 5Configure the Script
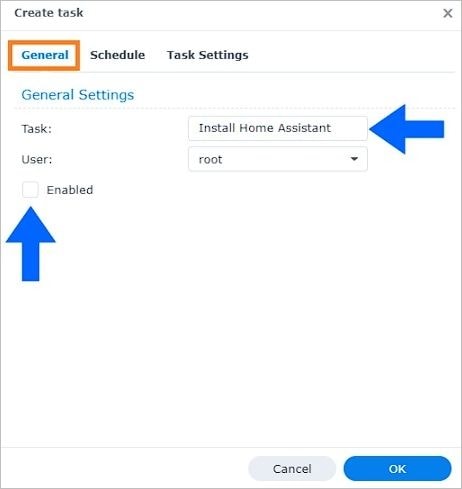
Now that you’ve created a user-defined script, you need to configure it. Click the User-defined script you’ve just created. A new window with three tabs, General, Schedule, and Task Settings, will open.
In the General tab, you must type “Install Home Assistant” in the Task field. Uncheck the Enabled option and select the root user.
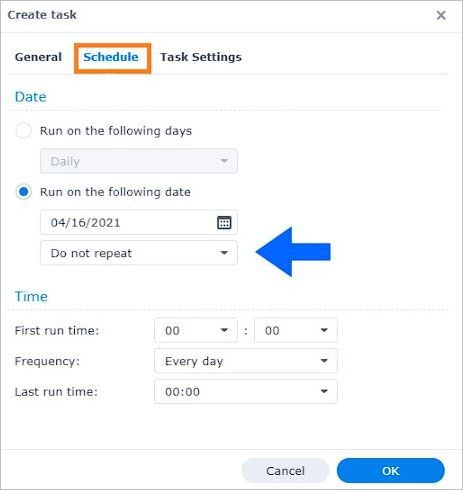
Now click the Schedule tab. Select the Run on the following date option and choose the Do not repeat option from the drop-down menu below.
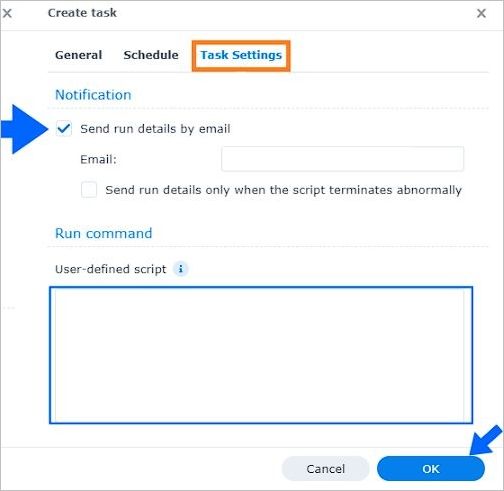
Now you need to access the Task Settings tab. Enable the Send run details by email option and enter your email. This contains the Run command section, where you must copy and paste this code:
docker run -d --name=home_assistant \
-e TZ=Europe/Bucharest \
-v /volume1/docker/homeassistant:/config \
--net=host \
--restart always \
homeassistant/home-assistant
(in the -TZ= line, you should enter your time zone.)
After that, confirm your settings with a click on the OK button.
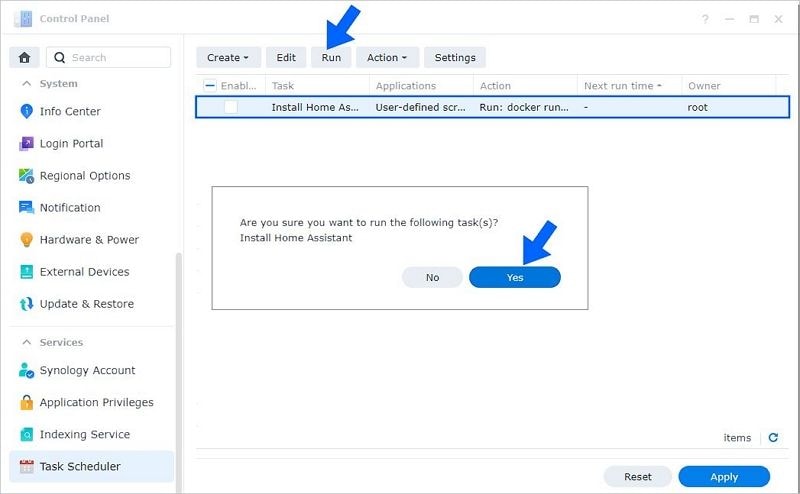
Step 6Run the “Install Home Assistant” Task
Now you need to run the task you’ve just created. You can find it in the Task Scheduler, which you can access via the left sidebar. Select the Install Home Assistant task from the list and click the Run button in the menu above. Confirm your action by clicking the Yes button.
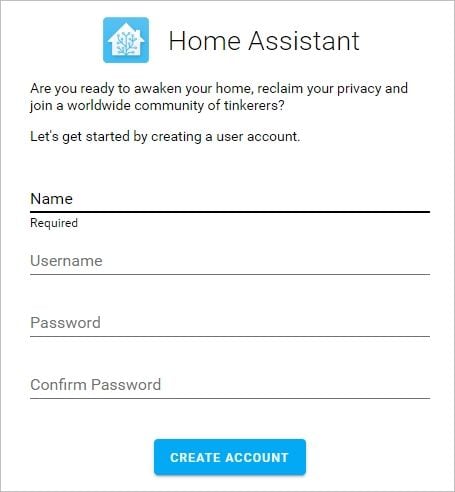
Step 7Create a Home Assistant Account
Once you install Home Assistant, you must create your account. Open your default browser and type your Synology IP address in the search bar. It should look something along the following lines: https://synology-ip-address:8123.
It will open your Home Assistant. To create your account, you must provide your name and generate a username and password before confirming the password.
The following window will ask you to enter the name of your home, specify your location, and choose the preferred unit system. You can click DETECT to enable the system to set your unit system and time zone automatically.

The following window will open, and Synology NAS Home Assistant will inform you about all the devices it automatically discovered on your home network. If some of your devices are missing, you can add them later.
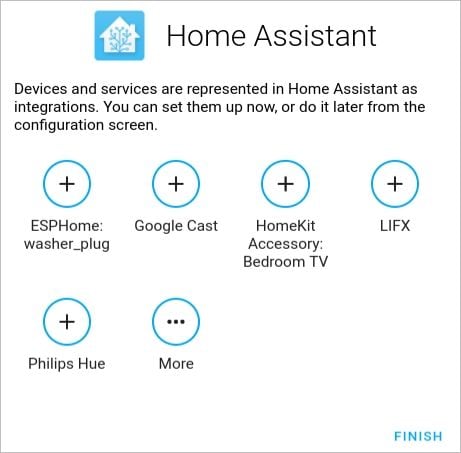
Click the Finish button to complete the account creation.
Step 8Configure Your Account
You can configure your Home Assistant account on Synology NAS with a few simple clicks. Look for the Settings option in the sidebar of your Home Assistant dashboard.
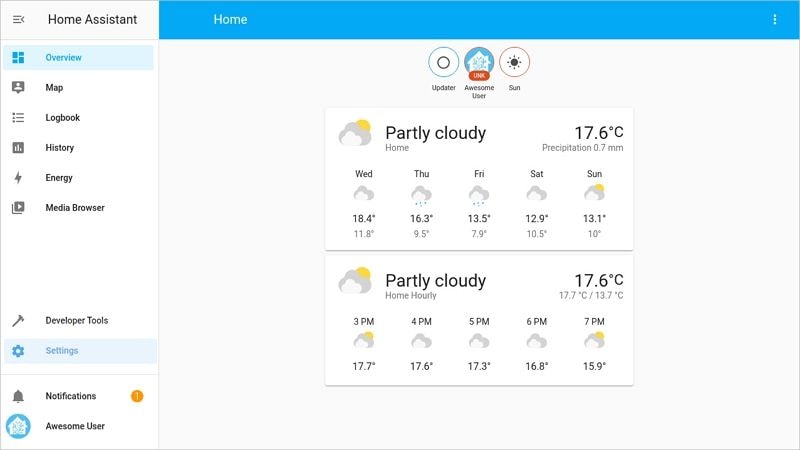
Click the Settings option. It will open a new window in the right section of the screen. Here you can access Integrations, Devices, Entities, and Areas.
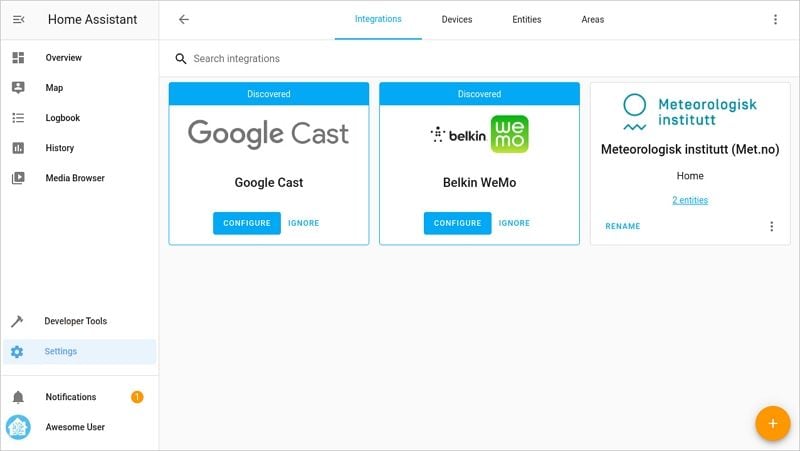
To access the recognized devices, you need to click Settings and select Devices & Services. The discovered section will show you all the devices that Home Assistant has automatically picked up on your network.
You can add new devices by clicking the Add integration button in the lower right section of the screen. Use the search bar to find the supported integrations.
Conclusion
The Home Assistant for Synology NAS setup is one of the most popular options for smart home automation. If you own a Synology device that supports Home Assistant, you can streamline the management of smart and IoT devices in your home.
As you can see, the installation and setup process is relatively straightforward. Follow all the above-listed steps, and Home Assistant will be up and running in a couple of minutes.
For Windows XP/Vista/7/8/10/11
For macOS X 10.10 or later


