Finding NAS on a network is essential to configure your Synology according to your needs. However, you may need help locating your Synology NAS after you acquire Synology NAS and install it. This comprehensive guide will cover the best Synology NAS-finding methods you can use to find your Synology NAS on a network, including your NAS IP address.
In this article
Part 1. Why Would You Need To Find Your Synology NAS?
You need to find your Synology NAS because it offers unique advantages, such as safe data storage in a centralized location. Internet users can harness the power of this innovative data management solution to build private cloud environments where they can share, back up, access, and store their files without fear of cyber threats, data breaches, data loss, etc.
Moreover, Synology NAS allows you to customize your cloud environment according to your needs, recover deleted files from the Synology NAS, share your data on demand, back up Mac and PC data, safeguard sensitive files, and more.
Accidentally deleted important files on Synology NAS?
No worries. Wondershare Recoverit can get back your lost files within 3 steps. The ultimate and professional NAS data recovery software is totally reliable and 100% safe.
Part 2. Two Most Used Synology Finder – Synology Assistant and Web Assistant
Although finding your Synology NAS on a network may sound like a complicated process, you have a Synology NAS finder that can simplify this task. The best solutions are Synology Assistant and Web Assistant.
· Synology Assistant
Synology Assistant is a user-friendly tool and desktop utility. Its function is to browse the local area network and find Synology servers. The assistant is the most effective solution for setting up Wake on LAN (WOL) or locating and connecting to your Synology server.
· Web Assistant
Web Assistant is an ideal solution for internet users who need a copy of the web pages they visit. The tool allows you to route your traffic through it and access the websites and pages you need both online and offline.
Web Assistant mimics your web browser and provides the same user experience when browsing your pages offline. If your network connection fails, you can access your files offline with Web Assistant.
Supported Operating Systems
You can run Synology NAS on various operating systems, including Mac, Linux, and Windows. You can also use a DiskStation finder to set up a virtualized OS for Synology NAS – DiskStation Manager.
Part 3. How To Find Synology NAS Using Synology Assistant

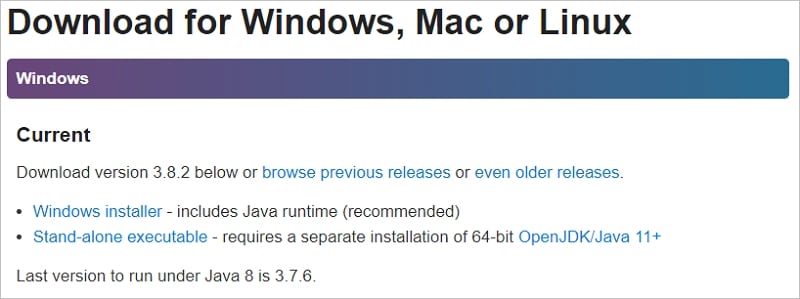
- Visit Synology’s Download Center, download the assistant, install it on your OS, and run it. This Synology NAS Finder is available for Windows, Mac, and Linux OS.

- While the app runs, it should display all visible Synology NAS devices by automatically browsing your network.

- Since the tool requires specific ports to find your Synology NAS, we recommend creating an Allow rule to ensure you find it even with your Synology’s Firewall on.
Things You Can Do When You Can’t Locate Synology NAS With Synology Assistant
Synology Assistant is an official Synology desktop tool designed to search for Synology devices on local area networks. Run the app, and let it automatically search for connected Synology devices by scanning your LAN.
You’ll find connected devices in your web browser if the scan is successful. Select the device (your Synology NAS) and connect to it.
If you’re still unable to locate your Synology NAS via Synology Assistant, follow these steps to retry:
- Make sure your desktop computer and Synology NAS share the same LAN and subnet;
- Allow Synology Assistant to access your device by adjusting your Windows and DSM firewalls;
- Pause or disable your antivirus program;
- Check your connection, router, and Ethernet cables;
- If you’re using several network ports, try connecting the Ethernet cable to a different port;
- Run Synology Assistant on another device and find your Synology NAS;
- Reset your Synology NAS and wait for four seconds to reset your settings;
- Change Wifi settings and turn off the connection on your device to connect your Synology NAS directly to your device via an Ethernet cable;
- Retry finding your Synology NAS with Synology Assistant by changing your device’s wired LAN interface to DHCP.
If all these steps still don’t come up with the desired results, turn off your Synology NAS and remove the drives. Turn it back on, restart it, and try finding your device again. You can also contact your RMA service vendor or Synology Technical Support for more guidance.
Part 4. How To Find Synology NAS Using Web Assistant
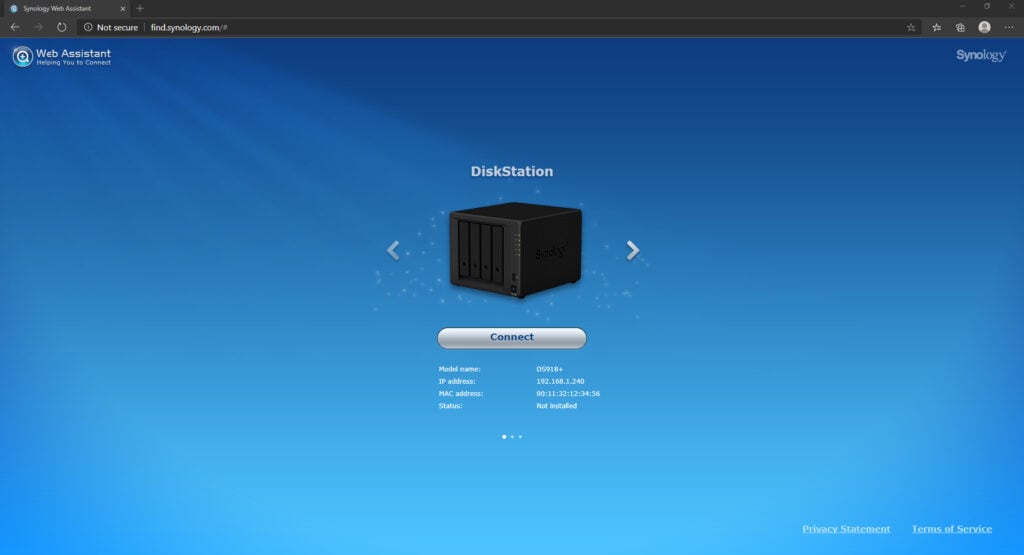
- Open your preferred web browser and access the Synology Web Assistant app via the https://finds.synology.com Connect to the app and let it search for your Synology NAS on your network.

- The app will automatically browse the network for any Synology devices within your LAN. If the query is successful, the app will display all available Synology devices in your web browser. Click Connect and set up the preferred device.

Things You Can Do When You Can’t Locate Synology NAS With Web Assistant
Open your browser, head to http://find.synology.com, and download/install the Web Assistant app. Run the app and select Connect to find your Synology NAS and connect to it.
If your query is unsuccessful, try the following:
- Check your internet connection to ensure your Synology NAS and device are connected to the same LAN and subnet;
- Try using a different web browser;
- If you still can’t locate DSM, follow this path: DSM > Control Panel > Info Center > Device Analytics > Share Network Location > Allow this DiskStation to be displayed in Web Assistant;
- Change the server name to Synology NAS by following these steps: DSM > Control Panel > Network > General > Server Name.
Part 5. Additional Synology-Finding Method 1: Locating NAS IP Address
If you still can’t find your Synology NAS with the two assistant tools, you can use the third option – locate your NAS IP address. Scan your LAN to display all connected devices on your network. Locating your NAS IP doesn’t involve the use of any tools.
If your device isn’t visible, it could be located on another subnet, or it isn’t reading the network connection. Download and install Angry IP Scanner (Synology finder Windows and Synology finder Mac available).

Run the scanner and follow these steps: Tools >Fetchers>MAC Vendor. You should see a prefilled network range. Click Start and let it scan your network. You should find your NAS IP address in the list of results. If it isn’t visible, check the MAC Vendor section.
Part 6. Additional Synology-Finding Method 2: Moving Synology NAS to Another Network
You can also access your Synology NAS by moving it to another network to reconfigure your network parameters. You’ll need to update your default gateway, subnet mask, and NAS IP address before reconfiguring your network settings.
Follow these steps:
- Run Synology Assistant and check the connection status;
- If you see the Connection Failed status, run the Setup Wizard by right-clicking on your device and choosing Setup;
- Log in to your Synology Assistant account and select Next;
- Select Get network configuration automatically (DHCP) and click Next;
- The status should change to Ready;
- If the status remains the same, refresh the page and select Search;
- Double-click Search to initiate a new connection to your Synology NAS.
You should now be able to connect to your Synology NAS on another network.
Conclusion
While there are numerous methods for finding a Synology NAS on your network, different scenarios require a specific approach.
Whether you have a new router or your OS isn’t installed, these options should work and help you find your Synology NAS on a LAN.
In most cases, you can quickly solve missing Synology NAS with Web Assistant or Synology Assistant. However, if the problem persists, try finding your NAS by locating its IP or changing the network.
For Windows XP/Vista/7/8/10/11
For macOS X 10.10 or later

 ChatGPT
 Perplexity
 Google AI Mode
 Grok
Grok


