Regarding networking, lean data storage and access are often the most desirable features. Although several manufacturers offer data storage solutions, few are as adept and reliable as Drobo. Since 2005, the company has made several robust products, seeking clients from small and large businesses alike.
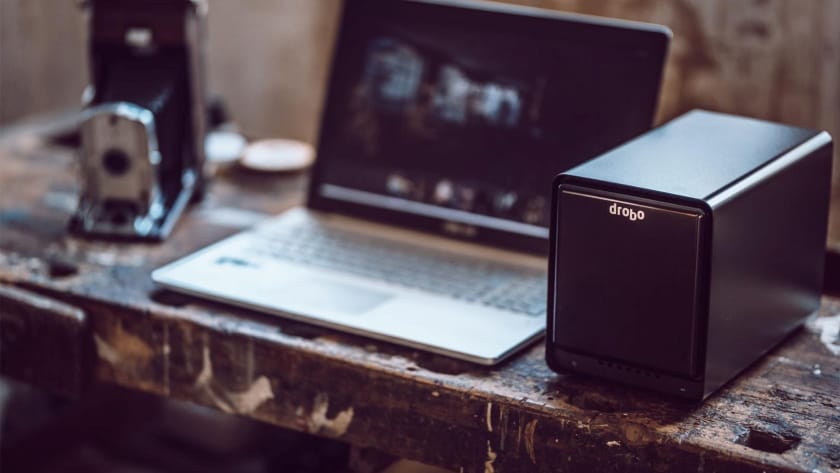
Nevertheless, even the best devices can encounter data loss, making it worth your while to learn how to recover data from Drobo devices. If you're a novice in the field, you need no longer worry. This guide will tell you all viable Drobo data recovery methods you can utilize, depending on the scenario you encounter.
Part 1. Drobo Storage Device Basics
Drobo (short for 'Data Robotics') is a firm based in the US that manufactures external storage solutions for NAS, SAN, and DAS appliances. Unlike peripherals connected to a local network, storing data online is comparatively complex. You not only need to assign the requisite storage to all connected users but also maintain consistent access for those accessing the same drive.
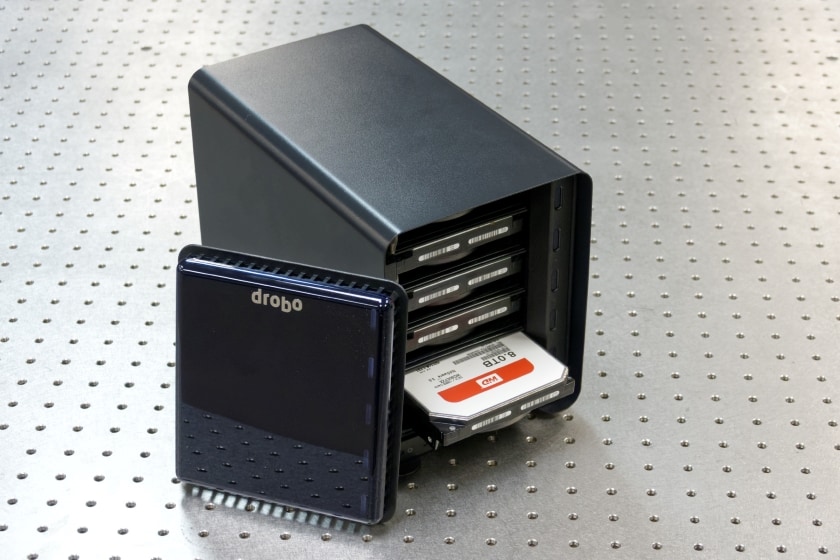
That's where Drobo displays its expertise. When availing of their hardware, it's easy for anyone to set up a storage network for up to 128 TB of storage. Most drives are high-quality SATA or SASCI variants, compatible with any file system developed to date. Thanks to their reasonable prices, Drobo has maintained a consistent supply of storage devices for SMBs, although they have been slow to fulfill orders since the supply chain issues of 2020.
Device Features
Drobo allows you to create a hybrid network from HDDs and SSDs within the same drive bay. Even as users are connected to a drive, you can remove other drives from their bays for Drobo file recovery or maintenance. The drives are compatible with USB 2.0, USB 3.0, Thunderbolt, Firewire 800, and Gigabit Ethernet ports.
Usage
Drobo can provide solutions for a wide range of personal and commercial services. You can use their services for creating private cloud storage devices, surveillance, and integrating streaming apps to have a high-density OTT HDR.
For businesses, Drobo file recovery and access make it viable to create online platforms for digital projects. Setting up a custom server sourcing hardware from Drobo can save you 30% on renting servers from third-party websites. Moreover, you get the configuration precisely as they fit your enterprise.
Drobo makes managing access or monitor settings more convenient through an intuitive app for smartphones and PCs. It allows you to share any data directly without giving away access to the network.
BeyondRAID Technology
RAID is the go-to backup solution for most storage servers. Due to striped data sets, you might find RAID 5 or RAID 6 configurations quite common. Still, Drobo file recovery is more robust with their own BeyondRAID technology.
Unlike conventional RAID configurations, BeyondRAID utilizes virtual data stripes to create an active backup for all the data stored on the data drives. That solves the most dreaded RAID backup issues - what to do if both your primary and backup drives get wiped? With a virtual backup, the data stripes remain accessible, so long as there's one drive capable of storing them active and fully functional.
That methodology also lets the user interact with the backups with a graphical interface instead of standard RAID configurations that require a programming background. You can access the feature from the Drobo Dashboard.
Part 2. Reasons for the Data Loss of Drobo NAS/DAS
Despite the company's best efforts, there are a few cases where you might need to recover data from Drobo drives in NAS or DAS configurations. Those can belong to either of the following categories.
Logical Issues
Such issues often crop up when there's something wrong with the network's software. That can happen as the system dynamically creates too many virtual tables or improper application of the file systems within separate drives. It can also occur with a nasty trojan or malware infection that makes the data from the drives unreadable.
Physical Issues
Your Drobo data recovery service is only reliable until you care for all the hardware involved. It is trivial among people with little IT experience to set up a storage server and forget about it for years. Physical factors like humidity and dust can creep up over time, setting the conditions for disk damage through electrical overload or pests.
Part 3. How To Recover Data From Drobo Drives
You need not worry if you face any of the issues mentioned above during your tenure using such storage services. Depending on the severity of the problem, you can follow any of the following procedures for Drobo data recovery.
Method 1: Perform Drobo Data Recovery Using UFS Explorer RAID Recovery
For DAS/NAS configurations containing 5 drives or fewer, you can use UFS Explorer RAID Recovery for Drobo data recovery. That grants you a convenient path to recover any dynamically stored data or fix any logical issues with the drive. After installing UFS Explorer RAID Recovery on your system, you can do it through the following method.
Step 1. Ensure all the drives are connected to the system and initialize UFS Explorer on the system.

Step 2. Click on the Open tab from the top pane and choose Named Device or Image file or virtual disk, depending on your preference.
Step 3. Select the appropriate drive from the menu and click Open.
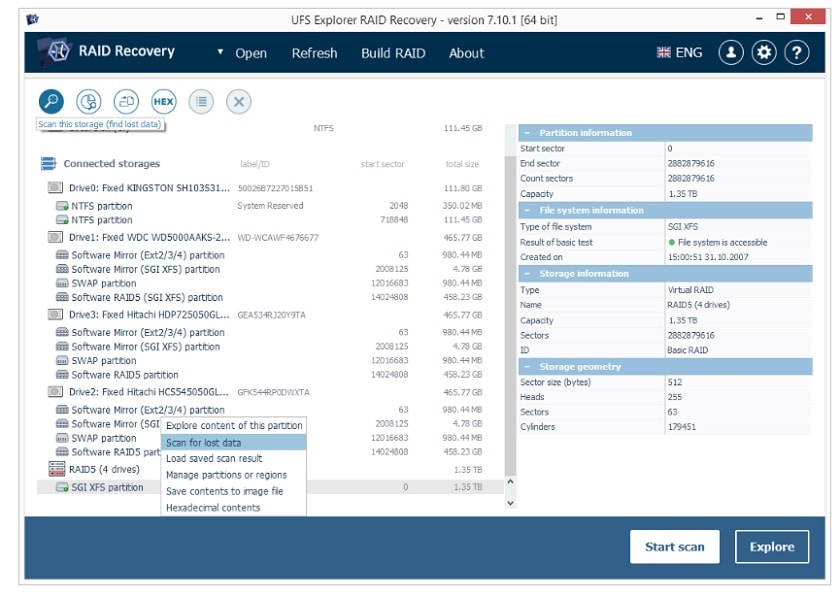
Step 4. You can browse to the precise file location using the left pane. Upon establishing the baseline, click the Scan button at the bottom of the dialog box.
Step 5. Specify the parameters from the following screen and click the Start Scan button.
Step 6. The system will initiate a scan for all the recoverable files. Once done, you can browse through them and examine the preview on the right of the dialog box.
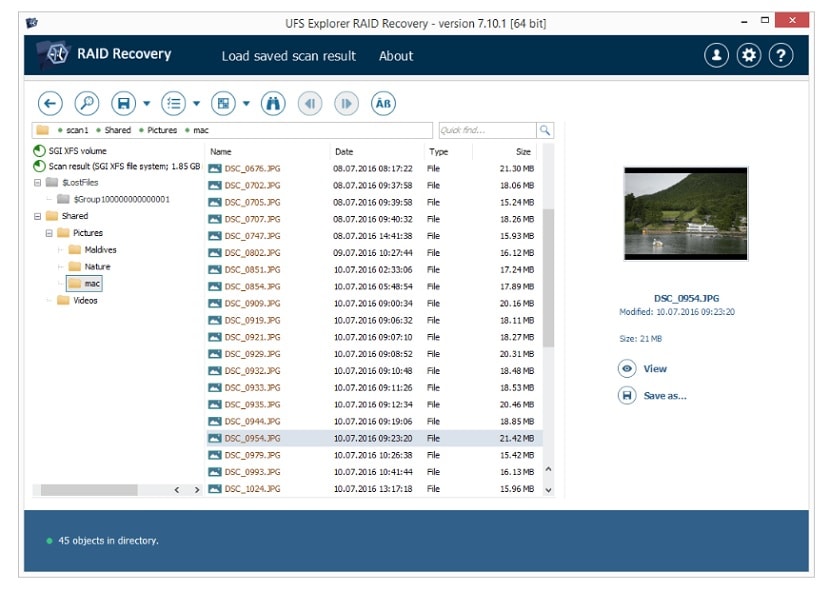
Step 7. Click the Define permanent selection button and mark the items you wish to recover.
Step 8. Choose the desired location from the Save selection menu from the top pane.
Method 2: Perform Drobo Data Recovery Using UFS Explorer Professional Recovery
If you desire a more comprehensive option for a reasonable price, you can upgrade to UFS Explorer Professional Recovery. It follows the same exact method for Drobo file recovery as mentioned above, only with added customization. You retrieve data from encrypted drives (up to 8 at a time), locating and aligning partitions automatically and relaying more metadata for recoverable files.
Method 3: Perform Drobo Data Recovery Using Drobo BeyondRAID Assistant
In case your Drobo storage device got reset to factory settings, you can speed up the recovery process by retrieving the BeyondRAID configuration instead of the files. You can do that with UFS Explorer RAID Recovery using the following method.
Step 1. Ensure all drives are connected to the system and launch UFS Explorer RAID Recovery.
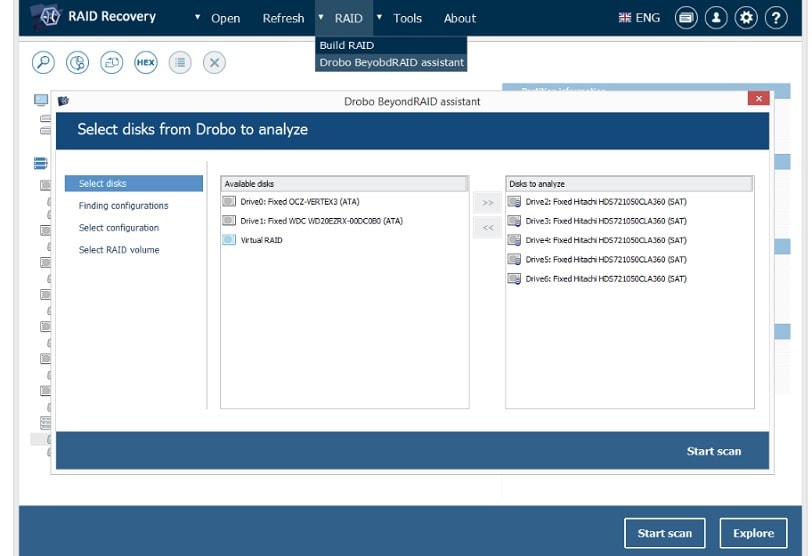
Step 2. Go to the RAID menu from the top pane and select Drobo BeyondRAID assistant.
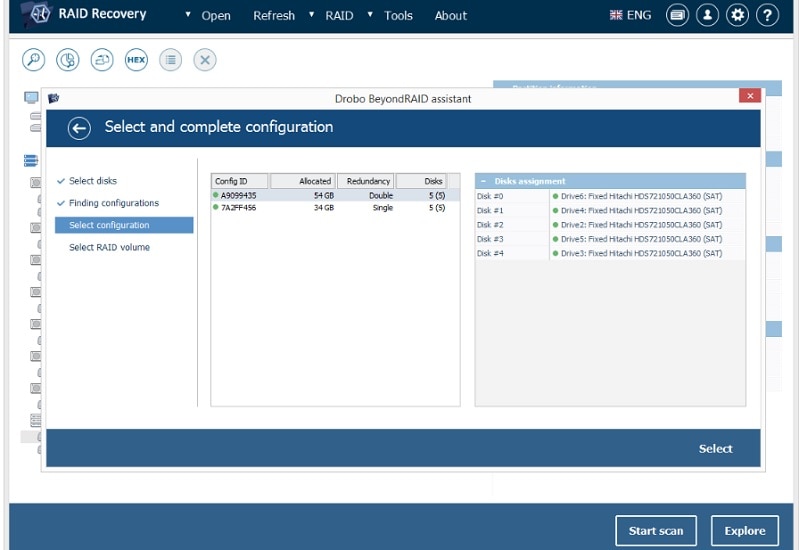
Step 3. A dialog box will open with older fragments of all available virtual metadata. Choose the one you're most comfortable with and click the Select button.
The program will now mount it as a virtual drive. You can now follow through with the setup as mentioned above.
Method 4: Recover Data From Drobo Drives With Drobo Data Recovery Service
If you observe severe physical damage on your Drobo drives, it is recommended to let the professionals handle it. You can avail of third-party assistance, like the Platinum Data Recovery Service. They can do the heavy lifting for you for a reasonable price, which you'll most likely need no more than once a year. You need to follow the procedure below to do that.
Step 1. Visit the official website and schedule a pickup for your Drobo device.
Step 2. A professional will visit your site and run diagnostics with the system.
Step 3. If they agree that the drive is repairable, you can disassemble the critical drives and ship them out to the service.
Step 4. Depending on your location, it will take about 72 hours for Platinum to send your drives back.
Step 5. When you receive the repaired drives, you can check for any faults and make the payment.
Platinum Data Recovery Service employs the best professionals that utilize various methodologies for most data loss scenarios. They have access to tools that you can't usually get online.
However, they are often slow with the process, and your drives may get delayed in case of any supply chain issues. There is also no choice in data recovery. You can give them a rough idea of what you want to recover, but in most cases, you'll get more data recovered than you require. Therefore, it is best to stick to manual data recovery software.
Video Tutorial on How to Recover Files from NAS Server?
For Windows Vista/7/8/10/11
For macOS X 10.10 or later
FAQs About Drobo Devices
How to prevent unnecessary downtime after a Drobo failure?
If you want to recover all the lost data immediately after a Drobo failure, it is best to save it on an external backup drive or a third-party cloud service. Applications like Dropbox and Google One can synchronize data in real time, letting you immediately recover lost files, so long as you have an internet connection.
How do I back up my Drobo?
Your Drobo device comes with an internal system to back up any data to a specified destination. You can verify it in the Default Folder section under the Friends tab from the Drobo Dashboard.
What file system does Drobo use?
Drobo supports NTFS, HFS+, and FAT32 file formats.
Is Drobo discontinued?
While the Drobo software support is still up and running, they have been unable to fulfill any hardware orders ever since 2020. Moreover, the parent company StorCentric filed for bankruptcy in June 2022, so it's unlikely that you'll receive adequate equipment and software if you want to build a setup from scratch.
Conclusion
Drobo is a reliable service that can last you for years. Still, if you get into trouble with data loss, you can use any of the methods detailed throughout this guide. For more details and the most viable solutions, check out the official Wondershare Recoverit website.
For Windows Vista/7/8/10/11
For macOS X 10.10 or later

 ChatGPT
 Perplexity
 Google AI Mode
 Grok
Grok


