
 TL;DR:
Installing the open-source Jellyfin media server on a Synology NAS requires deploying the jellyfin/jellyfin Docker container using a user-defined scheduled script to map configuration and media directories.
● Requires a Docker-compatible Synology NAS, the ffmpeg add-on, and a shared media folder where system internal users SC-JELLYFIN and SC-FFMPEG are explicitly granted Read-Only or Read/Write permissions.
● The installation relies on creating config and cache subfolders within the Docker volume and executing a docker run command via the DSM Task Scheduler to correctly route the mount paths.
● While the platform provides free streaming across major devices and features built-in DVR integration for content recording, it currently lacks Samsung Tizen compatibility and voice command capabilities.
Ask AI for a summary
 ChatGPT
 Perplexity
 Gemini
 Claude
 Grok
Grok
Accidentally deleted important files on Synology NAS?
No worries. Recoverit NAS Recovery can get back your lost files within 3 steps. The ultimate and professional data recovery software is totally reliable and 100% safe.
Jellyfin is an excellent solution for streaming data remotely without spending a dime. Although users have specific streaming needs, the Synology and Jellyfin combo might be an excellent way to stream your favorite media on your Synology NAS. This tutorial will break down the installation process of the Jellyfin on Synology system and other useful things you should know.
What Is Jellyfin?
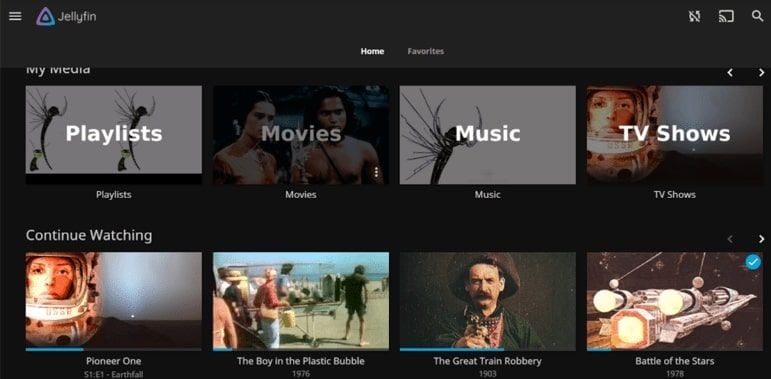
Jellyfin is a Docker-installed open-source media and data streaming platform. It allows you to stream media and data for free, be it music, your favorite TV shows, movies, you name it. Since it’s a dedicated media platform, it allows you to access your data from your server via any device you prefer.
In addition, Jellyfin allows you to gather, manage, and access different media content anywhere, at any time. Whether you want to store your music, organize TV shows, or create a movie catalog, Jellyfin covers it all and then some.
An additional benefit of installing the Jellyfin on your Synology NAS is that you can record media content automatically and watch live TV, thanks to DVR integration. Thanks to a simple and user-friendly interface, using, personalizing, and managing the Jellyfin platform is straightforward.
The Jellyfin platform is compatible with multiple media interfaces, such as:
- Infuse
- LG webOS
- PS4
- Android/iOS operating systems
- Gelli
- Chromecast
- Nest app (Android TV)
- Xbox One
- Roku
- Fire TV
Pros and Cons of Jellyfin
Here are the Jellyfin pros and cons you should know about:
Pros
Free streaming platform with built-in parental control
Covers an array of media content
Compatible with leading streaming platforms and apps
DVR integration allows for content recording and live streaming
Demo function
No user data tracking
User-friendly interface with multiple personalization options
Open-source
Cons
Lacks voice command
Samsung Tizen integration isn’t available (yet)
Lack of data recovery capabilities
Since Jellyfin doesn’t have data recovery options, you should consider using alternative methods to recover files from Synology NAS, when you accidentally deleted or lost your favorite movies or music.
Things You Need Before Installing Jellyfin on Synology
Before you move on to the installation tutorial, you must first ensure you have the essentials for installing Jellyfin on Synology.
- Synology NAS
Since the Jellyfin installed isn’t an official Synology app, set up your Synology NAS (it must be compatible with Jellyfin) to ensure you have data backup and system security in place.
- Shared Folder With Your Media
Since Jellyin is a third-party app, it can’t access your media on its own. You have to give Jellyfin access to your Synology NAS data, or in this case, your streaming media content.
- Docker
Jellyfin requires Docker installation to run. Docker is a software platform that allows app developers to develop, test, share, and run advanced applications.
Docker optimizes and streamlines the application development process by separating software into standardized units (containers) that provide all functionalities the software needs to run, including runtime, code, system tools, and libraries.
How To Install Jellyfin on Synology?
Follow these steps to successfully install Synology Jellfyin on your NAS drive.
Step 1Setting Up Synology NAS
Connect your Synology NAS with the SynologyCommunity app center and install the streaming add-on “ffmpeg” and the Jellyfin app.
Step 2Creating a Shared Folder and Adding Media
Navigate your Synology NAS to the DSM desktop, open Control Panel, and click Shared Folders. The Shared Folder option allows you to view all your Synology NAS folders and files.
Select the folder with your streaming media and follow this path:
Edit > Persmissions > System Internal User > SC-JELLYFIN > SC-FFMPEG.
Select how much access you want to grant to Jellyfin (Read-Only or Read/Write).
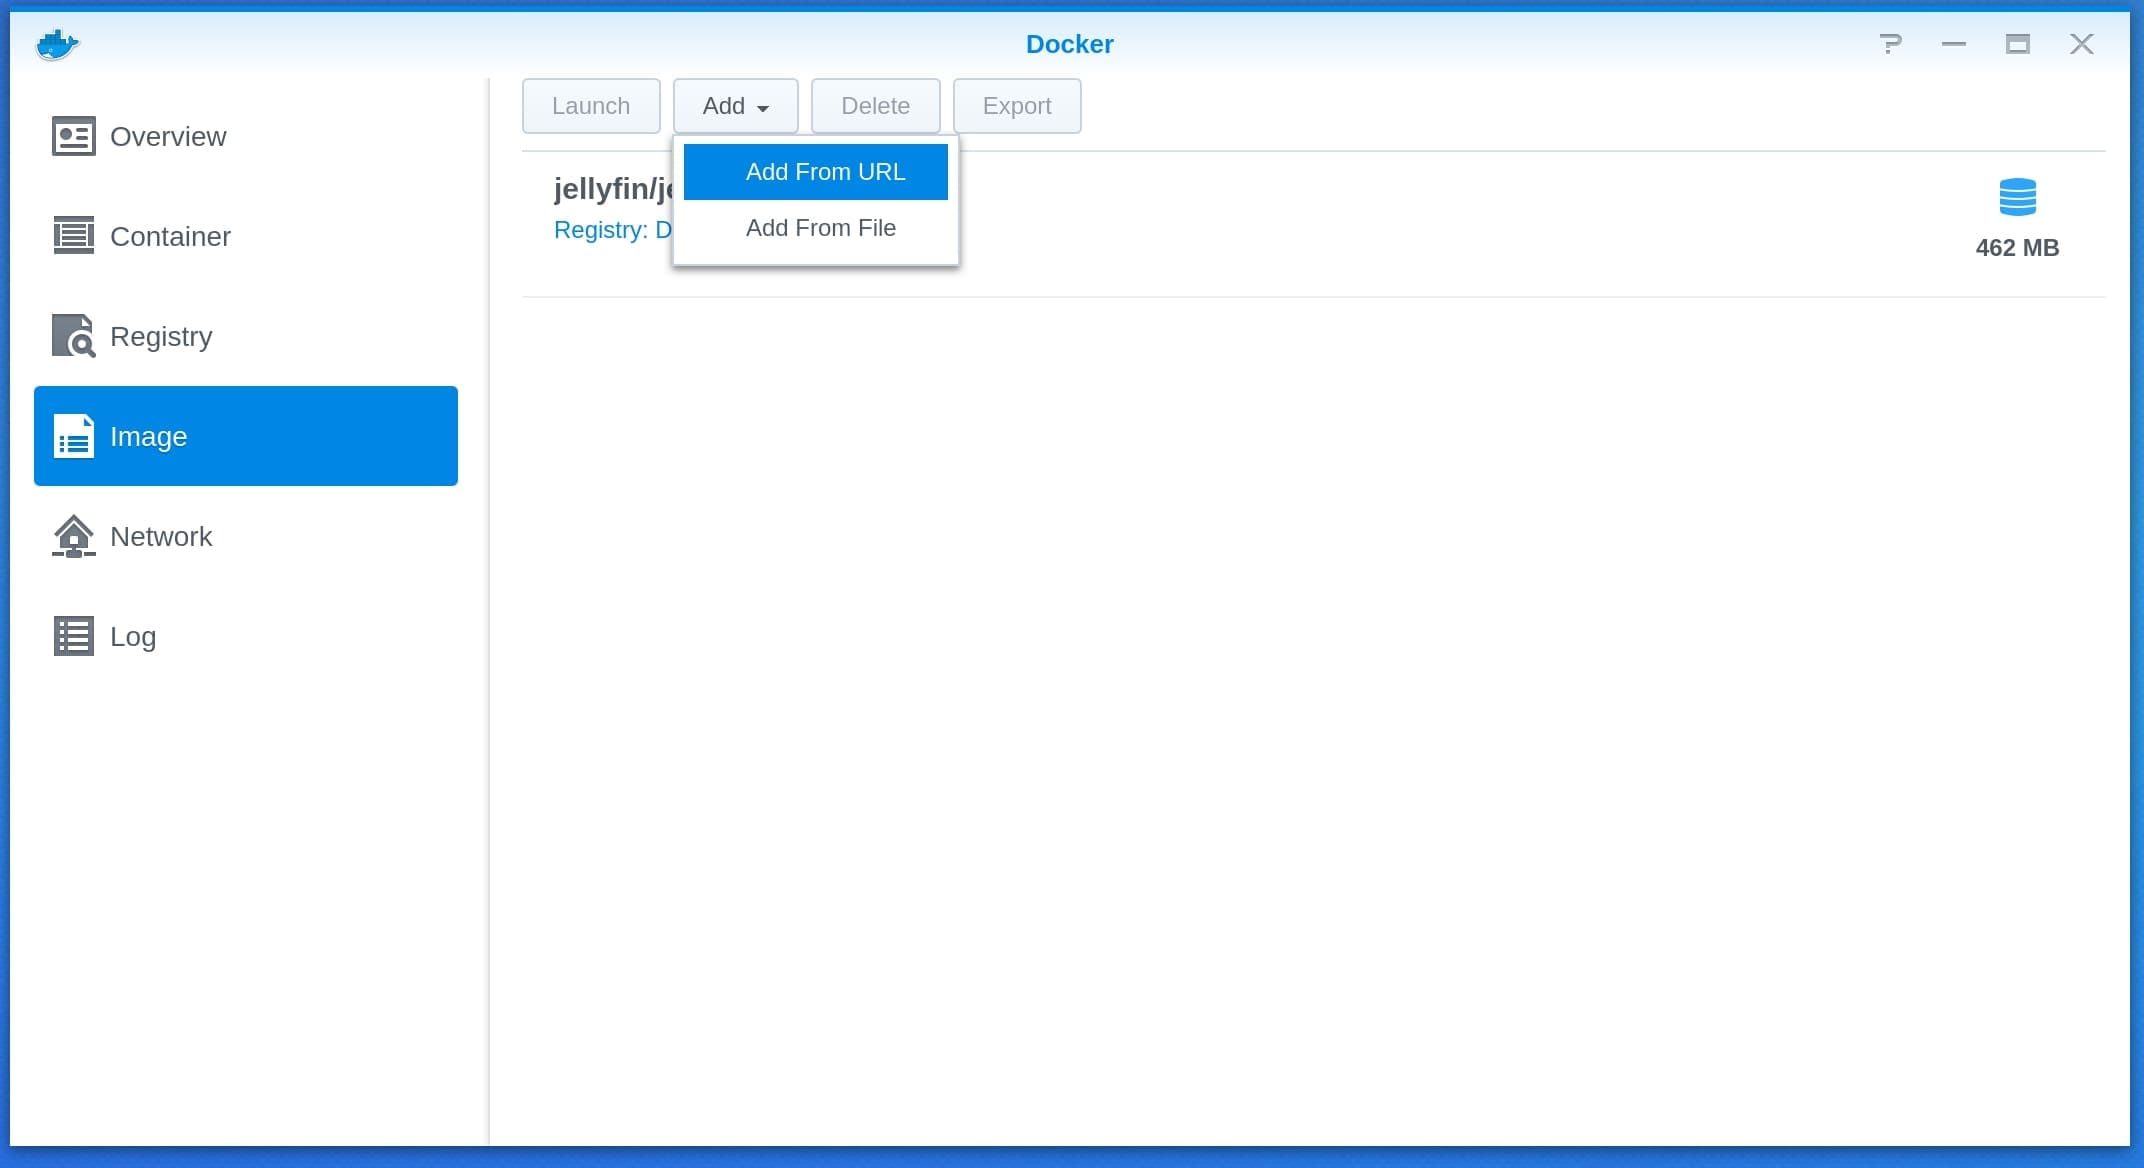
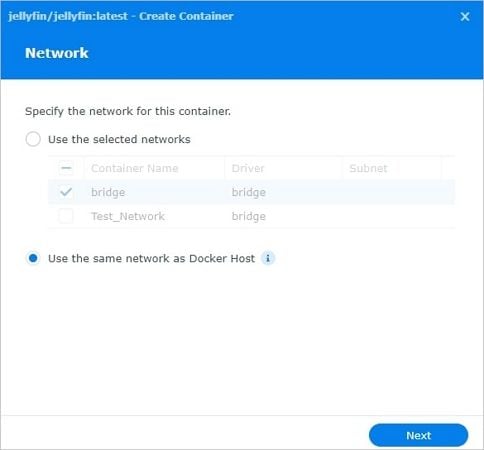
Step 3Installing Docker
Here are the steps to install Docker:
- Install Docker from Synology’s Package Center;
- Run Docker and use the latest image in the registry to download the jellyfin/jellyfin container;
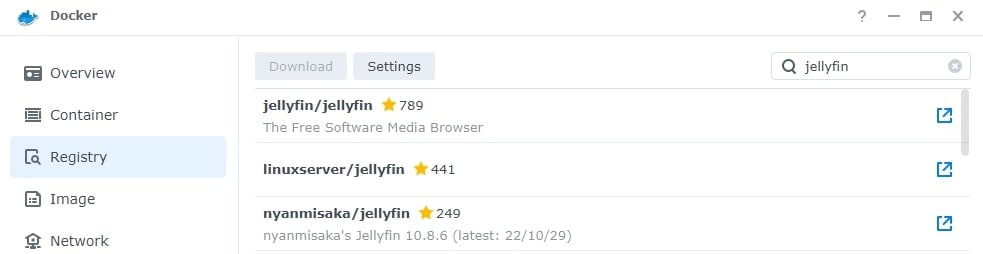
- Wait for your download to complete, then launch the installer;
- Specify the network for Docker by selecting Use the same network as Docker Host > Next;
- Name your Docker container, tick the Enable auto-restart box, then click Next.

Step 4Creating Docker Folders
Here’s how to create Docker Folders:
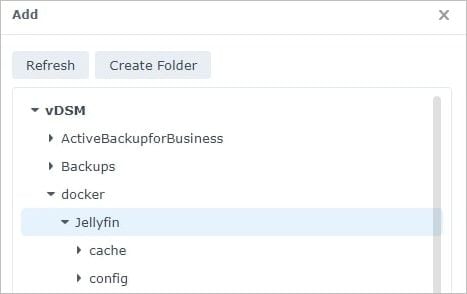
- Select Add Folder in the Volume Settings tab;
- Follow this path: Create Folder>Docker>Jellyfin;
- Create config and cache subfolders under the Jellyfin folder;
- Set the Mount Paths as /config and /cache.
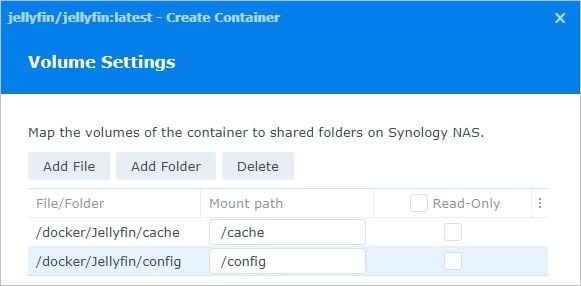
Note: You must create different mount paths for the shared folders where you keep your media (if you keep your media files in separate shared folders). So, your Docker Volume section should contain a folder for each media type..
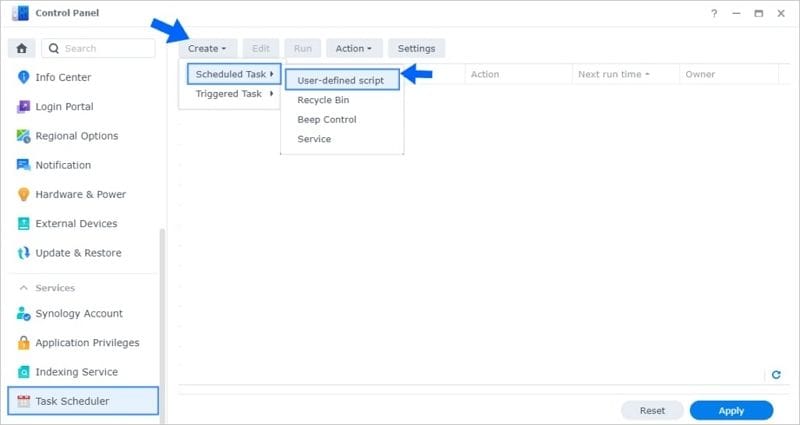
Step 5Creating a Scheduled Task
Follow these steps to create a Scheduled Task:
- Head to Control Panel;
- Select Task Scheduler and click Create;
- Choose Scheduled Task and select User-defined script.
Step 6Configuring Your Scheduled Task
When you select the User-defined script option, a new window will appear. Follow these steps to configure a Scheduled Task:
- Head to the General tab and enter Jellyfin in the Task section;
- Choose root in the User list;
- Uncheck the Enabled option;
- Head to the Schedule section and select Run on the following data, then click Do not repeat;
Locate the Run command area and copy-paste this code:
docker run -d --name=jellyfin \
-u 1026:100 \
-p 8096:8096 \
-v /volume1/docker/jellyfin:/config \
-v /volume1/docker/jellyfin/cache:/cache \
-v /volume1/data/media/movies:/movies \
-v /volume1/data/media/tv:/tvshows \
--restart always \
jellyfin/jellyfin
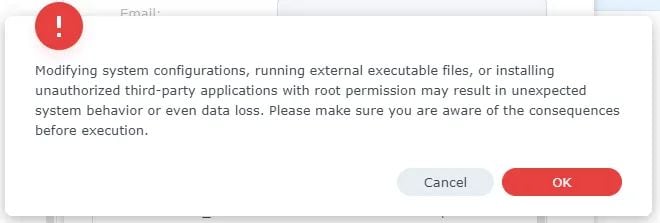
When you click OK, you’ll see the warning prompt – just click OK.
Step 7Running the Scheduled Task
Once you accept the warning message, a new window will appear with all your tasks listed. Select Jellyfin and click Run. Confirm the action by pressing Yes.
When Jellyfin appears in your Docker list, run your web browser and go to the default Jellyfin web page, where you can choose your language, username, and password.
Fill out the information and follow these steps:
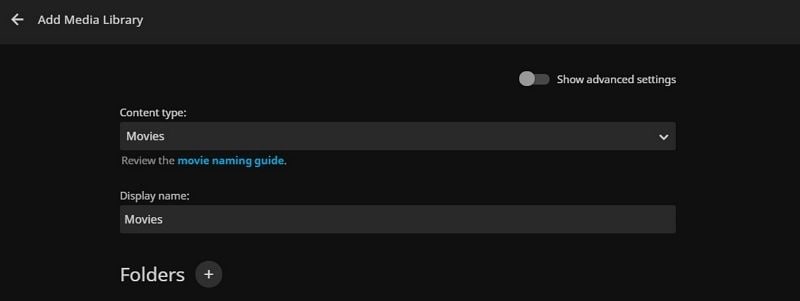
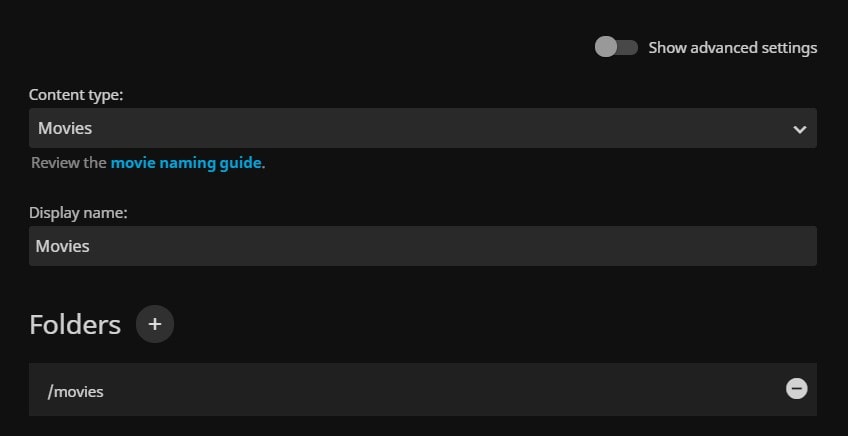
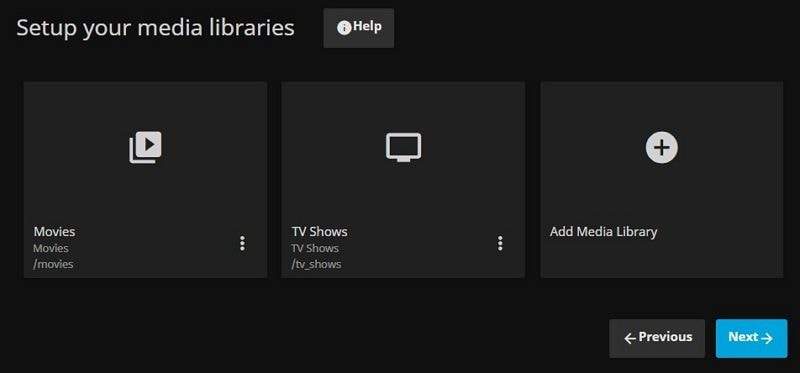
- In Add Media Library, choose your Content type to map the folders by content and media types (Content type > Movies > Display name > Movies > /movies);
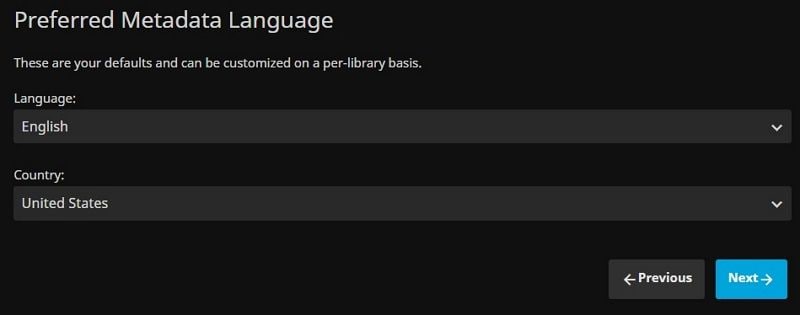
- Set your metadata settings in the Preferred Metadata Language section;
- Tick the Allow remote connections to this Jellyfin Server box to confirm remote access settings.

That’s it – you’re done! You’ve successfully installed Jellyfin on your Synology NAS.
Conclusion
Since Jellyfin is an open-source dedicated platform for streaming different media files, installing Jellyfin on Synology NAS is a great idea if you need remote access to your movies, music, and TV shows from anywhere and on any device.
The platform allows you to easily gather, manage, and access your media content according to your needs. You can also use Jellyfin to capture content automatically, watch live TV, add new and expert users, arrange your media libraries, and more.
Whether you want to customize the platform, listen to music, watch movies, or display photos, Jellyfin does it all with ease. In addition, Jellyfin is compatible with an impressive range of apps and integrations, including Xbox One, Roku, PS4, Android/iOS systems, etc.
For Windows XP/Vista/7/8/10/11
For macOS X 10.10 or later


