

 TL;DR:
Successfully recovering backed-up videos depends on your original storage method, requiring you to retrieve files from temporary cloud trash folders, utilize native operating system versioning, or extract missing data from damaged offline drives.
● Cloud services and apps like iCloud, Google Drive, and Dropbox hold deleted videos in their Trash or Deleted Files folders for a limited recovery window, with iCloud specifically enforcing a strict 30-day retention limit before permanent deletion.
● Windows File History, Windows Backup and Restore, and macOS Time Machine enable you to safely restore previous offline versions of altered or deleted videos, provided these built-in system features were actively configured and running before the data loss occurred.
● If an offline backup stored on an external hard drive or USB fails to open due to premature ejection or file system damage, utilize deep-scanning software like Recoverit to repair minor file errors and extract missing high-quality videos without overwriting the original storage device.
Ask AI for a summary
 ChatGPT
 Perplexity
 Gemini
 Claude
 Grok
Grok
Losing videos is upsetting. It can happen suddenly. One wrong click or system crash, and your memories or work disappear. But if you kept a backup, you do not need to worry much. Backups exist for this reason. They store a copy of your files in another safe place.
Backed-up video recovery makes it possible to bring your videos back. The process depends on where your backup is saved. Some people use cloud drives. Some save files on external storage or local tools. This guide will explain how to recover backed-up videos easily from every source.
Table of Contents:
Part 1: Can You Recover Videos from Backup Sources?
Yes, you can. Most backup systems save full copies of your files. They are like safety nets for your data. When your videos disappear from your phone or computer, you can use the backup to get them again. It may take a few minutes, but the process is usually simple.
Backup locations include your device memory, cloud storage, and physical drives. Each one works differently but serves the same purpose. You can perform a backup video recovery anytime if your backup is safe and accessible. Tools and built-in features can make the recovery faster and easier.
Part 2: Backup Video Recovery: How to Recover Backed-up Videos?
There are several ways to bring your backed-up videos back. The best method depends on how you stored your backups. For example, cloud users can log in and restore from the online folder. Those who saved videos on a hard drive or USB can connect and copy them back. Below are five proven methods that help in every situation.
Method 1: Use Recoverit Tool
Recoverit is one of the most reliable programs for backed-up video recovery. It helps when files are missing, formatted, or even corrupted. Many people use this tool because it works on almost every device and storage type. Whether your backup is on a USB, memory card, or local drive, Recoverit can scan and find your files again.
The software uses deep scanning technology. It looks beyond what normal file browsers can detect. Even if your backup folder seems empty, Recoverit can still locate your videos. It also keeps your data safe during the scan, so nothing gets overwritten. This makes it a trusted option for many users trying to recover backed-up videos.
Recoverit is especially useful when your external or local backups fail to open. It can repair minor file errors and restore videos to a working condition. People who work with large or high-quality videos often depend on it because it supports all formats and handles big files easily.
Steps to use Recoverit:
Step 1. Download and install Recoverit. Open it and choose the location of your backup.

Step 2. Click “Scan” and wait.

Step 3. When the videos appear, select and click “Recover.” Save them to a new safe location.

Method 2: Recover from an External Hard Drive or USB
External drives and USBs are still popular for storing videos. They are easy to carry and have enough space for long videos. If you backed up your videos on such a device, recovery is simple. You only need to connect it to your computer and look for your files.
Sometimes, though, the backup folder may not open. This happens if the file system is damaged or the device was removed too early before ejecting. In that case, backed-up video recovery tools can help. These tools can scan the USB or external drive and show your lost files for recovery.
Recovering from these drives is a safe choice because they are not connected to the internet. This prevents online loss or hacking. It is also useful for recovering backed-up videos from Windows backup and restore files that were saved to an external device for extra safety.
Why use it:
- Works without internet.
- Good for large videos.
- Simple and reliable.
- Compatible with most devices.
- Best for offline recovery.
Steps to Recover from an External Hard Drive or USB:
Step 1. Connect your external hard drive or USB to the computer.
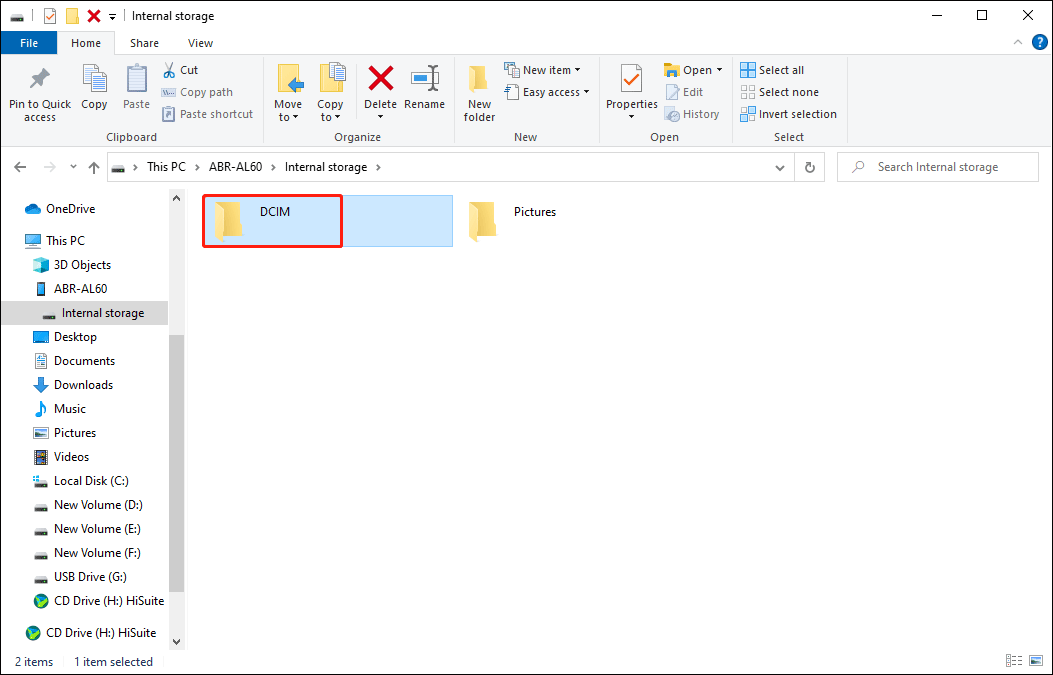
Step 2. Open the DCIM folder and copy your videos back. If missing, use recovery software to scan the device and restore them.
Method 3: Use File History or Time Machine (Windows/macOS)
Modern computers have built-in tools for backups. Windows includes “Backup and Restore” or “File History.” macOS offers “Time Machine.” These tools save regular copies of your videos and other files. You can use them to recover backed-up videos anytime something is deleted.
On Windows, Backup and Restore keeps full system images. File History saves versions of files over time. This means you can go back to a past version even if the file changed. Mac users can use Time Machine for a similar result. These tools make recovery backed-up videos from Windows backup and restore very simple.
If your system crashed or your folder got deleted, these built-in features will help. You just need to choose the backup date and restore your videos. It is also one of the safest methods because your computer handles the process without third-party apps.
Why use it:
- Already built into your system.
- Free to use.
- Creates regular backups.
- Saves file versions.
- Trusted by Windows and macOS.
Steps to Use File History or Time Machine:
Step 1. On Windows, open “Control Panel” and click “Backup and Restore.” On Mac, open “Time Machine.”

Step 2. Choose the backup date, select your videos, and click “Restore.” The files will return to the original folder.
Method 4: Retrieve from Backup Apps (e.g., Dropbox, Mega, Box)
Backup apps like Dropbox, Mega, or Box are convenient cloud services. They sync your videos between devices. If a video is deleted from your phone or computer, the backup copy stays safe in the app’s cloud. You can open it from any device with your login.
These apps often have a recycle bin or “Deleted Files” folder. Videos that you deleted are kept there for a few days or weeks before being removed completely. You can recover backed-up videos from there easily. This makes them helpful for both personal and professional users who store work online.
Most backup apps also save earlier file versions. For example, Dropbox lets you restore older versions of a video, not just the latest one. This is perfect if you edited or replaced a video by mistake. It gives you control over your data and recovery process.
Why use it:
- Available on all devices.
- Syncs automatically.
- Keeps deleted files for some time.
- Stores file versions.
- Easy restore from app or web.
Steps:
Step 1. Open the app or website for your backup service. Sign in.
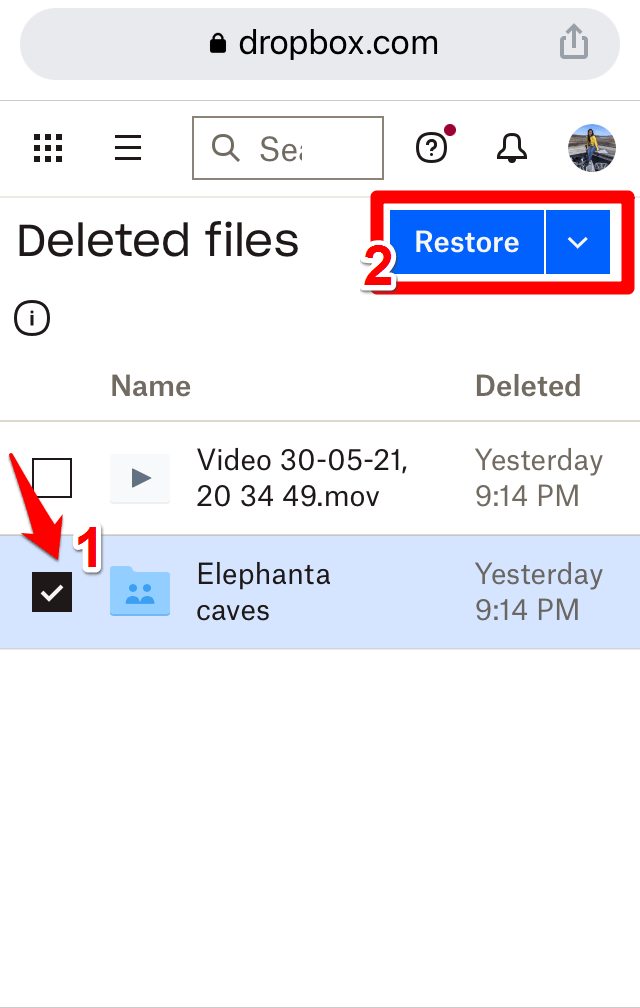
Step 2. Check the “Deleted Files” section. Choose your videos and click “Restore.” They return to your main folder.
Method 5: Restore from Cloud Backup (Google Drive, iCloud, OneDrive)
Cloud backups are the most common today. Services like Google Drive, iCloud, and OneDrive keep your videos online, safe from local damage. You can access them anytime from a phone or computer. This is useful for people who use multiple devices.
When you delete a video by mistake, cloud storage keeps it in the Trash folder for a short period. For Google users, this is the best way to recover backed-up videos from Google Photo or Google Drive. For Apple users, iCloud keeps deleted items for 30 days before removing them.
Cloud backups are also helpful for mobile users. You can recover backed-up videos from mobile devices by opening your cloud app, checking the Trash or Backup folder, and restoring the video. It takes only a few seconds and works automatically once the internet is connected.
Why use it:
- Safe from local damage.
- Access anywhere, anytime.
- Works across platforms.
- Automatic syncing.
- Keeps deleted items temporarily.
How to Restore from Cloud Backup:
Step 1. Log in to your cloud account (Google Drive, iCloud, or OneDrive).
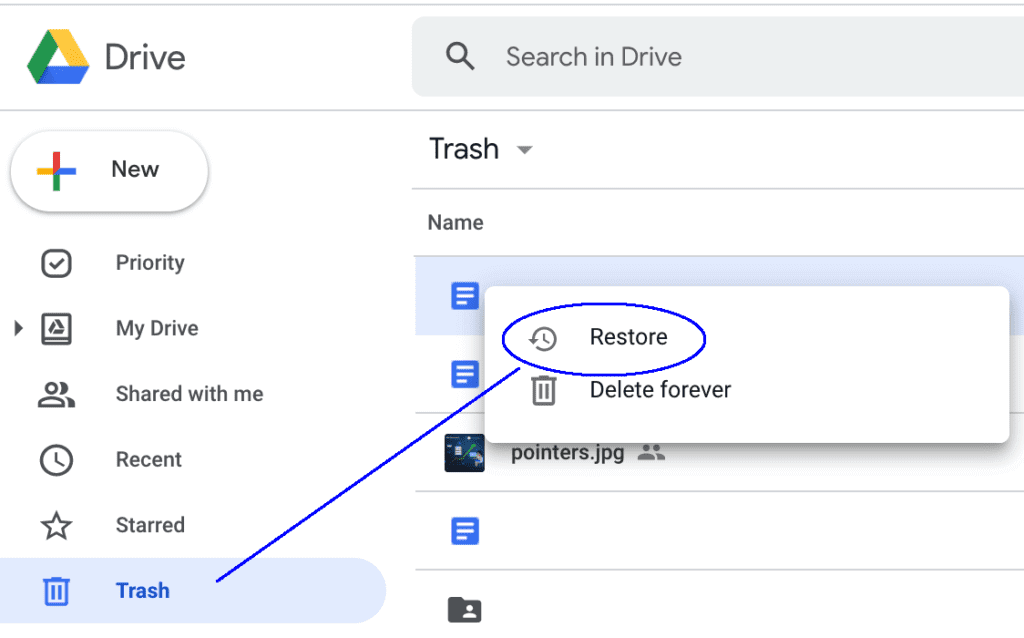
Step 2. Go to Trash or Backups, find your video, and click “Restore.” It will appear in your main video folder.
Part 3: Pro Tips to Keep Video Backups Safe and Accessible
After recovery, keep your backups secure. Videos are large and valuable files. If lost again, recovery might take time. You can avoid this by using smart backup habits. Follow these tips to make sure your videos remain safe and accessible.
- Keep two copies: Store one copy on a local drive and another in the cloud. It prevents full loss if one fails.
- Schedule backups: Set weekly or monthly backups so you never miss new files.
- Label folders properly: Use clear folder names like “Trip Videos” or “Client Work.” It saves time later.
- Encrypt private files: Use simple password tools to keep your videos safe from unauthorized access.
- Check your cloud regularly: Sometimes sync fails. Make sure all videos are actually uploaded.
- Use good hardware: Invest in quality external drives. Cheap ones can fail early.
- Avoid clutter: Delete duplicate or old versions that you no longer need. It saves space.
- Test restore function: Try restoring a small file once in a while to confirm your backups work.
By following these practices, you will always be ready. Even if your main files vanish, your backups will stay safe and ready for use.
Conclusion
Videos capture memories, stories, and work. Losing them can feel like losing time. But with proper backup systems, nothing is ever truly lost. Backed-up video recovery gives you control to bring your videos back quickly.
You can use recovery tools, built-in system backups, or cloud services. Keep your backups safe, organized, and up to date, and your videos will always be secure.
FAQs:
-
Can I use these methods on mobile phones?
Yes. You can recover backed-up videos from mobile devices using apps like Google Drive, iCloud, or Samsung Cloud. Just open your account and restore your videos directly to your phone. -
What if my external backup is not opening?
Use a recovery tool such as Recoverit. It can scan the external drive and recover backed-up videos even if the files are missing or corrupted. Save the recovered videos on a new drive to prevent more loss. -
Are cloud backups safe for large video files?
Yes. Cloud backups like Google Drive and OneDrive support large files. Upload may take time, but your videos remain protected. You can access them anytime, which makes cloud storage a smart long-term option.


