

 TL;DR:
Time Machine is the built-in macOS utility that automatically creates incremental, versioned backups of your entire system to an external or network drive, allowing you to restore specific deleted files or execute a complete full-system rollback.
● To accommodate its default rolling schedule of keeping hourly backups for the past 24 hours, daily backups for the past month, and weekly backups for previous months, your designated backup disk requires at least two to three times the total capacity of your internal Mac drive.
● Local external drives utilizing USB or Thunderbolt provide the fastest data recovery speeds but require a consistent physical connection, whereas NAS or shared Mac configurations automate backups wirelessly but make backup integrity dependent on network stability and strict permission settings.
● Because Time Machine automatically deletes the oldest snapshots when storage is full and remains vulnerable to external backup drive corruption, files lost between scheduled intervals or inaccessible backups require a specialized data recovery scanner like Recoverit to extract data directly from the affected volume.
Ask AI for a summary
 ChatGPT
 Perplexity
 Gemini
 Claude
 Grok
Grok
Time Machine is Apples built in backup feature for macOS, designed to automatically protect your files, apps, and system settings. By regularly backing up your Mac to an external drive or network location, Time Machine lets you browse through past versions of your documents, restore accidentally deleted files, or roll back your entire system after a crash or hardware failure. Understanding how Time Machine works, where it stores data, and what its limitations are is essential if you rely on it as your main safety net. This guide explains Time Machine in clear terms and shows what to do if your backup fails or important files are still missing.
Try Recoverit to Perform Data Recovery
 Security Verified. 3,591,664 people have downloaded it.
In this article
What Is Time Machine
Time Machine is the default backup solution built into macOS that creates automatic, versioned backups of your entire Mac. It continuously saves copies of your files, applications, accounts, system settings, and macOS itself to a separate storage device.
Unlike simply copying files to an external drive, Time Machine backup is incremental and organized by date. You can enter the Time Machine interface, browse a visual timeline, and restore anything from a single file to your full system from a specific point in time.
Key benefits of using Time Machine on Mac include:
- Automatic protection of user data with minimal setup.
- Easy recovery of accidentally deleted or overwritten files.
- Full-system restore after drive failure, macOS issues, or hardware replacement.
However, relying solely on Time Machine still carries risks, such as drive failure on the backup disk, misconfiguration, or corrupted backup snapshots. That is why understanding how it works, and pairing it with a dedicated Mac data recovery tool, gives you a stronger data protection strategy.
How Does Time Machine Work
Mac Time Machine works by taking automatic snapshots of your data and storing them on a designated backup drive or network location. After you select a backup disk in System Settings, macOS quietly runs in the background and keeps your backups updated.
Backup schedule and versions
By default, Time Machine follows this schedule:
- Hourly backups for the past 24 hours.
- Daily backups for the past month.
- Weekly backups for previous months.
When the backup disk is full, the oldest backups are removed to free space for new ones. This means you always have a rolling history of your Mac, which lets you restore earlier versions of files instead of only the latest copy.
How Time Machine stores data
On HFS+ formatted drives, Time Machine historically used a complex structure of folders and hard links. On APFS formatted disks, it uses snapshots and a more modern structure. In both cases, it efficiently stores only changed data between backups, which reduces storage consumption and backup time.
The main backup destination can be:
- An external USB, Thunderbolt, or FireWire drive.
- A network-attached storage (NAS) share that supports Time Machine.
- An Apple Time Capsule or another Mac sharing a disk over the network.
Because Time Machine keeps so much historical data, it is often possible to restore files you deleted days or weeks ago, as long as the relevant backups still exist on the disk.
How restore and recovery works
To restore a specific item, open the folder where the file used to be, enter Time Machine from the menu bar, and then browse through the timeline at the right of the screen. You can preview and restore a previous version of a file or bring back an item that has been fully removed from your live disk.
To restore an entire Mac, you can use macOS Recovery or the Setup Assistant on a new Mac and choose the option to restore from a Time Machine backup. This can save hours of manual reinstallation and reduce downtime after a major issue.
What are the Types of Time Machine
While many users think of Time Machine as a single feature, there are several ways to configure it, each with its own pros and cons. Understanding the types of setups helps you choose the right strategy for your environment and risk tolerance.
Local Time Machine backups
Local backups are the most common way to use Time Machine. You connect a dedicated external drive to your Mac, select it as a backup disk, and let macOS handle the rest.
| Type of local backup | Main characteristics |
|---|---|
| External USB/Thunderbolt drive | Affordable, easy to set up, fast backups and restores. Requires that the drive stays connected regularly for consistent protection. |
| Portable external SSD | Smaller and more durable than HDDs, much faster for both backup and restore, ideal for users who travel with their Macs. |
Advantages of local Time Machine backups:
- High speed for large backups and full-system restores.
- Full control over the physical disk, without dependence on network stability.
- Simple setup that works even without advanced networking knowledge.
Limitations to keep in mind:
- If the external drive fails, you may lose all previous snapshots.
- Backups only update when the drive is connected to the Mac.
- Local drives are vulnerable to theft, accidents, or disasters in the same location.
Network and advanced Time Machine setups
Some users prefer to keep their Time Machine backup on the network so all backups are centralized and the drive can be stored in a safer location.
| Type of network setup | Main characteristics |
|---|---|
| Network-attached storage (NAS) | Dedicated storage appliance on your network; many NAS models explicitly support Time Machine with quotas and user control. |
| Shared disk on another Mac | A disk connected to another Mac and shared via file sharing; good for small offices or multi-Mac households. |
Advantages of network Time Machine:
- Automatic backups over Wi-Fi or Ethernet, even when the Mac is not in the same room.
- Backup disk can be physically protected elsewhere in the building.
- Some NAS devices can mirror or RAID the data, improving resilience against drive failure.
Potential downsides:
- Backups and restores depend on network speed and reliability.
- Setup can be more complex, especially when working with permissions and quotas.
- Network outages can interrupt scheduled backups.
For critical data, many users combine local and network-based Time Machine backups, plus an additional backup software or cloud service, to protect against different kinds of failures.
Practical Tips for Time Machine
To get the most out of Mac Time Machine and reduce the risk of backup‑related surprises, it is important to apply a few practical best practices.
Setting up Time Machine correctly
- Connect an external backup drive or ensure your NAS/share is available.
- On macOS Ventura or later, go to System Settings > General > Time Machine. On earlier versions, open Time Machine from System Preferences.
- Click Add Backup Disk or Select Backup Disk, then choose your external or network drive.
- Enable automatic backups and, if possible, leave the disk connected or accessible over the network.
Make sure your backup disk has at least 2–3 times the capacity of the data on your internal drive. This gives you room for multiple historical snapshots.
Monitoring backup health and storage
Regularly check that backups are working:
- Use the Time Machine menu bar icon to confirm recent backup times and detect error messages.
- Occasionally enter Time Machine and confirm that older versions of files are visible and restorable.
- On network drives or NAS devices, verify that storage quotas and permissions still allow new data to be written.
If you see warnings about failed backups, do not ignore them. Long gaps in your backup history increase the chance of permanent loss if something happens to your Mac.
When Time Machine is not enough
Even with a reliable Time Machine backup, issues can occur:
- The external or network backup disk becomes corrupted or fails completely.
- You accidentally excluded folders from backup that later turn out to be important.
- A file is lost before the next scheduled backup runs.
In these situations, specialized tools for Mac data recovery such as Recoverit become essential. They scan your Mac or external drives directly to locate traces of deleted or lost data that Time Machine never captured or can no longer access.
How to Use Recoverit to Recover Lost Data
Recoverit by Wondershare is a professional mac data recovery solution that helps you restore files when Time Machine is unavailable, outdated, or corrupted. It works with Mac internal drives, external disks, USB sticks, SD cards, and even some damaged or formatted volumes. You can learn more and download the latest version from the Recoverit official website.
Key Features Offered by Recoverit
- Recover deleted files and lost data from Mac internal drives, external HDDs/SSDs, USB flash drives, SD cards, and Time Machine disks, even after formatting or partition issues.
- Support for hundreds of file types, including documents, photos, videos, emails, archives, and project files produced by creative and office apps.
- Intuitive interface with real-time scan progress, file filters, and preview so you can selectively restore only what you need and avoid overwriting important data.
Step-by-Step Guide on How To Recover Lost Data
1. Choose a Location to Recover Data
Install and launch Recoverit on your Mac, then select the drive, partition, or device where the data loss occurred. This might be your Macintosh HD system volume, an external backup drive used by Mac Time Machine, or another removable disk. After you have selected the correct target, click Start to begin the recovery process.

2. Deep Scan the Location
Recoverit will automatically perform a thorough scan of the selected location, searching for deleted, formatted, or otherwise inaccessible files. You can monitor the progress bar, pause or stop the scan if necessary, and use filters such as file type, modification date, or path to narrow down the results while the tool continues scanning in the background.

3. Preview and Recover Your Desired Data
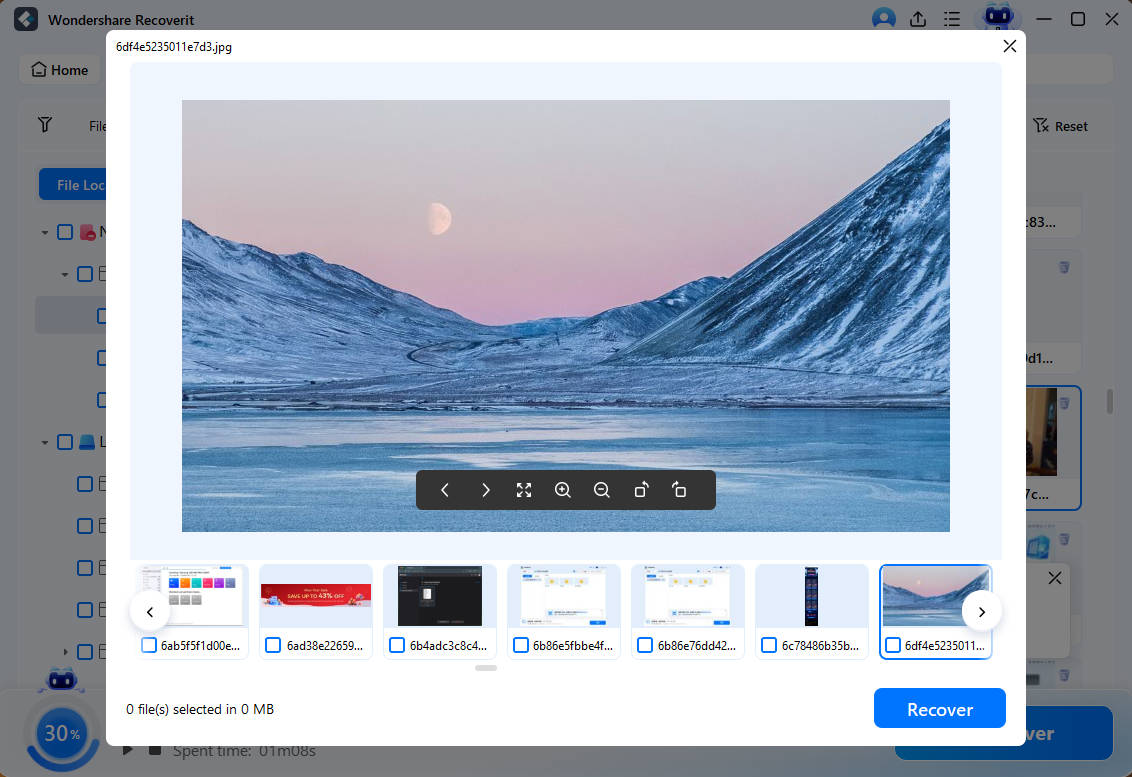
When the scan finishes, review the list of recoverable items. Use the built-in preview feature to open photos, videos, and documents to confirm their integrity before recovery. Select the files or folders you want to restore, click Recover, and choose a safe destination that is different from the original location to avoid overwriting any remaining recoverable data.
Conclusion
Time Machine is a powerful and convenient backup solution built into macOS, giving you an automated way to protect your files and restore past versions when something goes wrong. By pairing it with good habits, such as using a reliable external drive and checking backup status regularly, you can greatly reduce the risk of permanent data loss.
However, no backup system is perfect. If a Time Machine backup is missing, corrupted, or incomplete, a specialized tool like Recoverit can help you recover critical files directly from your Mac or external devices. Combining Time Machine with an additional recovery safety net keeps your data far more secure over the long term.
Next: System Restore
FAQ
-
What is Time Machine on Mac?
Time Machine is Apples built in backup feature for macOS. It automatically backs up your entire Mac, including system files, apps, accounts, settings, and personal data, so you can restore individual files or your whole system when needed. -
Do I need an external drive to use Time Machine?
In most cases you need an external drive, such as a USB, Thunderbolt, or network drive, to store Time Machine backups. You can also use a NAS or a compatible network volume, but the backup must always be stored separately from your main system disk. -
How often does Time Machine back up my Mac?
Time Machine usually creates hourly backups for the last 24 hours, daily backups for the last month, and weekly backups for older data. When the backup disk is full, the oldest backups are deleted to make space for new ones. -
Can Time Machine restore my entire Mac system?
Yes. You can restore your whole Mac from a Time Machine backup when setting up a new Mac or after reinstalling macOS. Use macOS Recovery or Setup Assistant and choose the option to restore from a Time Machine backup, then follow the onscreen instructions. -
What if my Time Machine backup is missing or corrupted?
If your Time Machine backup cannot be used or some files are still missing, you can try recovering data directly from your Mac or external drive with Recoverit. It scans the storage device for lost files and allows you to restore them even when you do not have a working backup.


