Hard Drive Recovery
- Recovers deleted or lost files from hard drive effectively, safely and completely.
- Supports data recovery from 500+ data loss scenarios, including computer crash, partition loss, accidental human error, etc.
- Supports 1000+ file formats recovery with a high success rate and without any quality loss.
How to Fix or Remove Errors Loading NvCpl.dll

Oct 23, 2026 • Filed to: Windows Computer Solutions • Proven solutions
 TL;DR:
To fix the NvCpl.dll loading error, you must update your Nvidia display adapter drivers, reinstall the recently added program that triggered the issue, or repair your Windows registry.
● Install the newest graphics drivers directly from the official Nvidia website to replace corrupted or outdated files linked to the Nvidia Control Panel.
● Utilize a dedicated registry cleaner to sweep out viruses and repair modified registry data, as editing the Windows registry manually carries high system risks.
● Use Recoverit Data Recovery software to scan the affected storage location and retrieve lost files if the error or improper troubleshooting operations result in hard drive data loss.
Ask AI for a summary
 ChatGPT
 Perplexity
 Gemini
 Claude
 Grok
Part 1. What's NvCpl.dll?
NvCpl.dll is a library file for the NVIDIA display adapter. It's loaded as a startup item, to load the Nvidia Control Panel and help to process the various files and information that Nvidia graphics cards use to help your computer run as smoothly as possible.
Non-system processes like nvcpl.dll originate from software you installed on your system. It is made by a Third Party but is most likely safe. Unfortunately, this file is often the cause of a lot of errors, causing your PC to become damaged and erroneous.
Typical nvcpl.dll error
Error loading C:Windowssystem32NvCpl.dll. The Specified module could not be found
Main reasons causing NvCpl.dll error
• Damaged or missing NvCpl.dll
• Attack of malware, adware or other spyware
• Incorrect installation of applications
• Damaged or obsolete windows registry
• Outdated windows device drivers that require updating
• Corrupted file allocation
Part 2. How to Fix NvCpl.dll Error?
Solution 1. Uninstall the program
If the error appears after the installation of a program, you are supposed to uninstall it at first. Incorrect installation of applications can always bring an NvCpl.dll error. If the program is corrupted, damaged, or outdated, it can cause an error like this as a result. To ensure this is not the issue, you can remove the program and reinstall it.
Solution 2. Clean out Viruses and registry
Viruses can infect various DLL files on your computer, which may cause the file unreadable. To make sure the environment is clean on your computer, you need to scan your computer and sweep out the virus programs, and then clean out or repair your Windows registry, which is the vital information keeper for your system. When the NvCpl.dll error comes up, the registry may have been modified. You have to repair it or clean out the useless information stored on it. To do this, you can use a registry cleaner, which can help to complete this work quickly and easily, because it's risky to modify the registry manually.
Solution 3. Update your Nvidia drive
It's usually the case that the Nvidia drive on your computer becomes outdated or corrupted, and this could bring you the NvCpl.dll error message. So you can remove the old one and install a new one, or just go to the Nvidia website to download the latest one for your computer.
Solution 4. Download a Hal.dll
You also can choose to download a Hal.dll file from the Internet, to replace the improper one. You can search for lots of it online. Here the website DLL-FILES.COM is recommended, where you can get various DLL files.
uplay_r164.dll Missing? Complete Troubleshooting Guide
KCD2 Won’t Launch? How to Fix the WHGame.dll Missing Error
Part 3. Recover Lost Data Caused by NvCpl.dll Error
NvCpl.dll error often comes along with system broken and data lost from your hard drive, with the wrong operations will result in the damaged hard drive and formatted, inaccessible data. Under these circumstances, you will need a hard drive data recovery software to retrieve your data back. Here are the steps:
Your Safe & Reliable Computer Data Recovery Software
- Recover lost or deleted files, photos, audio, music, emails from any storage device effectively, safely and completely.
- Supports data recovery from recycle bin, hard drive, memory card, flash drive, digital camera, and camcorders.
- Supports to recover data for sudden deletion, formatting, hard drive corruption, virus attack, system crash under different situations.
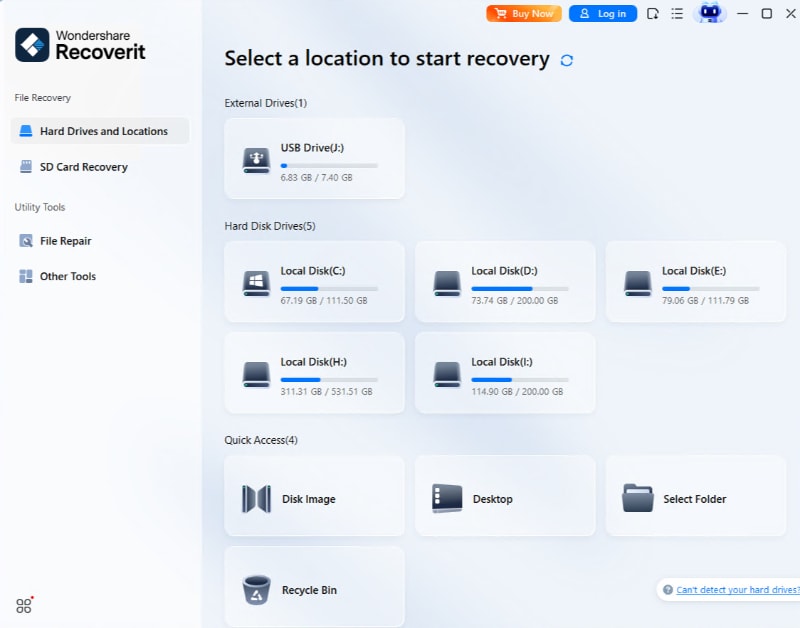
Step 1. Select a Location
First, download and install Recoverit Data Recovery to your computer. Then, launch the tool and select a location where you lost the data.
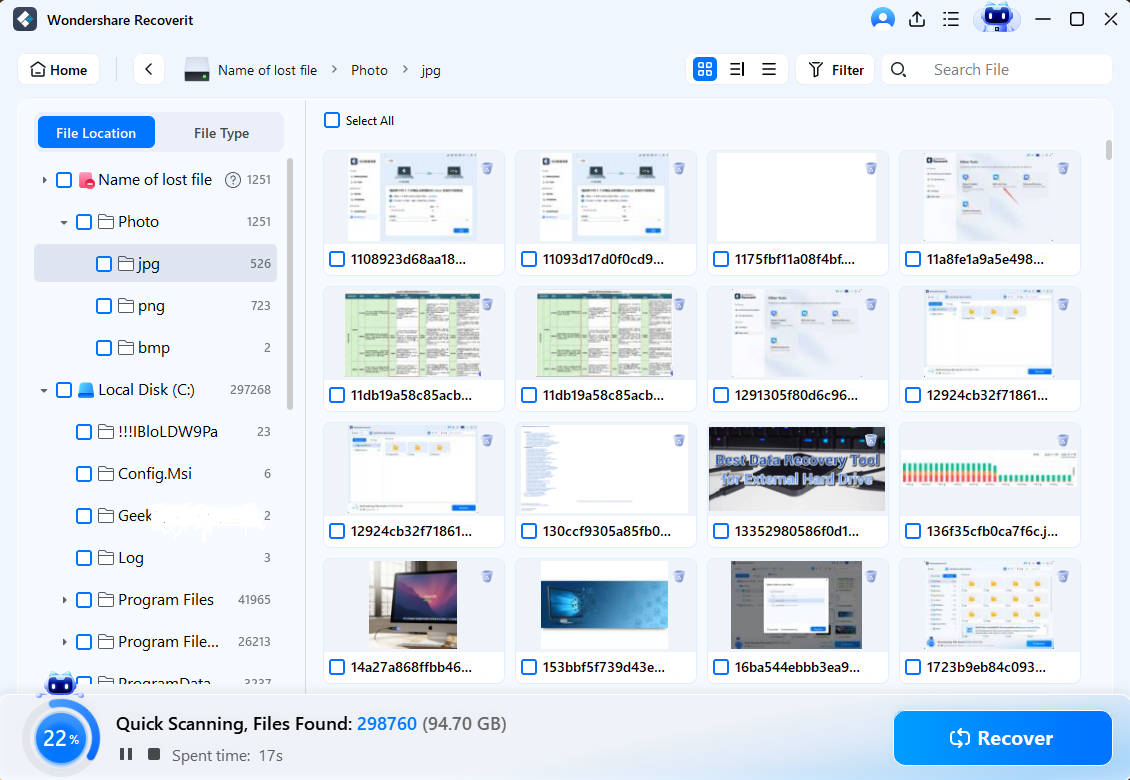
Step 2. Scan the Location
After that, Recoverit will start an all-round scan automatically. And you can see the scanning process on the interface.
Step 3. Preview and Recover Files
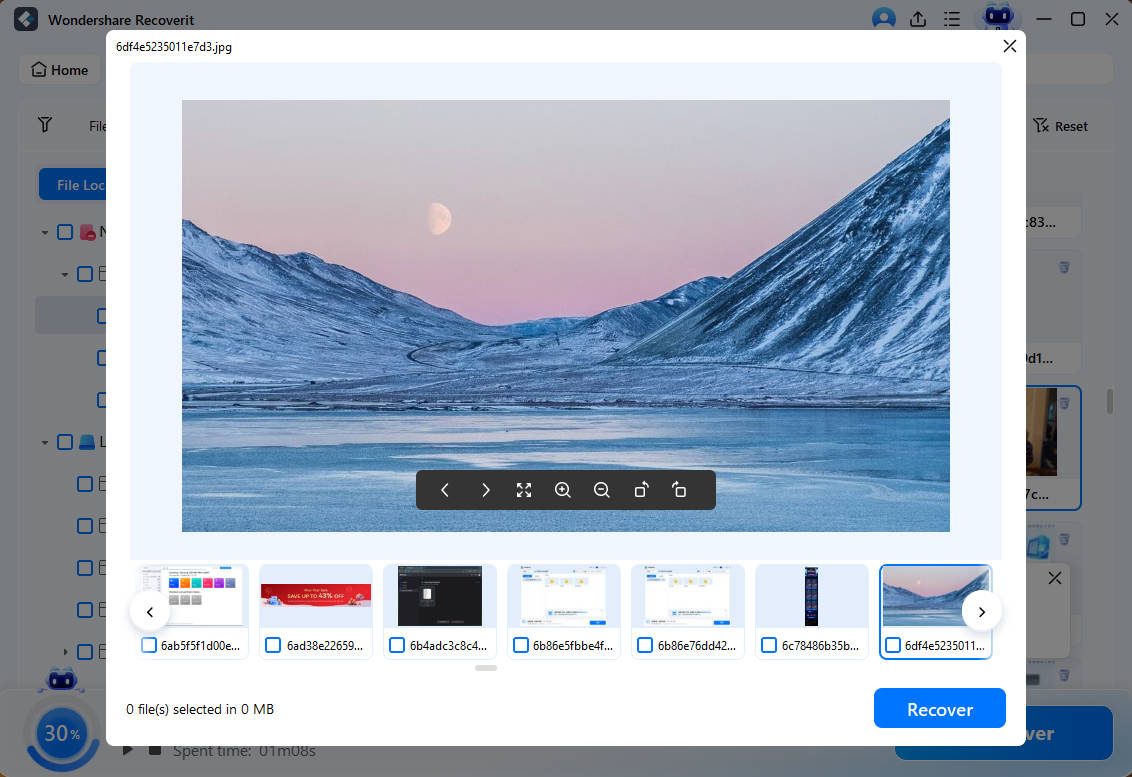
Before recovering the files, you can preview the scanned files to check whether they are the ones you want to recover. Once you find the files you want to retrieve, just taggle it and click Recover option at the bottom right.
Video Tutorial on How to Recover Lost Data with Wondershare Data Recovery

Computer Troubleshooting
- Win System Crash
- Crack Bios Password
- Fix Run Dll Errors
- Fix Taskbar Disappeared Error
- Fix BootMGR Image Corrupt
- MBR Errors Fixed
- Windows Tips
- How to Edit DLL Files
- How to Test Hard Drive Speed
- Bootcamp Windows 10 No Sound Issue
- Download iCloud on PC
- Difference between File Systems
- Fix Computer Overheat
- Computer Problems
- Best Bad Sector Repair Tools
- Audio Not Working in Windows 10
- Fix Windows 10/11 Error Code 0xc000014c
- Fix Windows 10 Error Code 0xc0000034
- SMART Status Bad Error
- Fix Grub Loading Error
- Remove Admin Password
- Blue Screen Errors


Recoverit Editorial Team
chief Editor