7 Tips to Fix Computer Monitor that Gets Black Screen
When you turn on your computer, is the monitor on but a black screen appears? You might be getting the message that "cable is not connected" or "no input." It can also be due to any software issue. Fixing it is sometimes easy, but sometimes you may need the help of an expert when you are unknown of the cause of the computer monitor black screen.
When a blue screen appears, the monitor displays the error. But with the black screen, you are just left guessing what could be the problem.
If you are experiencing such a problem, then in this article you will learn the possible solutions to fix the monitor's black screen. We will also explain how to recover the data if you lose any because of the pc monitor black screen.
Part 1: How to Fix Computer Monitor that Gets Black Screen?
Getting a black screen is the most frustrating thing because you do not know the reason for this issue. While turning on your computer if you are getting monitor black screen, do not worry. Here are the possible solutions that will help you fix this problem.
Solution 1: Check the Power
You might have already done this, but it is worth mentioning here because this happens more often than you think. So whenever you get pc monitor black screen, ensure that the power cable is correctly plugged into the outlet.
Now press the power button and see whether the indicator displays light. If it displays, the monitor will turn on, but if not, then either there is some defect with the monitor or it may not be receiving power.
If the power light does not display, check:
- There is power in the outlet and its power output matches the monitor's power input.
- Try connecting with a different cord and with some other power outlet.
Does the power light display now? If yes, then browse your computer, but if the above steps do not prove successful, proceed to the next solution.
Solution 2: Check Loose or Damaged Cables
Loose or faulty cables can also be the cause of the computer monitor black screen. So, it is advised to check all the connected cables from both ends. This is necessary to ensure that the wires are well-connected.
- Check the video cable, which is connected to the monitor at its back. All the connecting screws need to be tight to ensure proper connection.
- Your monitor's power adaptor cord should also be adequately plugged into the correct power connector.
After performing the above two steps, you should switch off and turn on the monitor again to see if the problem is fixed.
Solution 3: Inspect the video cable and connectors for any damage
Check for any breakage or bends in the video cable and connectors. If any of these is damaged, you will not be able to see any display on the monitor.
When you witness any broken and bent pins in the connector, try to mend them with some metal tube. After straightening, reconnect it again and ensure proper connection. Now turn out the computer and see if you can view the display on your monitor.
Solution 4: Connect your computer to another monitor to troubleshoot monitor issues
You can also try connecting your computer to some other monitor to check whether the monitor is at fault or the computer. After making the connection, tighten all the cables and check by turning on the computer and monitor.
- If you are not able to view anything, the problem might be with the video cable or connector. You can check it as discussed above.
- If the monitor is on but a black screen appears after some time, then the problem can be with Windows.
- After connecting the computer to the new monitor, if can view the display, then it indicates that the monitor is at fault.
- If you are changing the cables for connecting a new monitor, and it fixes the problem then this shows that the original cables have some fault.
Solution 5: Change the computer's display resolution to resolve monitor issues
You can also configure the compatible display resolution of your Windows. Proceed with the steps after connecting your computer to some other monitor.
You can change the display settings from the graphics mode. If you are using the LCD monitor, set the resolution to the monitor's native resolution.
Step 1: Right-click on "Start," and then click on Shut down or the sign-out link.
Step 2: Press the "Shift" key, when the computer restarts.
Step 3: Click on Troubleshoot, and then on Advanced options.

Step 4: Click on "Startup Settings" after entering the "Advanced options."

Step 5: Click on "Restart" when you reach the "startup settings."

When the computer restarts, the screen gives you a display of several options that you can enable or disable.
Step 6: Enable low-resolution video by clicking on 3 or F3.

Step 7: Wait till the Windows opens after changing the settings.
Step 8: Now connect your original monitor and change the resolution to match it with the default settings.
You need to update the graphic driver of your computer if you are unable to select the native resolution of your computer.
Solution 6: Check BIOS and Recovery Options
Are you able to see the boot screen when you turn on the computer? But does it disappears soon after Windows load? This could be the issue of the Windows.
Boot in safe mode and try to repair Windows with system restore or automatic repair. To enter the safe mode:
Step 1: Press the F8 key soon the computer reboots.
Step 2: Use arrow keys to reach the "Safe Mode" option in " Windows Advanced Options."
Step 3: Press "Enter."
You can also enter the safe mode through the startup settings option. Reach startup settings, as explained in Solution 5.
Now try the automatic repair or system restore option first. If it does not work, reset your computer. It will reinstall the system files of Windows.
Solution 7: Check System Failure
If the above solutions do not prove fruitful, you need to check the hardware of your computer.
Step 1: Disconnect all the connected peripherals and devices first. These include a mouse, keyboard, printer, speaker, scanner, external drives, joysticks, etc. All this is necessary because, at times, the problem with the hardware of any connected device can cause the "black screen" issue.
Step 2: Check the port connectors and monitor for any damage. There is a possibility that the cable does not get ejected properly and the ports remain bent and get damaged. Linking cable into an unmatchable port also results in the damage of connectors. If the port is damaged, you need to take it to a professional to fix it.
Step 3: If you have some technical knowledge, you can open the computer to check everything is sealed properly and connected. Also, make sure that the fan of your system is running properly.
Part 2: How to recover data from black screen computer due to system failure
If your system gets corrupted and shows a black screen on the computer, or while fixing the black screen, you lose your important data, you can recover it easily with professional data recovery software.
We are talking about the Recoverit data recovery software that has the maximum recovery rate and can recover data lost under various scenarios. It supports 1000-plus file formats and can recover data from the recycle bin, hard drive, crashed computer, and also from external storage devices.
Download and install Recoverit on some other computer to create bootable media.
Step 1: Create USB Bootable media
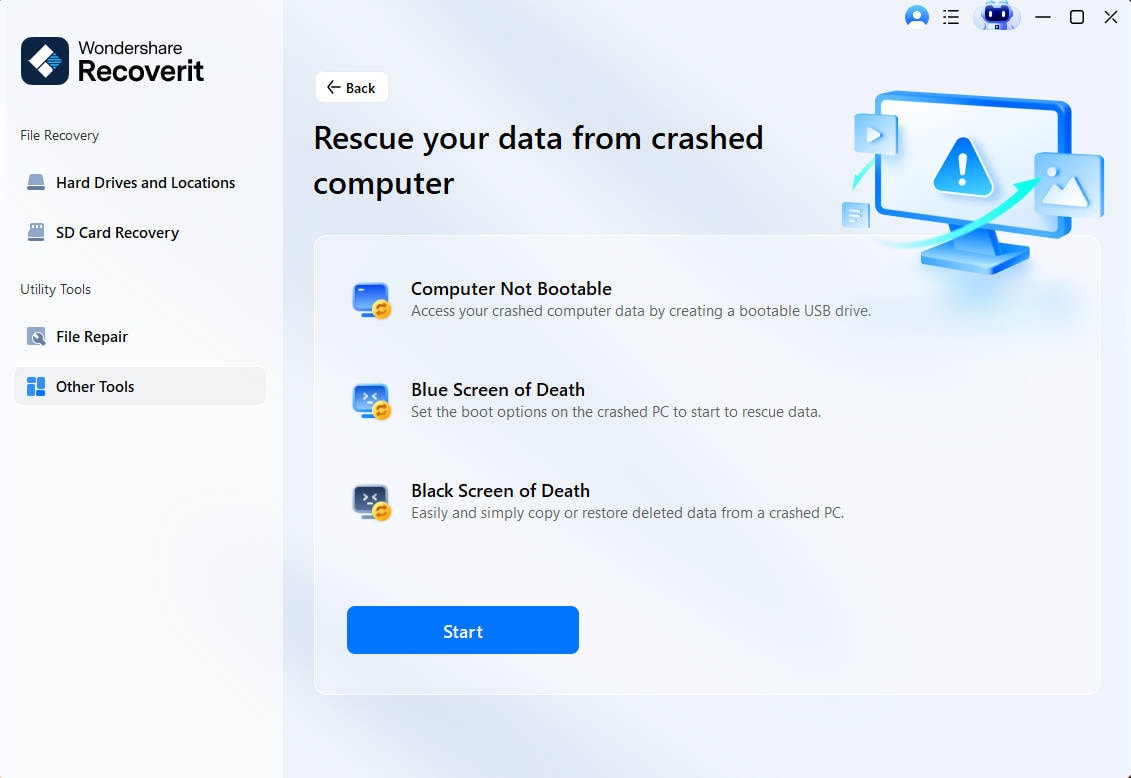
Launch Recoverit on the other computer and select the option "recover from the crash computer," and click on "Start."

Connect the USB device to the computer to create Bootable media. When the computer recognizes your connected USB, click on "Start." Select the USB and click on "Create."

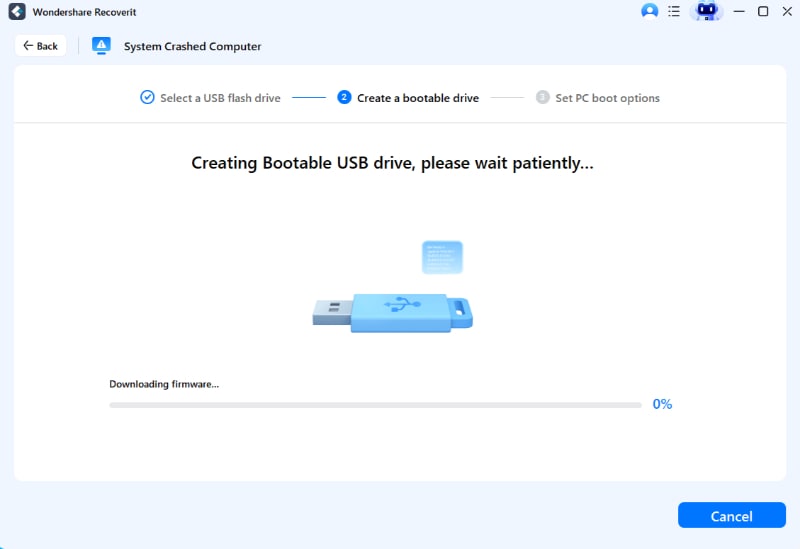
When you select the USB, you will see an alert message for the formatting USB drive. Before clicking on "Format" make sure all the data that is previously present on the drive has a backup. When you click on format, the firmware starts getting downloading. It is software embedded in other hardware devices and is necessary for creating a bootable drive.

After downloading the firmware, the formatting of the bootable drive begins. Now the creation of bootable media begins. It will take a few minutes, do not eject the USB when the process is in progress.

Step 2: Booting from USB
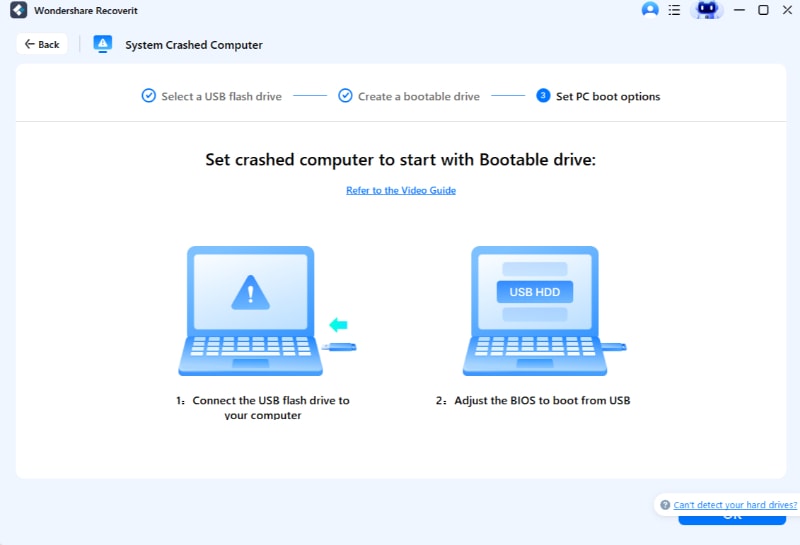
Connect bootable media - USB drive to your computer now. Start the computer and press the BIOS key that is displayed on your computer screen to select the bootable media and boot your system from it.
Step 3: Recovering data
When the computer boots from the created bootable media select data recovery or hard disk copy.
If you are selecting data recovery, select the disk to begin scanning and connect a good drive to your computer. When the scanning completes, select the location to save the recovered data. Select the hard drive connected to your computer and click on "recover." All the data will be recovered from the crashed computer to the hard drive. When the recovery completes, it displays the message – file recovery completed.
If you select hard disk copy, select the copy directory option and connect the good drive to your computer. Select the connected drive and click on "copy." You will see the process of copying data from your computer to a hard drive. When the process completes, it displays the message.
When the recovery process completes preview the data and saves them to a safe location.
The Bottom Line
Experiencing a black screen is a troublesome situation as you are unable to see the cause of it. Whenever you experience it, follow the solution discussed in this article. While fixing the monitor's black screen if your data gets lost, recover it with Recoverit Data Recovery software.
Computer Troubleshooting
- Win System Crash
- Windows Tips
- Computer Problems
- Blue Screen Errors


 ChatGPT
 Perplexity
 Google AI Mode
 Grok
Grok


David Darlington
staff Editor