9 Methods to Fix Windows 10/11 Stop Code Video Scheduler Internal Error
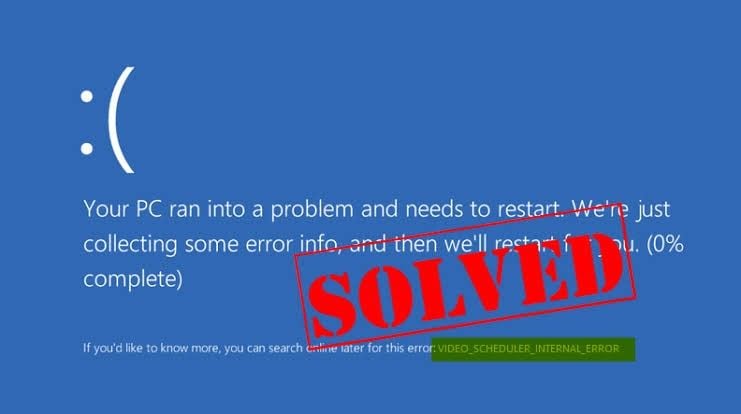
The stop code Video Scheduler Internal error is most common among Windows 11/10 users. This error comes with the symptom of the computer freezing for some minutes, especially if it is getting restarted. This can be frustrating, no?
There are reasons why this error occurs, ranging from issues with the graphics card, a virus infection, recent changes made in software or hardware, a corrupt Windows registry, and so on. No matter the issue, solutions are provided in this article to fix the error in your Windows 11/10.
How to Fix Windows 11/10 Stop Code Video Scheduler Internal Error
This section will teach you methods to use in fixing the Windows 11/10 stop code Video Scheduler Internal error; they include:
Method 1: Run an Anti-Virus Scan
Run a full scan of your system using an anti-virus program. You can decide to use Windows Defender, the anti-virus that has been built into Windows OS or you can go for a reliable third-party antivirus. To use Windows Defender, do these:
- In the Windows "Start" menu, input the words: Windows Defender. Then, double-click it to launch
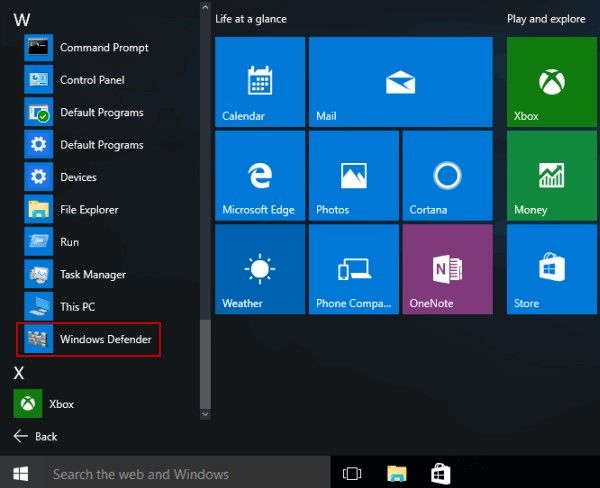
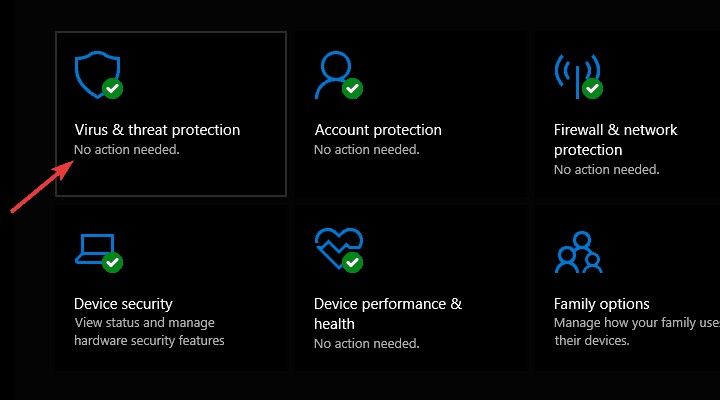
- In the Windows Defender window, go to the panel on the left end and choose the "shield" icon
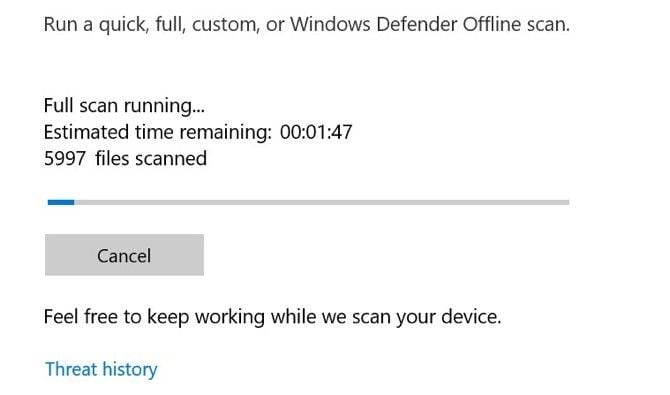
- Choose to do an advanced full scan in the next pop-up window
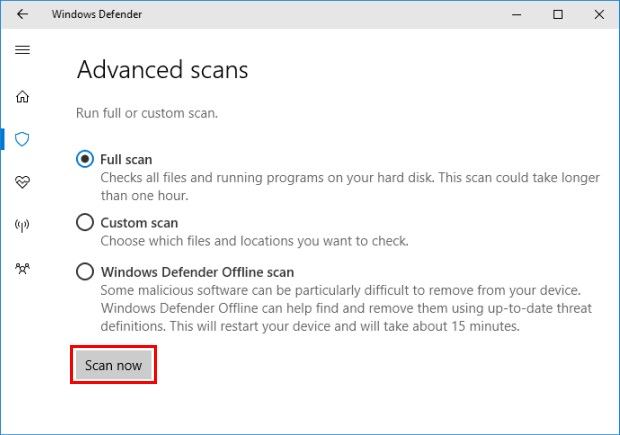
- To begin the process of full system scan, tick the option for that
Method 2: Run Check Disk (CHKDSK)
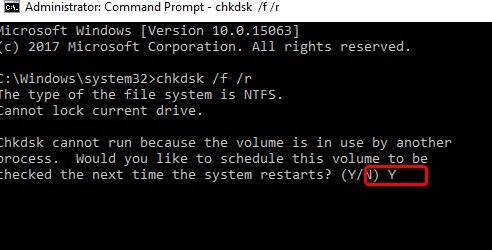
Follow the steps below to run Check Disk on your Windows 11/10; this will check your system for errors to be fixed:
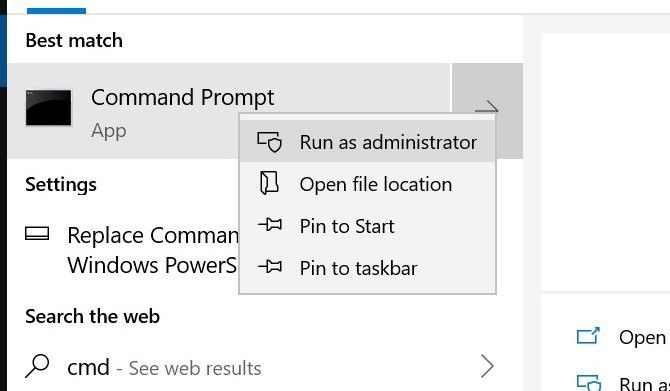
- Press the "Win" key on your keyboard. Here, input the short form for "Command Prompt": cmd. Right-click on this icon and choose to "Run as administrator"
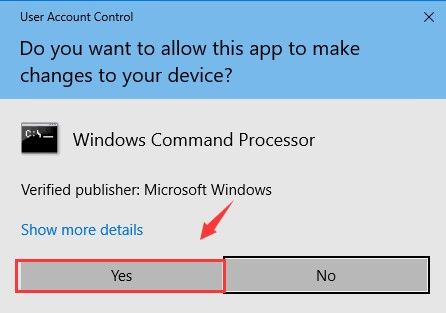
- You will get a pop-up requesting if you are okay with the app making changes to your computer, select "Yes" to continue
- Now that you are in the Command Prompt Window, type in the following instruction
CHKDSK /f /r
Press "Enter"
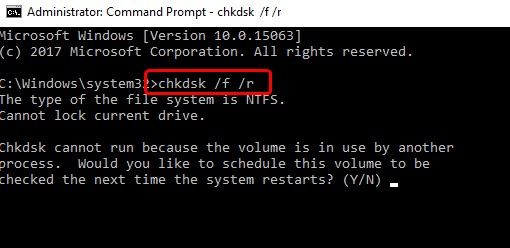
- On your keyboard, press the "Y" letter. This is to affirm that you are scheduling the check for when you restart your computer.
Method 3: Run DISM (Deployment Image Servicing and Management)
Run Deployment Image Servicing and Management (DISM) on your computer to fix this error. Follow the steps below:
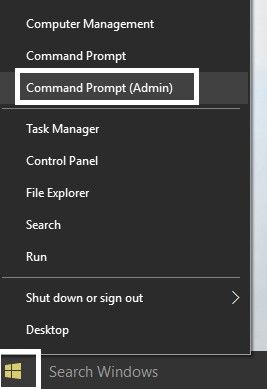
- Go to Command Prompt(Admin) after pressing the keys "Win" + "X"
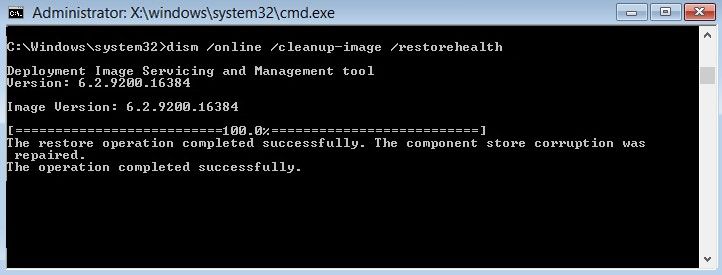
- Input the following commands:
Dism /Online /Cleanup-Image
/StartComponentCleanup
Dism /Online /Cleanup-Image
/RestoreHealth
- If you discover that the above lineup of commands is not working, try this set:
Dism /Image:C:\offline /Cleanup-Image /RestoreHealth
/Source:c:\test\mount\windows
Dism /Online /Cleanup-Image /RestoreHealth
/Source:c:\test\mount\windows
/LimitAccess
- Instead of "C:\\RepairSource\Windows", input your repair source location; this could be Recovery Disc or Windows Installation
- To verify the system's integrity, run this DISM command, instead of SFC:
Dism /Online /Cleanup-Image
/CheckHealth
- Restart your computer and the changes will be saved
Method 4: Repair Your Registry
If there are corruptions or errors in your system registry, different types of Windows stop codes can emanate from that, one of which is the Video Scheduler Internal error. The built-in System File Checker (SFC) of Windows is a useful utility for scanning and fixing the errors.
Use the steps below as a guide to make this method work:
- Hit these keys on your keyboard at the same time: "Windows" and "X". From the menu you see, choose "Command Prompt (Admin)"
- To run SFC, type these commands in the field and press "Enter":
sfc /scannow
sfc /scannow /offbootdir = c:\ /offender = c : \ windows
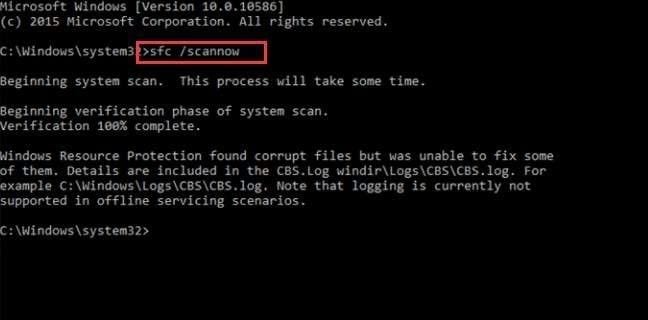
- Once the process is complete, restart your computer
Method 5: Uninstall Graphics Card Driver
The cause of this error may be from a faulty graphic card driver, hence the need to uninstall it. Once you have done that, you can reinstall the driver afresh, without errors. To do this, follow these steps:
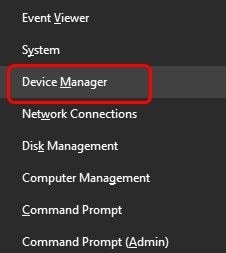
- Go to "Device Manager" on the "Control Panel" shortcut menu.
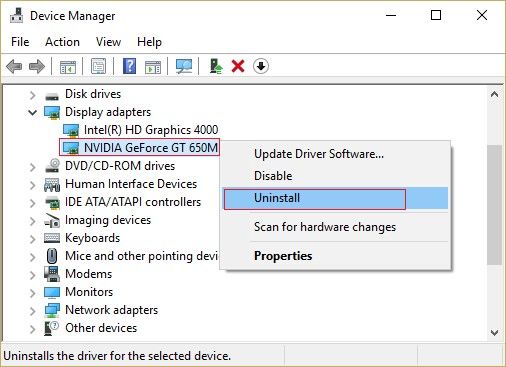
- Right-click your graphic card driver from the list and choose to "Uninstall"
- Click "Yes" to confirm your choice
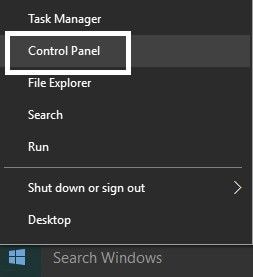
- Go to where you can launch "Control Panel" by pressing the "Windows" and "X" keys on your keyboard
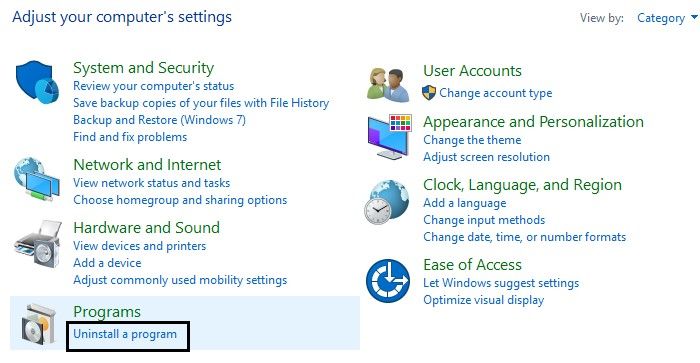
- Here, click the "Uninstall a Program" tab
- Move on to choose "uninstall everything related to Nvidia", Nvidia being the graphic card driver here
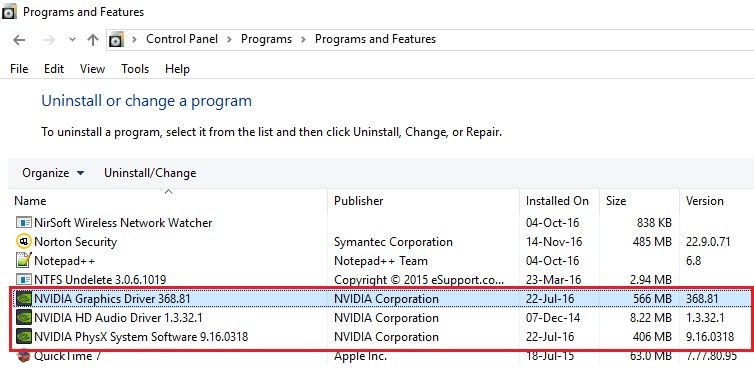
- Restart your system to enable the changes to be saved. Now go to your manufacturer's website to install a new driver and set it up
Method 6: Update Graphic Card Drivers
Remember when you were told that an outdated graphic card driver can cause the Video Scheduler Internal error? Well, if this is the cause of your problem, you need to follow these steps to update your graphic card drivers:
- Go to the "Run" dialog box using the shortcut "Win" + "R" keys. Once you are there, input the instruction: devmgmt.msc
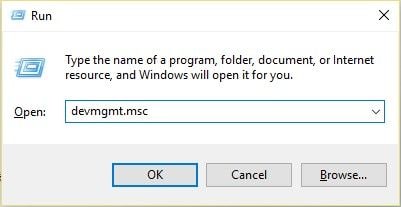
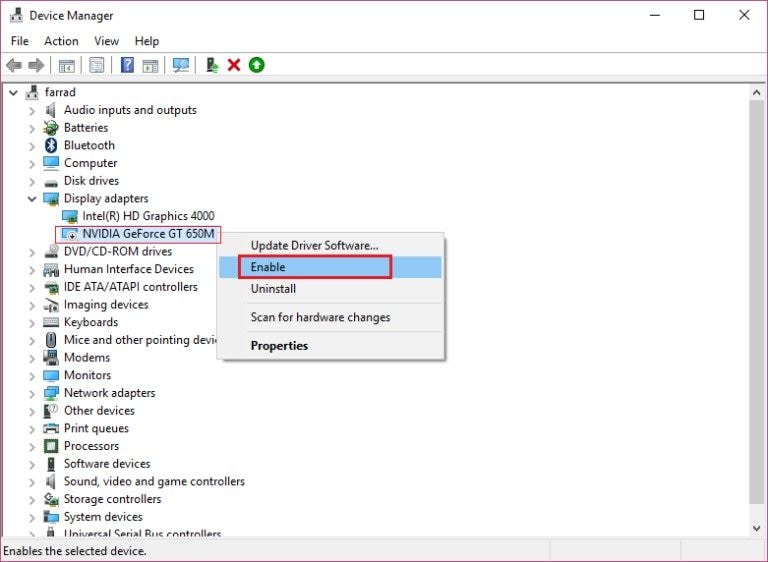
- Expand the option "Display adapters" to pick your graphic card driver. Right-click the card, then click "Enable"
- Right-click on the graphic card once again and choose the option "Update Driver Software"
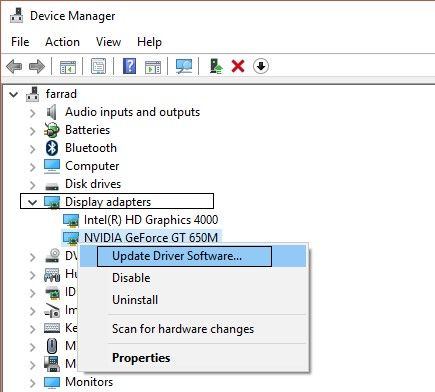
- Select the option that allows for an automatic search for the updated version of your driver software. Once the process finishes, your problem should be history
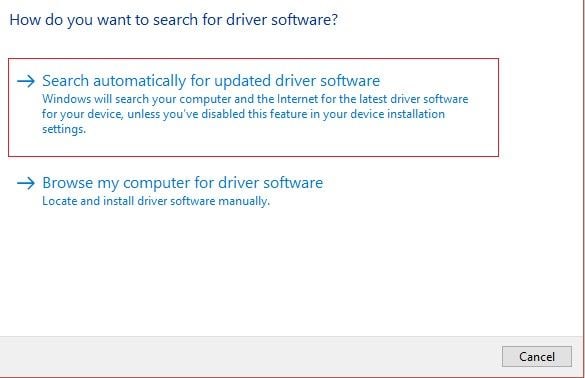
- If the above option doesn't work, choose the second option after clicking on "Update Driver Software". This will allow you to browse your computer to get the latest driver software
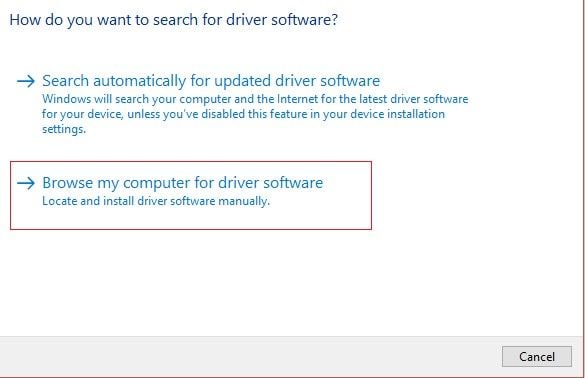
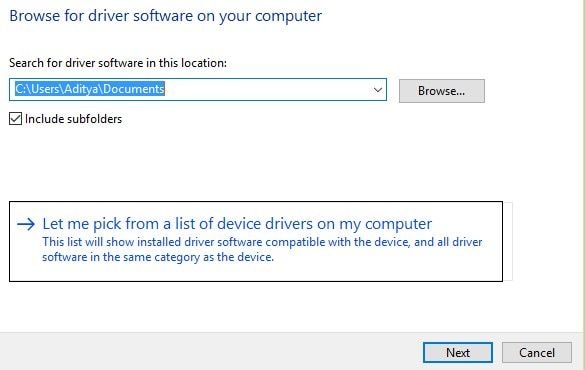
- Click "Let me pick from a list of device drivers on my computer" and choose the driver that is compatible with your graphic card. Select "Next"
- After the process is complete, save your changes by restarting your computer
Method 7: Run Disk Cleanup
Clean up your system's internal drive by following the steps below:
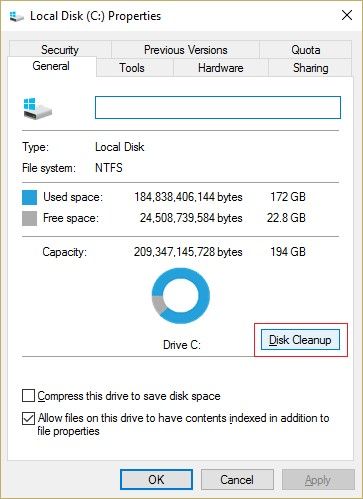
- Open "This PC" on your Windows system. Right-click the local drive "C:" and from the list of options, choose "Properties"
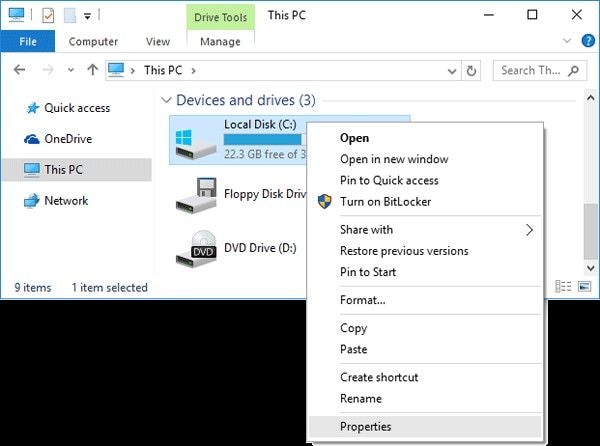
- In the new window for the drive's properties, scroll down to the section labeled "Capacity". At the right of that section, you will see "Disk Cleanup"; click it.
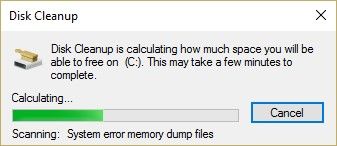
- Wait while the cleanup is done to free some space on your local drive
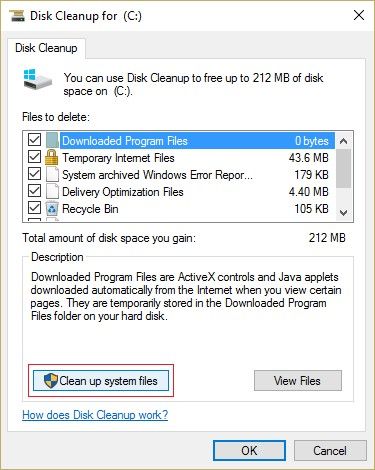
- Go to the "Description" section at the end of the window and choose "Clean up system files"
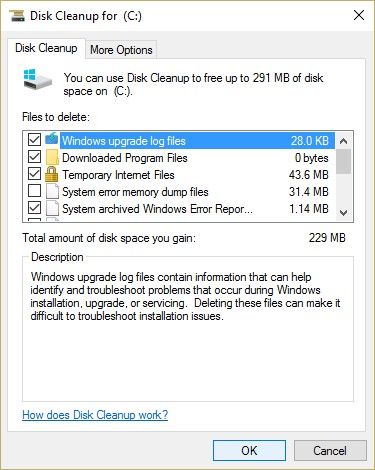
- Go to "Files to delete" and click everything in the list beneath. Run Disk Cleanup by selecting "OK"
Method 8: Uninstall Latest Installed Hardware or Software
Since one of the causes of this Windows 11/10 error is a software or hardware that is recently installed, it only becomes reasonable to uninstall any latest installed hardware or software to fix the problem; don't you agree?
These steps will serve as a guide on how to do this:
- In the "Start" search field of your Windows, input this and press "Enter" on your keyboard: "Apps & features".
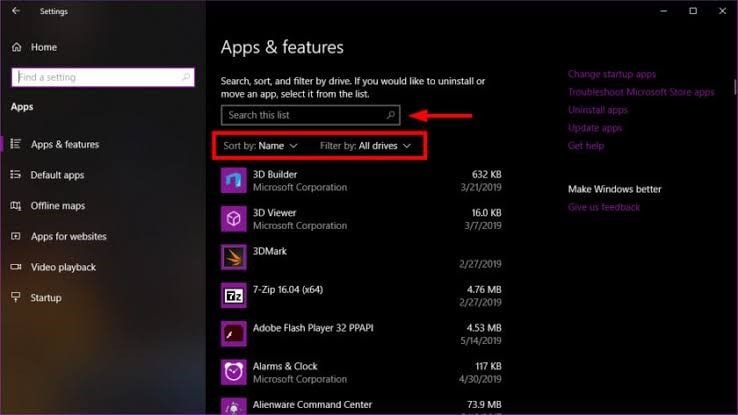
- Click on the installed software from the drop-down menu
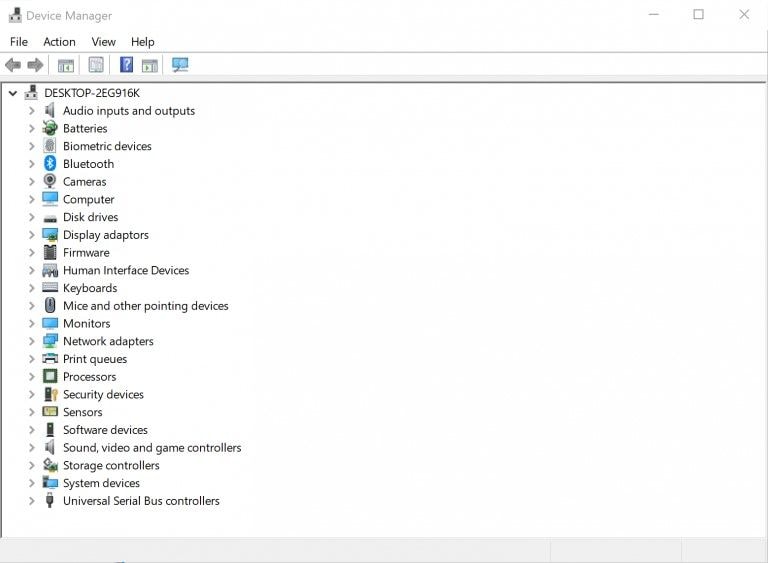
- Click on the software or program you most recently installed on your computer and choose to "Uninstall". Follow the prompts that will appear to guide you up to the end of the uninstallation
- For hardware, simply detach it from your computer
- Restart your PC to save changes and refresh
Method 9: Update Your Windows OS
Check to be sure that your Windows Operating System is updated and if it is not, do the needful. Follow these simple steps below to check and update your Windows 11/10 OS:
- Go to "Windows Settings" using the shortcut keys "Win" plus "I". Tap on the "Update & Security" button
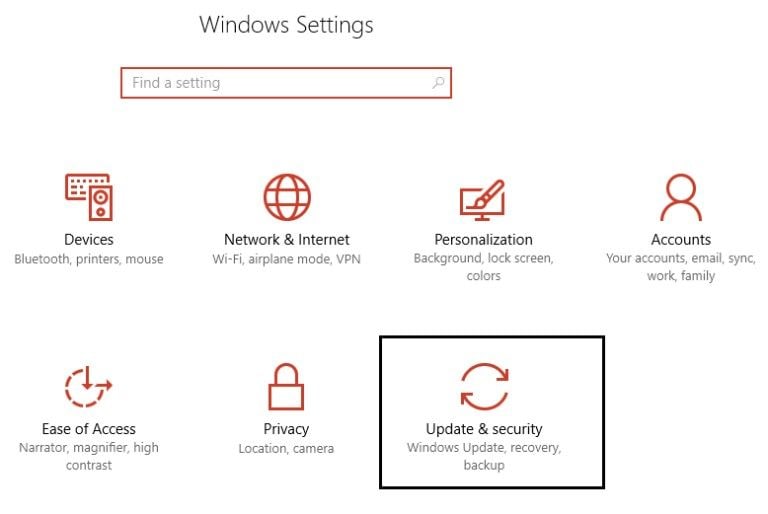
- Search for any available latest updates of Windows by choosing "Check for updates". Now you can go-ahead to do the installation of any available ones

- Restart your computer once the necessary updates are done. This should enable your system to fix the Video Scheduler Internal error.
Recover Unsaved or Lost Data Due to Stop Code Video Scheduler Internal Error
The Video Scheduler Internal error can occur at any time while you are using your computer. This means that you may have data you are still working on, that is, unsaved data. Also, you can lose your data when trying to restart the computer due to the error. If you are faced with such a problem, you can overcome it by using a third-party recovery tool to get back all your data. Recoverit Data Recovery is an effective and secure recovery tool that you can download and install on your Windows 11/10 system. It supports the recovery of data from Windows OS versions and Mac OS computers.
Moving on, the tool can handle recovery of data lost from crashed systems, formatted computers, corrupted internal hard drives, damaged external drives, memory cards, etc. Even with the ability to handle all of these, the tool's interface is user-friendly and the steps for recovering lost data are quite simple and easy to follow.
Step 1: Select a Location
Choose the option that represents the location from where you want to recover your lost files and click "Start"

Step 2: Scan the Location
The scanning process will be done by Recoverit and the time it takes to do this depends on the size of the data within the location

Step 3: Preview and Save
Before you decide to save your recovered files, use the Preview feature to check all the data. If you are satisfied with the results, tap "Recover"

The Bottom Line
This article has provided methods to fix Windows 11/10 stop code Video Scheduler Internal error. Each method can be applied to a specific cause of the error so you must try the method that applies to your case. If you lose data or you have unsaved data, Recoverit is a great tool to use in recovering all your data.
Computer Troubleshooting
- Win System Crash
- Windows Tips
- Computer Problems
- Blue Screen Errors



 ChatGPT
 Perplexity
 Google AI Mode
 Grok
Grok


David Darlington
staff Editor