

 TL;DR:
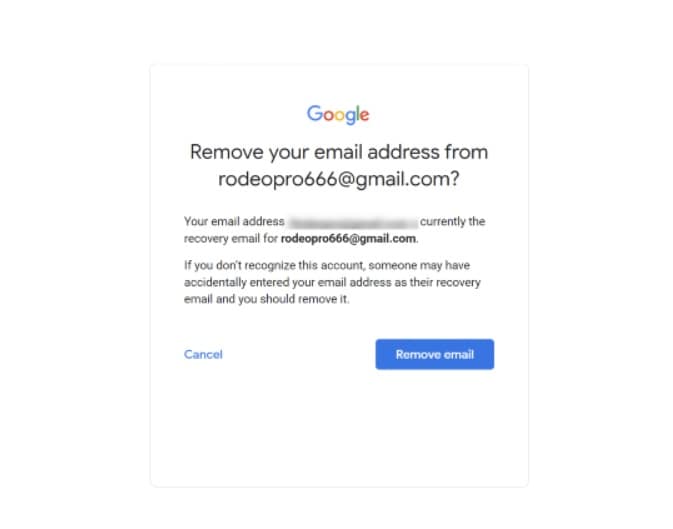
To remove a recovery email from Gmail, navigate to your Google Account's Security tab, select the Recovery email option under the sign-in settings, verify your password, and leave the address field blank before saving.
● Before removing the address, link an active phone number or enable two-factor authentication to maintain a valid account recovery method in case you forget your password.
● This action does not delete your Gmail account or messages, but it permanently stops Google from sending password reset links and suspicious login alerts to that backup inbox.
● There are no waiting periods or restrictions if you decide to add a recovery email back; you can update it instantly in the Security menu by submitting a new address and confirming a verification code.
Ask AI for a summary
 ChatGPT
 Perplexity
 Gemini
 Claude
 Grok
Grok
Gmail keeps your account safe with a recovery email. This email helps you get back into your account if you forget your password. But sometimes you want to remove it. Maybe you no longer use that old email address. Or perhaps you want better privacy. Whatever your reason, removing a recovery email is simple.
This guide shows you how to remove a recovery email from Gmail step by step. We'll explain what recovery emails do. You'll learn the right way to remove them. We'll also share tips on managing your Gmail data. Plus, you'll discover how to restore permanently deleted emails in Gmail if you ever need to.
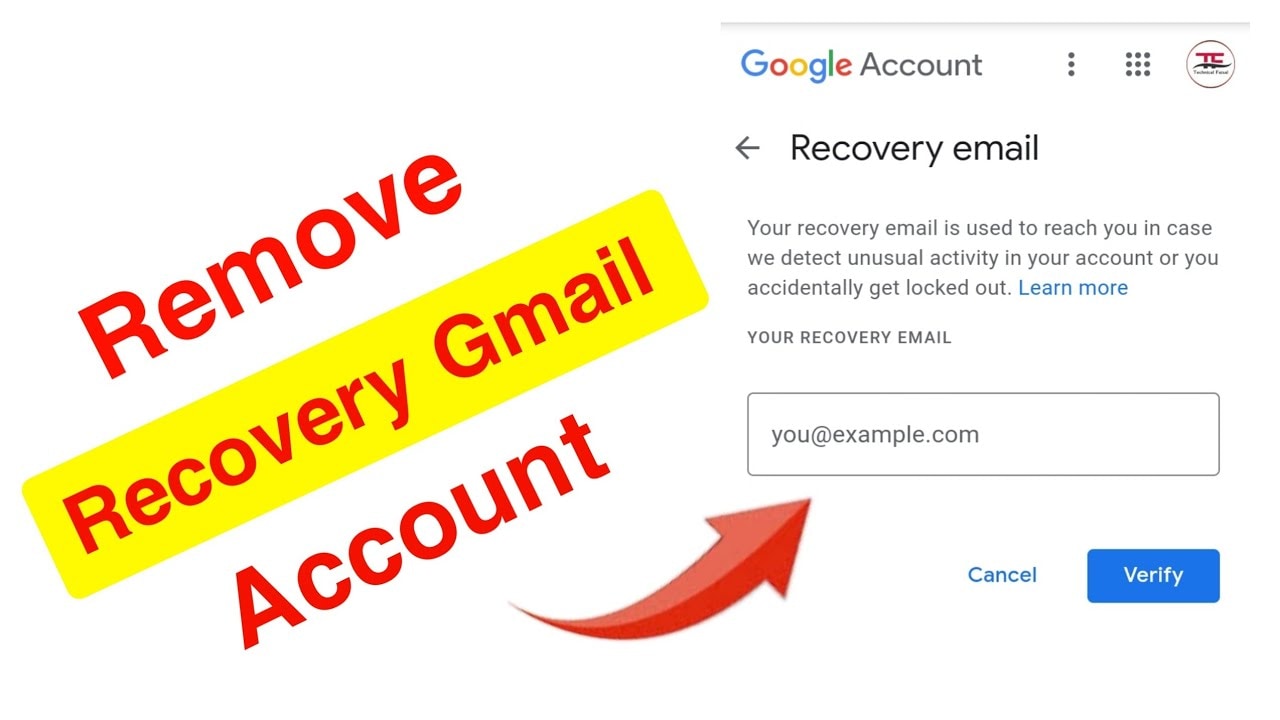
Table of Contents
Part 1: What is a Recovery Email and Why Gmail Uses It?
A recovery email is a backup email address linked to your Gmail account. Google uses it to verify your identity. When you forget your password, Google sends a reset link to this email. It also alerts you about suspicious login attempts. This extra layer keeps your account secure from hackers.
Gmail asks for a recovery email during account setup. It's not required, but Google strongly recommends it. The recovery email acts as a safety net. If someone tries to access your account, you get notified. You can also use it to recover your account if locked out. However, you can remove recovery email anytime you want.
Part 2: Things to Check Before Removing Your Recovery Email
Important Preparations
Before you learn how to remove recovery email from Gmail, make some preparations. Removing your recovery email affects account security. Think carefully about this decision. Here are the key things to verify first.
- Remember your password well - Write it down somewhere safe or use a password manager
- Enable two-factor authentication - Add extra security before removing recovery options
- Have your phone number linked - Keep at least one recovery method active
- Update security questions - Make sure you can answer them correctly
- Check recent account activity - Ensure no one else has accessed your account
- Backup important emails - Download emails you want to keep forever
- Know your account creation date - Google may ask this to verify identity
- Keep trusted devices logged in - Don't log out of all devices at once
Part 3: Step-by-Step Guide to Remove Recovery Email
Now, let's walk through the process of how to remove a recovery email from Gmail. The steps are easy to follow. You'll need just a few minutes. Make sure you're logged into the Gmail account you want to change.
Step 1: Access Google Account Settings
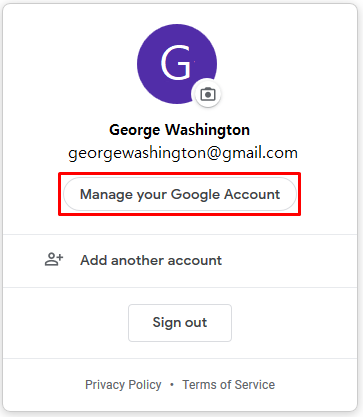
Open your web browser and go to Gmail. Click on your profile picture in the top right corner. A menu will drop down with several options. Look for "Manage your Google Account" and click it.
You'll land on your Google Account homepage. This page shows all your account information. You'll see tabs like Home, Personal Info, and Security. The interface is clean and easy to navigate. Keep this page open for the next steps.
Step 2: Navigate to the Recovery Email Section
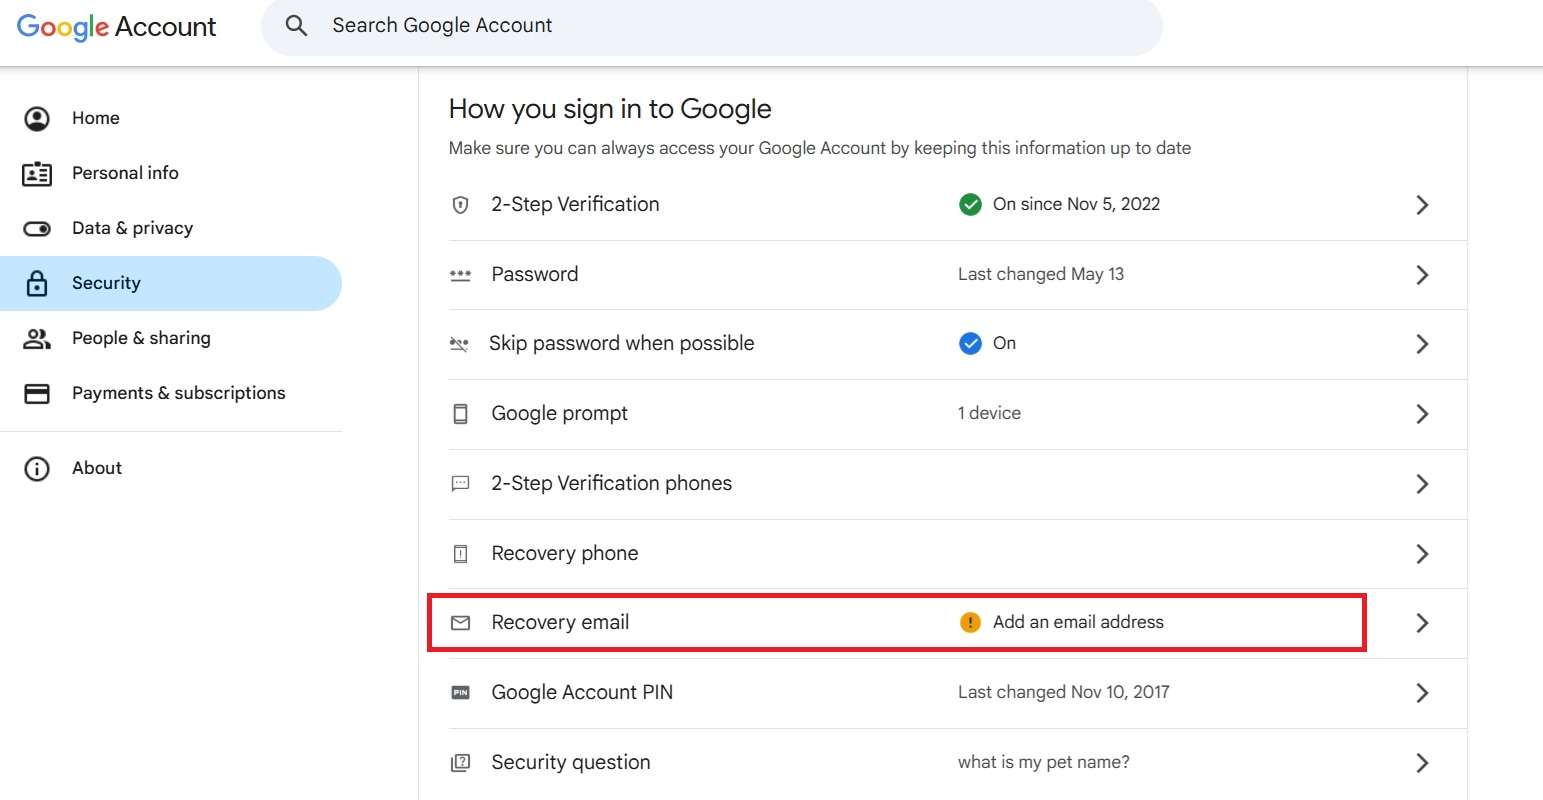
Click on the "Security" tab on the left sidebar. This section handles all security settings. Scroll down until you find “How you sign in to Google." You'll see your recovery email listed there.
The recovery email appears under "Recovery email" with the address displayed. You might also see your phone number listed. Both help recover your account. Click on the recovery email to modify it.
Step 3: Remove or Replace the Recovery Email
A small window will pop up on your screen. Google may ask you to sign in again. Enter your password to prove it's really you. This extra check keeps your account safe.
Once verified, you'll see options to edit the recovery email. You can type a new email address or leave it blank. To remove it completely, delete the existing email and leave the field empty. You can also replace it with a different email if you prefer.
Step 4: Confirm Changes
After removing or changing the recovery email, click "Done" or "Save." Google will process your request immediately. You might see a confirmation message on screen. Your recovery email is now removed or updated.
Google may send a notification to your Gmail account. This confirms the change you just made. Check your inbox for this message. It serves as proof that the recovery email has been changed successfully.
Part 4: What Happens After Removal?
After you remove your recovery email, some things change. You lose one way to recover your account. If you forget your password, recovery becomes harder. Google can't send password reset links to that email anymore.
Your account security changes slightly. You'll rely more on other recovery methods. Make sure your phone number is updated. Keep two-factor authentication turned on. These help protect your account without a recovery email.
You can still use your Gmail normally. Sending and receiving emails works the same. Your contacts and folders remain unchanged. The only difference is in account recovery options.
If you change your mind later, you can add a recovery email back. Just follow the same steps. Google lets you update this information anytime. There's no waiting period or restrictions.
Part 5: How to Protect Your Data with Recoverit
What is Recoverit?
Try Recoverit to Recover Permanently Deleted/Lost Data
![]() Security Verified. Over 7,302,189 people have downloaded it.
Security Verified. Over 7,302,189 people have downloaded it.
Sometimes you need to know how to permanently delete Gmail emails or recover them later. Recoverit is a powerful data recovery tool. It helps restore lost emails and other files. The software works on computers and external drives. Many people use it to recover important data.
Recoverit handles various file types beyond emails. It recovers photos, videos, documents, and more. The tool is useful when you accidentally delete something important. It works even after you empty your trash folder. The software has helped millions recover their precious data.
The program features a simple interface. You don't need technical skills to use it. Just a few clicks can start the recovery process. Recoverit scans your device for deleted files. It finds items you thought were gone forever.
How to Use Recoverit
Step 1: Download and Install

Download the version of Recoverit on our operating system. Install it following the on-screen instructions. Launch the program after installation completes.
Step 2: Scan and Recover

Select the location where your files were stored. Click the "Start" button to begin scanning. Wait for the scan to complete.
Step 3: Recovery Files

Preview the found files and select what you need. Click "Recover" to save them to a safe location.
Related Video >>: How to Recover Permanently Deleted Files from PC?
Part 6: Pro Tips for Successful Email Recovery
Best Practices for Gmail Management
Understanding how to recover permanently deleted email in Gmail helps prevent data loss. Here are expert tips to keep your emails safe. These practices work for everyone, from beginners to advanced users.
- Act quickly after deletion - Deleted emails stay in trash for 30 days only
- Check the Trash folder first - Most "deleted" emails are actually just in the trash
- Use Gmail's search function - Sometimes emails are archived, not deleted at all
- Export important emails regularly - Download emails you absolutely cannot lose
- Enable Gmail's undo send - This prevents accidental deletions right after sending
- Create backup copies - Use email clients to keep local copies of messages
- Contact Google Support - They might help if you lost something really important
- Use filters and labels - Organize emails so you don't delete the wrong ones
Conclusion
Now you know how to remove recovery email from Gmail safely. The process takes just a few minutes. Remember to keep other recovery methods active. Your phone number and two-factor authentication are important. They protect your account when the recovery email is gone.
Managing your Gmail properly keeps your data safe. Whether you need to know how to undelete emails in Gmail or remove recovery options, understanding the basics helps. Always think twice before making security changes. Keep backups of important emails. And if you ever lose something valuable, tools like Recoverit can help. Stay safe and keep your Gmail account secure.
Frequently Asked Questions
-
Can I recover emails after 30 days?
Gmail permanently deletes emails after 30 days in trash. After this, standard recovery isn't possible. However, you might try contacting Google Support. They sometimes help in special cases. Also, if you use an email client like Outlook, check there. Some programs keep local copies even after Gmail deletes them. -
Will removing recovery email delete my account?
No, removing your recovery email won't delete your Gmail account. Your account stays active and works normally. You can still send and receive emails. All your messages and contacts remain safe. The only change is losing one account recovery method. Make sure you have other ways to recover access. -
How do I add back a recovery email?
Adding a recovery email back is simple. Go to your Google Account Security settings. Find the "Recovery email" section. Click it and enter your new recovery email address. Google will send a verification code. Enter the code to confirm the new recovery email. The whole process takes less than five minutes.


