

 TL;DR:
UFS Explorer is a highly capable, read-only data recovery tool designed for technical experts handling complex setups like RAID arrays and virtual disks, but Wondershare Recoverit provides a more accessible alternative for general users needing automated recovery.
● To prevent permanent data overwriting, UFS Explorer must be installed on a healthy drive separate from the damaged source, and it requires manual performance tuning that makes its dense, tool-heavy interface challenging for beginners.
● The software excels at rebuilding NAS RAID layouts and recovering NTFS, EXT4, and HFS+ metadata with an approximate 91% success rate during 10–15 minute deep scans, though it is less effective at rebuilding FAT32 and exFAT folder structures.
● While UFS Explorer targets professionals with specialized hex viewing and custom caching (with licenses starting at $64.95), Recoverit is better suited for non-technical users due to its automated smart scanning, clearer file filtering, and lack of required manual configuration.
Ask AI for a summary
 ChatGPT
 Perplexity
 Gemini
 Claude
 Grok
Grok
Losing important files feels stressful, and that’s why a helpful recovery tool matters. UFS Explorer restores data from broken drives, deleted partitions, and common RAID setups reliably. It also works with encrypted storage, while still keeping the process clear for everyone. As a result, users get steady scans and results that are simple to follow.
Moreover, this review shows how the software performs during different data-loss situations. In addition, it covers features that support faster and smoother file recovery tasks. Together, these details help readers decide whether the tool suits their recovery needs.
Try Recoverit to Perform Data Recovery
 Security Verified. 3,591,664 people have downloaded it.
In this article

Part 1. UFS Explorer Review: Key Features That Make It Stand Out
UFS Explorer stands out because it works with many systems, handles complex storage setups, and gives users strong options for safe data recovery. Above all, it supports damaged drives, RAID setups, virtual disks, encrypted volumes, and failing media. Despite these, the following features make it stand out as well:

- System Support: ufs data recovery works across Windows, macOS, Linux, BSD, Solaris, and VMware platforms. It handles NTFS, APFS, ext, XFS, Btrfs, ZFS, and many other file systems.
- RAID Recovery: The tool rebuilds RAID levels and custom layouts used by many modern storage devices. It supports NAS brands like Synology, Drobo, and others needing careful multi-disk handling.
- Disk Imaging: Its imager protects failing drives using gentle read rules and controlled access patterns. The platform supports hardware imagers that reduce stress while capturing reliable forensic-style copies.
- Virtual Awareness: UFS Explorer opens virtual disks created by VMware, Hyper-V, QEMU, and VirtualBox. It also recovers data from NAS systems by reading exports or prepared images cleanly.
- Secure Decryption: The tool unlocks encrypted volumes with proper credentials for safe recovery tasks. It offers a hex viewer, deep scanning, and smart filters for precise technical work.
Part 2. Performance Insights From Our UFS Explorer Review
With the core functions explained, the next step is reviewing ufs explorer review’s actual performance:
| Performance Area | What It Does Well | What to Keep in Mind |
|---|---|---|
| Scan Speed & Accuracy | Deep scans finish fast (10–15 minutes) with high recovery rates (~91%). | Quick scans have lower success (~82%), depending on the damage level |
| File System Handling | Excellent on NTFS, EXT4, and HFS+ with strong metadata recovery. | FAT32/exFAT may not always rebuild complex folder structures perfectly. |
| RAID & Large Volumes | RAID caching boosts speed massively (1.6 MB/s > 37 MB/s). | Speed gains depend on stripe size and RAID layout complexity. |
| Resource Usage & Tuning | Custom cache and performance settings help balance speed and memory use. | Requires manual tuning for best results on large images or arrays. |
Safety Criteria in Using UFS Explorer
To understand the safety profile clearly, here are the main points of the ufs data recovery:
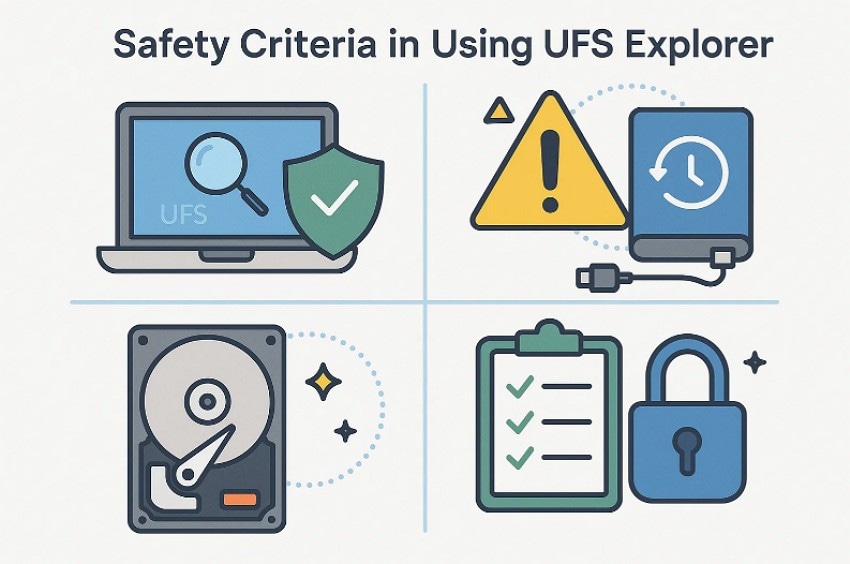
- Read-Only Protection: UFS Explorer uses strict read-only access that keeps original data fully unchanged. This safeguard protects damaged drives and helps prevent further loss during scanning.
- Local Processing: All actions remain on your device, preventing any data from reaching external servers. This setup improves privacy and ensures sensitive files stay under your full control.
- Drive Safety: The software includes tools designed to reduce stress on weak, failing drives. Read-once modes and timeout controls help protect unstable hardware during scans.
- Installation Risk: Installing the program on the damaged drive may overwrite important recoverable sectors. This mistake reduces success rates and can permanently remove some valuable data.
- User Knowledge: Safe operation requires understanding imaging steps and careful read-only device handling. Without guidance, users might apply settings that negatively impact recovery results.
Part 3. UFS Explorer Review: User Experience and Interface Evaluation
UFS Explorer offers strong control but feels technical for many beginners. Its dense, tool-heavy layout suits professionals who prefer precise navigation. The interface is functional yet dated, with many advanced options and limited guidance. Moreover, features like the device tree and hex viewer help experts, but limited filtering makes large scan results harder for casual users to manage.
Understanding the Comprehensive Data Recovery Process
Review the structured outline below to better understand the comprehensive ufs explorer data recovery process:
- Install Safely on a Healthy Drive
Begin by installing the correct edition of UFS Explorer on a clean system drive. Installing the program on the damaged drive can overwrite recoverable sectors, so keeping the installation separate ensures maximum safety. This step prepares a stable environment for the upcoming recovery process.

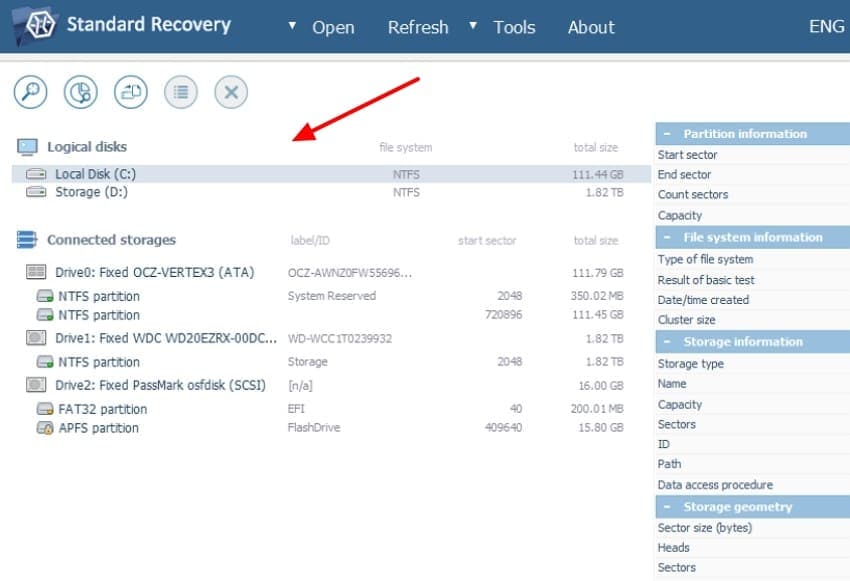
- Select the Target Device
Once the software opens, it automatically detects all attached storage devices. From the left-hand device tree, choose the drive, partition, RAID array, or disk image that contains the lost data.
- Start the Scanning Process
Now, click “Start Scan” to begin locating the missing files. You can choose specific regions to scan, select likely file systems, and enable IntelliRAW or content-aware search for deeper recovery.

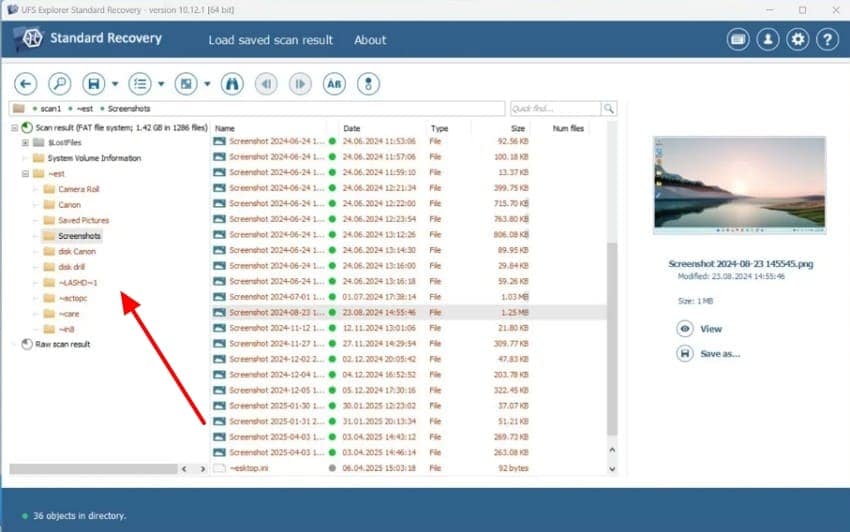
- Review and Analyze Scan Results
When the scan completes, UFS Explorer generates a new “Scan result” tree with recovered folders and files. You can browse through directories, inspect metadata, preview documents and photos, and mark the items you want to restore.
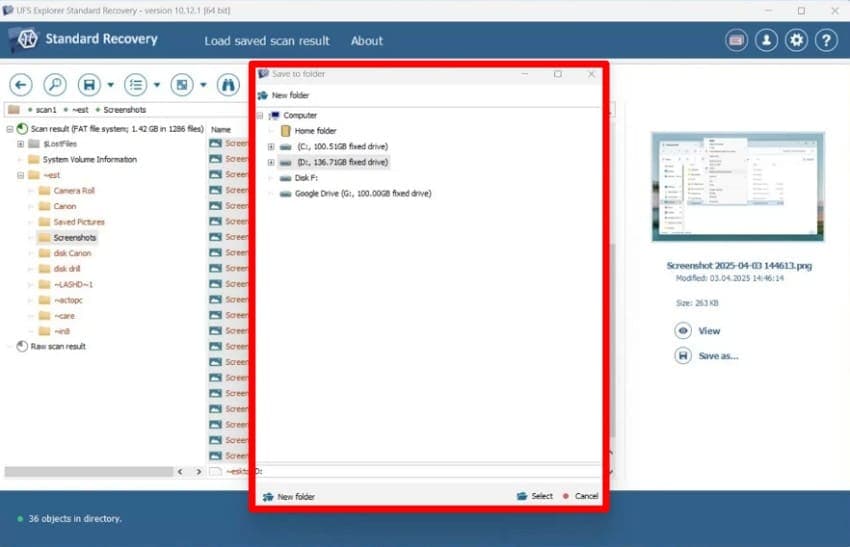
- Save Recovered Data Safely
Finally, choose “Save as” to save the selected items to a different, healthy storage device, never back to the damaged source. You may also save the scan session so you can reopen the results later without repeating the scan.
Verdict: UFS Explorer’s Recovery Performance
Using this tool feels straightforward once we understand where each option belongs. The scanning process runs smoothly, giving us trust in its ability to find data. Most recoveries finish with strong results, especially when the files are not heavily damaged. Even complex cases usually return usable content, which makes the overall process reassuring.
Checking User Feedback
Positive User Review
- "I started UFS Explorer on Disk 2, and like DiskDrill, it took it approximately 5 days. I was able to successfully recover the vast majority of files with not only the file names but the extended attributes (nice bonus) and overall was pretty happy with it". - Bobby6kennedy
- "…There is about 500GB of data to recover that, pertain to files such as: JPG, JPEG, GIF, PDF, DOC, TXT, MP3, MP4, MOV, WAV, AVI, PNG, and essentially all other variations of word, video, photo, and document type files. From my research, the best decision as to which program to purchase would be between UFS Standard Recovery $64.95 vs DMDE Standard Edition $64.94 vs DMDE Express $20…"- Reindeer993
Negative Reviews
- "Recovering a Drobo 5 drive set. The drobo just stopped working after unplugging / replugging the USB cable, so it should be ok , but after 2 weeks of letting ufs run against it" - Delchi
- "One of my main complaints about UFS is their default of using hidden folders for data recovered from outside of the filesystem ($foldername, $Lostdata etc). They make the data invisible to the Windows clients, and a pain to work with in the Linux command line. And it can take forever to rename manually…" - thefanum
Part 4. UFS Explorer: Pricing Plans in Review
This section provides a clear, structured review of UFS Explorer’s pricing plans:
| Edition | License | Computers | Users | Price |
|---|---|---|---|---|
| Standard Recovery | Personal | 1 | 1 | $64.95 |
| Professional Recovery | 1 Seat | 1 | Any | $629.95 |
| Network RAID | Personal | 1 | 1 | $209 |
| RAID Recovery | Personal | 1 | 1 | $139 |
| Technician | 3 Months | 1 | Any | $399.95 |
Part 5. Comparing UFS Explorer Review with Recoverit: Why Recoverit Wins
To understand the practical differences, the table below compares UFS Explorer with Recoverit and highlights why many users find Recoverit the more dependable choice:
| Aspects | UFS Explorer | Recoverit |
|---|---|---|
| Ease of Use | The technical layout is hard for beginners to navigate. | Simple interface with clear, guided steps. |
| Safety | Needs careful setup to avoid overwriting data. | Auto-protection keeps source drives completely safe. |
| Scan Process | Strong scans but requires manual configuration. | Smart scans run automatically with accurate results. |
| Preview Tools | Limited filters for large file groups. | Smooth previews with helpful sorting and categories. |
| Overall Experience | Best for experts and technicians. | Friendly for all users with steady, stable performance. |
Recoverit seems easy because each step is clear and simple for users. Furthermore, the clean layout helps people stay calm when problems appear quickly. Each tool sits where users expect, which helps guide their actions. Thus, every step moves in order, which keeps the recovery process steady. This design beats the stress linked with ufs data recovery tasks for users.
Moreover, the software works well with lost files from broken drives or formatted disks. The smart scan finds missing data fast without needing a difficult setup. Moreover, the built-in tools protect your drive during each part of recovery. So, clear previews help users check files before saving them to storage.
Key Features
- Batch Processing: Recovers multiple files or folders together, allowing faster, organized restoration during large recovery tasks.
- Smart Scanning: Uses intelligent deep-scan technology to locate deleted, formatted, or lost files with strong accuracy.
- File Preview: Shows clear previews of photos, videos, and documents before saving, ensuring accurate and selective recovery.
Quick Guide: How Recoverit Simplifies Data Recovery for Everyone
Let’s walk through the guide below to recover data with Recoverit effectively:
- Select the Location for Recovery
Start by accessing the “Hard Drives and Locations” option in the left sidebar to begin the recovery.

- Initiate the Scanning Process
After the scan starts, all recoverable files will appear under the “File Location” tab, in the “Name of Lost Files” folder.

- Preview and Recover the Data
Lastly, preview the files and hit the “Recover” button to complete the Recovery.

Recoverit delivers faster and more consistent results, making the recovery experience noticeably smoother. Moreover, its intelligent scans run automatically and handle deleted, formatted, and corrupted data accurately. In contrast, UFS often needs technical adjustments to reach similar outcomes. Therefore, Recoverit provides higher practical success by keeping the entire recovery process simple, organized, and reliably steady for all users.
Conclusion
To conclude, this ufs explorer review shows that the tool is strong but still needs some technical skill to use well. It can handle tough storage problems, yet many people want something simpler. For quicker scans, easier steps, and better results in daily recovery work, Recoverit offers a smoother and more comfortable experience for most users
FAQ
-
1. Is UFS Explorer suitable for beginners?
UFS Explorer can recover many types of data, but it feels technical for new users. Some steps need extra knowledge, so beginners may find it harder to use without guidance. -
2. How does UFS Explorer handle damaged or formatted drives?
UFS Explorer can scan damaged or formatted drives and bring back many readable files. It works best when the right settings are chosen, especially for more complicated cases. -
3. What makes Recoverit easier than UFS Explorer?
Recoverit uses guided steps and automatic scans that simplify difficult recovery situations effectively. Its clear layout and smooth workflow help users recover data without unnecessary confusion. -
4. Can both tools recover files from external devices?
Both tools support external devices, including USB drives, memory cards, and portable SSDs. However, Recoverit processes these devices more smoothly due to its optimized scanning engine.


