While looking to relive memories from an unforgettable vacation, you realize that the images you captured are corrupted and refuse to open. This scenario is more common and can occur due to incomplete file transfers or malware infections. Such situations can be frustrating when the JPG files hold sentimental or professional value.
To repair JPG files, it is essential to restore their usability and ensure you don’t lose important memories or creative assets. While fixing a damaged image or enhancing the quality, it is important that you depend on a reliable method to address the issue to save time and effort. In this article, we will explore the easiest ways to edit or repair a JPG file on an Apple device.
Try Wondershare Repairit to Perform JPG Repair on Macbook

In this article
Part 1. What are the Major Reasons Behind a Corrupted or Damaged JPG File?
Understanding the common causes can help prevent these issues and address them more effectively. This section of the guide will look into a few of the reasons that led us to learn how to repair JPG files:
- Interrupted File Transfer: JPG files can become corrupted if their transfer process is interrupted unexpectedly. Disruptions like unstable internet connections, accidental disconnection during USB transfers, or sudden power outages often result in incomplete files.
- Faulty Storage Devices: Physical damage to storage devices can compromise the integrity of JPG files. This is why aging memory cards or external hard drives usually cause file corruption.
- Malware Attacks: Viruses and malware can distort or render JPG files inaccessible by targeting their data. It often happens when downloading images from unsafe websites or using infected storage devices.
- Corrupted Metadata: When the metadata of a JPG file is altered, it becomes unreadable, which causes the image to malfunction. This issue may arise due to improper editing tools or errors during the file-saving process.
- Software Crashes: A photo file may be left incomplete if the application that is used to edit or open it crashes. Just like that, using outdated software to edit a JPEG on a Mac can damage the file structure.

Part 2. How to Repair JPG File with the Most Advanced AI Photo Repair Tool?
Now that we understand the reasons that cause image files to get damaged or corrupted, let us dive into the best third-party tool to fix them. For this, Wondershare Repairit allows users to upload and restore damaged files in a single click. It supports multiple file formats that ensure users have the flexibility to fix vast images in various formats with the help of integrated AI.
Furthermore, this not only recovers your corrupted files but also edits a JPG on a Mac by increasing the resolution up to eight times. Unlike most tools, it does not compromise the quality of the pictures to ensure you get your memories back just the way they were. As a one-click solution, it restores files instantly without you having to try.
Key Features
- Supports All Storage Devices: It is compatible with a wide range of storage devices, such as SD cards and USB flash drives. This tool can easily access and repair them despite their location.
- Batch Recovery Process: The software allows you to recover multiple files simultaneously, saving time and effort. Repairit has a batch processing feature that ensures efficiency when handling large volumes of corrupted files.
- Advanced Enhanced Repair Functions: The tool restores your files with improved accuracy and retains their original quality. Users can fix scratches and add colors when it comes to learning how to edit a JPEG file on Mac devices.
- Multiple File Formats Supported: The tool supports various file types, including photos, videos, and documents in popular formats. This feature makes it a one-stop solution for all your repair needs.
Walkthrough on Repairing JPG Files on MacBooks Through Repairit
To further understand how to navigate through this tool, here is an easy-to-follow guide to help you out:
Step 1. Download Repairit and Get Access to the Photo Repair Tool
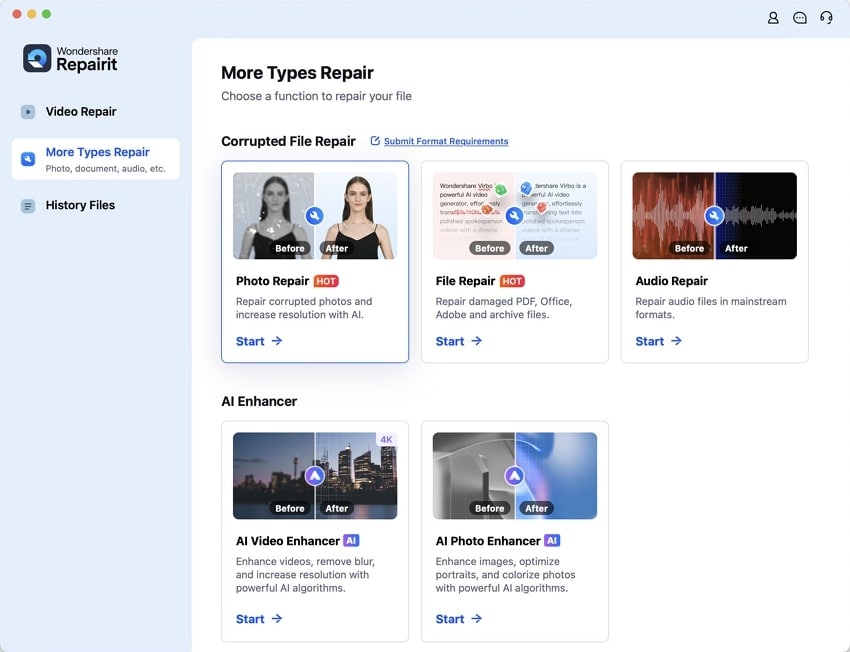
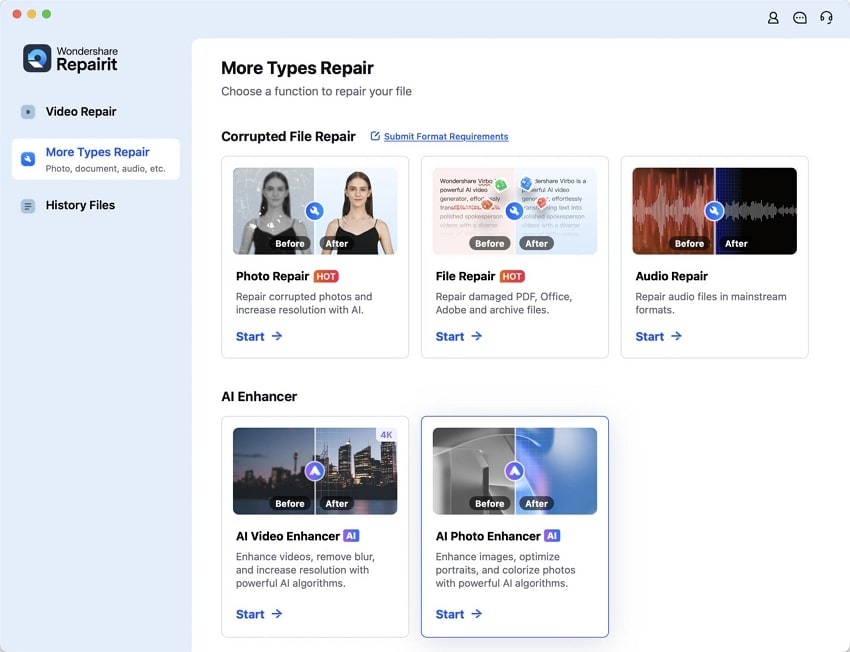
To initiate the procedure of fixing your images, download Repairit on your MacBook. Then, get access to the main interface and navigate to the “Photo Repair” tool from the “More Types Repair” tab.
Step 2. Import Corrupted JPEG files onto the Image Repair Interface
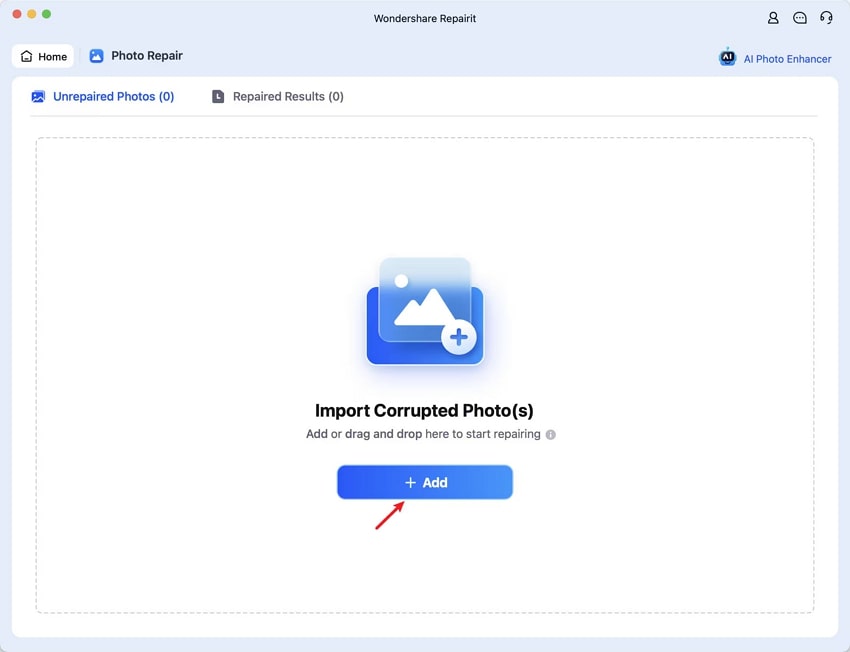
Now, click the “+Add” button and add the corrupted or damaged files to the Photo Repair interface.
Step 3. Hit the Repair Button to Progress the Recovering Process
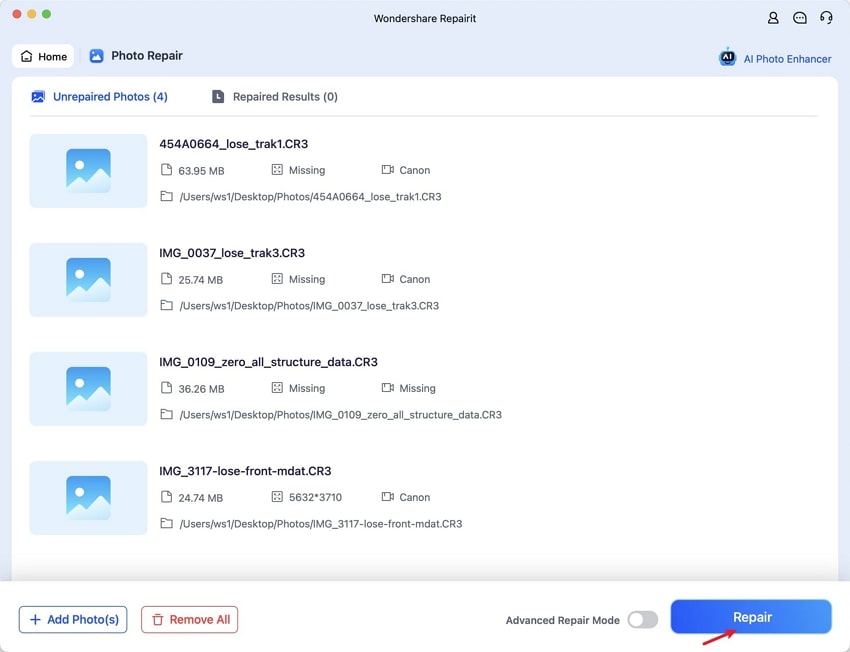
Once all your images are on the interface, hit the “Repair” button at the bottom of the right corner of the screen. This will shift all our recovered media from the “Unrepaired Photos” to the “Repaired Results” tab.
Step 4. Preview the Results and Save The Repaired JPG to Your MacBook
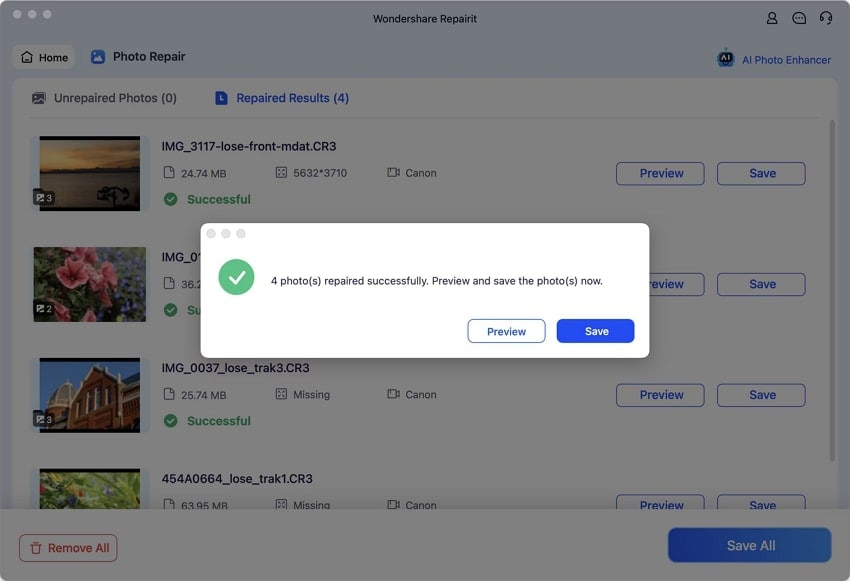
Moving forward, you can select the “Preview” option to look into the improved and fixed file. Then, click the “Save” button to download the new JPG file to your desktop device.
Part 3. Other Ways to Repair JPG Files on Mac
Apart from the above-discussed methods, you may want to know about some built-in features to repair files on Mac. So, here are effective ways to repair JPG files on your Mac device with ease:
Way 1. Update Photos App to Open JPG File
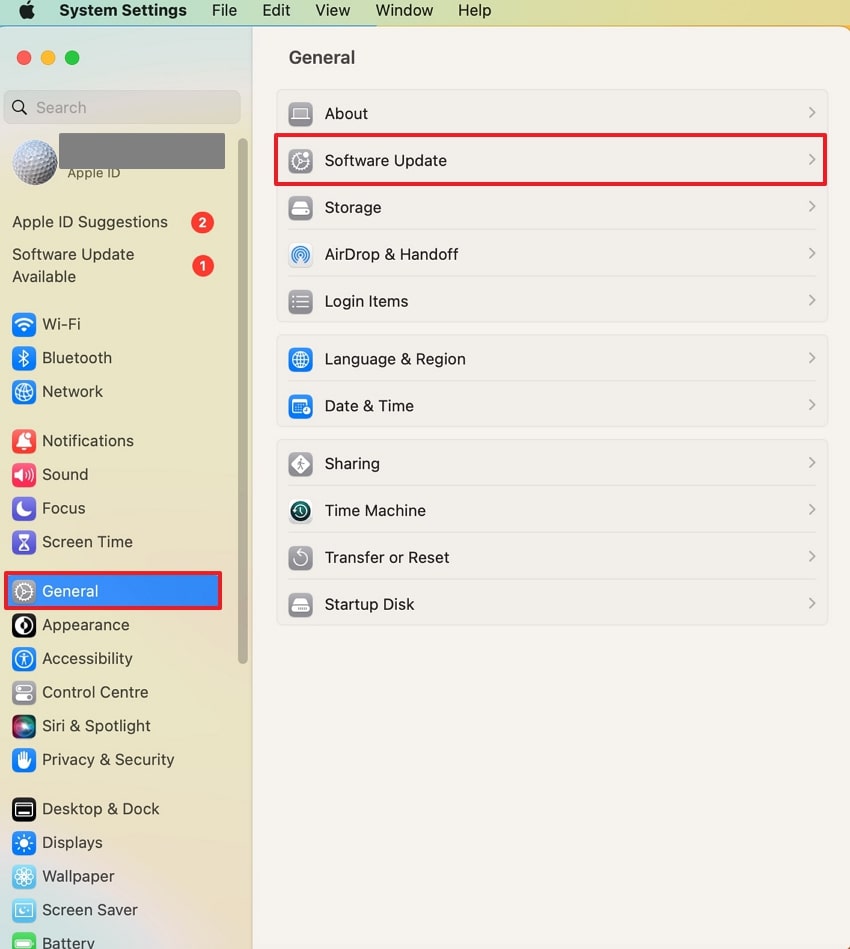
This app on your device may fail to open JPG files due to an outdated version. Users must ensure that their app is up to date so that they can resolve the issues of corrupted files. As this is a built-in app, you need to update the whole system to get the job done. Look at the steps below to learn how to repair JPGs on your Mac device through a software update:
Step 1. Locate "System Settings" on your device and proceed with the "General" tab. Following that, hit "Software Update" to proceed to the next step of this solution.
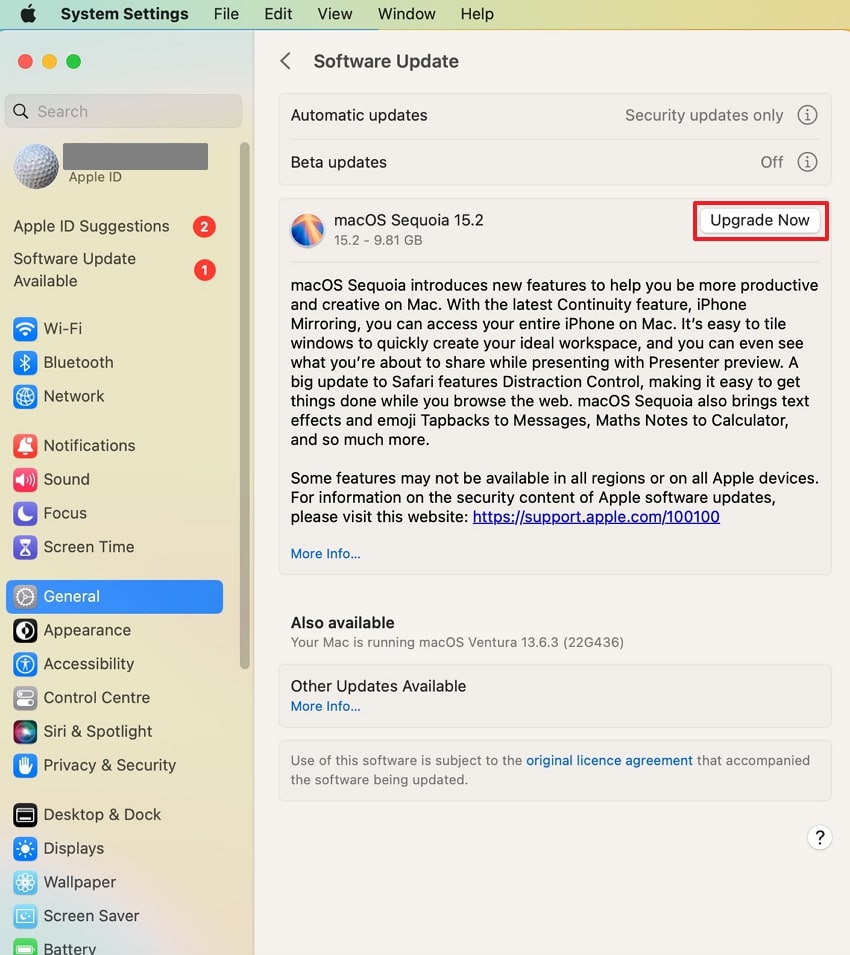
Step 2. Now, ensure that your software is updated to the latest version by hitting the "Upgrade Now" button.
Way 2. Change Photo Extension to Repair JPG on Mac
When your images refuse to open, the file extension may have been changed or corrupted. Changing the extension back to .jpgor .jpeg can often resolve the issue. This method is simple and works when the image is intact, but the extension has been modified incorrectly. With the help of the easy guide below, you can understand the best way to carry out this procedure to repair JPG.
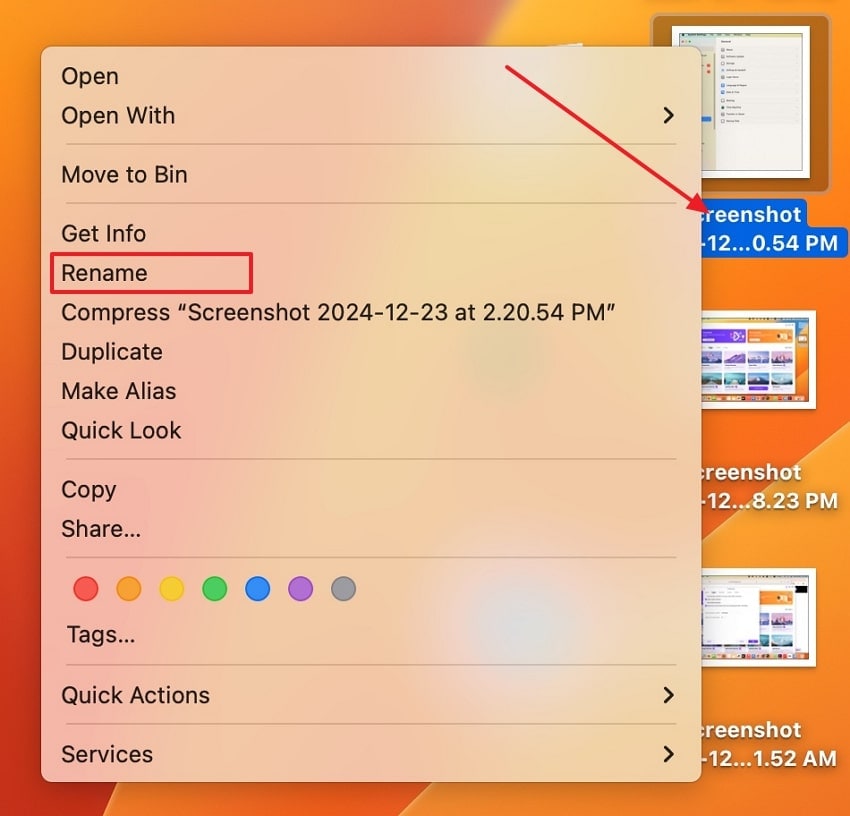
Step 1. Initiate the process by locating the corrupted picture file and right click on it. Then, from the drop-down menu, pick the "Rename" option and add the word ".jpg" to it. This will help you convert the file to the mentioned format.
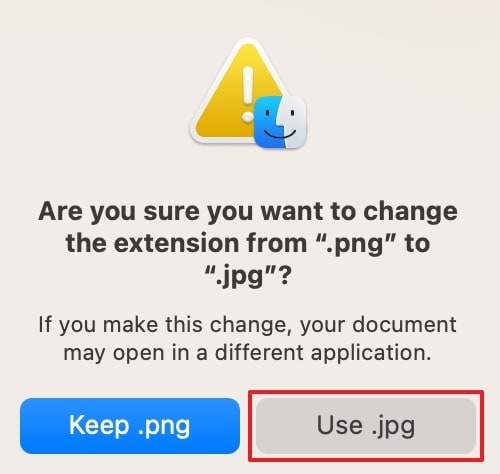
Step 2. You then get an alert message where you must hit the "Use .jpg" button. This is to ensure your file is converted and you can access it again in a JPG format.
Way 3. Use Disk Utility to Fix JPG Corruption on Mac
In case the JPG file is corrupt due to issues with your storage device, Disk Utility can help repair the drive or volume where the file is stored. This built-in macOS tool can check and fix disk errors that might be preventing the JPG from opening properly. Follow the instructions below to understand how to repair JPG files with the disk utility:
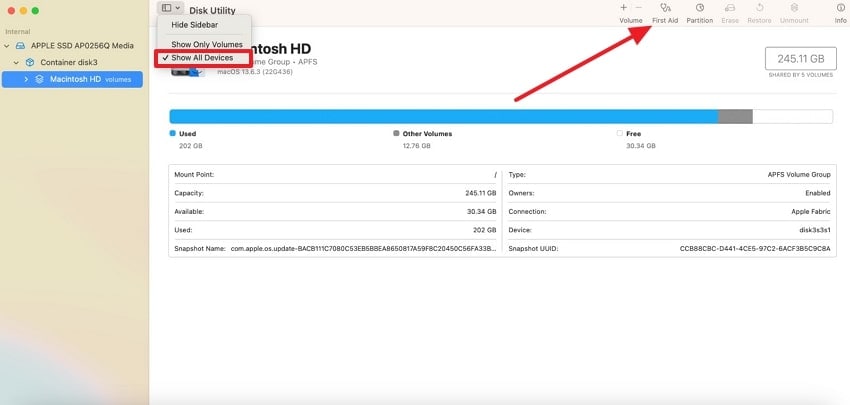
Step 1. Start by searching for "Disk Utility" and clicking the "Sidebar Tab" at the top left corner. Next, from the drop-down menu, tick the "Show All Devices" option and pick the hard drive where the corrupted file is located. As you open up the drive, select the "First Aid" button on the top navigation bar.
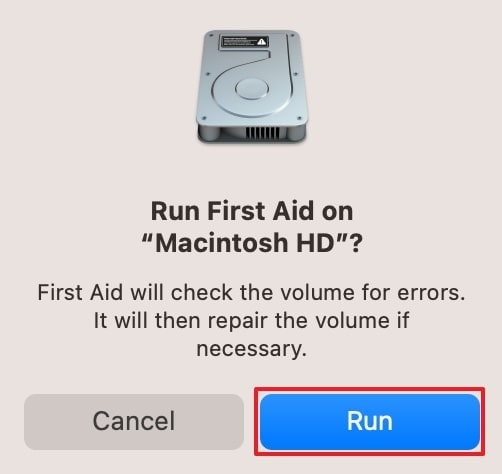
Step 2. Upon clicking the First Aid tab, a pop-up will appear to confirm whether you want to run First Aid on the specific selected drive. Here, hit the "Run" button to begin the progress and repair the corrupted file drive.
Part 4. How to Edit a JPEG File on a Mac to Enhance Its Quality?
Wondershare Repairit goes beyond basic file repair by offering advanced features to enhance and edit a JPG on Mac devices. Its AI-powered technology intelligently restores details, adjusts colors, and fixes distortions to improve image clarity. Dealing with low-resolution images, the tool applies precision algorithms to refine your JPEGs while maintaining their original integrity.
Another standout feature is its ability to process multiple JPEGs simultaneously, ensuring consistent quality across a batch of images. This tool also supports high-definition enhancements, perfect for restoring professional-grade photos or cherished personal memories. With Repairit, your images are enhanced seamlessly, delivering results that look as good as, if not better than, the originals.
Guide to Enhance Quality of a JPG File on Mac Devices
Follow the guide below to better understand how to edit a JPEG on a Mac device.
Step 1. Install and locate the AI Photo Enhancer Tool
Start enhancing your low-pixelated images on Repairit by downloading the tool to your MacBook. Then, move to the “More Types Repair” tab from the left navigation bar and here pick “AI Photo Enhancer.”
Step 2. Click on the Add Button to Upload the Low-Resolution JPG
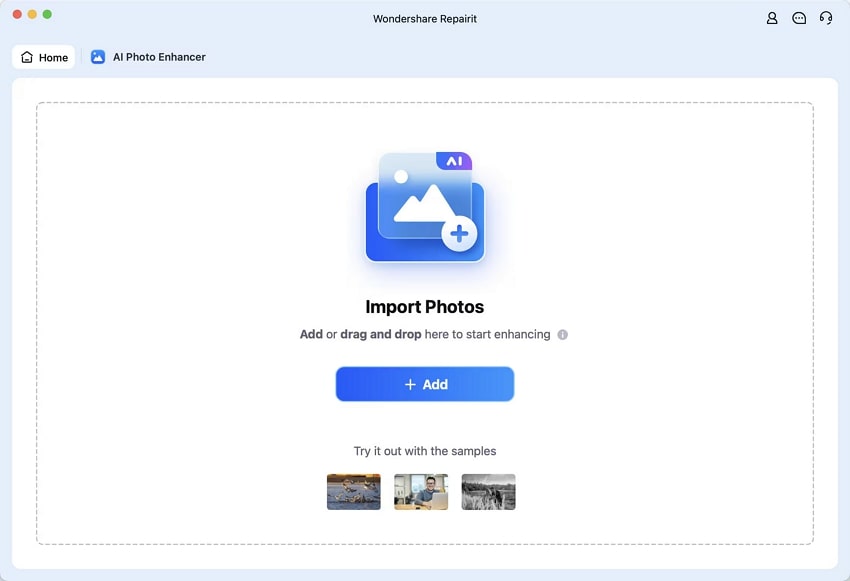
Moving on, at the AI Photo Enhancer window, use the “+Add” button to add the images you want to enhance.
Step 3. Adjust Your Properties to Let Repairit Start Enhancing
Next, select the "AI Model" you want to apply to your images and choose the "Image Resolution" for the picture. Then, hit the "Start Repairing" button to initiate the process and move to the next step.
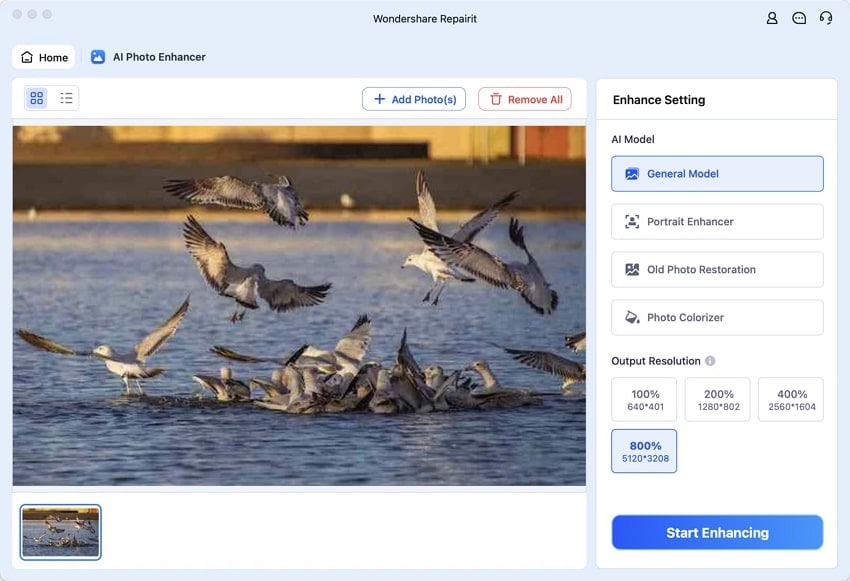
Step 4. Save the Enhanced Images to Your macOS Desktop
Upon enhancing the images, look into the before and after versions of the pictures to make sure you are satisfied with your results. Lastly, click the “Save All” button to download the enhanced JPG files to the MacBook device.
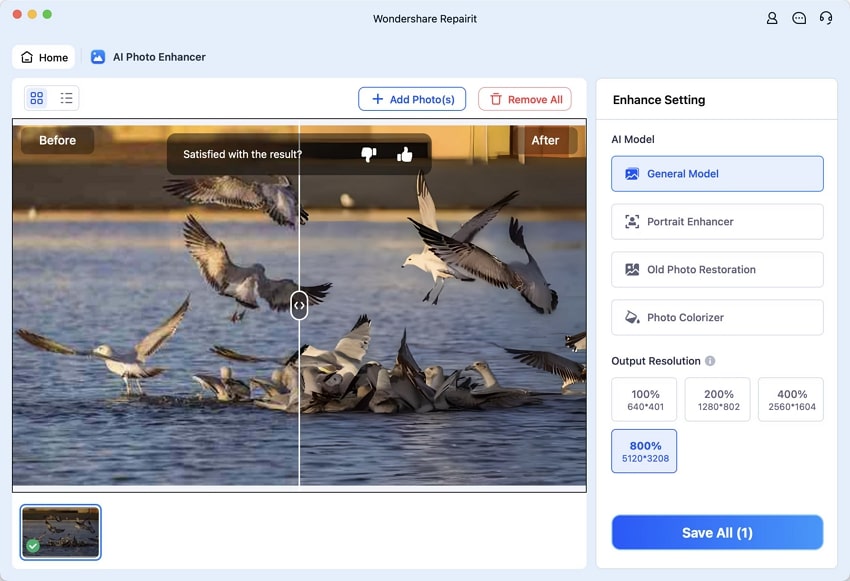
Pro Tip. How to Fix a Damaged or Corrupted JPG File from Any Apple Device?
Using the online version of Repairit, you can fix corrupted files directly from any device, which includes MacBooks and iPads. This cloud-based tool doesn't require you to download any additional software, which makes it a convenient option for users on the go. When dealing with corrupted images, it provides an efficient and simple way to repair JPG files.
With a simple design, Repairit online guides users through the repair process to make it accessible for both beginners and experienced users. Your files are encrypted during the entire repair process to ensure that your personal and sensitive images are always protected.
Key Features of the Repairit Online
- Upscale Repaired Photo: Repairit enhances the resolution of repaired photos, restoring their original quality and clarity. The feature to upscale allows your images to be sharper and more detailed after the repair process.
- Various File Formats: Repairs a wide range of image formats, including JPG, JPEG, and PNG. It ensures that no matter the format, your images are restored without compromising quality.
- Batch Processing to Repair: With Repairit, you can process and repair multiple files simultaneously. This batch-processing feature speeds up the repair workflow, saving you time when dealing with numerous corrupted images.
Steps on Fixing Damaged Files Online Through Repairit
With the help of the instructions discussed below, you can better understand the repair JPEG online through Wondershare Repairit.
Step 1. Navigate to the Online Image Repair Tool
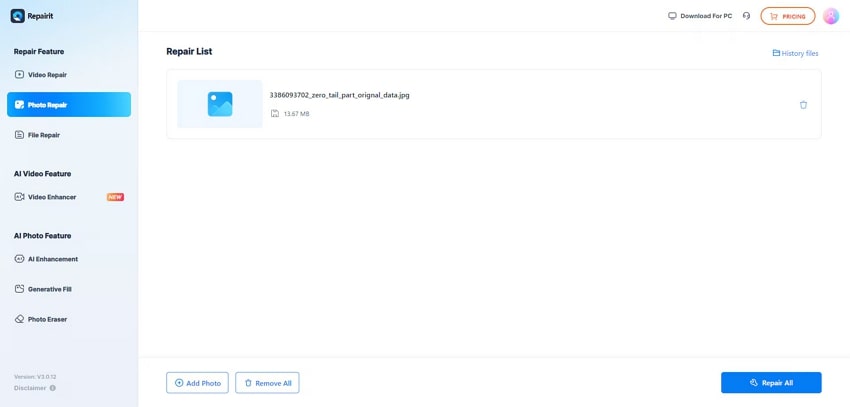
To repair your files online, locate the “Online Image Repair” tool on the main browser and hit the "Add" button.
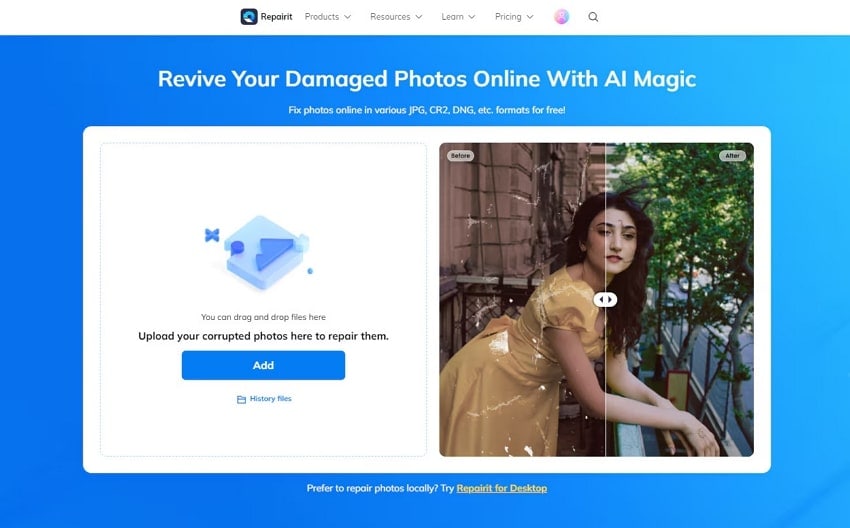
Step 2. Add Damaged Photos Files to the Repair Interface
Moving on, hit the "Add Photo" button to get redirected to your device Finder folder and add the corrupted files. It gives you the option to drag and drop as well to begin the procedure of repairing your JPG files.
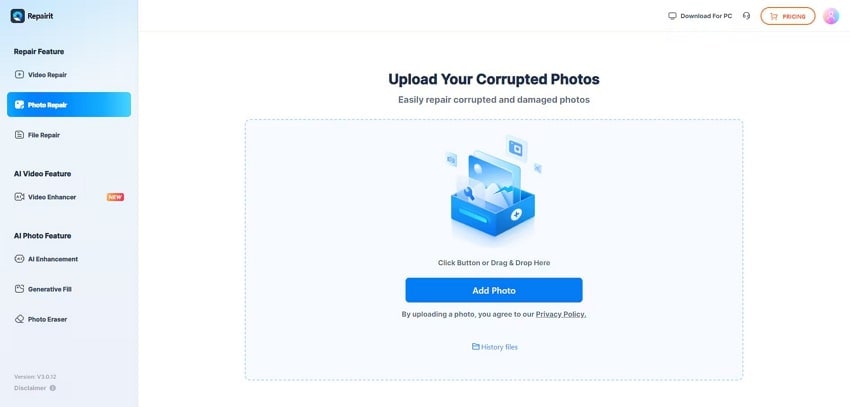
Step 3. Hit on Repair All to Begin the Process
Once the damaged images are on the online Repairit platform, click the “Repair All” button and move to the last step.
Step 4. Check the Results and Download All to Your Apple Device
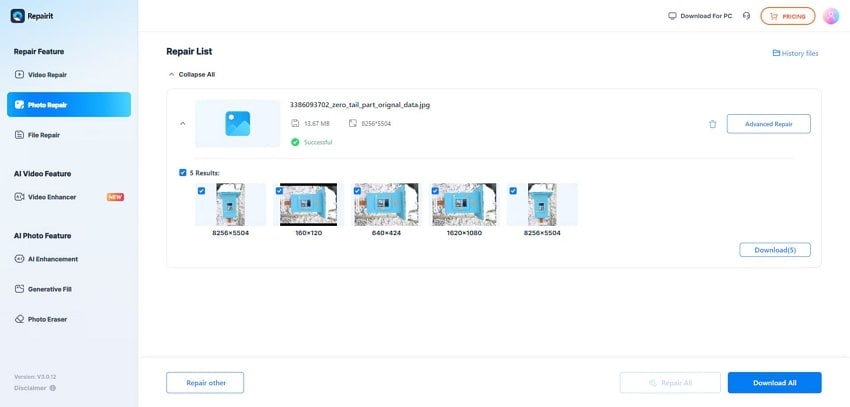
Lastly, press the "Download All" button to save all the repaired JPG files from the online platform.
Conclusion
In conclusion, this article looks into the two most straightforward ways to repair JPG files in a single click without having to use manual methods. Moreover, it also discussed the built-in techniques in the guide to help you carry out the process. We then dived into how you can repair the damaged files on any of the Apple devices by simply accessing the online version of the Wondershare Repairit tool.
FAQs
1. Why can't I open JPG files on my Mac?
JPG files may fail to open due to corruption, unsupported formats, or software compatibility issues. A damaged file structure or incomplete file transfer can also cause this problem. Ensuring you have an updated image viewer, or a repair JPG tool can help resolve the issue.2. How do I manually fix a corrupted file on macOS devices?
Manually fixing a corrupted file involves changing the file format, using the Preview app, or running Disk Utility to check storage integrity. However, this process can be time-consuming and might not always yield results. Instead, tools like Wondershare Repairit Online and offline platforms use AI to repair files quickly and efficiently.3. How to repair an unsupported image file?
An unsupported image file can be repaired by converting it to a compatible format using tools like Preview or online converters. Alternatively, cutting-edge repair tools like Repairit can fix damaged files and make them readable without changing their format.


 ChatGPT
 Perplexity
 Google AI Mode
 Grok
Grok


