
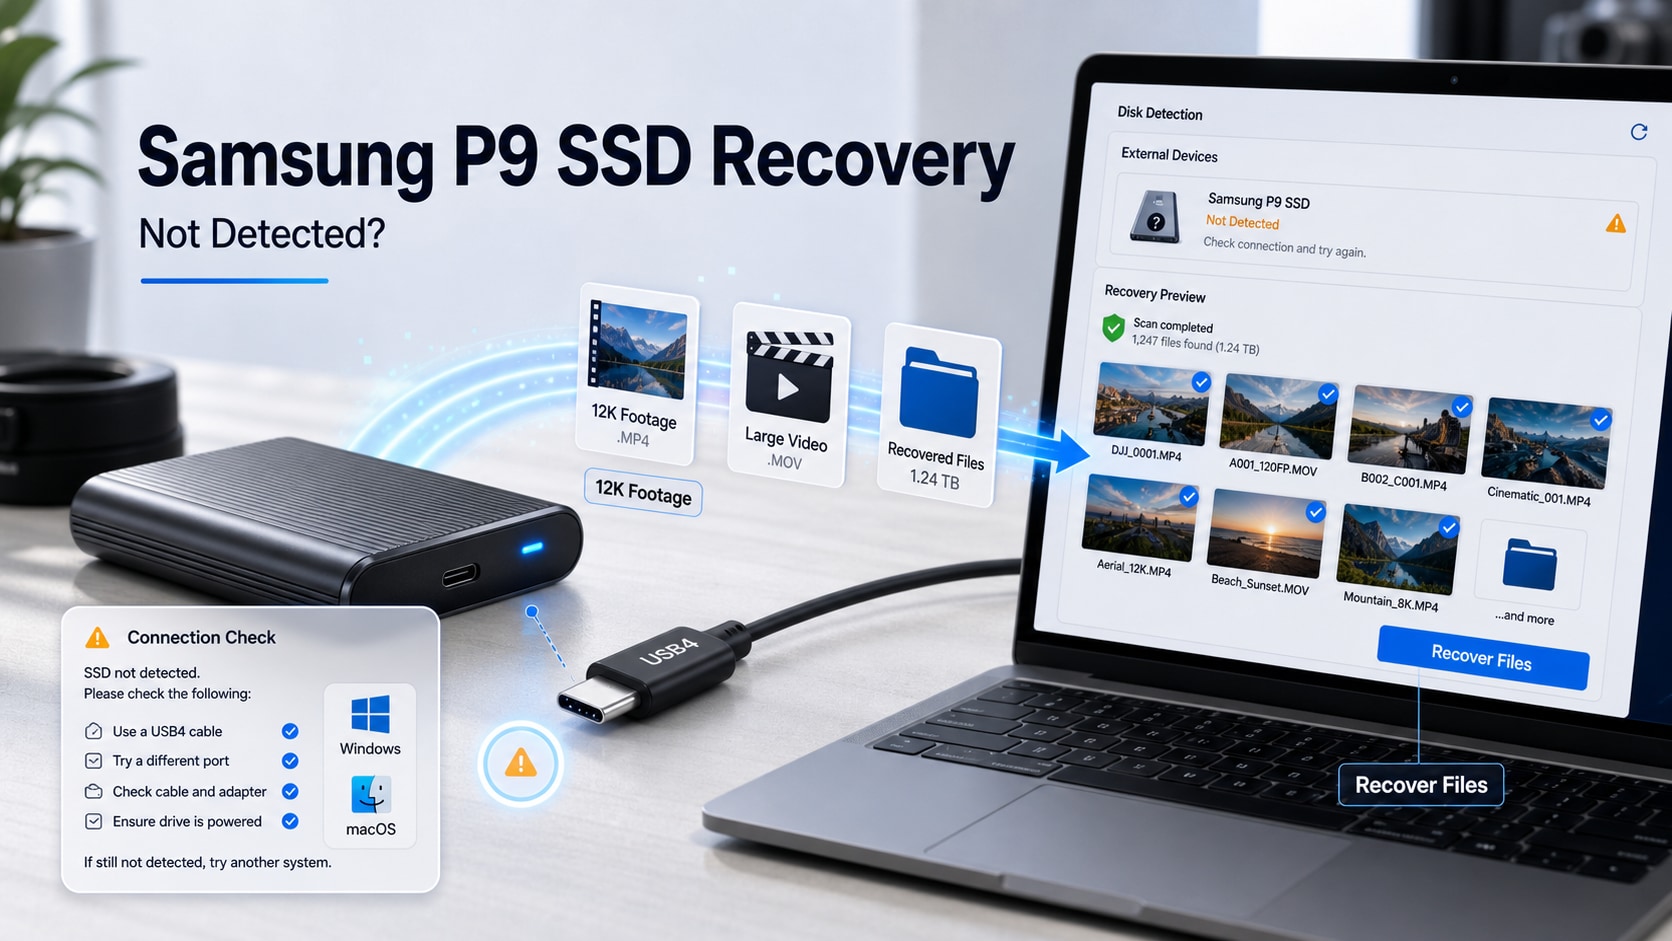

 TL;DR:
If a Samsung P9 or P7 SSD is not detected, immediately verify its hardware presence and capacity in Windows Disk Management or Mac Disk Utility, and extract your files to a separate drive before attempting any initialization or file-system repairs.
● Never format, initialize, or run CHKDSK or macOS First Aid on a RAW or unallocated volume, as these tools alter metadata and can permanently destroy missing files.
● Because operating systems use TRIM to permanently clear deleted SSD blocks, you must immediately halt all writes and avoid changing system settings if a file disappears during a 12K direct recording or transfer.
● Software recovery requires a stable block device, meaning you must stop DIY attempts and seek a professional lab if the USB4 drive reports 0 bytes, displays an incorrect capacity, or repeatedly disconnects.
Ask AI for a summary
 ChatGPT
 Perplexity
 Gemini
 Claude
 Grok
Grok
Quick answer: If a Samsung P9 or P7 portable SSD is not detected, first replace the cable and connect the drive directly to another compatible port or computer. Then check Disk Management on Windows or Disk Utility on Mac. Do not initialize or format a drive that contains needed data. If the physical SSD appears with the correct capacity and remains stable, recover missing or inaccessible files to a different disk before attempting file-system repair.
Samsung announced the P9 and P7 on August 26, 2026, with a global rollout beginning in September. The P9 combines USB4 with sequential speeds of up to 4,000MB/s read and 3,800MB/s write, capacities from 1TB to 8TB, and sustained performance for 12K direct recording. Those specifications make a detection failure unusually expensive: the missing device may hold the only copy of large RAW files, camera originals, an editing project, or an interrupted transfer.
Fact-checked on September 1, 2026: Product specifications and availability were checked against Samsung's current announcement and P9 product page. Windows and macOS steps were checked against current Microsoft and Apple documentation. Recovery guidance distinguishes a missing mount from logical corruption, SSD deletion from hard-drive deletion, and software-readable devices from hardware failures.
In This Article
Part 1. Samsung P9 And P7 Recovery Review
Samsung's Gamescom 2026 announcement positions the P9 as the performance model and the P7 as the more versatile portable drive. Both use USB4. The P9 is designed for professional production, large RAW images, ultra-high-resolution video, and direct recording, while Samsung lists desktops, laptops, smartphones, consoles, and cameras among the P7's host-device categories.
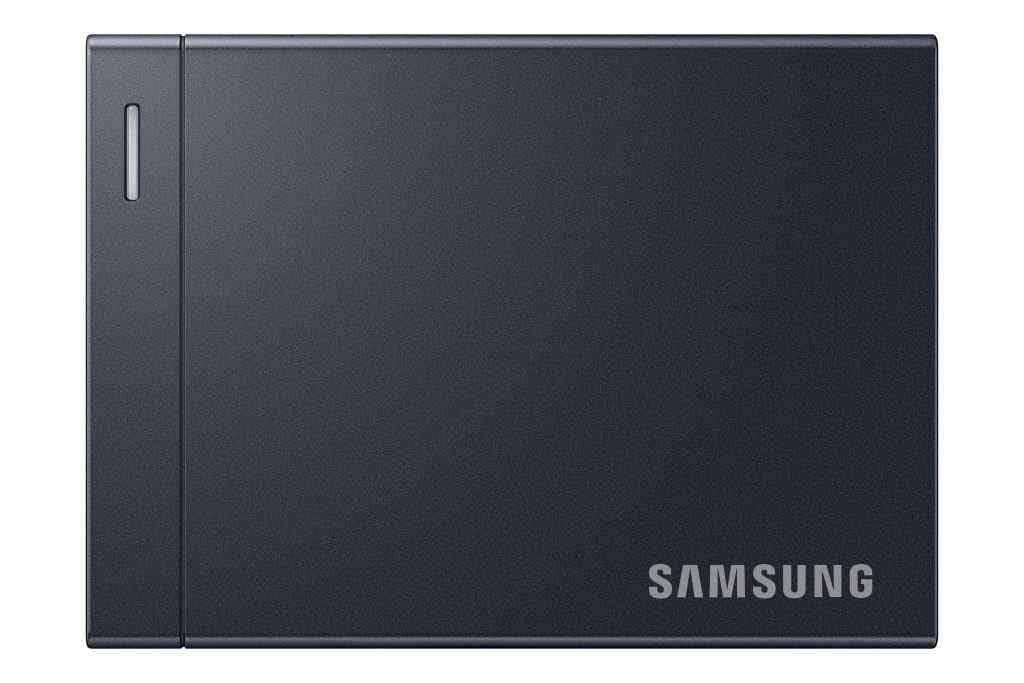
| Official Detail | Samsung P9 | Samsung P7 | Recovery Relevance |
| Interface | USB4 | USB4 | A USB-C-shaped connector alone does not prove that a cable, port, hub, or host supports the required data link. |
| Performance | Up to 4,000MB/s sequential read and 3,800MB/s sequential write | Samsung describes fast everyday storage but did not publish a P7 speed figure in the launch announcement. | High throughput makes it easy to move huge batches quickly, but an interrupted operation can affect many files at once. |
| Capacity | 1TB, 2TB, 4TB, and 8TB; market availability and timing can vary | A correct reported capacity is an important diagnostic signal. A 0-byte or wildly incorrect size points away from a simple mount problem. | |
| Creator Workflow | Samsung states support for 12K direct recording and large RAW workflows. | Samsung lists cameras among compatible host-device categories. | Camera support still depends on the exact camera, recording format, cable, power, and approved-media requirements. |
| Management | Samsung's current P9 product page lists Samsung Magician software. | Features can vary by model and platform. | Do not update firmware, reset security, or erase the SSD while irreplaceable data is inaccessible. |
At the time of fact-checking, Samsung's global rollout had only just begun. Capacity, regional stock, host compatibility, firmware behavior, and support details may develop after launch. This guide therefore relies on the official information Samsung has published and does not assume that P9 and P7 use the same controller, security implementation, or failure behavior as older T-series drives.
Part 2. What “Not Detected” Actually Means
“Not detected” can describe four different states. The distinction determines whether you need a cable, a mount fix, data-recovery software, or a hardware specialist. Do not treat the absence of a File Explorer icon as proof that the SSD is dead.
| Detection Level | What You See | Likely Layer | Safest Next Move |
| Volume is mounted | The SSD appears in File Explorer or Finder, but a folder or file is missing. | Deletion, wrong destination, interrupted copy, catalog path, or damaged individual files | Check the original source and destination once. If files are missing, stop writes and scan the SSD. |
| Physical disk is present; volume is absent | Disk Management or Disk Utility shows the correct-capacity device, but File Explorer or Finder does not. | Missing drive letter, unmounted volume, unsupported file system, damaged partition, RAW volume, or lost partition | Do not initialize or erase. Recover data before changing the disk structure. |
| USB device is present; disk is absent | Device Manager or System Information sees a USB device, but no usable disk appears. | Cable, port, power, USB bridge, driver, controller, or firmware path | Test a known-good direct connection. Software cannot scan storage the OS does not expose as a readable disk. |
| No hardware detection | The SSD is absent from every system tool and every tested computer. | Connection failure, enclosure electronics, controller failure, or other physical fault | Stop repeated power cycles. Seek Samsung support for an empty drive or a recovery lab for irreplaceable data. |
A fifth state deserves special caution: the P9 appears, but the capacity is 0 bytes, far smaller than expected, unstable, or changes between connections. That is not a routine missing-drive-letter case. Repeated full scans can stress an unstable controller, so high-value data should go to a professional rather than through prolonged DIY testing.
Part 3. Why Portable SSD Recovery Is Different
An SSD does not handle deleted data like a mechanical hard drive. Modern operating systems can send delete notifications, often called TRIM or unmap, to tell the storage device which blocks are no longer in use. Microsoft's current file-system documentation states that NTFS enables TRIM by default unless an administrator disables it.
Once a delete notification reaches an SSD, its controller and background garbage collection may make deleted blocks unavailable. The outcome depends on the file system, operating system, USB bridge, firmware, workload, and whether the command reached the device. That is why a recovery program may find deleted file names but not intact content, or find nothing even when deletion was recent.
Do not try to disable TRIM after the loss. It cannot reverse notifications already sent, and changing system settings creates another variable. The practical response is to disconnect the SSD, avoid new writes, and scan only when you have a stable connection and a separate destination drive.
Security is another boundary. If you deliberately protected the portable SSD with a password or encryption layer, unlock it normally with the correct credentials before scanning. A recovery tool cannot lawfully or technically reconstruct plaintext from properly encrypted data without the required key. Do not choose a reset, secure erase, or factory action to bypass a forgotten password when the files matter.
Part 4. Protect The SSD And Isolate The Connection
Before opening any recovery or repair tool, remove avoidable connection failures. This method is non-destructive as long as you do not accept a format, initialize, repair, benchmark, or firmware prompt.
Method 1. Test The USB4 Connection Without Writing To The SSD
- Stop The Current Workflow: Quit the camera, editing app, game, backup utility, or transfer task that was using the P9 or P7. If a file disappeared, disconnect the SSD once the operating system is no longer writing.
- Inspect The Connector And Cable: Check for a loose plug, damaged connector, severe bend, or cable that is intended only for charging. Use the supplied cable or a known-good data cable rated for the connection you are testing.
- Connect Directly: Bypass docks, monitors, front-panel ports, extension cables, and passive adapters. Connect the SSD directly to a known-good computer port.
- Try One Alternate Path: Test another compatible port and, if available, another computer. A device that works elsewhere points to the first host, cable, port, permissions, or software stack rather than lost data on the SSD.
- Record What The System Reports: Note the device name, capacity, file-system state, disconnect behavior, and any exact error. This prevents random fixes and helps support or a recovery lab reproduce the failure.
- Stop On Instability: If the SSD repeatedly disconnects, becomes unusually hot, reports 0 bytes, or vanishes under light reading, do not run a long scan.
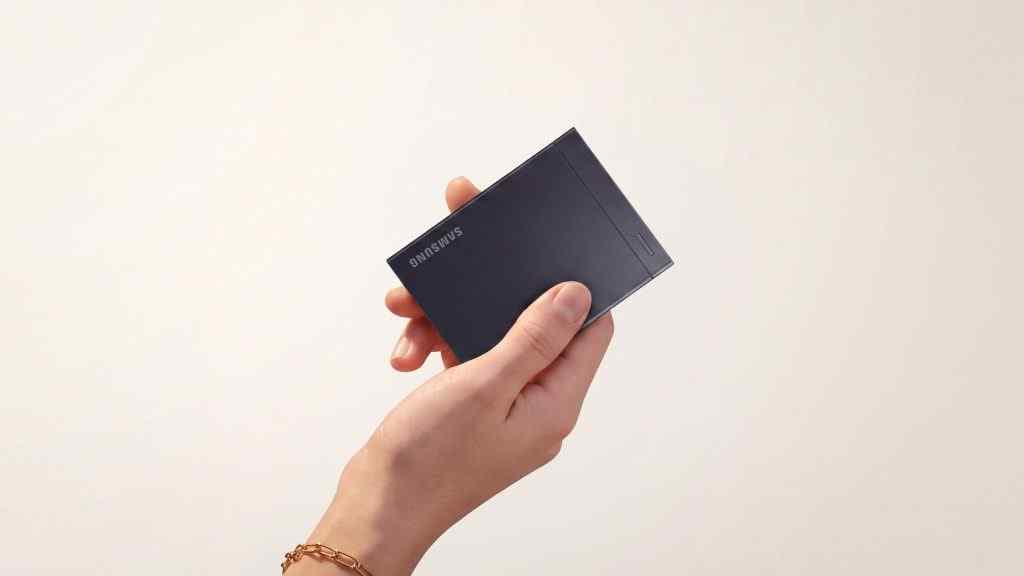
A slower connection is not automatically a detection failure. The P9's maximum performance requires a compatible USB4 host and workload; connecting through an older compatible port can reduce speed. The recovery question is whether the host exposes a stable, correct-capacity device—not whether a benchmark reaches the advertised maximum.
Part 5. Diagnose A Samsung P9 On Windows
Windows presents a storage device at several layers. File Explorer shows mounted volumes, Disk Management shows disks and partitions, and Device Manager shows the hardware path. Checking them in that order reveals where detection stops.
Method 2. Check Device Manager And Disk Management
- Press Windows + X and open Device Manager. Expand Disk drives and Universal Serial Bus controllers. If the Samsung drive appears, note any warning icon but do not uninstall the device yet.
- Right-click Start and select Disk Management. Microsoft also documents Windows + R > diskmgmt.msc as a direct route.
- Match the P9 or P7 by capacity. Do not rely on “Disk 1” or a drive letter, because numbering changes between computers.
- If the disk and volume are healthy and the files are accessible through another application or computer, copy the important data before changing the drive letter or mount state.
- If the disk shows RAW, Unallocated, Unknown, or Not initialized, do not click Initialize Disk, create a new volume, or format it. Proceed to recovery while the correct-capacity physical disk remains visible.
- If Device Manager sees a USB device but Disk Management does not show the SSD, return to the cable, port, host, and hardware path. File-recovery software has no stable block device to scan.
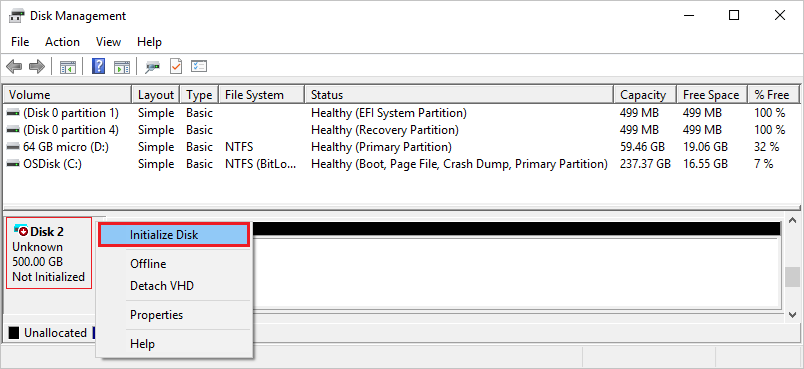
The screenshot above comes from Microsoft's current Disk Management documentation and shows the exact menu to avoid on a used P9 or P7 containing needed data. Microsoft's Initialize New Disks guide limits initialization to a new disk with no existing data and warns that initialization erases data on a disk already in use.
Do not run CHKDSK as the first response to a RAW, unallocated, or intermittently disconnecting SSD. CHKDSK repairs file-system structures; it is not a recovery scan, and repairs can alter the metadata that describes missing files. Protect or recover the data first.
Part 6. Diagnose A Samsung P9 On Mac
Finder shows mounted volumes, while System Information and Disk Utility can reveal whether macOS sees the USB device and the physical storage device. Use these tools for observation before repair.
Method 3. Check System Information And Disk Utility
- Open Apple menu > System Settings > General > About > System Report, then select USB. On some macOS versions, hold Option, open the Apple menu, and choose System Information.
- Look for the Samsung SSD or its USB storage entry. Hardware visibility here but not in Disk Utility points to the connection, bridge, driver, controller, or media layer.
- Open Disk Utility from Applications > Utilities.
- Choose View > Show All Devices. This exposes the physical disk above its containers and volumes.
- Select the physical external SSD and verify its reported capacity. If the device is present but a volume is gray, missing, or unreadable, do not click Erase.
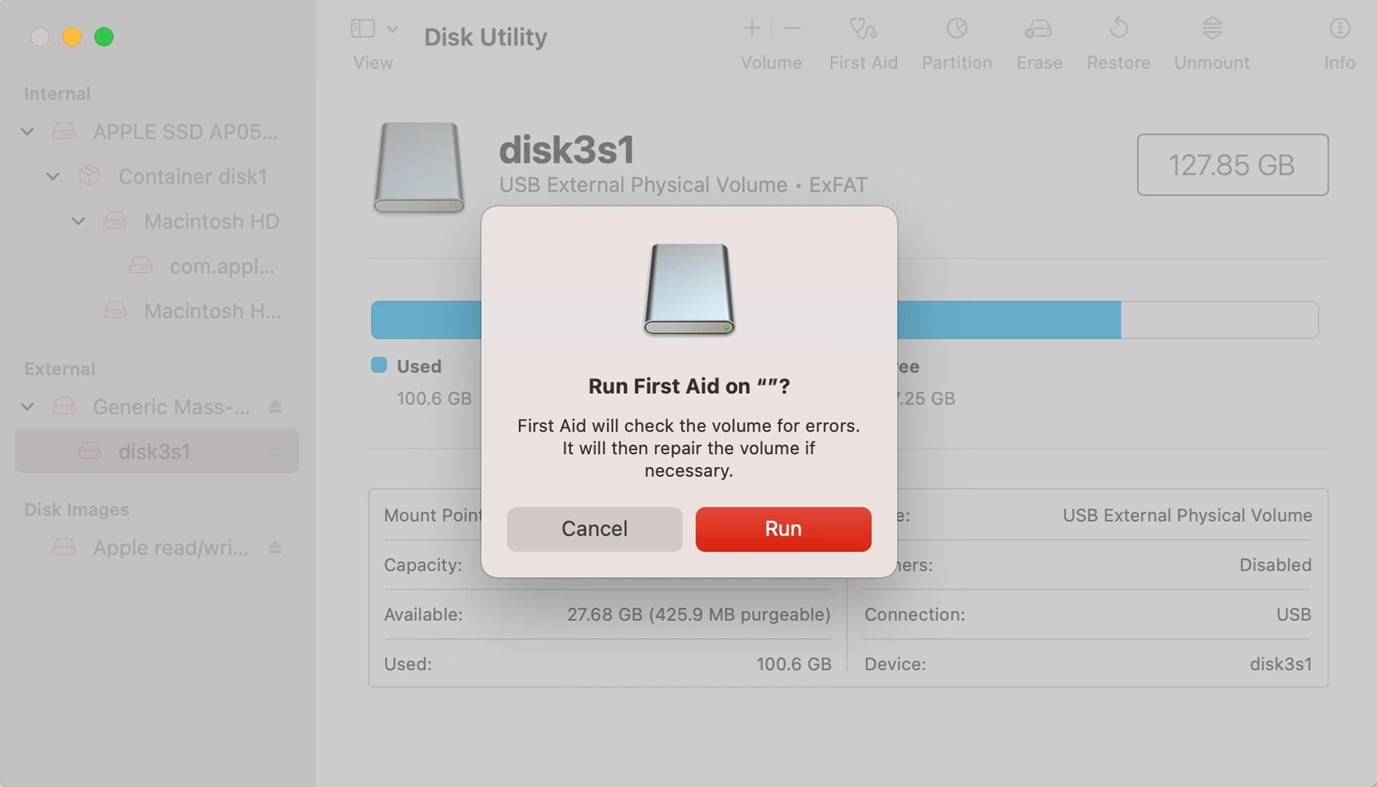
- If important files are missing or the volume is damaged, recover them before running First Aid. If the First Aid confirmation dialog opens accidentally, click Cancel.
Apple explains that First Aid checks and repairs formatting and directory structures, but it cannot fix every disk problem. Because it is a repair operation, not a file-recovery scan, use it after the important data is copied or recovered.
Part 7. Choose The Right Recovery Path
| What You See | Use Recoverit? | Best Next Step |
| The P9 is mounted and files were deleted or disappeared after a transfer. | Yes, if the SSD is stable. | Stop using it, check the original source once, then scan the affected SSD. SSD TRIM may limit results. |
| Disk Management or Disk Utility shows the correct-capacity SSD as RAW or unallocated. | Yes, before repair or format. | Use unallocated disk recovery guidance and save results elsewhere. |
| A partition disappeared, but the physical SSD is stable and correctly sized. | Yes. | Scan first; use the lost partition recovery guide only after separating recovery from repair. |
| The drive is detected and asks for a password. | Only after normal unlock. | Use the correct credentials and supported security software. Do not reset or erase the SSD. |
| Device Manager sees USB hardware, but no physical disk appears. | Not yet. | Resolve the cable, port, host, bridge, controller, or power path first. |
| The SSD reports 0 bytes, wrong capacity, repeated disconnects, or severe heat. | No prolonged DIY scan. | Disconnect it and consult a professional recovery service if the data is valuable. |
| The P9 is physically damaged or absent from every computer. | No. | Software cannot scan a device the operating system cannot read. Use Samsung support for device service or a specialist for data recovery. |
This page owns the model-specific search intent around Samsung P9 SSD recovery and P9/P7 detection. Broader topics such as general SSD data recovery, portable-drive recovery, unallocated disks, partitions, and video recovery remain separate guides so each problem has one clear next step.
Part 8. Recover Files From A Detected Samsung P9 Or P7
Use this method only when Windows or macOS exposes the physical SSD at the expected capacity and the connection remains stable. Recoverit can scan a readable external SSD for deleted, formatted, lost-partition, or inaccessible files; it cannot repair a dead USB controller or bypass a password.
Method 4. Scan The Portable SSD With Recoverit
Prepare another healthy disk with enough free space for the recovered files. Do not use the P9 or P7 itself as the recovery destination.

- Install Recoverit Away From The Affected SSD: Install it on the computer's internal drive or another healthy disk. Mac users can use Recoverit for Mac.
- Select The Samsung Portable SSD: Open Recoverit, go to Hard Drives and Locations, and select the external drive that matches the P9 or P7 capacity. Stop if the displayed size is wrong or the device keeps reconnecting.

- Scan The Drive: Start the scan and let the connection remain undisturbed. Use file type, file path, date, size, and search filters to narrow large creator projects instead of opening every result.

- Preview Representative Files: Preview several photos, documents, or supported media files. For very large video, verify the recovered copy in its intended player or editor after saving because a thumbnail or file name alone does not prove the stream is complete.
- Recover To Another Disk: Select the needed files, click Recover, and choose a different healthy storage device. Writing the results back to the affected P9 or P7 can overwrite other recoverable data.
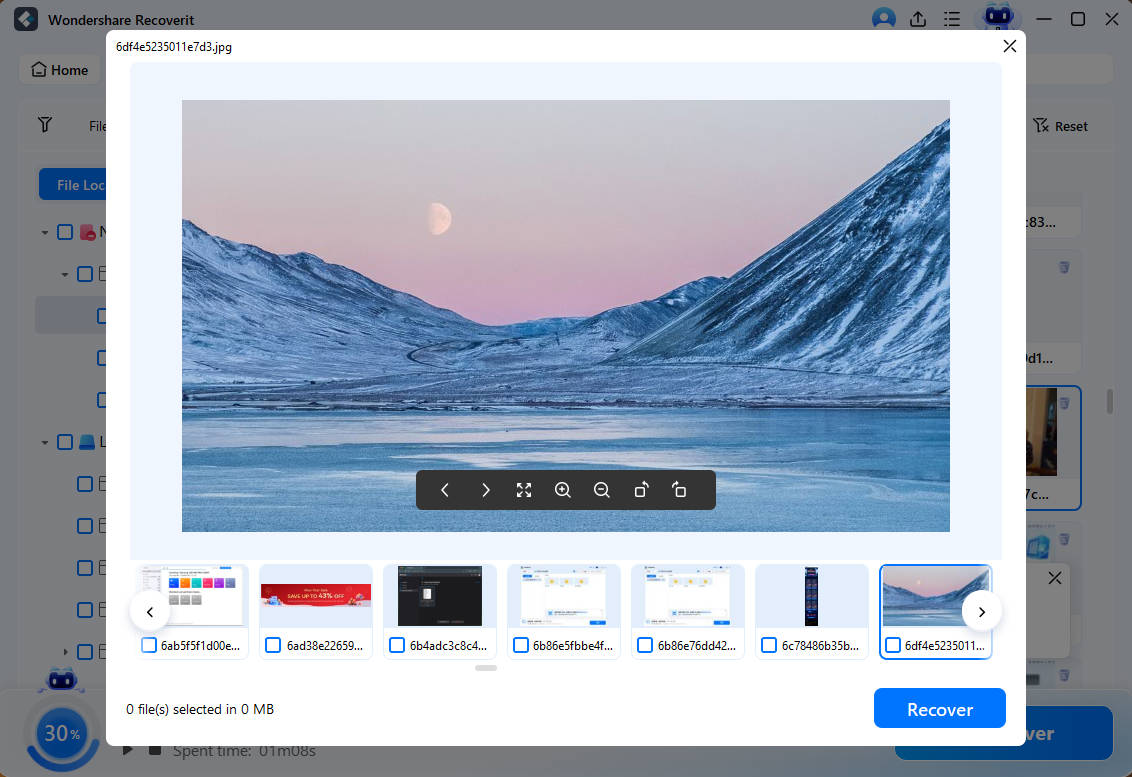
- Verify Before Repair: Open multiple recovered files, compare expected sizes and durations, and copy the recovery set to a second location before initializing, repairing, or reformatting the Samsung SSD.
A scan result is evidence, not a guarantee. SSD cleanup, overwrite, encryption, file fragmentation, interrupted recording, and hardware instability can affect which files are recoverable and whether they open correctly. For model-independent workflows, see portable drive file recovery.
Recover Files From A Detected Samsung P9 Or P7
 Security Verified. Over 7,302,189 people have downloaded it.
Part 9. Recover Large Video And Direct-Recording Files
The P9's 12K direct-recording positioning creates two different failure cases: data can disappear during a copy, or recording can stop before the camera finalizes the file. The correct source changes between them.
| Creator Failure | Best Source To Protect | What Recovery Can And Cannot Do |
| A copy from a camera card to the P9 failed. | Keep both the original card and the partially written P9 unchanged. | Recover from the source with the most complete original. Do not erase the card because a destination folder exists. |
| A move operation was interrupted. | Protect both source and destination. | Some files may exist only on one device. Scan each separately and recover to a third disk. |
| Direct recording to the P9 stopped unexpectedly. | The P9 is the recording source. | Recovery may find an existing stream or deleted container, but it cannot recreate frames that were never written. An unfinalized video may also need file repair after recovery. |
| The SSD disconnected during editing. | Protect the P9 plus autosave, cache, and project-backup locations. | Media recovery and project-file recovery are separate tasks. A recovered project can still point to missing source media. |
| Large video files were deleted from the P9. | Disconnect the P9 immediately. | Use Recoverit Video Recovery, but understand that SSD TRIM and overwrite can make deleted content unavailable. |
| Original clips remain on a camera card. | Preserve the camera card until the P9 copy is verified. | Recover from the original camera media with Recoverit Camera Recovery if that source is missing files. |
File presence is not the same as media integrity. After recovery, verify full duration, audio tracks, timecode, resolution, and representative frames. A file that opens only at the beginning may still contain damaged or missing segments.
Part 10. Know When Software Cannot Help
Self-service software needs the operating system to read a stable block device. Stop and escalate when the symptoms fall outside that boundary.
- No Detection Anywhere: The P9 or P7 remains absent from Disk Management, Disk Utility, Device Manager, and System Information across known-good cables and hosts.
- Wrong Or Changing Capacity: A 4TB or 8TB SSD reports 0 bytes, a tiny capacity, or different sizes between connections.
- Repeated Disconnects: The device resets during simple directory reads or a short scan.
- Severe Heat Or Physical Damage: The enclosure is unusually hot, the connector is bent, liquid entered the device, or the SSD suffered impact before the failure.
- Critical Encrypted Data Without Credentials: The drive is healthy but locked, and the required password or recovery key is unavailable.
- Only Copy Of High-Value Production Media: The cost of losing the remaining readable state exceeds the cost of professional evaluation.
Do not open the enclosure, transplant components, or repeatedly power-cycle an unstable new SSD. Hardware architecture can differ from older Samsung portable models, and launch-era assumptions are not a substitute for a model-specific professional diagnosis.
Part 11. Repair Or Reformat Only After Recovery
Once two verified copies of the important files exist, you can decide whether the SSD needs a mount change, file-system repair, erase, firmware update, warranty service, or replacement. The choice should match the diagnosis.
| Post-Recovery State | Reasonable Next Step | Do Not Assume |
| Healthy volume without a Windows drive letter | Assign a drive letter after data verification. | A missing letter did not mean the files were deleted. |
| Unmounted but otherwise healthy Mac volume | Try Mount after data protection and confirm the file-system format is supported. | Erase is not required merely because Finder did not show the volume. |
| Logical file-system errors | Run the operating system's repair tool only after recovery. | A successful repair proves neither hardware health nor future reliability. |
| RAW, unallocated, or lost partition | Recover first; then repartition and format only if you accept erasing the remaining structure. | Initialization is a data-recovery step. |
| Recurring disconnects or corruption | Replace or service the device after securing data. | Another format will repair controller, connector, or flash failures. |
On a Mac, Apple's First Aid can repair certain directory and formatting errors. The confirmation screen below is the point to reach only after the data is safe. Apple also states that Disk Utility cannot repair every disk problem and recommends backing up and replacing a disk that is about to fail.
Formatting is destructive. Microsoft warns that formatting a volume destroys its data, and Apple's Disk Utility guide likewise states that erasing a storage device deletes everything on it. If a repaired or reformatted P9 or P7 fails validation or repeats the error, do not return irreplaceable media to it.
Part 12. Prevent The Next P9 Or P7 Data Loss Event
- Keep The Original Until Verification: Do not erase a camera card or source drive until the P9/P7 copy has been opened, checked, and duplicated.
- Use A 3-2-1 Workflow: Keep three copies, on two storage types, with one copy off-site or offline. A portable SSD is a working drive, not the entire backup plan.
- Copy Before You Move: Copy the files, verify size and playback, and only then delete the source. A move operation can hide which side owns the last complete file after interruption.
- Protect The Cable Path: Use a short, known-good data cable, avoid strain on the connector, and bypass unstable hubs during direct recording or large transfers.
- Confirm Camera Compatibility: Check the camera maker's supported media, file system, cable, power, and recording-format requirements. Samsung's broad host compatibility does not override a camera's own limitations.
- Eject Cleanly: Wait for recording, cache flushing, or file copying to finish, then use the operating system's eject function before unplugging.
- Keep Free Space: Avoid filling a production SSD to its last available bytes. Leave room for file-system metadata, application caches, and recording finalization.
- Validate Before Reuse: After recovery or repair, perform a non-critical test transfer, verify the copied files, and watch for disconnects or capacity errors before trusting the drive again.
Part 13. Final Verdict
The Samsung P9 is a high-capacity, high-throughput USB4 SSD designed for demanding creator workflows, while the P7 broadens the same interface family across everyday hosts. Their launch makes portable storage faster; it does not change the basic recovery rule. A missing File Explorer or Finder icon is a symptom, not a diagnosis.
Use the detection ladder first. If the computer exposes a stable, correct-capacity physical SSD, recover important data to another disk before repairing the file system. If the drive is absent, unstable, incorrectly sized, locked without credentials, or physically damaged, software recovery is not the right first tool. That boundary protects both the files and the user's time.
FAQ
-
Can Recoverit Recover A Samsung P9 That Is Missing From File Explorer?
Possibly. File Explorer only shows mounted volumes. If Disk Management still shows a stable P9 at the correct capacity, Recoverit may be able to scan it. If the SSD does not appear as a readable physical disk anywhere, software cannot access it.
-
Should I Initialize A Samsung P9 That Windows Marks As Not Initialized?
Not when the SSD contains needed data. Microsoft's initialization procedure is intended for a new disk with no existing data and warns that initialization erases data on a disk already in use. Recover first, then initialize only if you accept rebuilding the disk.
-
Can Deleted Files Be Recovered From A Portable SSD After TRIM?
Sometimes, but there is no guaranteed result. If TRIM or unmap reached the SSD and its controller cleaned the freed blocks, deleted content may no longer be readable. Disconnect the drive quickly and avoid new writes.
-
What If My Samsung P9 Shows As RAW Or Unallocated?
Do not format, initialize, or create a new volume. If the physical SSD is stable and reports the correct capacity, scan it and recover files to another disk before repairing or repartitioning it.
-
Why Does The P9 Work On One Computer But Not Another?
The difference can be the cable, USB port, hub, power delivery, host controller, operating system, supported file system, permissions, or security state. A USB-C connector does not by itself confirm the same data capability on both hosts.
-
Can Recoverit Repair An Interrupted 12K Recording?
Recoverit can search for a missing or deleted file on a readable SSD. It cannot recreate frames that were never written. If an interrupted recording is recovered but its container was not finalized, the saved file may require a separate video-repair step.
-
Should I Run CHKDSK Or First Aid Before Recovery?
Not when important files are missing or inaccessible. These tools repair file-system structures and may change metadata. Copy accessible files or recover missing data first, then run repair tools on the protected device.
-
When Should I Stop DIY Samsung P9 SSD Recovery?
Stop if the SSD reports 0 bytes or the wrong capacity, disconnects repeatedly, overheats, is physically damaged, or is absent from every tested computer. For irreplaceable data, avoid repeated scans and contact a professional recovery service.


