File Recovery
- Recovers deleted or lost files effectively, safely and completely.
- Supports data recovery from 500+ data loss scenarios, including computer crash, partition loss, accidental human error, etc.
- Supports 1000+ file formats recovery with a high success rate and without any quality loss.

A Complete Guide to Fix "Erase Process Has Failed" on Mac

Jun 22, 2026 • Filed to: Solve Mac Problems • Proven solutions
 TL;DR:
You can fix the Mac Disk Utility Erase Process Has Failed error by forcing the format through Terminal commands, erasing individual volumes instead of the whole disk, or lowering the formatting security options for external devices.
● To force an erase via Terminal, run the diskutil list command to find the specific disk identifier, then execute the diskutil eraseDisk command to bypass standard Disk Utility halts.
● Formatting an external device can fail if the security level is set too high in Disk Utility, whereas erasing an internal Macintosh HD requires booting into macOS Recovery Mode to execute successfully.
● Because forcing an erase permanently wipes the drive, you must run a data recovery application like Wondershare Recoverit to extract inaccessible files before applying these advanced troubleshooting methods.
Ask AI for a summary
 ChatGPT
 Perplexity
 Gemini
 Claude
 Grok
Grok
While the problem is not that common, chances are that you might also get the Disk Utility Erase Process has failed error on your Mac. The problem happens when we try to format the Macintosh HD or any other external hard disk. Since it can happen due to a device or a firmware related issue, it is important to diagnose the problem first. In this guide, I'm going to tell you how to resolve the erase process that has failed on Mac with some other smart suggestions.
Part 1: Why the Erase Process Fails on Mac?
To learn different ways to fix the Mac Disk Utility erase process has failed error, it is important to diagnose it first. The following are some of the major reasons for the error to help you understand its causes.
- The hard disk on your Mac might be corrupt or unavailable.
- The presence of malware or virus on your Mac can also cause this problem.
- If you are trying to format an external device and have removed it while formatting.
- You could be trying to format a volume in Mac HD that might not be logically present.
- Any other security-related issue could have stopped the process in between.
- Your system might be ruining an old or outdated macOS version.
- The essential Mac components related to Disk Utility might not be initiated properly.
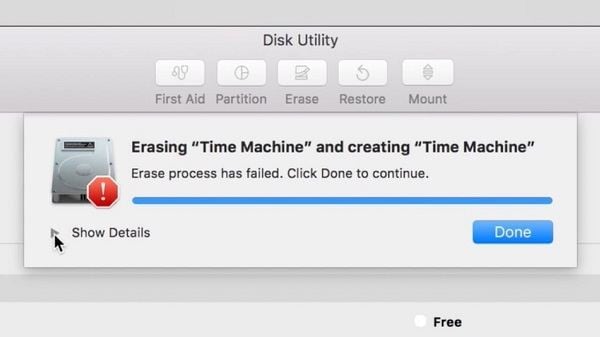
Once we get the "Error Process has Failed" prompt on Mac, the Disk Utility halts the formatting process in between. As a result, we are not able to erase the Mac drive (or an external device) using Disk Utility. Therefore, if want to troubleshoot a problem or would like to format the disk, then you need to find ways to overcome it.
Part 2: Common Fixes to Solve "Erase Process Has Failed" on Mac
Since there could be various reasons for getting the erase process has failed error on Mac, you might look for different ways to fix it. Here are some suggestions that you can implement to fix the Disk Utility erase process has failed error.
Method 1: Erase your Disk via Terminal
If there is a problem with the Disk Utility application on your Mac, then you can try to do the same via Terminal. It is a cleaner approach to erase a disk and would help you meet your requirements easily.
Step 1. To start with, go to Finder and navigate to Applications > Utility to launch the Terminal app as an administrator.

Step 2. Once the Terminal application is opened, just type the command "diskutil list" and press return. This will display detailed information regarding various disks and volumes in your Mac. From here, please note the identifier of the disk you wish to format (like disk2 or disk1).

Step 3. Great! Once you have noted the identifier, use the "erase disk" command to erase the entire disk or the "ease volume" command to just erase a volume.
Step 4. The entire format of the diskutil command is diskutil erase disk. For instance, to format the disk2 in the HFS+ format, you can just enter the command "diskutil eraseDisk HFS+ DISK disk2" and press the return key.
Step 5. After that, just wait for the commands to process as your selected disk would be formatted in the supported file system.

Method 2: Update the macOS
As stated above, if your Mac is running on an outdated firmware version, then it can encounter the Disk Utility erase process that has failed the problem. Thankfully, it can easily be fixed by updating your Mac to its latest supported firmware. You can look for the latest update for macOS from the App Store. Alternatively, you can also click on the Apple logo from the top, go to System Preferences > Software Update and check for updates from here.

Method 3: Erase Selected Volumes Instead
Sometimes, users get the erase process has failed error on Mac while formatting the entire disk. Therefore, you can consider formatting selected volumes of the disk instead. In this way, you can check whether the issue is with a selected volume or not.
Step 1. Firstly, go to your Mac's Finder > Applications > Utility and launch the Disk Utility application on your system.
Step 2. Once the Disk Utility application is launched, go to the top-left corner of the interface. From the dropdown menu, you can choose to view all volumes or external devices.

Step 3. Now, just select a volume from the sidebar (instead of the entire disk) and click on the "Erase" button on the toolbar to format it.

Similarly, you can try to erase the entire disk as well to further diagnose the problem. In this way, you can be sure whether the problem is with the entire disk or selected volumes.
Method 4: Adjust the Security Levels for Formatting an External Device
If you are getting the Disk Utility to erase the process has failed error while formatting an external device, then you should follow this drill. Ideally, if the security level for the USB drive or the external hard disk is too high, then the Disk Utility might not be able to successfully format it. To adjust its security level and fix the erase process has failed on Mac, follow these steps:
Step 1. Firstly, launch the Disk Utility application on your Mac and make sure the external device is connected to it.
Step 2. Now, select the external device from the sidebar and click on the "Erase" button. As the following pop-up would be launched, go to its Security Options.

Step 3. From here, you can just adjust the security level for formatting the external device. I would recommend keeping the security level on the lower side to avoid getting the erase process has failed error on Mac.

Part 3: A Complete Process to Erase Hard Drive on Mac
By following the above-listed techniques, you would be able to overcome the Disk Utility erase process has failed issue. Though, if you don't want to encounter it in the first place, then make sure you take all the right steps to erase a hard drive on Mac. If you don't make any mistake and there are no issues with your system, then you will not encounter the Mac Disk Utility erase process has failed issue.
There can be different reasons for formatting a hard drive or an external device on Mac. Some of them can be as follows:
- You might wish to troubleshoot an issue by formatting the hard disk.
- There can be an issue with your external device and formatting it can fix it.
- You might want to change the file system or the partition style of your Mac's drive.
- If malware has corrupted your Mac, then you easily fix it by formatting the disk.
- If you are reselling your Mac, then you might wish to format it to protect your data.
It doesn't matter what your reason for formatting a hard drive or external device is – the process is extremely easy. I have already provided a smart solution to format a disk via Terminal above that you can follow. Although to format the disk via Mac's graphic user interface, the following steps can be taken.
Step 1: Launch the Disk Utility application
As you know, Disk Utility is responsible to run formatting and erasing operations on the disk. Therefore, you can just go to Finder > Applications > Utility and launch the Disk Utility application from here.

Step 2: Select a Disk or Device to format
Now, you can view a list of all the available disks and the connected devices on the sidebar of the Disk Utility application. If you want, you can go to the dropdown menu from the top-left corner to view all volumes and devices. From here, you can just select a disk, volume, or even an external device that you wish to format.

Step 3: Erase the selected disk
After selecting the internal drive or the external device of your choice, just go to the Disk Utility toolbar on the right and click on the "Erase" button.

This will launch a pop-up window so that you can make the needed changes to format the drive. For instance, you can give it a new name, change its file system, or even its partitioning scheme. After making the appropriate changes, just click on the "Erase" button and wait for a while as the selected drive would be erased.

Part 4: Tips for Erasing a Disk Without Losing Data
Needless to say, when we format a disk, all the saved data in it is automatically erased. Therefore, if you don't want to lose your important files in the process, then consider taking a backup of your data in advance. For instance, you can manually copy your data and save it in another location (like another volume or an external hard disk). Apart from that, you can also use Time Machine to take an entire backup of your drive that you can later restore.

Though, if you have not taken a prior backup and have formatted your disk, then using a data recovery tool would be an ideal solution. You can take the assistance of Wondershare Recoverit, which is an extremely reliable data recovery application, supporting all the major macOS versions. By following a simple click-through process, you can get back your lost photos, videos, music, documents, and kinds of data. The application has one of the highest data recovery rates and can be used in the following way:
Step 1: Pick a source to scan
Firstly, launch the Recoverit Data Recovery application on your Mac by visiting its Finder > Applications. Now, from its home, you can just select a location to scan. It can be any drive, volume, or even an external device. You can also select a particular folder to scan too.

Step 2: Start the data extraction process
After selecting a source, simply commence the data recovery process that would scan the selected location. You can wait for the process to be over, view the scanning results, and even halt the process in between.

The application also provides different filters for you to search for the files that you have lost. You can filter the searched results by file size, type, last modified date, and so on.
Step 3: Restore your deleted files
After completing the process, the application will automatically list the extracted content under different categories. You can now preview your photos, videos, music, documents, etc. here and select the files you wish to get back. In the end, just click on the "Recover" button and go to a secure location to restore your deleted data.

I'm sure that after reading this guide, you would be able to fix the Disk Utility Erase Process has failed issue on your Mac. As you can see, I have listed different tried-and-tested solutions for the "Erase Process has Failed" error on Mac that you can implement. Besides that, I have also provided a step by step solution to successfully erase a hard drive (or an external device). Though, if you have ended up erasing your data by mistake, then just use Recoverit Data Recovery. Recommended by experts, it will let you get back all kinds of data from different sources on your Mac without any hassle.
Before You Force Erase: What About Your Data?
If the drive you are trying to erase contains important files that you cannot access, forcing the erase process might lead to permanent data loss. Before attempting advanced solutions like Terminal commands, consider using a data recovery tool first.
Using a tool like Recoverit can help you scan the problematic drive and retrieve your valuable files. Once your data is safely backed up, you can proceed with erasing the drive without worry.
Frequently Asked Questions (FAQ)
- Why does the erase process fail on my Mac?
A: The "Erase Process has failed" error typically happens due to minor file system corruption, a background app preventing the disk from unmounting, or a partition map issue. Running First Aid in Disk Utility is a great first step to diagnose and fix the root cause.
- Is it possible to fix the erase error without losing my data?
A: The fix involves successfully wiping the disk. For **erasing a disk without losing data**, you must recover your files *before* you erase. Use data recovery software to scan the drive and save your important files to a separate, safe location first, then proceed with formatting.
- Are the steps different when I erase an external hard drive on a Mac versus the internal one?
A: Yes, the context is different. You can usually fix the **Erase Process has failed** error on an external drive from your normal desktop. However, to **erase the hard drive on your Mac** that contains macOS, you must boot into the special macOS Recovery Mode to perform the action.
What's Wrong with Mac
- Recover Your Mac
- 5 best data recovery software for Mac
- Recover my trashed files.
- Recover deleted files on Mac.
- 3 ways to restore Mac photos.
- Recover SD card files on Mac.
- Recover files from external hard drive on Mac
- Fix Your Mac
- Fix grey screen at startup.
- Ethernet issues occur | Fixed.
- Mac won't shut down. Boot it.
- Solve flashing question mark.
- Fix slow WiFi after upgrade.
- Delete Your Mac
- Format your USB drive.
- Delete APFS partition.
- How to format APFS drive.
- What can be cleaned on Mac.
- Format external hard drive.
- Learn Mac Hacks


Sue Wayne
staff Editor