

 TL;DR:
You can recover deleted files from a Synology NAS natively using the #recycle shared subfolder if previously enabled, or utilize third-party software like Wondershare Recoverit or ReclaiMe for emptied bins or hardware failures.
● Native recovery requires the "Enable Recycle Bin" setting to be active in the DSM Control Panel prior to deletion, but the system permanently purges these files after 30 days.
● Wondershare Recoverit ($79.99/month) is best for Windows and macOS users needing safer remote data recovery without extracting NAS drives, supporting all RAID levels, EXT4, and BTRFS file systems.
● ReclaiMe File Recovery ($89.95) is suited exclusively for Windows users who need advanced XFS file system support, but it requires physically removing the hard drives from the NAS and explicitly declining Windows initialization prompts to prevent further data destruction.
Ask AI for a summary
 ChatGPT
 Perplexity
 Gemini
 Claude
 Grok
Grok
“I have a Synology NAS (Synology America DiskStation 2-Bay Network Attached Storage DS215j) with RAID 1 configuration and 2 drives. I just deleted a lifetime of photos and videos by mistake. Is there a way to recover these files?” - Reddit
The Synology NAS lets you create a private cloud where you can securely and freely store, back up, access, and share your files. It allows one to delete data from the NAS hard drive, which frequently occurs inadvertently. So, in this article, we'll show you how to process Synology NAS data recovery, wherein you can discover how to recover deleted files from Synology NAS.
In this article
Causes for Synology NAS Data Loss
Synology NAS devices are susceptible to all types of data loss typical for other data storage media, such as accidental file deletion, logical failures of the operating system, and the impacts of viruses and malicious software.
In addition, NAS storages are vulnerable to specific data loss scenarios, such as operator errors during RAID re-configuration or incorrectly adding extra disks to the NAS box, NAS software failures or flawed updates, etc.
Let’s look at the potential causes of Synology NAS drive failure with its corresponding Synology NAS data recovery solutions.
| Causes | Solutions |
| Accidental deletion | Recover From Recycle Bin (If Enabled) |
| Recycle Bin disabled or emptied | Option 1: Recoverit NAS Data Recovery (Without NAS Hard Drive Pull-Out) Option 2: Reclaime NAS Data Recovery (Pull Out NAS Hard Drive) |
| Disk initialization or formatting | |
| NAS file system corruption that leads to data inaccessible | |
| RAID reconstruction failure | |
| Sudden power failure or voltage fluctuations that lead to NAS server corruption | |
| Virus attack or malware infection results in data loss |
How To Recover Deleted or Lost Files From Synology NAS Server
Synology offers the Recycle Bin option to store deleted files, which can be enabled for each shared folder. In this part, you will learn how to activate the Synology Recycle Bin and recover deleted files from the Synology Recycle Bin in this part.
If the Recycle Bin is emptied or the files are lost due to other reasons, you can use some third-party NAS recovery software to recover deleted or lost files from Synology NAS.
Method 1: Restore Deleted Files From Synology NAS by Using Recycle Bin
The Enable Recycle Bin checkbox is automatically selected when creating shared folders. Deleted files are kept in a subfolder created when this option is enabled. Files can be permanently deleted or recovered from the Recycle Bin. To proceed, do as follows to recover deleted files from the Synology NAS drive by using Recycle Bin:
First, the Recycle Bin must be enabled for your chosen shared folder.
To make the Recycle Bin feature available:
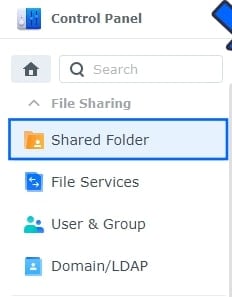
- Navigate to Control Panel > Shared Folder on DSM.
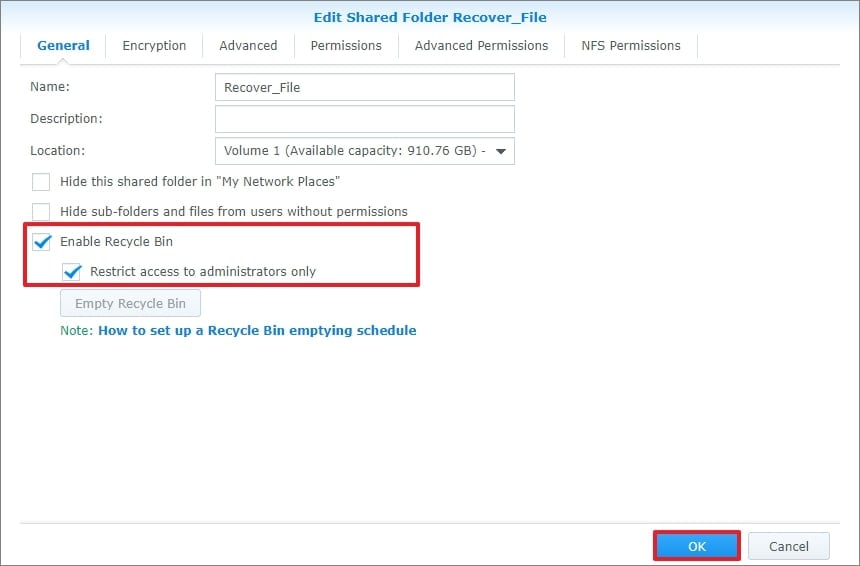
- Go to Edit after choosing a shared folder. Then, check Enable Recycle Bin. Select Restrict access to administrators only checkbox if you want only to allow administrators access to the Recycle Bin. Press OK to save your changes.
To recover a deleted file or folder from the Synology Recycle Bin:
- Go to File Station and navigate to the shared folder with the enabled Recycle Bin feature.
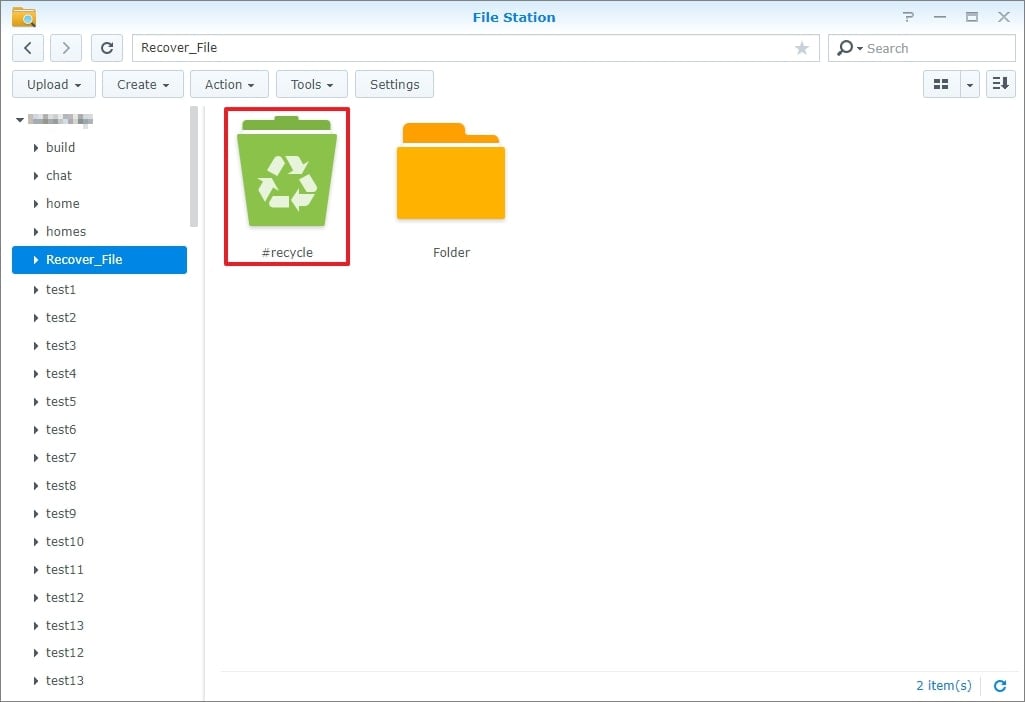
- Find the #recycle subfolder. Then, right-click on the file or folder to be retrieved. Click Copy to/Move to... and select Move to... to recover the deleted files from the Synology NAS server to the desired location.

More Related: How To Backup Synology NAS to OneDrive or Vice Versa
Method 2: Synology NAS Data Recovery Using Recoverit (Without Disk Pull-Out)
Except for unintentional deletion, you may lose files in your Synology NAS due to various other reasons, such as sudden power outage, disk damage, virus attack, etc. The good news is that Wondershare Recoverit NAS Recovery can help you recover deleted or lost files from the Synology NAS drive, no matter what data loss disaster happens to you.
Follow these 4 simple steps to recover data from Synology drives with Recoverit NAS Recovery:
Step 1. Select NAS Recovery After Installation.
Download and install Wondershare Recoverit on your Windows or Mac computer. Then, launch the Synology recovery tool and choose NAS Recovery in the NAS and Linux option.

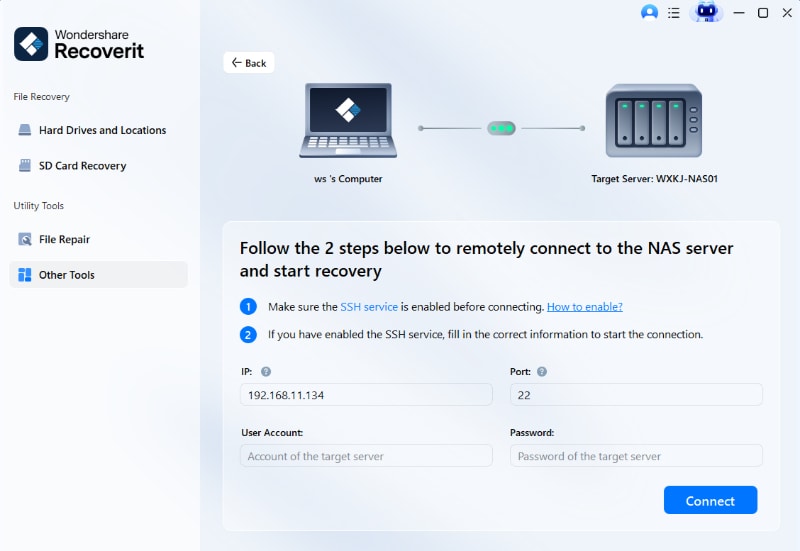
Step 2. Connect to Your Synology NAS.
Recoverit will automatically search for the Synology NAS device after hitting the NAS Recovery button. You will see a list of NAS devices on the screen. Select the Synology NAS device from which you want to recover deleted or lost files.
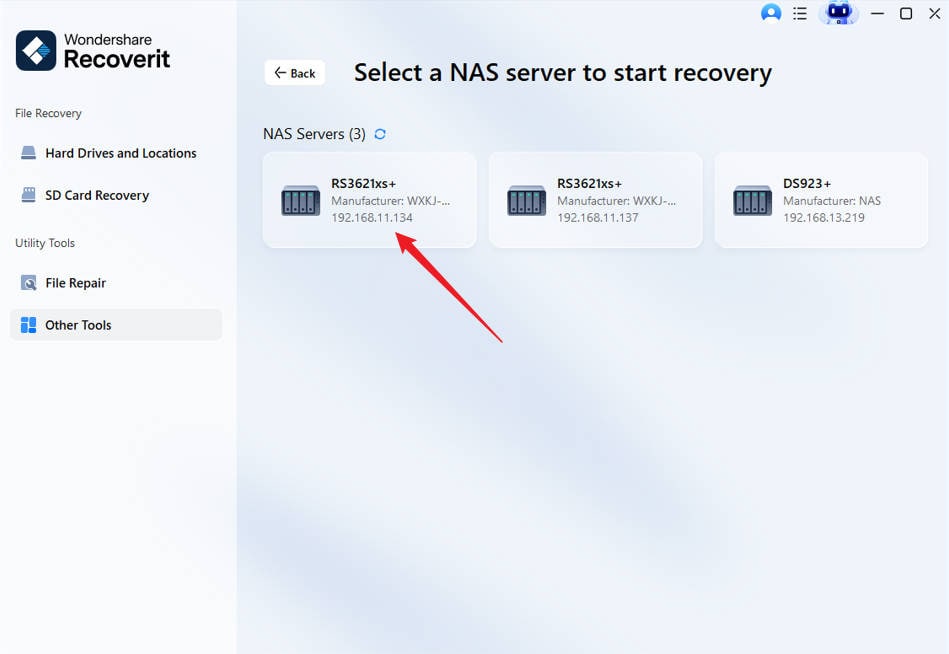
You need to enter the IP, port, user account, and password to establish a connection between Recoverit NAS Recovery and your Synology NAS, allowing the Synology recovery tool to scan the Synology drive for lost files.
Step 3. Scan the Deleted Files in Synology NAS.
The scanning process will start automatically after a successful connection. While Recoverit is scanning your Synology NAS hard drive, you can apply filters to find your desired files more quickly.
If the connection failed, just go to Recoverit Support Center to find the reasons and fixes for NAS/Linux Connection Failed Issue.

Step 4. Preview and Recover.
After the scanning process is finished, you can preview the files before recovery to confirm that you are recovering the correct files. Then, click Recover to restore the files from your chosen Synology NAS drive. The files will now be saved on your internal or external storage media.

Method 3: Synology Data Recovery Using Reclaime (Disk Pull-Out Required)
The Synology NAS data recovery process of ReclaiMe File Recovery software is relatively more complicated than Wondershare Recoverit, because you must remove the hard drives from the Synology Server first. But it does its work.
You can effectively restore the disk order, block size, start offset, and other RAID configuration parameters from the unplugged Synology NAS drive with ReclaiMe File Recovery.
Follow the steps below to recover your deleted files from Synology NAS using ReclaiMe:
After disassembling the NAS server,
- Pull out the hard drives from Synology NAS and connect them to your Windows PC. Remember to switch off the power when disconnecting and connecting the hard drives. Label each disk with the section it belongs in before removing them from the Synology NAS. These labels will help you similarly reassemble everything if necessary. Refuse any requests from Windows on the computer to which you have connected the disks to "Initialize disks" or even "Format" them.
- Launch ReclaiMe File Recovery. Most NASes use MD-Raid or LVM drivers to manage an array. ReclaiMe can break the MD-Raid and LVM control structures.
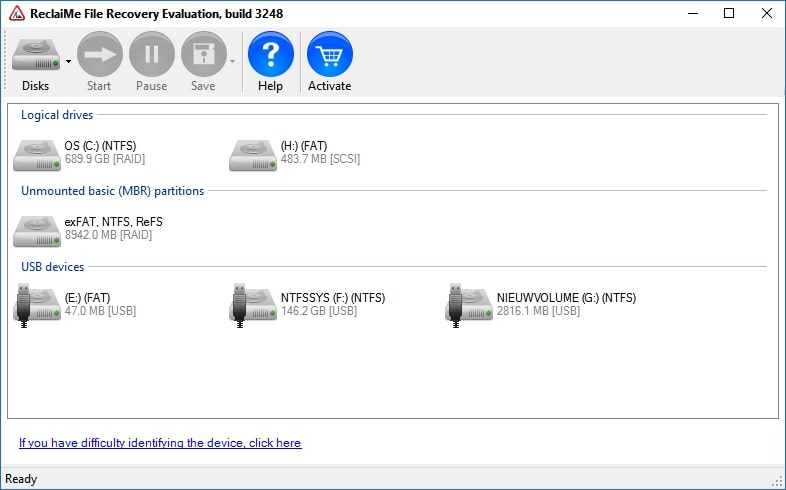
- Choose the NAS volume to be recovered and press Start. For btrfs-based NASes such as NETGEAR, the volume will be in the BTRFS section; for other NASes, look for it in the Linux MD-Raid or Linux LVM sections.

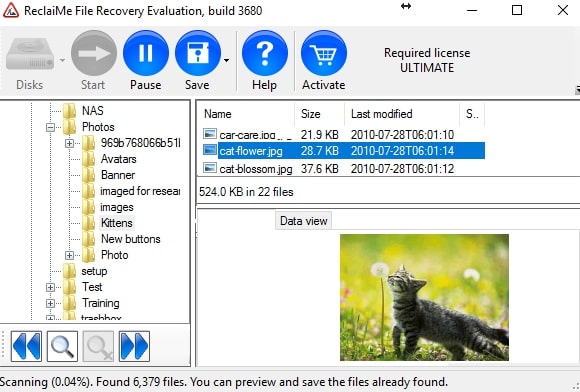
- Wait until the ReclaiMe File Recovery brings files, then click Preview to check the recovery's quality. After purchasing the license key, copy the retrieved data to the prepared storage media.
More related:
How To Backup Synology NAS to OneDrive or Vice Versa
What Is Synology C2 Cloud and How To Use It?
How to Install Nextcloud on Your Synology NAS?
Recoverit vs. ReclaiMe: Which Synology NAS Recovery Tool Should You Choose
Recoverit and ReclaiMe are usually suggested to Windows users who need to recover lost files from different storage devices.
Both these data recovery software solutions have an intuitive user interface and a simple step-by-step data recovery process. However, there are a few considerable variations between them that you need to learn beforehand to choose which best suits your needs. See this table below.
| Recoverit | ReclaiMe | |
| Supported OS | Windows and macOS | Windows only |
| Recovery Process | Without Disk Pull-Out | With Disk Pull-Out |
| Supported RAID Levels | All RAID Levels, including RAID 0, RAID 1, RAID 5, RAID 6, RAID 01, and RAID 10 | RAID 0, RAID 5, RAID 6, RAID 01, and RAID 10 |
| Supported NAS vendors | Synology, QNAP, ASUSTOR, NETGEAR, WD (Western Digital), Buffalo, LaCie, Seagate, etc. | Synology, QNAP, ASUSTOR, NETGEAR, WD (Western Digital), Buffalo, LaCie, Seagate, etc. |
| Price | Premium Plan: $79.99/month(Wherein the NAS data recovery feature is included) | Instant Purchase: $89.95 (ReclaiMe File Recovery Standard) |
Both Recoverit and ReclaiMe NAS Recovery have a lot to offer. However, there can only be one ideal for your needs. While some may prefer ReclaiMe's broad support of Linux file systems, Recoverit provides objectively better data recovery performance and includes more extra features. Purchasing Recoverit is also significantly less expensive than the ReclaiMe.
Why should you choose Wondershare Recoverit?
Recoverit supports Windows and Mac PC, while Reclaime runs only on Windows. Furthermore, Recoverit doesn't need to pull out the NAS drives to recover data (pulling out disk may cause disk damage, resulting in further data loss). Recoverit is much more affordable than Reclaime with the same features.
Why should you choose Reclaime?
You should purchase Reclaime for advanced data recovery from Linux. Wondershare Recoverit supports the EXT4 file system and BTRFS, while Reclaime supports EXT4, BTRFS, and XFS.
Conclusion
Numerous factors can cause a Synology NAS drive to fail. But no worries if you accidentally delete files from a Synology NAS drive because the data can be easily recovered using the 3 methods mentioned above: Recycle Bin, Recoverit NAS Recovery software, and ReclaiMe NAS recovery software.
The comparison between Wondershare Recoverit and ReclaiMe is also included. We highly recommend Recoverit as it has a straightforward setup and is safe to use. You can recover deleted or lost files from your Synology NAS for an affordable price.
FAQ
-
Does Synology NAS have a recycle bin?
Yes. Shared folders on Synology network-attached storage (NAS) can use a recycle bin. Although this feature is turned on by default, it is simple to disable and empty the Recycle Bin by folder. -
How long do files stay in Recycle Bin of Synology NAS?
The system will permanently delete anything that has been in the Recycle Bin for more than 30 days and cannot be recovered. Recycled materials count toward your record and storage allotments. -
Does Synology reset to delete data?
Yes. However, data on the Synology NAS are unaffected by resets. But before the reset, we firmly advise you to back up your data and system settings.


