The Sony A6500 is a powerhouse camera for both photographers and videographers, offering a wide range of features and excellent video quality, particularly in 4K. Whether you’re a professional content creator or someone who loves documenting life’s special moments, the camera’s advanced features make it a favorite in its class.
However, nothing ruins a day of shooting faster than realizing that some of your videos have disappeared. Maybe you accidentally deleted them or the SD card malfunctioned—whatever the case, video loss can be both frustrating and overwhelming.
Fortunately, there are ways to recover deleted videos from Sony camera, even if the situation seems hopeless. This guide will walk you through three proven methods to solve the problem of how to recover deleted videos from sony camera. Given the impressive video specs of the Sony A6500, such as its high-bitrate 4K recording, losing files is particularly painful. Let's explore how to recover them. We’ll also touch on some of the key features of the camera, explore common causes of video loss, and provide tips to help you avoid losing footage in the future. By the time you’re done reading, you'll be equipped to not only recover your videos but also protect your data moving forward.
Which Recovery Method is Right for You? A Quick Comparison
| Method | Best For | Success Rate | Ease of Use | Cost |
Recoverit Software |
Deleted, formatted, or corrupted files (incl. 4K XAVC S) | Very High | Very Easy (GUI) | Free Trial / Paid |
| CMD (chkdsk) | File system errors, minor corruption | Low to Medium | Technical | Free |
| Reinstall Driver | SD card not recognized by PC | Low (for recovery) | Medium | Free |
Overview of the Sony A6500
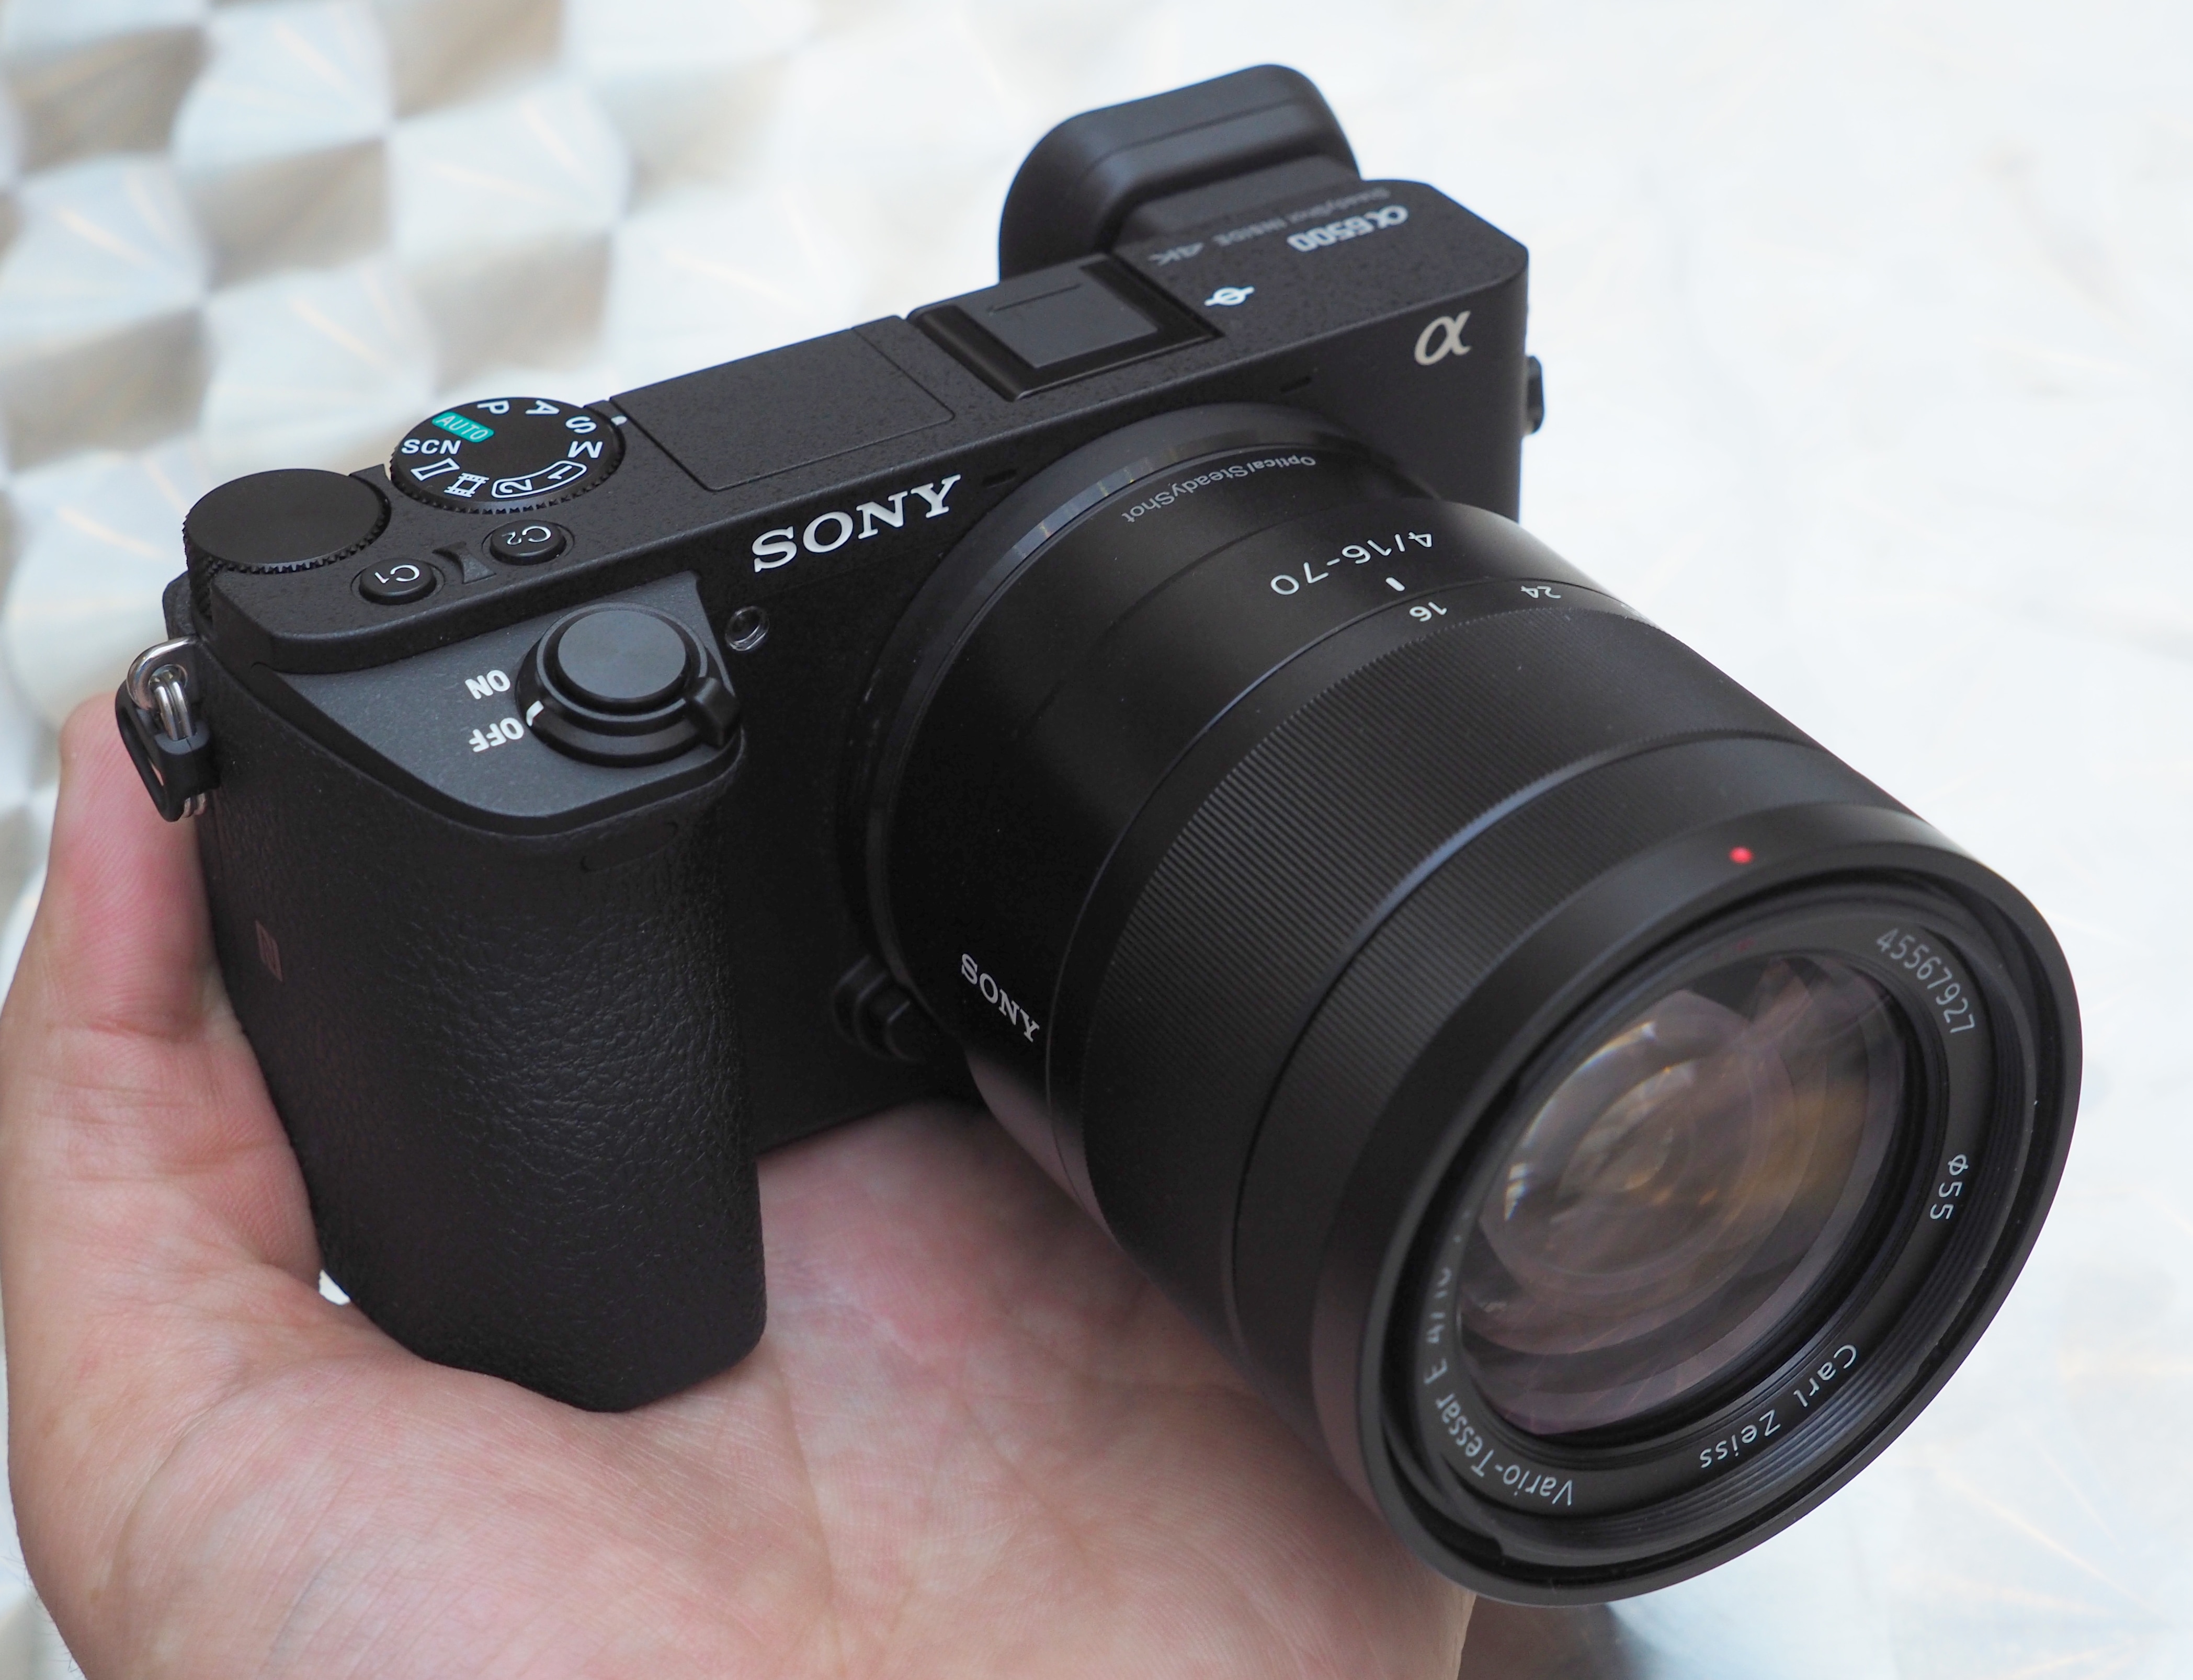
The Sony A6500 video quality gives outstanding performance in both photography and videography.
- Pixel Count: Equipped with a 24.2MP APS-C Exmor CMOS sensor, the A6500 captures rich details and high-quality images, making it perfect for shooting high-resolution photos and videos.
- ISO Range: It offers a broad ISO range of 100-25,600, expandable up to 51,200, making it suitable for shooting in both low-light and bright conditions.
- USB Port: The camera features a Micro USB port for both charging and data transfer, making it easy to offload your files or charge the camera on the go.
- Continuous Shooting Rate: The A6500 can shoot at 11 frames per second (fps), making it excellent for action shots or fast-moving subjects.
- Image Stabilization: One of the standout features is its 5-axis in-body image stabilization, which helps reduce camera shake and produce smoother, more stable footage.
- 4K Video: It records 4K video at up to 30fps with no recording time limits, allowing for extended shooting sessions.
- Battery Life: With a battery life of around 350 shots using the rear screen and 310 shots using the EVF (Electronic Viewfinder), the A6500 can last for quite a while during shoots.
- Price: The Sony A6500 raw video body typically retails around $1,200, making it a mid-range option for professionals and serious enthusiasts alike.
When combined with its 4K video recording capabilities and high-speed autofocus, the A6500 4K stands out as a versatile tool for videographers. But, like all digital devices, it’s not immune to data loss issues.
Causes of Video Loss from the Sony A6500
While it’s devastating to lose footage, understanding the root causes can help you avoid the same mistakes in the future. Here are some of the most common reasons why videos go missing:
- Accidental Deletion: This is probably the most common reason. It’s surprisingly easy to press the wrong button and delete videos while navigating the camera’s menus.
- Corrupted SD Card: Over time, SD cards can suffer from corruption, especially if they are frequently used and swapped between different devices. Corruption can also happen if the card is ejected improperly while files are still being transferred.
- Accidental Formatting: Formatting your SD card wipes everything clean. If you format the card without realizing there are important videos on it, you could lose all your data.
- Power Interruptions: If the camera loses power while recording or saving files, there’s a chance the video won’t be saved correctly, which can lead to file corruption.
- Improper Ejection: If you remove your SD card while the camera is still writing data, you risk corrupting not only the video you’re saving but potentially all the data on the card.
- SD Card Wear and Tear: Like all electronic storage devices, SD cards have a limited lifespan. As they age, they are more likely to encounter issues like corruption or data loss.
These scenarios might feel overwhelming, but there’s good news—you can often recover your lost videos using the right tools and techniques.
How to Recover Deleted Videos from Sony A6500
Let’s look at four practical methods for recovering deleted or lost videos from your Sony A6500.
Method 1: Using Sony SD Card Recovery Software
One of the easiest and most reliable ways to recover deleted videos from your Sony A6500 4k video is by using Sony SD card recovery software. This is a specialized tool for your SD card for deleted files and gives you the option to recover them.
- Stop Using the SD Card: If you’ve lost videos, it’s important to stop using the card immediately. Continued use can overwrite the deleted data, making it impossible to recover.
- Choose a Recovery Tool: Some of the best tools for SD card recovery include Recoverit, EaseUS Data Recovery Wizard, Stellar Data Recovery, and Disk Drill. These programs are designed to scan your SD card and recover lost or deleted files.
- Connect Your SD Card: Remove the SD card from your camera and insert it into your computer using an SD card reader.
- Run the Recovery Software: Launch the software and select the SD card as the drive to scan. Follow the software’s prompts to initiate a deep scan.
- Preview the Files: Once the scan is complete, the software will show you a list of recoverable files. You’ll often be able to preview the videos before deciding which ones to recover.
- Recover and Save: Select the videos you want to recover and save them to a new location on your computer (not the same SD card to avoid overwriting).
Try Wondershare Recoverit to Perform Deleted Movie Recovery

How to Recover Video/Photos from Sony A6500 Using Recoverit Software
- Download and Install Recoverit: Start by downloading Recoverit from its official website.
- Connect Your SD Card: Use an SD card reader to connect the card to your computer. Make sure the card is properly inserted, and your computer recognizes it.
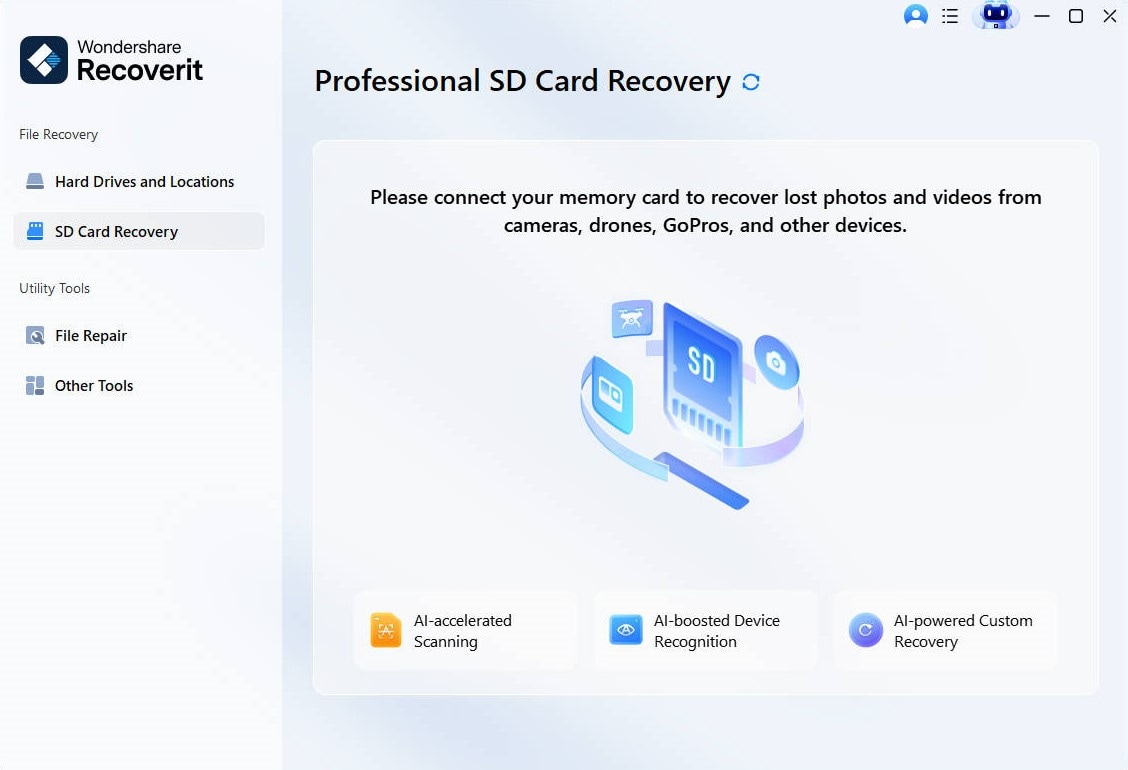
- Select the SD Card for Scanning: Open Recoverit and you’ll see a list of connected drives. Select the SD card that contains the lost videos and hit Start to begin the scanning process.
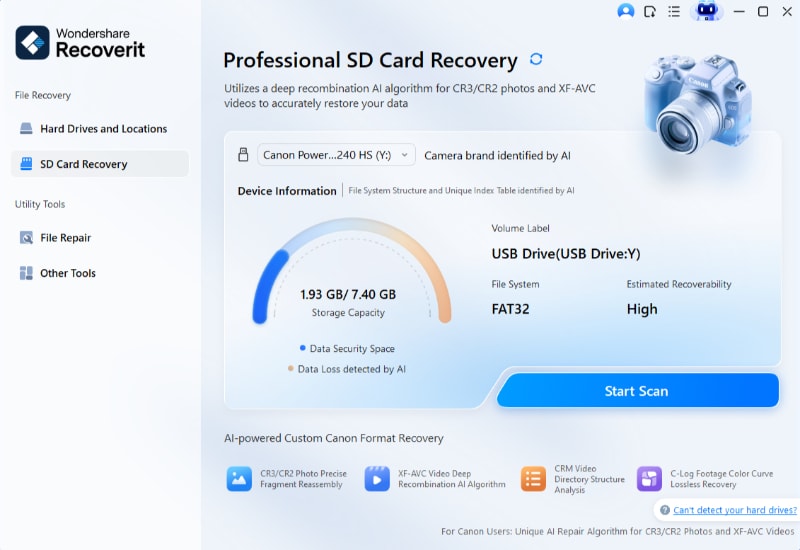
- Deep Scan for Deleted Files: Recoverit will run a deep scan of the SD card, looking for deleted or lost video files. This may take some time, depending on the card’s capacity and the amount of data on it.
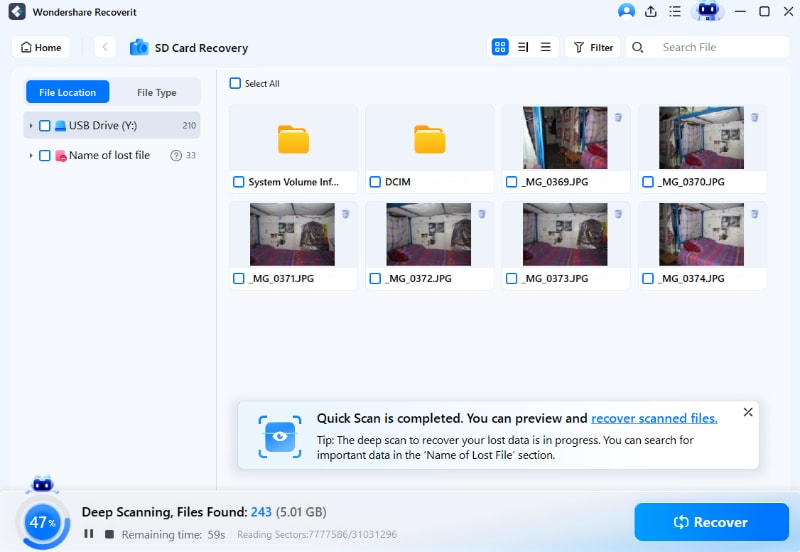
- Preview and Recover: Once the scan is complete, Recoverit will show a list of recoverable files. Preview the video files to confirm they are the ones you want. Select the videos and click Recover. Save them to a different location on your computer to prevent further data loss.
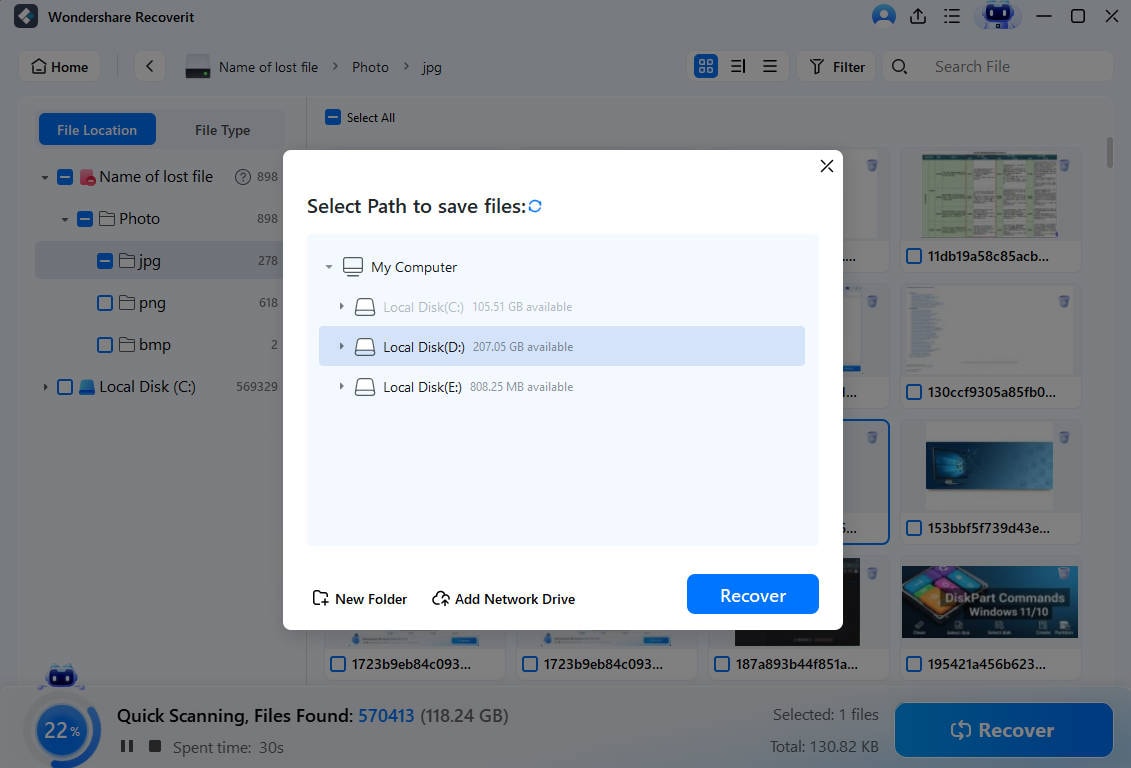
Recoverit is an excellent option for those who may not be tech-savvy and need a straightforward tool to recover video files.
Method 2: Using CMD on Windows 10/11
If you’re using a Windows PC, the Command Prompt (CMD) can help you recover videos, especially if your SD card is corrupted. This method is particularly effective for finding hidden or inaccessible files.
- Launch Command Prompt: Press Windows + R, type cmd, and press Enter to open the Command Prompt window.

- Run chkdsk: In the Command Prompt window, type the following command and press Enter:chkdsk X: /f

- Replace X with the letter assigned to your SD card (you can check this in File Explorer).
- Wait for the Scan to Complete: The chkdsk command will scan the SD card for file system errors and attempt to fix them. This process can take several minutes, depending on the size of the SD card.
- Check the SD Card: Once the scan is done, open the SD card in File Explorer to see if your lost videos have been restored.
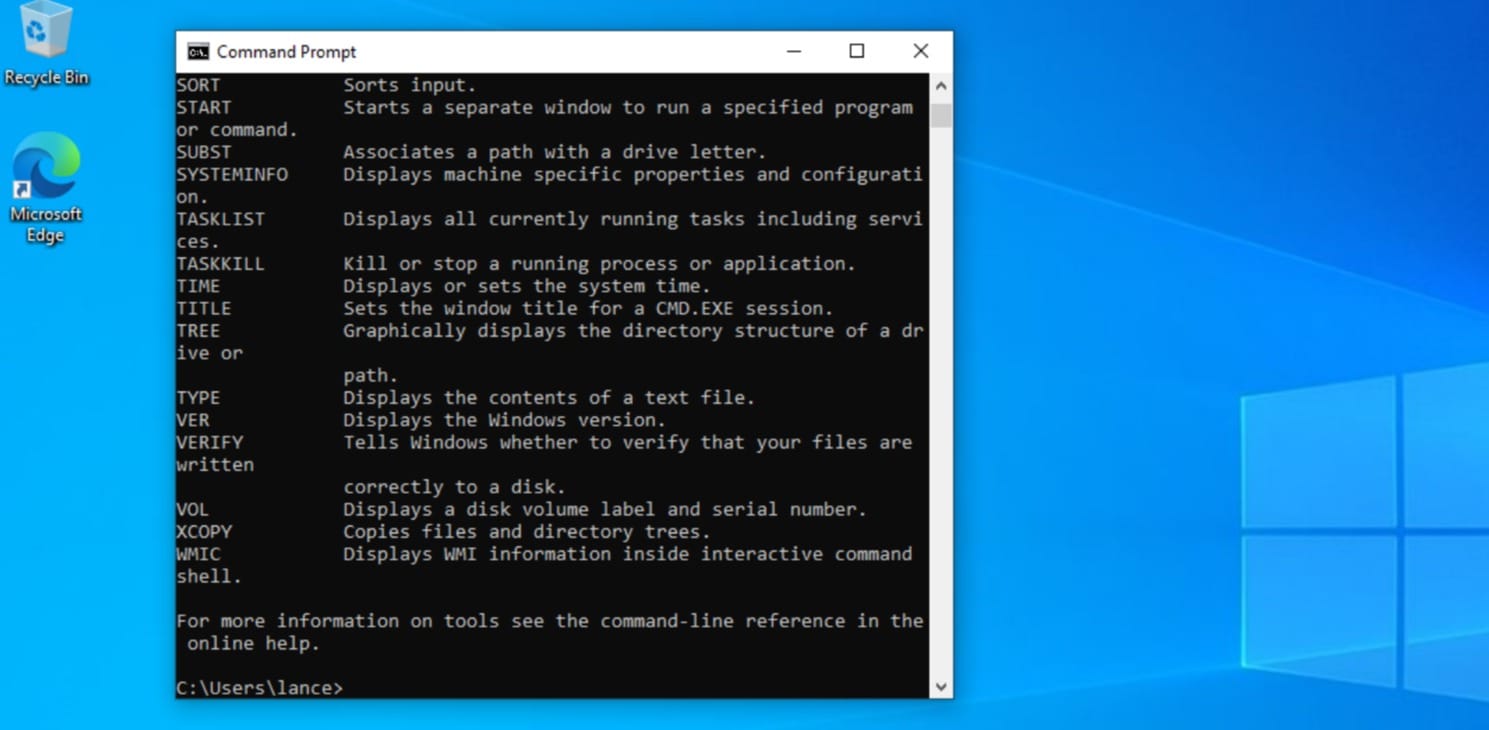
While CMD is a bit more technical than recovery software, it’s a solid option if you’re dealing with file system errors or a corrupted SD card.
Method 3: Reinstalling the Memory Card Driver
Sometimes, your computer might fail to recognize the SD card due to a corrupted or outdated driver. Reinstalling the memory card driver can resolve this issue and allow you to access your files.
- Open Device Manager: Press Windows + X and select Device Manager from the list.

- Locate the SD Card: In Device Manager, look for your SD card under the Disk Drives section. It may also appear under Portable Devices or Universal Serial Bus controllers.
- Uninstall the Driver: Right-click on the SD card and choose Uninstall Device.

- Restart Your Computer: After uninstalling the driver, restart your PC. When it boots up, Windows will automatically reinstall the necessary driver for your SD card.
- Check the SD Card: Once the driver is reinstalled, check if your SD card is now recognized. If it is, try accessing your videos to see if they’re still there.
This method can resolve issues related to SD card recognition, especially if the problem stems from a faulty or outdated driver.
Tips to Prevent Data Loss in the Future
Losing videos can be a nightmare, but there are several preventive measures you can take to protect your footage moving forward.
- Regular Backups: Make a habit of backing up your videos after every shoot. Regular backups ensure that even if something goes wrong with your SD card, you’ll have a copy of your data.
- Use High-Quality SD Cards: Cheap or unreliable SD cards are more prone to failure. Always invest in high-quality SD cards from reputable brands like SanDisk, Lexar, or Samsung. Look for cards with fast write speeds, especially if you’re recording 4K video.
- Eject SD Cards Properly: When removing your SD card from your camera or computer, always use the eject option. This ensures that all data has been written to the card, preventing file corruption.
- Avoid Recording on Low Battery: Recording when your camera is low on battery increases the risk of data corruption. Always charge your battery fully before recording, or carry a spare to swap out if needed.
- Label and Organize SD Cards: If you use multiple SD cards, label them clearly and keep them organized. This helps you avoid accidentally formatting or overwriting important files.
By following these tips, you can significantly reduce the chances of losing valuable footage in the future.
Conclusion
Losing videos from your Sony A6500 4k 60 fps doesn’t have to be the end of the world. Whether it’s due to accidental deletion, a corrupted SD card, or another issue, there are several ways to recover your lost footage. Recovery software like EaseUS, Disk Drill, or Recoverit can help restore deleted videos, while more technical methods like using CMD or reinstalling drivers can resolve issues related to SD card corruption or file system errors.
Beyond recovery, prevention is key. Regularly backing up your data, using reliable SD cards, and handling your files with care can save you from the frustration of lost videos in the future.
FAQ
-
1. Can I recover deleted videos from my Sony A6500?
Yes, deleted videos can often be recovered unless they’ve been overwritten. Using SD card recovery software or tools like CMD can help retrieve lost files. -
2. How long does it take to recover deleted videos?
The recovery process can vary. It typically takes anywhere from a few minutes to several hours, depending on the size of the SD card and the amount of data on it. -
3. What should I do if my SD card is corrupted?
If your SD card is corrupted, use specialized recovery software like Recoverit. It is a wonderful tool that can often recover data from corrupted cards. -
4. Can I prevent video loss on my Sony A6500?
Yes. Regular backups, using high-quality SD cards, and avoiding recording when your battery is low are all good practices to prevent data loss. -
5. Is recovery software safe to use?
Yes, reputable recovery software is safe and effective. However, always download from trusted sources to avoid malware or unwanted programs.


 ChatGPT
 Perplexity
 Google AI Mode
 Grok
Grok


