

 TL;DR:
Windows File History is a built-in version-control backup tool in Windows 8, 10, and 11 that automatically saves copies of your personal folders to a separate drive, allowing you to roll back to previous document states or recover accidentally deleted files.
● It strictly monitors personal user data like Libraries, Desktop, Contacts, and manually added custom folders, but does not create system images, protect installed applications, or back up Windows configuration files.
● To enable the feature via the Control Panel, you must first connect a dedicated secondary storage destination, such as an external USB drive, a secondary internal disk, or a network location.
● If a file goes missing before a backup runs (which can be scheduled from every 10 minutes to once a day) or if the feature was disabled during the data loss, you must rely on deep-scan data recovery software like Recoverit to retrieve the items directly from the drive sectors.
Ask AI for a summary
 ChatGPT
 Perplexity
 Gemini
 Claude
 Grok
Grok
Windows File History is a built in backup feature that automatically saves copies of your personal files so you can restore them if they are changed, damaged, or deleted. By regularly recording versions of documents, pictures, and other important data stored in your libraries and selected folders, Windows File History offers a simple way to protect your everyday work without complex backup tools. Understanding how Windows File History works, how to set it up correctly, and what its limitations are will help you decide when to rely on it and when to use additional backup or data recovery solutions.
Try Recoverit to Perform Data Recovery
 Security Verified. 3,591,664 people have downloaded it.
In this article
What Is Windows File History
Windows File History is a continuous, version based backup feature introduced in Windows 8 and still available in windows 10 file history and windows 11 file history. Instead of cloning your whole system, it quietly monitors key user folders and periodically copies any changed files to another drive.
These copies are stored as a "history" of versions. When you accidentally overwrite a document, delete a photo, or need yesterday's revision of a project, you can browse this history and restore the exact version you want. It is designed as a simple, always on safety net for your personal data.
Compared with older backup tools, File History focuses on being automatic and easy to restore from, especially for non-technical users who only need protection for documents, pictures, and work files rather than full system images.
How Does Windows File History Work
windows file history works by combining three simple ideas: monitoring specific folders, saving copies to another drive, and keeping multiple versions over time. Once you turn it on and choose a target drive, the process is largely automatic.
What File History actually backs up
By default, File History watches these locations on your PC:
- User Libraries (Documents, Music, Pictures, Videos)
- Desktop
- Favorites (Internet Explorer) and some browser-related items
- Contacts and some parts of the user profile
- Any additional folders you manually add in the settings
Whenever a file in those locations changes, Windows schedules it for backup during the next File History run. New folders you create inside the protected locations are also automatically included.
How versioning and scheduling protect your data
File History does not just keep one backup copy. Instead, it keeps a timeline of versions so you can roll back to earlier states of a file.
- Windows scans protected folders on a schedule (as often as every 10 minutes, or as rarely as once a day, depending on your settings).
- If it detects modified files, it copies only the changed items to the selected backup drive or network share.
- Each time it copies, it stores a new version instead of replacing the old one, allowing you to browse by date.
- Windows applies a "Keep saved versions" policy (for example, "Forever" or "Until space is needed") to manage disk space.
Because of this, you can restore a file that was edited many times over weeks or months, not just a single snapshot.
Enabling and using File History in Windows 10 and 11
On most PCs, you need an extra drive (internal secondary disk, external USB drive, or network location) before you can enable File History backup.
To turn on File History in Windows 10:
- Connect an external drive or ensure your network share is accessible.
- Open Control Panel and go to "System and Security" > "File History".
- Click "Turn on". If multiple drives are available, choose the one you want.
- Optional: Click "Advanced settings" to adjust backup frequency and retention.
To turn on File History in Windows 11:
- Connect your external drive or access a network location.
- Open the Start menu, type "Control Panel", and launch it.
- Navigate to "System and Security" > "File History".
- Select your desired backup drive and click "Turn on".
From then on, Windows will automatically maintain your history while the drive is connected.
Restoring files and folders from File History
Restoring files is often where File History shines. Instead of manually searching through backup folders, you can use a simple time-based interface.
- Open Control Panel and click "File History".
- Select "Restore personal files" in the left pane.
- Browse through libraries, folders, or search for a specific file name.
- Use the left and right arrows at the bottom to move through different backup dates.
- Select the version you want and click the green Restore button.
You can choose to restore to the original location (overwriting or keeping both versions) or restore to a new folder for comparison. If File History is not enabled or the backup drive is unavailable, you may need to use another method like a full system backup or a data recovery tool.
What are the Types of Windows File History
While File History is a single feature, it can be understood as a mix of different backup sources, destinations, and usage patterns. Knowing these "types" helps you design a protection plan that matches your habits and hardware.
File History backup sources
When people talk about file history backup, they often mean different sets of content. In practice, there are several source types you can protect with File History.
| Source type | Description |
|---|---|
| Default user data | Documents, Pictures, Music, Videos, Desktop, and Favorites libraries that File History includes automatically. |
| Custom folders | Additional local folders you add manually, such as project directories on another partition. |
| Workgroup/Shared folders | Folders synced locally from cloud storage (OneDrive, Dropbox, etc.) or mapped network shares that you decide to include. |
For example, if you store most of your work on "D:\Projects", you should add that folder to File History so that your real working data, not just libraries, are protected.
File History storage destinations
There are also different types of storage that can hold your File History backups. Each option has its own reliability, speed, and portability characteristics.
| Destination type | Best use case |
|---|---|
| External drive backup | USB hard drives or SSDs are ideal for home users who want a simple offline copy that can be unplugged and kept safe. |
| Secondary internal drive | A second disk inside the same PC can protect against accidental deletion but not against whole-computer disasters like theft or severe hardware failure. |
| Network location (NAS or server) | Best for offices or advanced home setups where a central device stores File History for multiple PCs over the network. |
Whichever type you choose, avoid storing File History on the same physical drive as your original data, as that defeats the purpose of having a backup.
Practical Tips for Windows File History
To get reliable protection rather than a false sense of security, you need to configure and maintain File History correctly. These practical tips can help you avoid common mistakes.
Plan your schedule and retention wisely
If you back up too often, your backup drive will fill quickly. If you back up too rarely, you might miss important versions.
- Set backup frequency based on how often you change files (for active work days, 15–30 minutes is common).
- Choose "Keep saved versions" according to your storage size ("Forever" for very large drives, or "Until space is needed" for smaller ones).
- Review the drive regularly and remove unnecessary large files from your source folders.
Use reliable external drives and test restores
A backup is only as good as your ability to restore from it. To ensure your restore files windows workflow actually works when needed, follow these steps.
- Buy a reputable external drive or NAS with enough capacity for multiple versions of your data.
- Keep the backup drive plugged in during working hours or at least weekly, so File History can run.
- Test restore a few sample files every month to confirm the history is up to date and readable.
Understand what File History does not cover
File History is not a full system backup. To avoid surprises after a major problem, make sure you know its limits.
- It does not protect installed applications, many system files, or full Windows configuration.
- It does not guard against drive-wide failures on the backup drive itself.
- It may not include files stored outside your monitored folders unless you add them manually.
Because of this, many users pair File History with system image backups or cloud-based services, and keep a recovery tool for emergencies when File History is turned off or incomplete.
When you should combine File History with data recovery
Sometimes a file goes missing before File History has a chance to copy it, or the feature was disabled when the loss occurred. In these cases, data recovery software can often scan the disk and restore data that is no longer visible to Windows.
For example, if recover deleted files windows is your immediate need and File History shows no previous versions, a dedicated recovery tool can search deep sectors on the drive and retrieve items that are not present in your backups.
How to Use Recoverit to Recover Lost Data
Recoverit by Wondershare is a professional data recovery solution that complements windows file history. When backups are missing, outdated, or misconfigured, Recoverit can scan your PC, external drives, USB sticks, and memory cards for lost files. To learn more, visit the Recoverit official website and download the latest version for your system.
Key Features Offered by Recoverit
- Recover deleted, formatted, or lost files from a wide range of storage devices, including system disks, external drives, USB flash drives, and SD cards.
- Support for hundreds of file formats such as documents, photos, videos, audio files, emails, archives, and more.
- Intuitive scanning, filtering, and preview options so you only restore the data you really need, reducing clutter and saving time.
Step-by-Step Guide on How To Recover Lost Data
1. Choose a Location to Recover Data
Install and launch Recoverit, then select the drive or specific location where you lost your files. This might be your system partition, an external drive, a USB stick, or an SD card. Once selected, click the Start button to begin the recovery process.

2. Deep Scan the Location
Recoverit will automatically perform a deep scan of the chosen location, searching for deleted, formatted, or inaccessible data. You can monitor the progress, pause if you need system resources for other tasks, or stop the scan early if you already see the files you want.

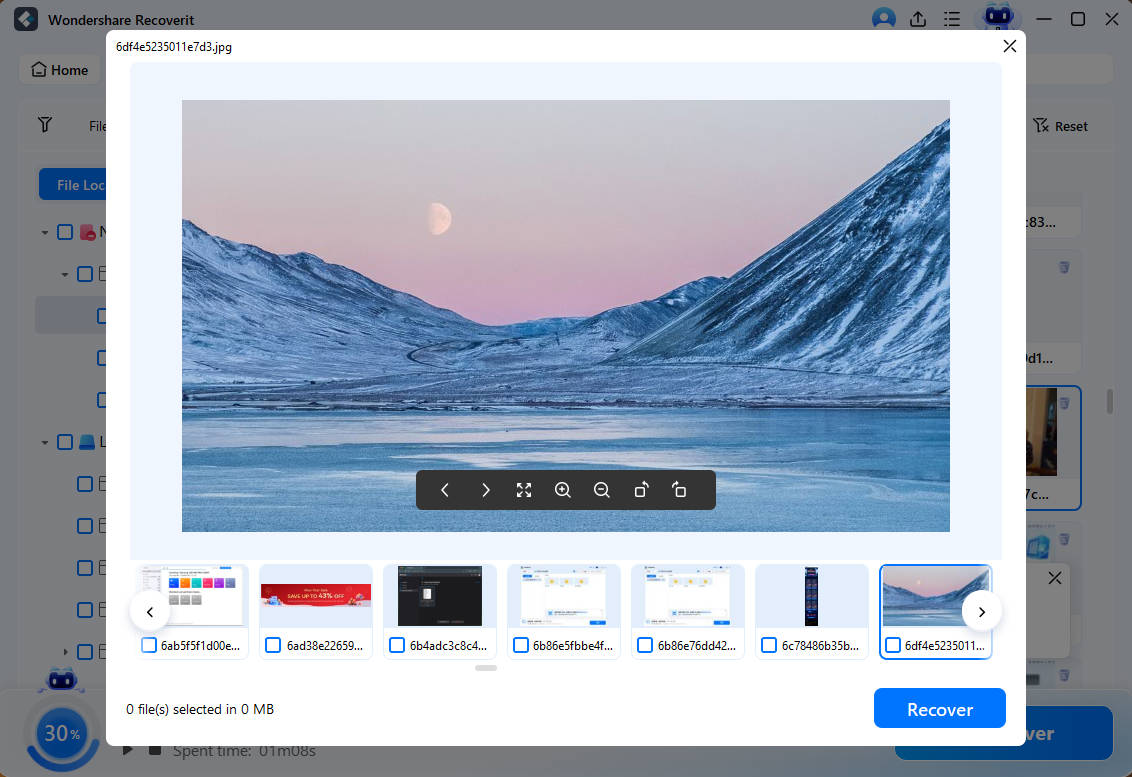
3. Preview and Recover Your Desired Data
After the scan completes, browse the results by file type, path, or use the search bar to locate specific names. Use the preview feature to verify each file, select the items you need, and click Recover. Always save recovered files to a different drive than the original location to avoid overwriting remaining lost data.
Conclusion
What is windows file history in practical terms? It is a convenient, built in way to keep rolling versions of your personal files so you can undo accidents, restore earlier drafts, and protect everyday work without extra software. By enabling it, selecting a reliable backup drive, and verifying restores occasionally, you add an important protective layer to your data.
Still, File History does not replace full system backups or professional recovery tools. It cannot always help after drive failure, serious corruption, or when the feature was disabled at the time of loss. For a more complete safety net, combine File History with periodic system images, offsite or cloud backups, and a capable recovery solution like Recoverit that can scan disks directly and recover data even when no backup exists.
Next: Windows Backup
FAQ
-
What is Windows File History used for?
Windows File History is used to automatically save versions of your personal files so that you can restore previous copies if they are changed, damaged, or deleted. It focuses on libraries, desktop, favorites, and selected folders rather than the entire system. -
Does Windows File History back up everything on my PC?
No. File History does not create a complete system image. It mainly protects user files in libraries, desktop, contacts, and any folders you add to its list. System files, programs, and many settings are not fully covered, so you should use additional backup methods for full protection. -
Where does Windows File History store backups?
Windows File History usually stores backups on an external drive, such as a USB hard drive, or on a network location. You choose this target when turning on File History, and Windows then maintains a history of versions in a dedicated FileHistory folder on that drive or share. -
Can I recover deleted files if File History was turned off?
If File History was turned off when the file was deleted, you will not have historical copies from that feature. In this case, you can try to recover the file with a data recovery tool like Recoverit, which scans the storage device directly for recoverable data. -
Is Windows File History available in both Windows 10 and Windows 11?
Yes. Windows File History is available in both Windows 10 and Windows 11, although its location in the settings interface may look slightly different. You can find it through the Control Panel or by searching for File History in the system search box.


