

 TL;DR:
Restoring deleted files from a Citrix Desktop session depends on your storage environment, utilizing native ShareFile retention features for standard files or third-party remote recovery tools for NAS-hosted data.
● The built-in Citrix ShareFile Recycle Bin retains deleted data for up to 45 days; files older than this require administrators to use the StorageZones Recovery Folder to restore from a specific backup timestamp.
● If the deleted Citrix files were located on a NAS server, Wondershare Recoverit can retrieve the data by establishing a remote connection, eliminating the need to physically extract the hard drives.
● When transferring recovered files back into Citrix Visual Desktop, note that the system restricts operations to a maximum of 10 files at a time, capped at 2GB per upload and 250 MB per download.
Ask AI for a summary
 ChatGPT
 Perplexity
 Gemini
 Claude
 Grok
Grok
This guide will help you through effective methods to quickly restore important data when needed.
Try Recoverit to Perform Citrix Desktop Data Recovery
 Security Verified. 3,591,664 people have downloaded it.
In this article

Part 1. Recover Deleted Files From Citrix Desktop [100% Efficient]
Losing files during a Citrix Virtual Desktop session can be frustrating when working on critical projects. In case your deleted files were stored on a NAS device, recovering them might seem complicated. A reliable solution like Wondershare Recoverit can help you restore lost files from NAS in an efficient manner. This tool specializes in retrieving lost or deleted files from over 2000 storage devices without the need to remove hard drives.
Furthermore, Recoverit offers a seamless recovery procedure to ensure a high success rate. It connects to your NAS system remotely to scan for lost files and restore them in an efficient manner. The software ensures that your Citrix Desktop data is secure from viruses for a smooth procedure. Apart from file recovery, it allows you to perform repairs on corrupted videos through the software itself.
Key Features
- Advanced Scanning Technology: The software utilizes a deep scan algorithm to locate and restore lost data files, even if they were deleted permanently.
- Support for Various File Types: Recoverit can recover documents, videos, images, and other 1000 essential file formats to make sure you regain access to critical work data.
- Real-time Preview: Before you save the results, it allows you to preview the recoverable data to ensure that the correct files are retrieved.
Guide to Recovering Data From NAS Server Through Recoverit
Here are the simple steps you can follow in order to retrieve the Citrix Virtual Desktop lost files with the help of the Recoverit NAS recovery procedure:
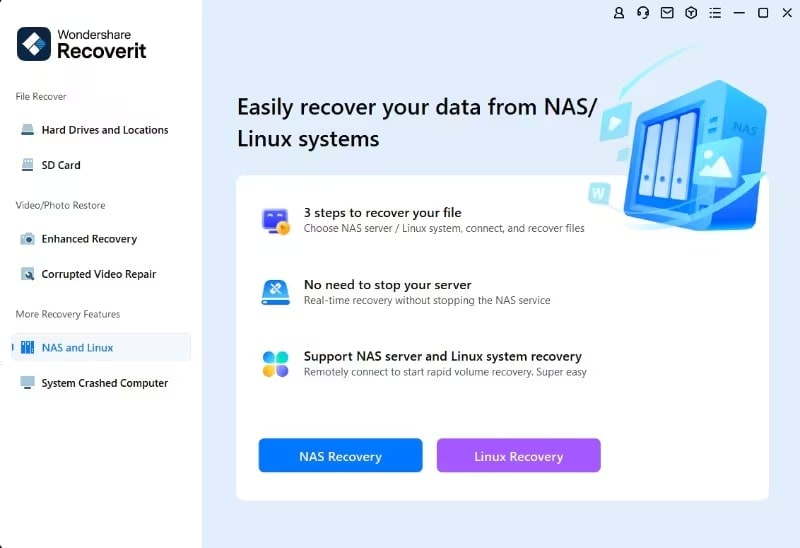
Step 1. Install Wondershare Recoverit and Access NAS Recovery
Initiate the process by getting access to the “NAS and Linux” tab from the main interface as you download and launch the software. Here, hit the “NAS Recovery” button and move to the next step.
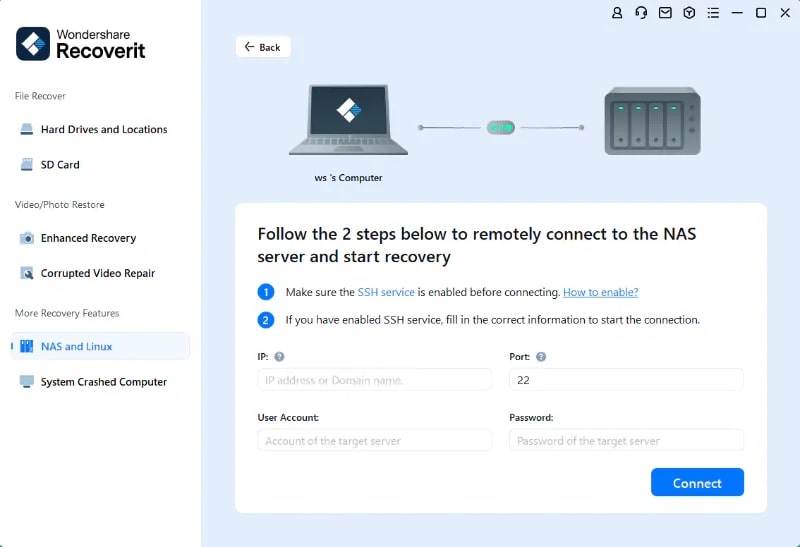
Step 2. Pick a Detectable NAS Server and Develop a Remote Connection
Next, select from the given detected “NAS Servers” available. Then, follow the steps guide shown to create a remote connection to the selected server. Now, hit the “Connect” button to confirm the established connection and start the procedure.
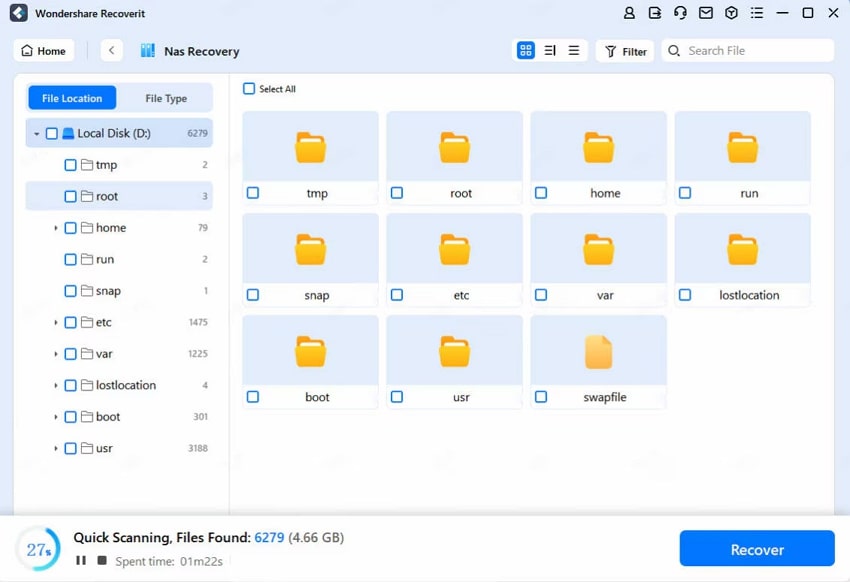
Step 3. Perform the Deep Scan and Preview Results
Once your location is secured, Recoverit begins the Deep Scan process. Upon completion of the scan, hit the “Recover” button to preview the files.
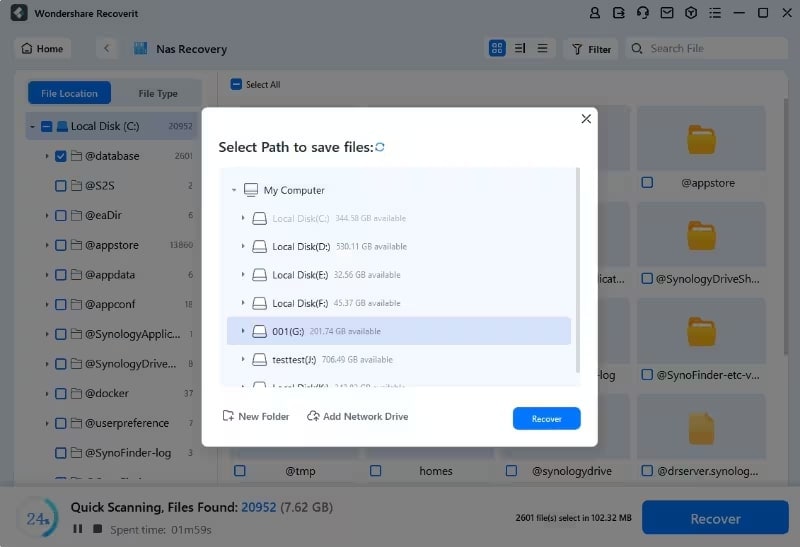
Step 4. Save Path of Recovered Files
Finally, after you view the results and are satisfied, you can choose the File Destination and hit the “Recover” button.
Part 2. Recover Deleted Files From Citrix Desktop [Direct Methods]
Instead of the above method, let us look into some of the direct steps we can apply to understand how to recover deleted files from Citrix. These methods provide a straightforward way to restore files from Citrix Desktop to ensure minimal data loss.
Method 1. Using Recycle Bin in Citrix Virtual Desktop
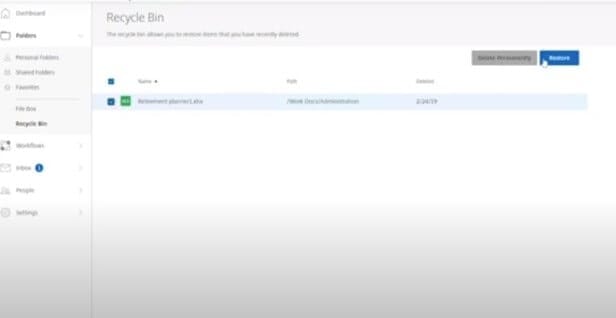
Deleting files from the Citrix ShareFile on accident can bring a stop to a lot of workflows for users. The easiest way to recover them is through the built-in Recycle Bin function. ShareFile stores the deleted files for up to 45 days and allows users to restore them before it permanently deletes them. Read into the steps below to recover the files from Citrix Desktop’s Recycle Bin:
Instructions. Start the process by accessing the main interface by logging in with your credentials. Here, select the “Recycle Bin” option from the left navigation bar. Now, select the recently deleted file you want to restore and click the “Recover” button at the top.
Method 2. Adopting Citrix ShareFile Recovery Folder
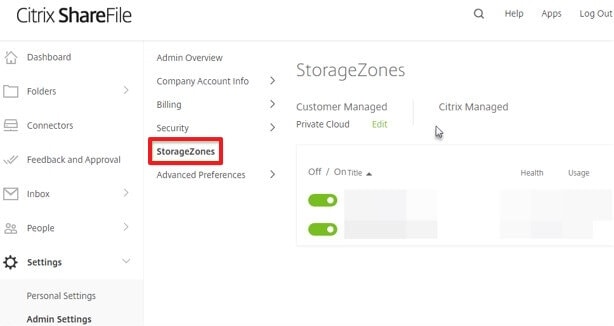
For files that are not available in the Recycle Bin, ShareFile provides an additional recovery method through the Recovery Folder within the storage zones. This feature gives you greater control over the restoration procedure of files older than 45 days. It is recommended for businesses that require long-term data retention and security. With the help of the walkthrough guide, you will be able to use the Citrix ShareFile Recovery Folder.
Instructions. Access the Citrix ShareFile web interface and log in using your credentials. Now, select "Admin Settings" from the "Settings" section from the left bar. At the Admin Overview section, pick the "StorageZones" option and click "Recover Files." Choose the date and time of the backup, select the files, and click the "Restore" button. Finally, pick a folder to save the restored files and confirm the recovery process.
Bonus Part. Important File Corrupted? Try Repairit To Regain Access
Losing access to an important file due to corruption can be a major setback when dealing with critical business documents. Corrupted files do not open and might display error commands, disturbing the workflow. Therefore, introducing Repairit as a solution to help you repair and restore corrupted or damaged Citrix Desktop files to regain access.
Its integrated AI technology further allows users to perform image enhancements on the pictures to achieve high-quality final results. It supports the repair of multiple scenarios of corruption to ensure all users find their solution through one tool. Moreover, you do not need to have high expert knowledge to use the tool; you can navigate through the tool with ease.
Key Features
- Advanced File Repair Technology: Uses intelligent algorithms to fix corrupted files and restore them to their original quality.
- File Formats Supported: Repairit helps users repair documents and media files in various formats like DOCX, MP4, JPEG, and more.
- Batch Repair Process: This tool allows users to repair multiple corrupted files in one go to help save time and effort.
Guide on Repairing Corrupted Files with Repairit
To get a better understanding of fixing the corrupted files after you performed the Citrix ShareFile Recovery Folder, follow the guide below:
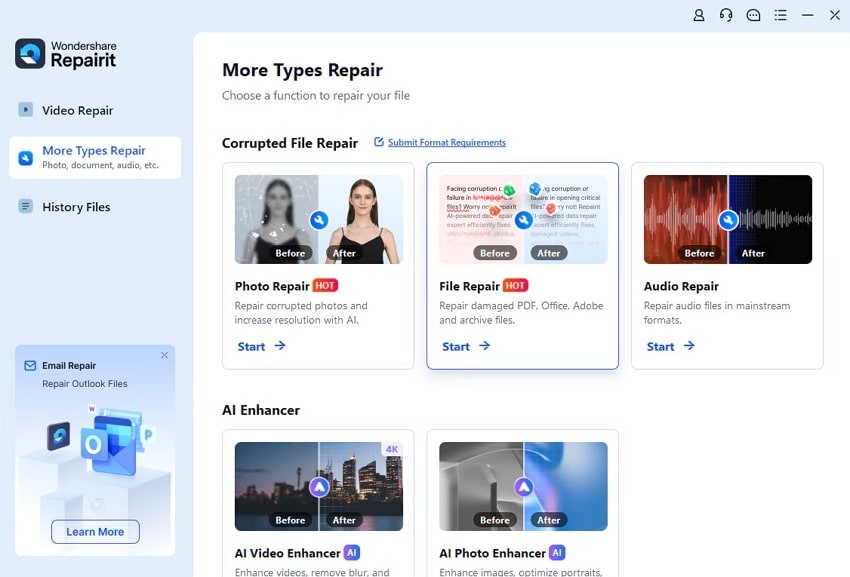
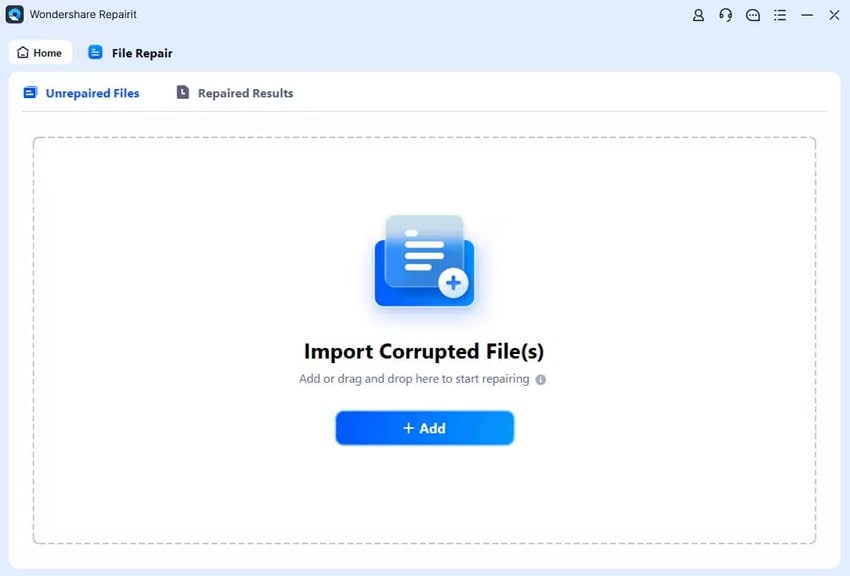
Step 1. Download Repairit and Choose the File Repair Feature
To begin the fixing procedure, download Repairit to your device and launch the software. Then, pick the “File Repair” option from the “More Types Repair” section from the left navigation bar.
Step 2. Add the Corrupted Files to the Interface
At the “File Repair” section, hit the “+Add” button to add the damaged field to your device.
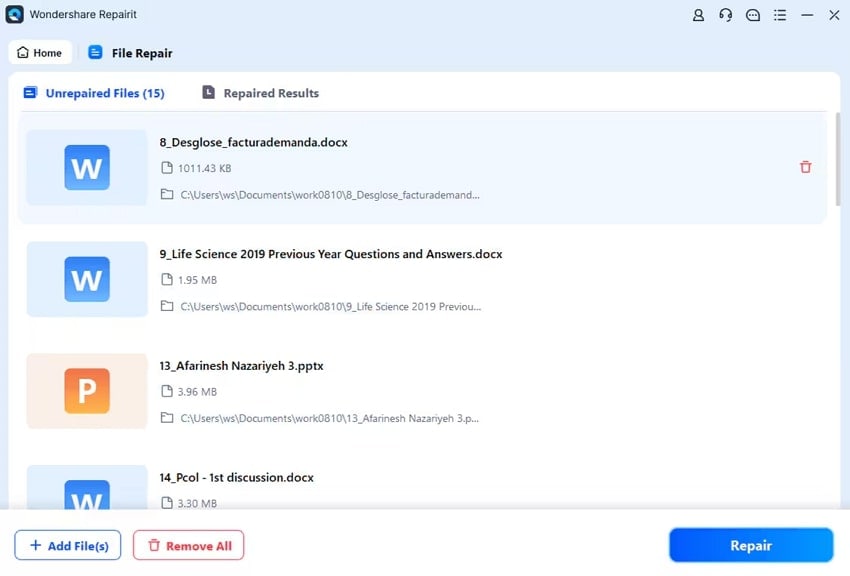
Step 3. Hit the Repair Button to Initiate the Procedure
Once the files are up on the “Unrepaired Files” interface, you can add more files through the “+Add Files” button at the bottom left corner. Then, hit the “Repair” button and shift to the last step.
Step 4. Preview and Save Results
Finally, as the files are shifted to the “Repaired Results” section, you can “Preview” them and “Save” them to your preferred location.
The potential solutions of repairing corrupted Microsoft file online free.
Conclusion
To conclude this discussion, we have looked into the scenario where you accidentally deleted your project files through the Citrix Desktop. You can easily navigate through a third-party tool or the built-in method to figure out how to recover deleted files from Citrix Desktop. With the help of Wondershare Recoverit, one can even recover the file through the NAS recovery procedure. Thus, download Recoverit to your devices today to restore files and resume workflow.
FAQ
1. Where is the Citrix data stored?
The Citrix data or logs are analyzed and stored on the Citrix Analytics Servers when it is enabled. It securely transmits the data into the Citrix Analytics section.2. How to back up a Citrix database?
First, download and install Microsoft SQL Server Management Studio, then connect to your server. To create a backup, right-click your "Citrix Datastore Database," go to "Tasks," and select "Backup."3. How do I save files in Citrix Receiver?
Open the file and click on the “File” tab to pick the “Save As” option to choose “Browse” from the extended menu. You then choose the location of the file where you want it to be saved.4. What is the file transfer limit for Citrix?
The Citrix Visual Desktop limits users to a maximum of 10 files at a time while uploading or downloading. Whereas the file size is 2GB for uploads and 250 MB for downloads.


