

 TL;DR:
The "windows resource protection could not start the repair service" error occurs when the Windows Modules Installer (TrustedInstaller) is disabled, and you can resolve it by manually reactivating this specific service before running your SFC scan.
● Enable the service by opening `services.msc`, setting the "Windows Modules Installer" startup type to "Manual", and clicking "Start", or by executing `sc config trustedinstaller start= auto` and `net start trustedinstaller` in an elevated Command Prompt.
● If `sfc /scannow` still fails after the service is active, run `DISM /Online /Cleanup-Image /RestoreHealth` to repair corrupted underlying source files first, or boot into Safe Mode to prevent third-party background apps from blocking the repair.
● Before executing advanced boot structure repairs in the Windows Recovery Environment (such as `bootrec /rebuildbcd`), use a rescue tool like Recoverit to extract and secure your data from unbootable drives without modifying system preferences.
Ask AI for a summary
 ChatGPT
 Perplexity
 Gemini
 Claude
 Grok
Grok
When your PC refuses to fix system files, it can feel like everything has come to a stop. As a result, tools that normally help you repair problems suddenly freeze or fail. In many cases, this happens when important services do not run the way they should, leaving your system stuck and unable to heal itself.
Soon after, many users see the message windows resource protection could not start the repair service, and they don’t know where to begin. Fortunately, the cause is often simple, and the steps to fix it are easy to follow.
Try Recoverit to Perform Missing System File Recovery
 Security Verified. 3,591,664 people have downloaded it.
In this article
- Enable and Start Windows Modules Installer (TrustedInstaller)
- Configure TrustedInstaller Startup Type via Command Prompt
- Run SFC /SCANNOW After Enabling the Service
- Run SFC /SCANNOW in Safe Mode
- Run DISM to Repair Component Store Before SFC
- Apply Pending Windows Updates and Reboot
- Use Windows Recovery Environment to Repair Boot Files (Advanced)

Part 1. What “Windows Resource Protection Could Not Start the Repair Service” Means
This error appears when Windows cannot start the service that SFC needs to check system files. SFC depends on the Windows Modules Installer, also known as TrustedInstaller, because it has the permission to read and fix protected files. If this service does not start, SFC cannot run its scan, and Windows shows the message instead of repairing your files.
Common Reasons the Repair Service Fails in Windows 10/11
Before moving ahead, here are the main causes you should understand clearly:
- Service Unavailable: The TrustedInstaller service may stay off when its settings change by accident. This stops SFC from opening important files needed for basic system repairs.
- File Damage: Some system files may get damaged and stop Windows tools from working properly. These damaged files block services that help SFC start and run normally.
- Bad Permissions: Wrong permission settings can stop the repair service from reaching needed files. These limits make SFC fail before it can begin any repair tasks.
- App Conflict: Other apps or security tools can interrupt SFC when it tries to fix files. Such conflicts block needed services and stop the repair tool from starting.
- Update Errors: Failed updates may change system settings needed for normal repair work. These update errors may also damage files required to start repair services.
Part 2. Quick Pre-Checks Before You Start Fixing the WRP Error
Review the table below to see the quick pre-checks before you start fixing the WRP error:
| Pre-Checks | Why It Helps |
|---|---|
| Restart Windows | Removes glitches and restarts essential repair services. |
| Use Elevated Command Prompt | Allows SFC and WRP to access protected files. |
| Free Up Disk Space | Ensures repair logs and replacement files can be written. |
| Pause Security Software | Prevents antivirus software from blocking file repairs. |
| Check Drive Health | Detects file system issues that may stop WRP. |
Part 3. Fixing “Windows Resource Protection Could Not Start the Repair Service” in One Clear Path
To fix the windows resource protection could not start the repair service error, review the solutions below:
1. Enable and Start Windows Modules Installer (TrustedInstaller)
TrustedInstaller must run because SFC needs this service to repair protected files. Enabling it restores normal access, allowing Windows to check and replace damaged items. This fix works to avoid deeper system problems and often stops repair failures completely. Consider using the guide below to enable and start the Windows Modules Installer:
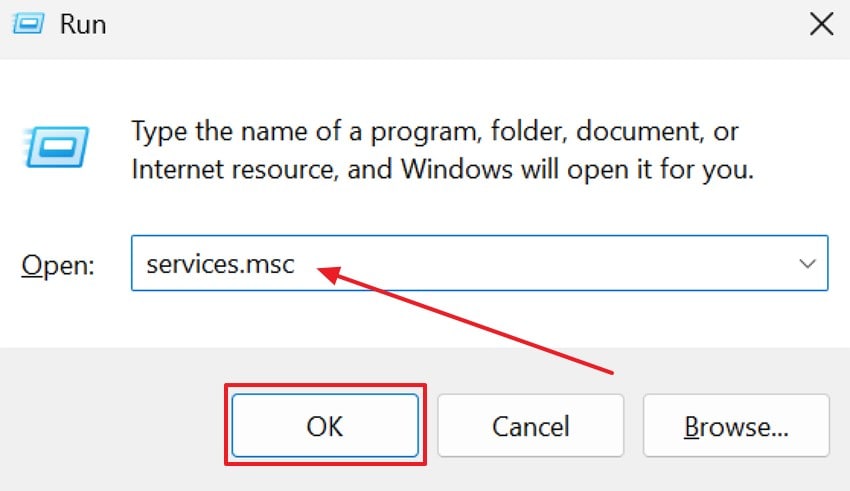
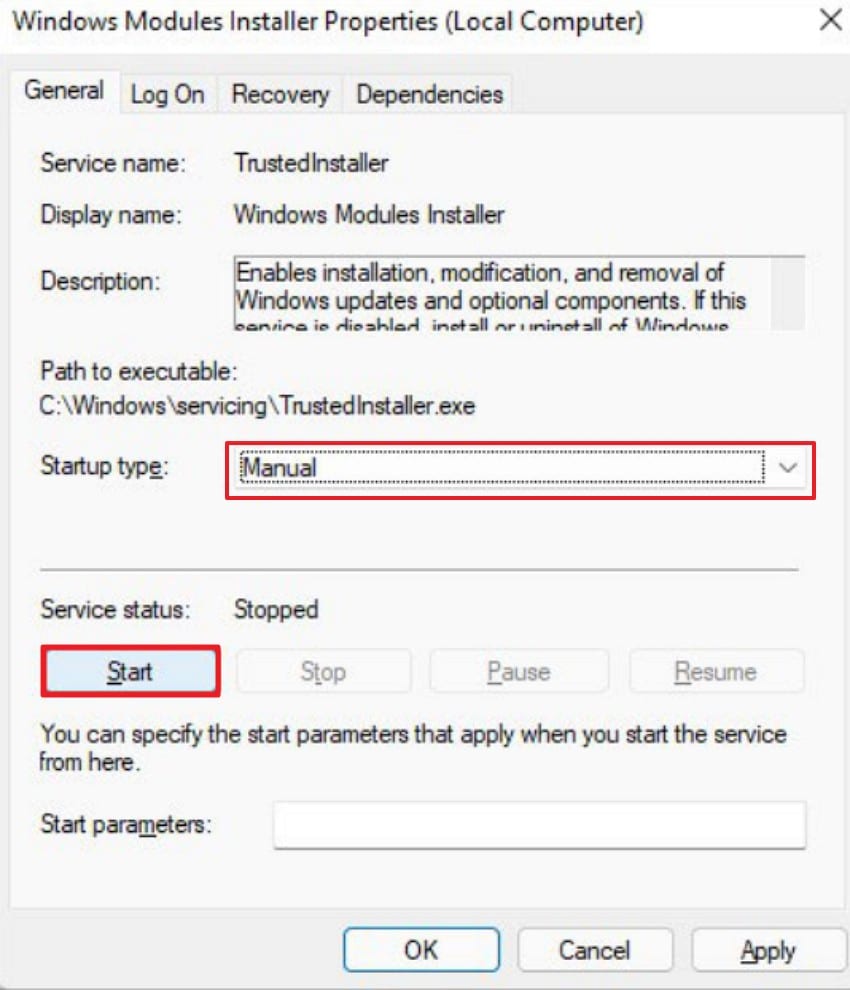
- 1. First, open the Services console by pressing Win + R, typing "services.msc" across the Run program, and clicking "OK."
- 2. Next, scroll through the list, right-click "Windows Modules Installer," and choose "Properties" from the context menu.
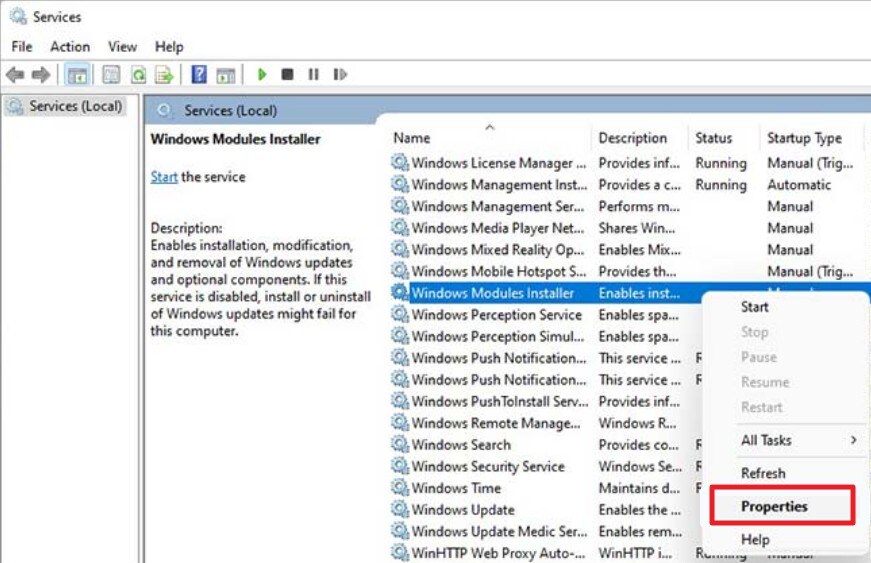
- 3. Finally, set "Startup type" to "Manual," then click the "Start" button to activate the service.
2. Configure TrustedInstaller Startup Type via Command Prompt
Setting TrustedInstaller to start automatically helps Windows load it when repairs begin. This change removes blocks caused by disabled settings that stop important repair actions. CMD ensures the service starts even if previous tools changed related controls. Above all, it fixes locked values that prevent normal system checks. Follow the stepwise guide below to adjust these settings correctly:
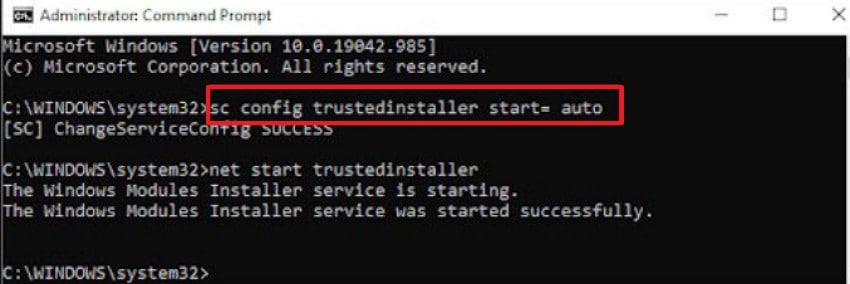
- 1. To start, search Command Prompt in the Start menu, then click "Run as administrator" to launch elevated mode.
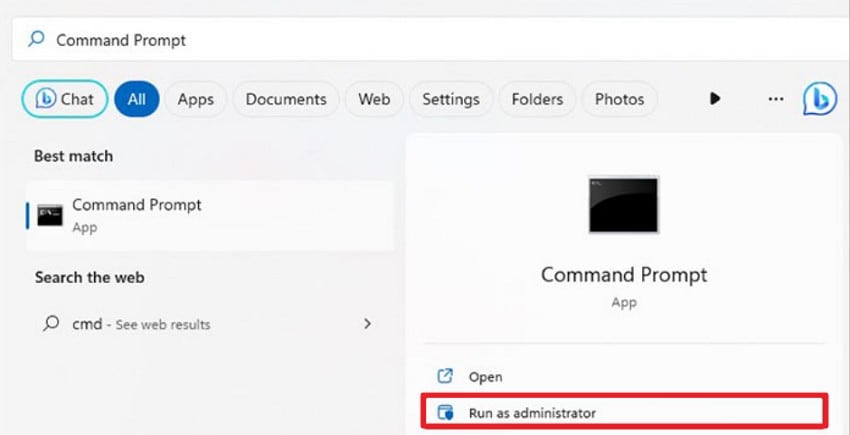
- 2. Afterwards, type the command "sc config trustedinstaller start= auto" and press "Enter", then run "net start trustedinstaller" to activate the service.
3. Run SFC /SCANNOW After Enabling the Service
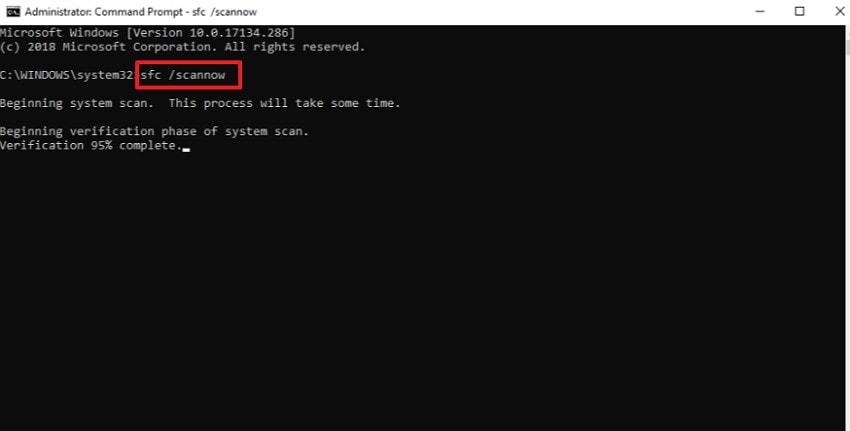
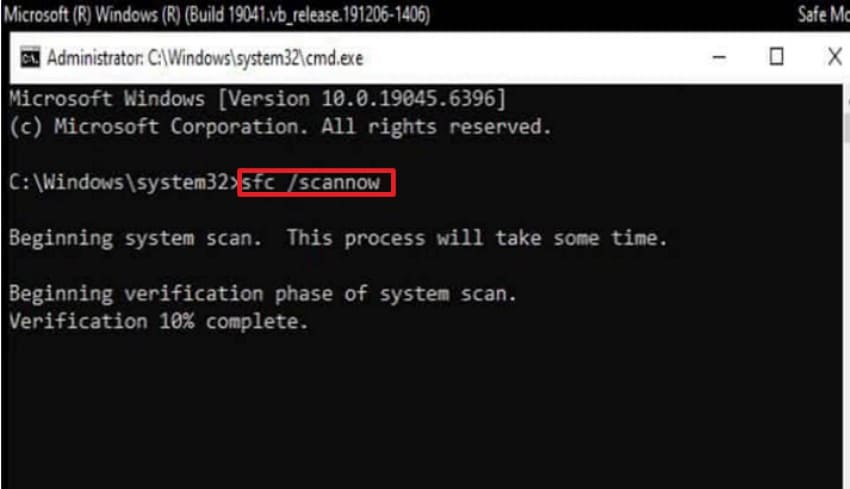
Running SFC after enabling TrustedInstaller helps Windows scan protected files correctly. SFC replaces damaged items once the needed service starts without any blocking issues. This step restores missing parts that may affect updates or system features later. Moreover, it ensures stable performance by fixing hidden corruption early. Adhere to the instructions below to complete this SFC scan safely:
Instructions. After enabling TrustedInstaller, run SFC to start the actual repair scan. To start, open Command Prompt as administrator, type "sfc /scannow", and press Enter so Windows can verify protected files and automatically repair any corrupted items.
4. Run SFC /SCANNOW in Safe Mode
Safe Mode stops extra programs that block SFC from checking protected Windows files. Moreover, running SFC here removes conflicts caused by antivirus tools or other background apps. This fix helps when normal scans still fail even after enabling TrustedInstaller. Follow the step-by-step guide below to run SFC scan in Safe Mode smoothly:
- 1. First, open "msconfig", go to the "Boot" tab, enable "Safe boot" to further check "Minimal', then click "Apply" and "OK" to restart in Safe Mode.

- 2. Next, run an SFC scan, launch Command Prompt as administrator, type "sfc /scannow", and hit "Enter" to perform a clean repair scan.
5. Run DISM to Repair Component Store Before SFC
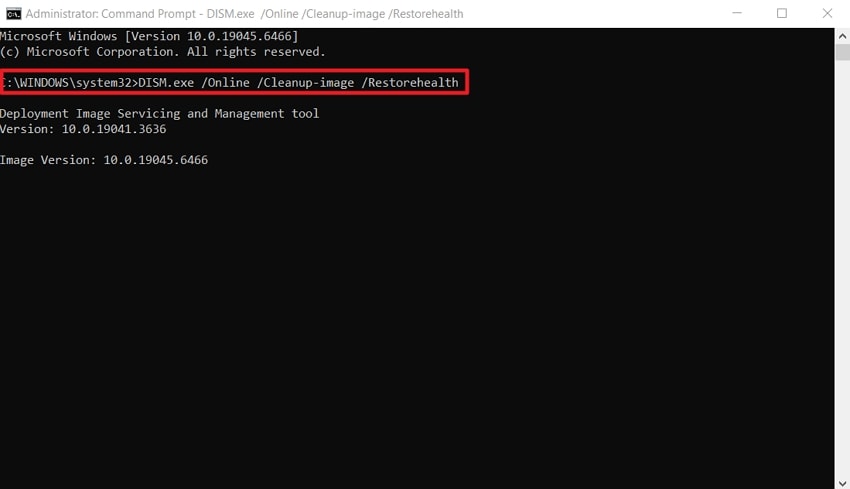
DISM repairs Windows source files that SFC needs for restoring damaged system items. Applying it first ensures SFC uses clean copies for all repair tasks. This fix solves deeper issues that break update features or service loading. Above all, it often prevents repeated SFC failures caused by corrupted components. Let’s walk through the instructions below to run these DISM commands:
Instructions. To start, Open CMD as administrator, then enter "DISM /Online /Cleanup-Image /RestoreHealth" and press "Enter." Wait for DISM to fix corrupted component store files so SFC can use clean sources during its repair process.
6. Apply Pending Windows Updates and Reboot
Installing updates restores damaged services needed for SFC and TrustedInstaller repair tasks. In addition, updates replace broken files that stop repair tools from working correctly during scans. Plus, rebooting after updates reloads important components with fresh and stable versions. This fix removes issues caused by incomplete updates or earlier shutdown problems. Continue with the stepwise guide below to complete these update steps:
- 1. First, press Win + R, type "control update", and click "OK" to launch the update settings page.
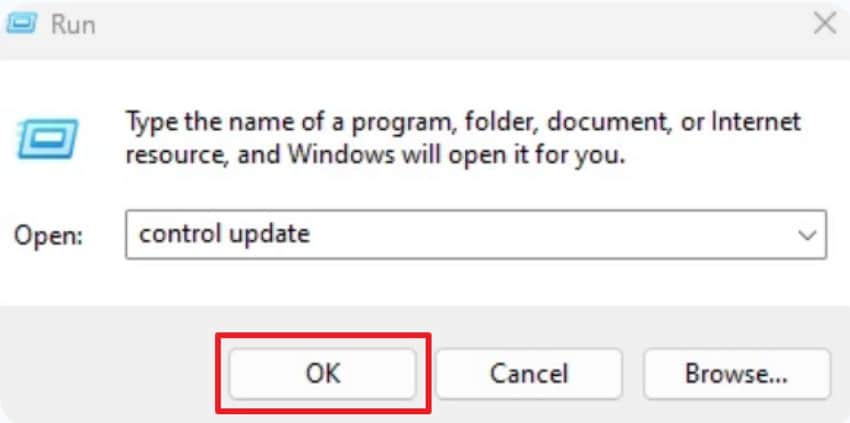
- 2. Later, click "Check for updates," and allow Windows to download and install all pending updates.

- 3. After that, access the Start menu, select the "Power" icon, and click the "Restart" button to reboot Windows and complete the update process.

7. Use Windows Recovery Environment to Repair Boot Files (Advanced)
Recovery Mode repairs boot files that stop TrustedInstaller and SFC from starting properly. Fixing these files outside Windows restores access to damaged system areas safely. This step helps when normal commands cannot repair deeper corruption inside Windows folders. Moreover, it protects important data by repairing structures before Windows loads fully. Follow the stepwise guide below to complete these Recovery steps:
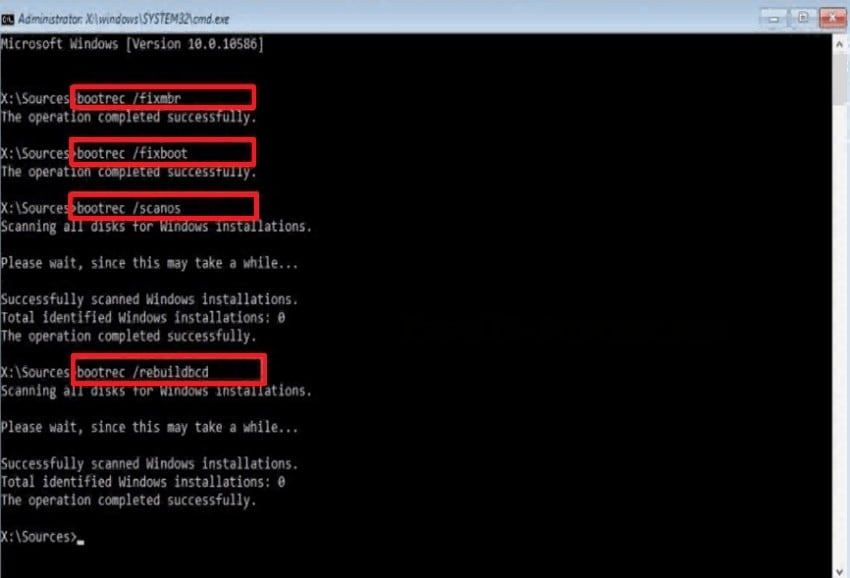
- 1. First, restart your PC, interrupt startup three times, and select "Advanced options" > "Troubleshoot" > "Command Prompt" to access repair tools outside Windows. Then, in Command Prompt, execute the following commands one by one: "bootrec /fixmbr," "bootrec /fixboo,t" "bootrec /scanos."

- 2. Finally, rebuild the Boot Configuration Data (BCD) store, and enter "bootrec /rebuildbcd". Then press "Enter" to create a refreshed BCD entry and complete the advanced boot repair process.
Pro Tip: Revive Missing System Files with Recoverit Before You Attempt Deep Windows Repairs
As Windows repair software is unable to boot, a lot of users get concerned about losing valuable files in the process. It is safer to secure your data and recover any lost or damaged files before attempting to do more system fixes. Recoverit makes it easy to retrieve the lost files before you start repairing Windows, providing you with a stable starting point.
Additionally, the program searches your disk and locates lost files, and recovers them without modifying system preferences. This reduces stress and lowers the chance of losing data while you fix Windows errors, including issues like windows resource protection could not start the repair service. With your files safe and restored, you can repair your system with clearer confidence and fewer risks.
Key Features
- Deep File Recovery: Recovers lost data by scanning storage sectors and rebuilding deleted files safely.
- Crashed PC Rescue: Recovers files by creating bootable media that extracts data from unbootable systems.
- Advanced Repair Tools: Recovers damaged media by repairing corrupted file structures through guided repair modes.
Guide to Revive Missing System Files with Recoverit
Let’s walk through the step-by-step guide to recover missing system files with Recoverit:
- Choose the Location to Start Recovery
First, locate the "Hard Drives and Locations" option in the left sidebar to continue the Recovery process.

- Start the Scanning Process
After the scan starts, all the recoverable files will appear in the "Name of Lost File" folder under the "File Location" tab.

- Preview the Files and Recover
At the end, preview the file, select those you want to recover, and press the "Recover" button to complete the recovery.

Part 4. Prevent “WRP Could Not Start the Repair Service” in the Future
To avoid seeing "windows resource protection could not start the repair service" again, follow these simple habits:
- Service Enabled: Keep the TrustedInstaller service set to Manual or Automatic for safety. This lets SFC start it anytime and reach all the needed system files.
- Regular Scans: Run DISM and SFC sometimes to fix image issues before problems happen. These scans repair protected files and stop small errors from growing bigger.
- Update Often: Install Windows updates often to remove bugs that can harm system tools. These updates fix parts that help repair services start and work normally.
- Avoid Tweaks: Stay away from strong tweaks that may stop or change important system services. These tools can disable TrustedInstaller or break permissions needed for repairs.
- Check Storage: Make sure your system drive has enough free space for needed files. A healthy disk allows logs and repairs to save without blocking services.
- Scan for Malware: Regular malware scans prevent harmful programs from blocking important Windows repair services. These checks protect TrustedInstaller and keep system files safe from hidden corruption issues.
Conclusion
To conclude, the "resource protection could not start the repair service" issue occurs when Windows cannot launch the service required for system file repairs. We explored its causes, essential pre-checks, practical fixes, and prevention steps. If the error leads to missing or damaged files, Recoverit provides a dependable way to restore important data before applying deeper system repairs.
FAQ
1. Can I fix this issue without using hard technical steps?
Yes, you can fix it by starting the needed service and running simple repair tools. Most fixes are easy and safe, and they do not change deep system settings.2. Why does this error appear on my Windows computer?
This error appears when the needed repair service cannot start during system scans. It happens because Windows cannot open important files required for normal repair work.3. Do I need admin rights to run SFC properly?
Yes, SFC needs admin rights because it must reach protected system files safely. Without admin rights, the tool cannot scan or repair any important system area.4. Can Recoverit help if my files get damaged by this error?
Yes, Recoverit can restore files that become damaged when system tools fail to work properly. It helps recover lost or broken data safely without changing your computer settings.


