Whether you're a journalist who has just finished conducting an important interview, a musician who captured a surge of creativity, or a student who recorded a key lecture, there could be nothing more heart-stopping than the loss of your audio files. But all hope is not lost in recovering those lost audio files.
In this detailed guide, we share all the ups and downs of how to recover audio files from your Zoom H1 recorder. We will be talking about everything from the reasons it happens in the first instance to step-by-step instructions on how to recover voice recordings using specialized software.
By the end of this article, you'll have grasped the techniques and know the tools that are used to save vital recordings and avoid data-loss nightmares in the future.
In this article
Overview of the Zoom H1 Recorder
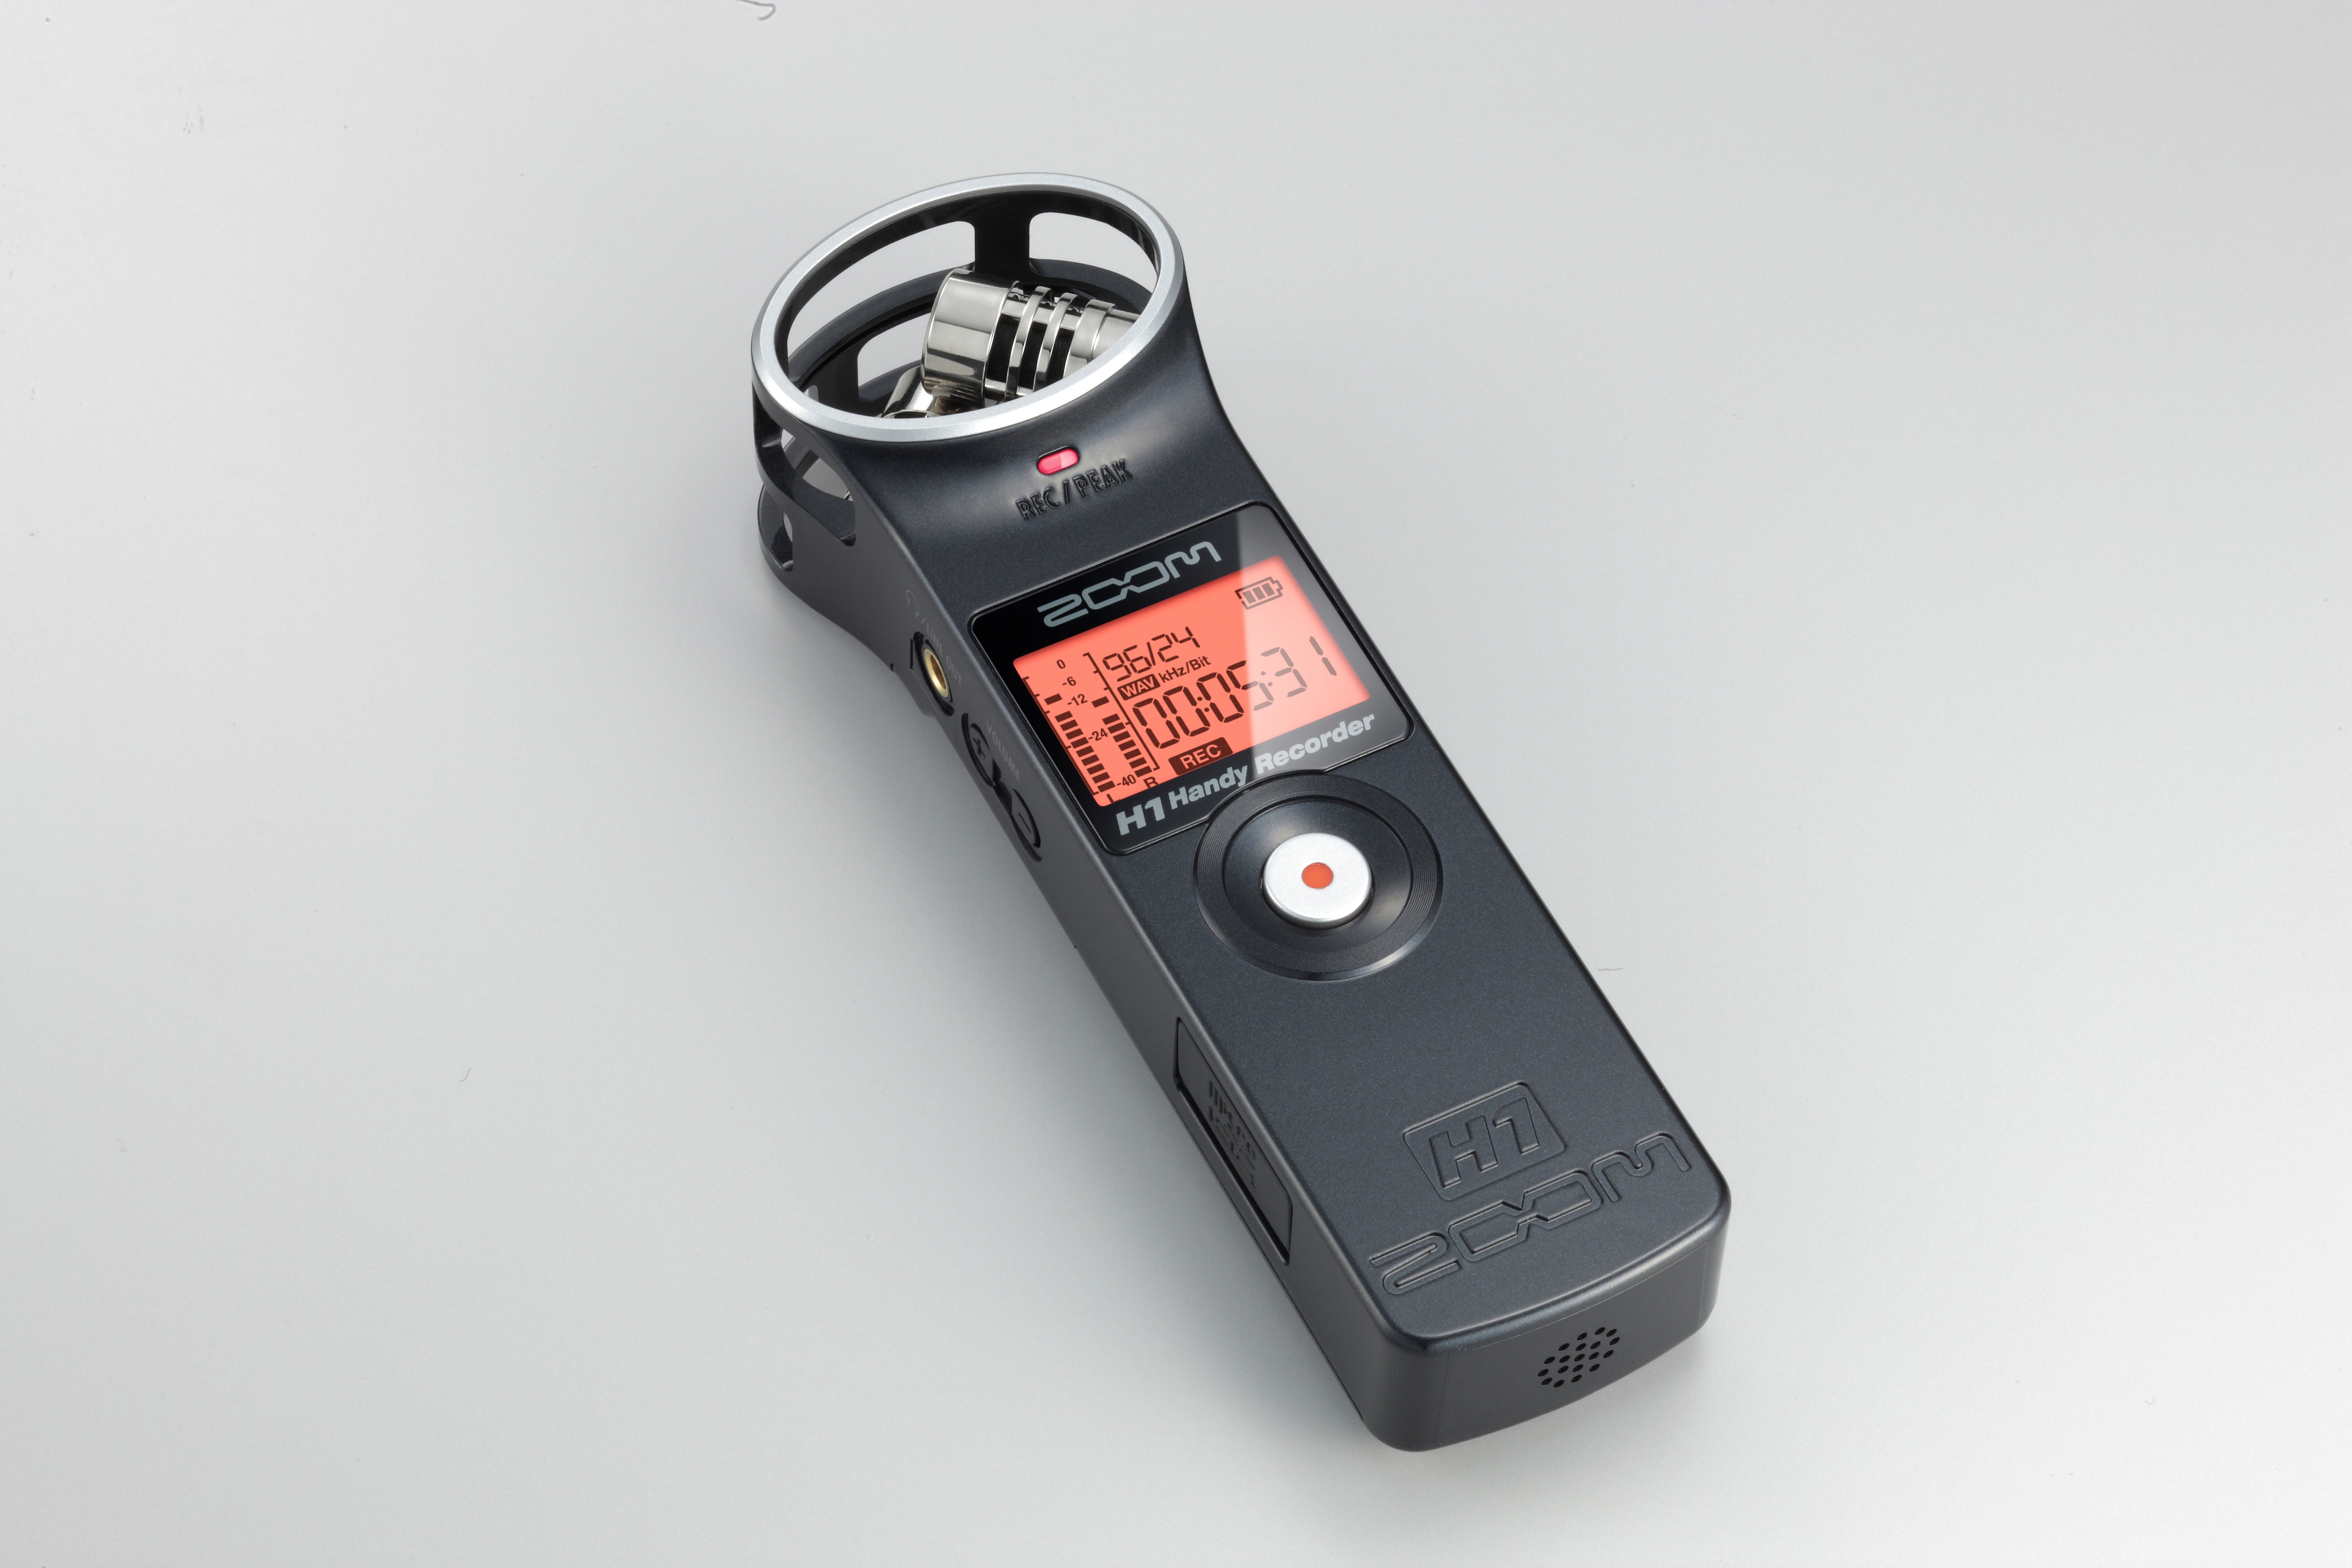
The Zoom H1 is a popular, lightweight, compact portable digital audio recorder, not only easy to operate but also captures great sounds. It has become a go-to device for voice, music, or ambient sound, which is recorded on the move among professionals and hobbyists.
The H1 stores its recordings as digital audio files on a microSD card, making it easy to transfer them to a computer for editing or sharing. But, like any other digital device, it's not immune to failures in data storage, so methods of recovering files from a Zoom recorder are an absolute must for any user.

The recorder uses SD card, Micro SDHC, Micro SDXC, MMC card, xD picture card, and SD mini card to store the sound files. However, the formats supported by zoom recorder include .wav, .mp3, .ac3, .wma, and more.
Some other important features of zoom recorder are, it comes with interchangeable input capsules, supports six tracks simultaneous recording, records directly to SD card, Micro SDHC, Micro SDXC, and has an auto, pre, and backup record function. Zoom recorder also comes with a USB port for data exchange to and fro from the computer, and also has a multichannel and stereo USB interface for PC and Mac.
Causes for Zoom Audio Files Loss
Understanding why audio files go missing is the first step in prevention and recovery. Here's a table outlining common causes of audio file loss on Zoom recorders:
Here's a list of the main reasons why data is lost on an Apple Fusion hard drive:
|
Cause |
Description |
|
Accidental Deletion |
Users may mistakenly delete files while managing storage |
|
Formatting Errors |
Improper formatting of the microSD card can erase all data |
|
File System Corruption |
Power interruptions or improper ejection can corrupt the file system |
|
Physical Damage |
Drops or exposure to extreme conditions can damage the SD card |
|
Virus or Malware |
When connected to a computer, malicious software can affect files |
|
Software Glitches |
Firmware issues in the recorder can lead to file loss |
|
Overwriting |
Recording over existing files without realizing |
|
Battery Failure |
Sudden power loss during recording can corrupt files |
Why Audio Files Can Be Recovered?
Wondering how to recover files from Zoom recorder? Well, the good news is that, in many instances, deleted audio recordings can be recovered, or voice recordings that seem to have vanished. Now, when a file is "deleted," this doesn't really mean it gets wiped out from the storage device; instead, the space it occupies is marked available for new data.
In most cases, the original data is still there until that space gets overwritten by new recordings. This principle applies in most digital storage devices other than Zoom recorders, hence recovering the audio files in different scenarios.
How to Recover Audio Files from Zoom H1 Recorder: Use Wondershare Recoverit
So, is it possible to recover deleted audio recordings? Well, Yes! When it comes to zoom recording recovery, one of the most effective tools available is Wondershare Recoverit. This powerful software is designed to recover audio files from various devices, including the Zoom H1 recorder.
Steps to Use Recoverit to Recover Sound Files
Step 1: First, visit the official Wondershare website and download the Recoverit software. Install it on your computer, ensuring you have administrative rights to do so. Remove the microSD card from your Zoom H1 recorder and connect it to your computer using a card reader. Alternatively, if your Zoom H1 can connect directly to the computer via USB, you can use that method.
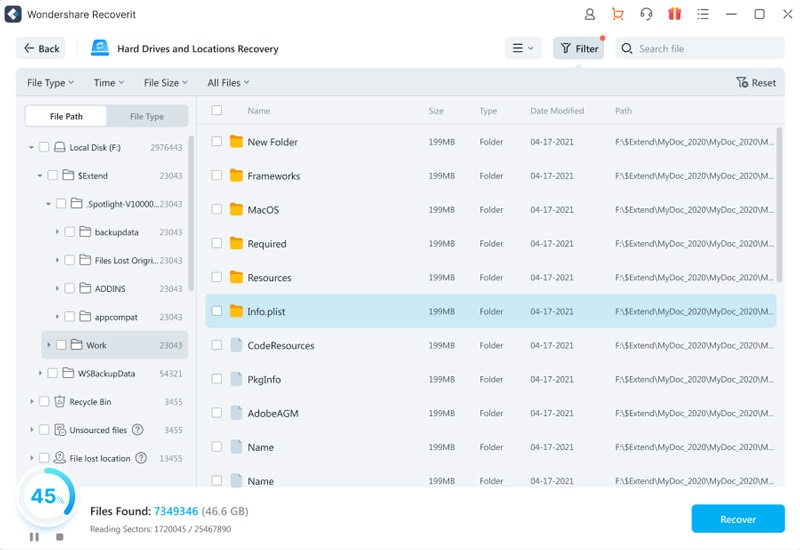
Step 2: Launch Recoverit and select the drive or location where your Zoom H1 files were stored. This will typically be the drive letter assigned to your microSD card or the Zoom H1 device itself. Click on the "Start" button.

Step 3: Recoverit will thoroughly search for any recoverable files on the selected drive.

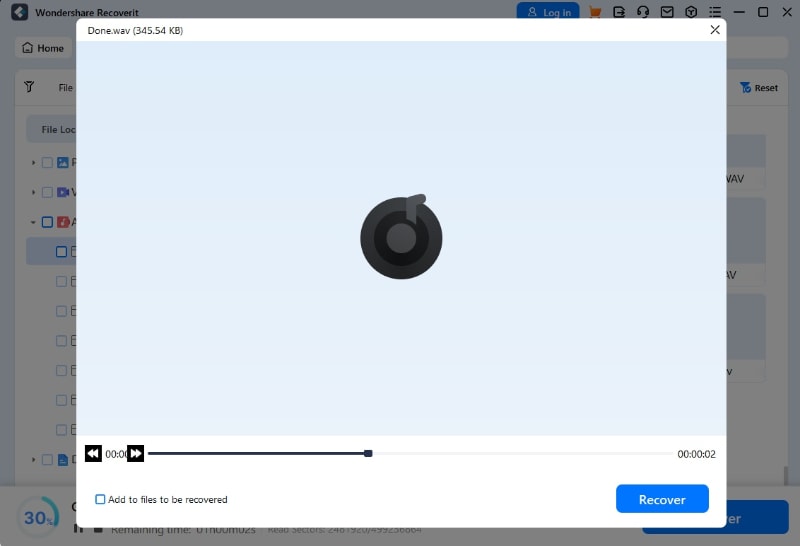
Step 4: Once the scan is complete, Recoverit will provide you with a list of recoverable files including photos, videos and audio files. Preview the audio files to ensure they're the ones you want to recover. Select the desired files and click "Recover" to save them to a safe location on your computer.

Why Wondershare Recoverit is Effective for Zoom Audio Files Recovery:
- Deep Scan Technology: This deep scanning method involves Recoverit using advanced algorithms to scan your storage device, thereby recovering the lost audio files.
- Supports Multiple File Formats: It can support several formats of audio files usually used by Zoom recorders, such as WAV and MP3.
- Preview Function: This, in turn, will help you make sure that you recover only the right audio files.
- User-Friendly Interface: Recoverit has an easy-to-use interface, which makes it user-friendly for recovery processes to any user who may not be that savvy with technology.
- High Recovery Rate: It recovered deleted audio recordings and other file types at a very high rate of up to 98%.
Alternative Methods to Recover Audio Files:
While Wondershare Recoverit is a robust solution, there are other methods you can try to recover sound files from your Zoom H1:
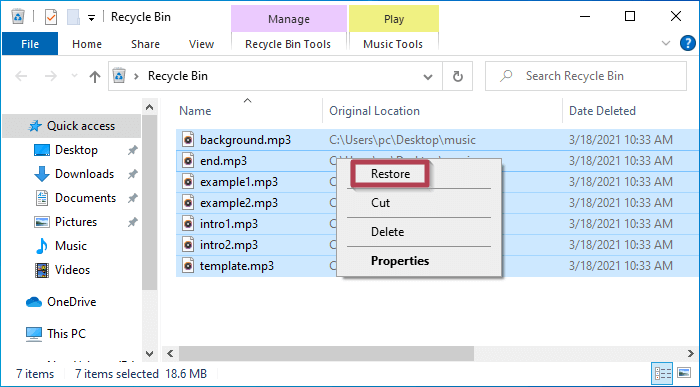
Check the Recycle Bin (if connected to a computer):

Sometimes, deleted files from connected devices end up in the computer's Recycle Bin. Check there before attempting more complex recovery methods.
Use Built-in Recovery Tools:
Some operating systems have built-in recovery tools that might help recover deleted files from external devices.
Professional Data Recovery Services:
For critical files that you absolutely must recover, consider professional data recovery services. They have specialized tools and clean room environments for handling severe data loss cases.
Prevention is Better Than Cure: Recover Audio Files Easily
To avoid the stress of having to recover files from a Zoom recorder in the future, consider these preventive measures:
- Regular Backups: Always back up your important recordings to a computer or cloud storage.
- Use High-Quality SD Cards: Invest in reliable, brand-name microSD cards to reduce the risk of corruption.
- Proper Handling: Always eject the SD card properly and avoid removing it while the device is on.
- Keep Firmware Updated: Regularly update your Zoom H1's firmware to avoid software-related issues.
- Monitor Battery Life: Ensure your device has sufficient battery life before starting important recordings.
BONUS: Additional Tips for File Transfer:
- Organize Your Transfers: Create a dedicated folder on your computer for Zoom H1 recordings, with subfolders for different projects or dates.
- Check File Integrity: After transferring, play the files on your computer to ensure they are transferred correctly.
- Consider Automatic Backup Software: Use software that automatically backs up new files when you connect your Zoom H1.
- Use Cloud Storage: After transferring to your computer, consider uploading important files to cloud storage for an extra layer of backup.
By following these steps and tips, you'll ensure that your audio files are safely transferred and backed up, reducing the risk of data loss and the need for audio file recovery in the future.
Conclusion
Losing important audio recordings can be a stressful experience, but as we've explored in this guide, all hope is not lost when it comes to recovering audio files from your Zoom H1 recorder. With tools like Wondershare Recoverit, many users find success in recovering deleted audio recordings and rescuing their valuable sound files. The key is to act quickly and avoid using the device further once you realize files are missing, to prevent overwriting the data.
But keep in mind that while the thought of having a chance at recovery could be pretty reassuring, prevention still works best. Backing up your files often, taking care of your equipment, and being mindful of storage management may just spare you from the nightmare of lost recordings.
This way, you can apply good habits together with your knowledge of how to recover files from a Zoom recorder whenever necessary, so you will be well-equipped against any data challenge that might arise in your audio recording efforts.
FAQ
-
Can I recover audio files if I've already recorded them on my Zoom H1?
Unfortunately, if you've recorded the files, the chances of recovery are very low. Once new data is written to the same space on the storage device, the original files are typically unrecoverable. This is why it's crucial to stop using the device immediately when you realize files are missing. -
Is it safe to use data recovery software on my Zoom H1 recorder?
Yes, it's generally safe to use reputable data recovery software like Wondershare Recoverit. However, it's always recommended to perform the recovery process on a copy of the data rather than directly on the device, if possible. This minimizes the risk of further data loss during the recovery attempt. -
What should I do if my audio files are corrupted on my Zoom H1 recorder?
If your audio files are corrupted on your Zoom H1 recorder, follow these steps: (1) Transfer Files to Your Computer: Connect your Zoom H1 to your computer and transfer the corrupted files. (2) Use Audio Repair Software: Utilize software like Audacity, Adobe Audition, or VLC media player to try and repair the corrupted files. (3) Use Audio Repair Software: Utilize software like Audacity, Adobe Audition, or VLC media player to try and repair the corrupted files. (4) Backup Files Regularly: To avoid future issues, always back up your audio files immediately after recording.


 ChatGPT
 Perplexity
 Google AI Mode
 Grok
Grok


