

 TL;DR:
Enabling DirectX 12 Ultimate in Windows 11 unlocks next-generation graphics features like hardware-accelerated ray tracing, variable rate shading, and mesh shaders for improved gaming performance and visual quality.
● Check hardware support by running "dxdiag" (Win + R), noting the DirectX features under the Display tab, and verifying compatibility on your GPU manufacturer's website.
● Update to the latest Windows 11 build and install the newest display drivers directly from your GPU manufacturer (e.g., Intel, NVIDIA, AMD) to ensure required system components and feature access.
● For supported games, you may need to force DirectX 12 by opening the game's Properties in Steam, navigating to the General tab, and typing "-dx12" into the Launch Options field.
● If features aren't showing, verify your OS build is fully updated, perform a clean installation of the newest GPU drivers, and confirm your specific hardware physically supports Ultimate-level features, not just standard DX12.
Ask AI for a summary
 ChatGPT
 Perplexity
 Gemini
 Claude
 Grok
Grok
Modern PC games and graphics-intensive applications rely heavily on advanced rendering technologies to deliver smooth performance and realistic visuals. Understanding how to enable DirectX 12 Ultimate in Windows 11 can help you unlock features like ray tracing, variable rate shading, mesh shaders, and improved GPU efficiency.
Whether you're looking for higher frame rates or aiming for better visual output, DirectX 12 Ultimate ensures your system is fully optimized for next-generation graphics. This guide explains the step-by-step process to ensure your Windows 11 PC is ready to take full advantage of DirectX 12 Ultimate's capabilities.
Try Recoverit to Perform Game Data Recovery
 Security Verified. 3,591,664 people have downloaded it.
In this article

Part 1. What DirectX 12 Ultimate Is and Why It Matters for Windows 11
DirectX 12 Ultimate is Microsoft's advanced graphics API that standardizes next-generation gaming features. It combines ray tracing and mesh shaders to deliver better visuals and improved performance on modern GPUs and Windows 11 for gamers and developers worldwide.
Benefits of Enabling DirectX 12 Ultimate on Your PC
Before learning how to enable DirectX 12 Ultimate on Windows 11, you must understand why this process is important. Follow the guide below and explore the benefits of enabling DirectX 12 Ultimate on your device:
- Enhanced Visual Quality: DirectX 12 Ultimate enables hardware-accelerated ray tracing for realistic lighting, shadows, and reflections. This significantly improves immersion in modern Windows 11 games and graphics-heavy applications.
- Better Performance Efficiency: Features like variable rate shading optimize GPU workloads, increasing frame rates without sacrificing image quality. Windows 11 leverages these optimizations to deliver smoother gameplay on supported hardware.
- Standardized Next-Gen Features: DirectX 12 Ultimate ensures developers target a unified feature set across compatible graphics cards. This reduces compatibility issues and guarantees consistent visual experiences on Windows 11 PCs.
- Improved Game Development: Mesh shaders and sampler feedback allow developers to create complex scenes more efficiently. Windows 11 fully supports these tools, helping games scale better across different GPU tiers.
- Future-Ready Gaming: DirectX 12 Ultimate prepares Windows 11 systems for upcoming games using advanced rendering technologies. It ensures long-term compatibility and maximizes the value of modern graphics hardware investments, leading you to learn how to enable DirectX 12 Ultimate in Windows 11.
Easily Retrieve Your Lost/Deleted Game Files!

Pro Tip: Keep Your Data Safe: Use Recoverit Before Tweaking Graphics Settings
Before adjusting graphics settings, recovering important files ensures you don't lose critical data in case of system errors or crashes. Using a reliable tool like Recoverit makes this process simple and safe. Its V14 version offers a secure platform for restoring lost or deleted files. You can recover data from over a million storage devices, including SD cards, hard drives, and USB drives, with full compatibility for both Windows and Mac.
Recoverit provides a high success rate of 99.5%, helping you retrieve files regardless of the reason for their loss. Supporting over 10,000 file loss scenarios, it offers flexibility and reliability for various situations. Custom search filters allow you to locate and restore specific files quickly, while the preview feature lets you verify your data before downloading it back to your device.
Key Features
- File Scan Options: Recoverit provides two scanning methods to help locate deleted files on your device. If the standard All-Around Scan doesn't detect your file, the Deep Scan mode performs a more thorough and precise search.
- Batch File Recovery: You can restore multiple files at once with Recoverit, saving time and improving your workflow efficiency.
- Wide Format Support: The tool supports recovery of over 1,000 different file types, including documents, images, videos, and audio files, helping users maintain productivity.
A Complete Demonstration of Recovering Missing Files Using Recoverit V14
After learning how to enable DirectX 12 Ultimate in Windows 11, it is important to retrieve important files to prevent damage. Follow the guide below and learn how to recover files using this tool:
- Step 1. Select the Folder of the Missing File
To begin with, open Recoverit and select the location of your missing file from the left panel.
- Step 2. Choose the Missing Files and Recover
When the missing files appear on the next interface, select them and click "Recover" to retrieve them.
- Step 3. Preview the Recovered File and Save
As the files are recovered, preview them and hit the "Recover" button to save them.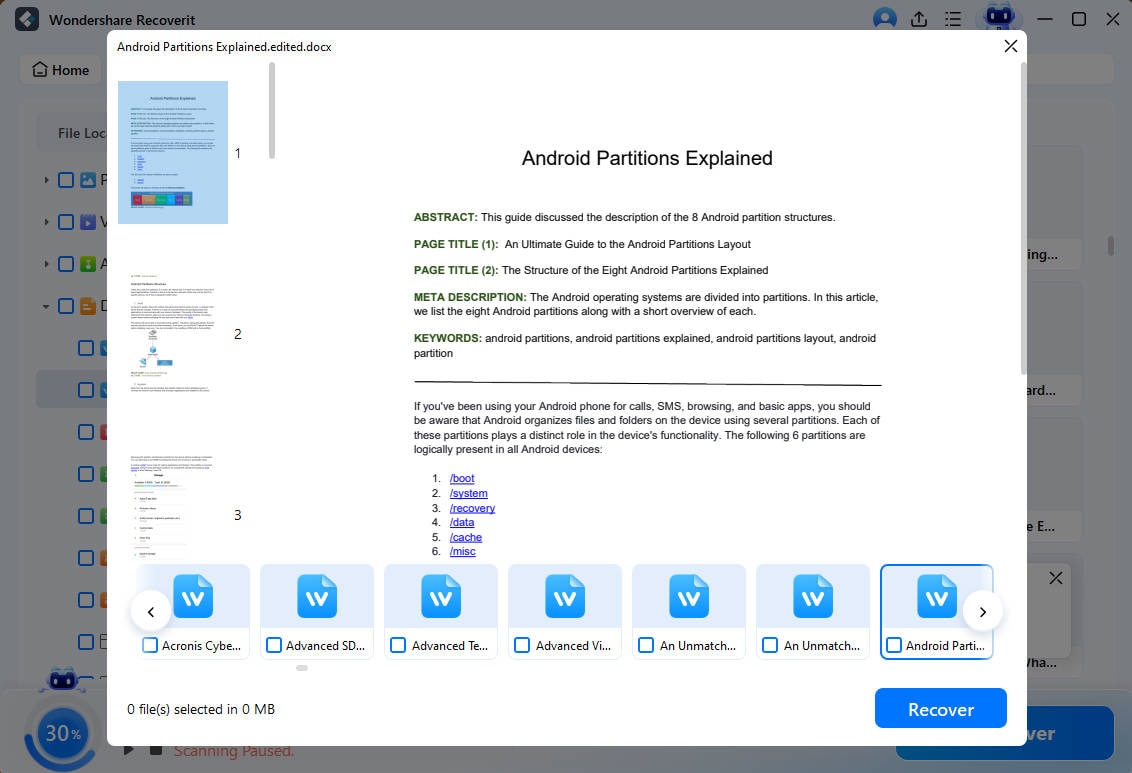
Part 2. How To Enable DirectX 12 Ultimate in Windows 11: Step-by-Step Guide
Before enabling DirectX 12 Ultimate, it's important to understand why each step matters. The following methods ensure proper compatibility, stability, and optimal performance on Windows 11:
1. Check if Your PC Supports It
Checking PC support ensures your system meets DirectX 12 Ultimate requirements before making any changes. It helps avoid wasted effort, identifies hardware limitations early, and confirms whether advanced graphics features can function properly on your Windows 11 device. This step helps you plan any necessary upgrades before attempting to enable Ultimate features. Follow the instructions below to learn how to enable DirectX 12 Ultimate in Windows 11:
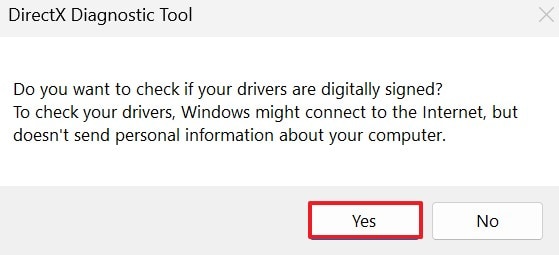
- In the "Win + R" window, give the "dxdiag" command and press Enter.

- On receiving the DirectX Diagnostic Tool warning, click "Yes" and continue.
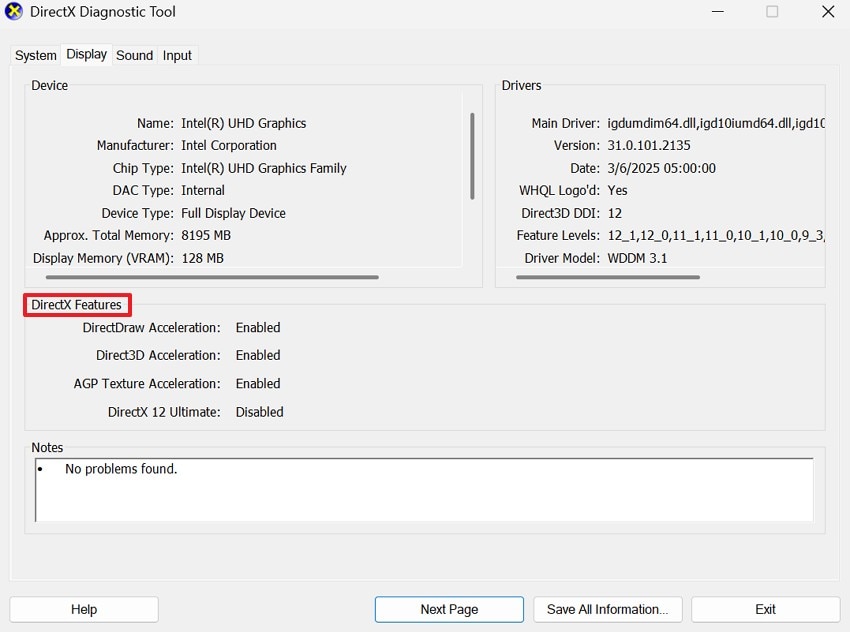
- In the "DirectX Diagnostic Tool" window, note the "DirectX Features" and visit your GPU manufacturer's website to confirm DirectX 12 Ultimate support. If unsupported, upgrading hardware is required to access Ultimate features.
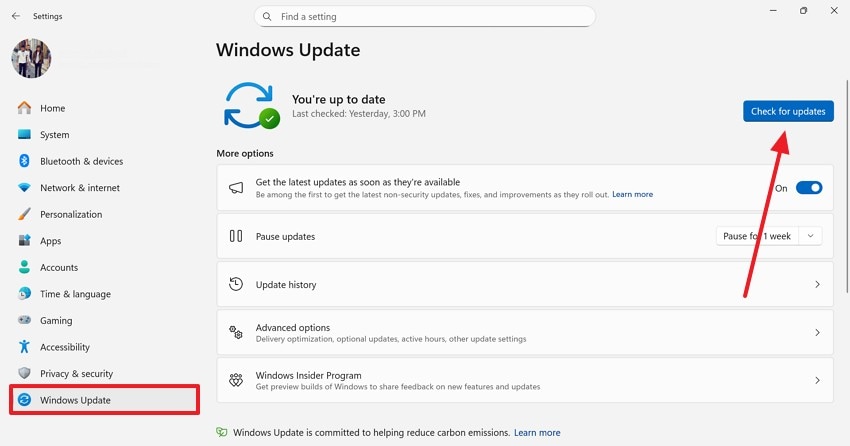
2. Update Windows 11
Updating Windows 11 is essential because DirectX 12 Ultimate relies on the latest system components. Regular updates fix bugs, improve compatibility, and enable access to newer graphics features required for optimal performance and stability. Continue with the instructions below to learn how to enable DirectX 12 Ultimate on Windows 11:
Instructions. In the "Settings" app, find and click the "Windows Update" tab on the left and select the "Check for Updates" button. Now, follow the on-screen instructions to shift your device to the latest version of the OS.
More Related: Windows 11 Update Taking Too Long? Finding Proper Answers!
3. Install the Latest GPU Drivers
Installing the latest GPU drivers ensures your graphics card fully supports DirectX 12 Ultimate features. Updated drivers improve performance, unlock advanced rendering technologies, and prevent crashes or graphical issues in supported Windows 11 games. Driver updates also improve system stability and fix known graphical bugs. Follow the steps below to learn how to enable DirectX 12 Ultimate Windows 11:
- To start, right-click on "Start" in your taskbar and select the "Device Manager" option to continue.
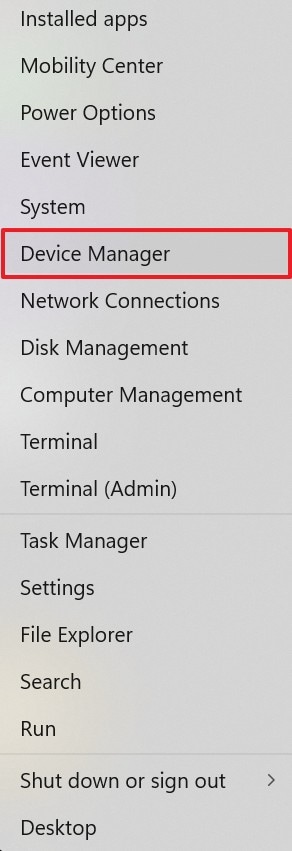
- Find and expand the "Display Adapters" menu to note your GPU model.
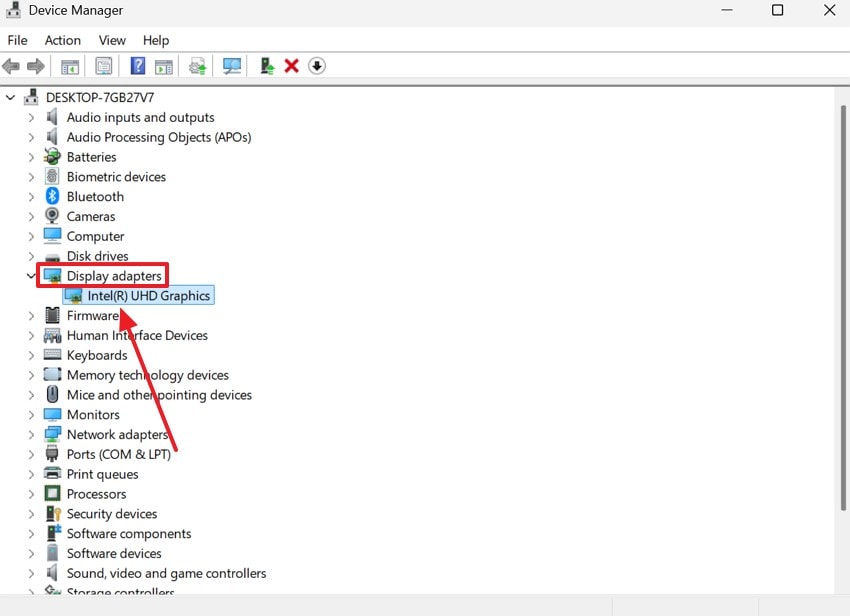
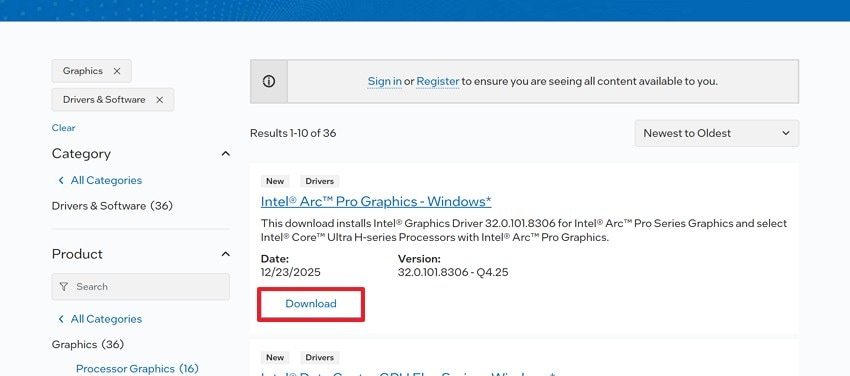
- Now, visit the official website of Intel or your GPU company to download and install the latest driver for your GPU. Finally, restart your PC and check DirectX 12 Ultimate again.
4. Ensure Hardware Compatibility
Ensuring hardware compatibility confirms your GPU meets DirectX 12 Ultimate specifications. This step prevents performance bottlenecks, avoids feature limitations, and ensures ray tracing and mesh shaders work as intended on Windows 11. It also helps identify components that may need upgrading for optimal gaming performance. Look into the following section to see all that you need to verify to ensure hardware compatibility:
- Check your GPU specifications on the manufacturer's site for DirectX 12 Ultimate support.
- Ensure your CPU, RAM, and system meet recommended gaming or graphics requirements.
- Verify that your monitor and connections support high-performance features if needed.
- Remove or disable incompatible hardware that may block Ultimate features.
- Confirm system stability by testing basic graphics applications before enabling advanced features.
5. Verify in Supported Games
Verifying DirectX 12 Ultimate in supported games confirms features are enabled and functioning correctly. It helps detect configuration issues early and ensures you experience improved visuals and performance during actual gameplay. This step also allows you to fine-tune settings for the best balance of performance and graphics quality. Follow the guide below to learn how to enable DirectX 12 Ultimate in Windows 11:
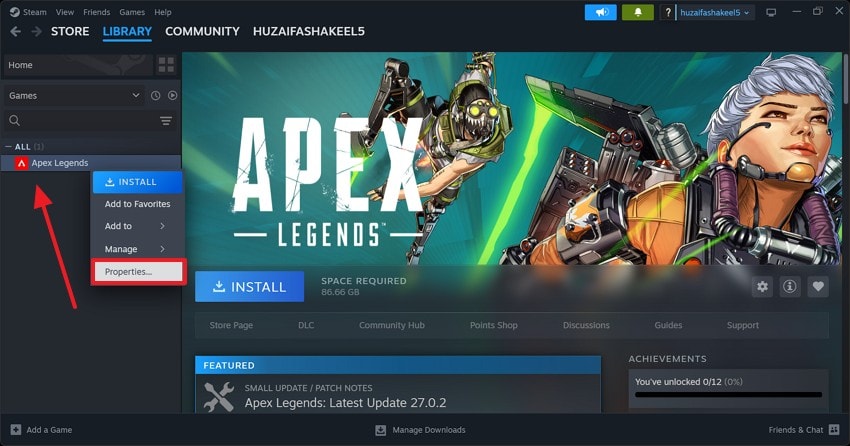
- Open Steam and right-click on the supported game to select the "Properties" option from the pop-up menu.
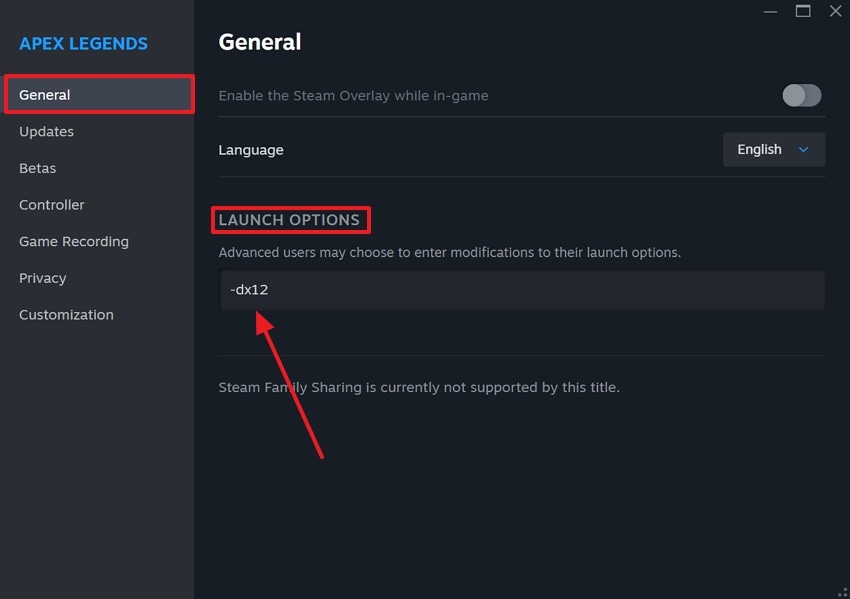
- Enter the "General" tab and type "-dx12" in the "Launch Options" field to enable DirectX 12 Ultimate for the game.
Part 3. Troubleshooting: DirectX 12 Ultimate Not Showing
If DirectX 12 Ultimate is not showing on your device, you must execute troubleshooting and proper diagnosis. The following section shares the top troubleshooting methods for Windows 11:
1. Recheck GPU Drivers
Rechecking GPU drivers is important because outdated or corrupted drivers can hide DirectX 12 Ultimate support. Updated drivers unlock advanced features, improve stability, and ensure proper communication between Windows 11 and your graphics hardware. Keeping your drivers current is the first step to unlocking all DirectX 12 Ultimate features. Use the instructions below to learn how to enable DirectX 12 Ultimate on Windows 11:
Instructions. Check your GPU model from the "Device Manager" and download its latest version from the company's official website.

2. Verify Windows Build
Verifying your Windows build ensures your system includes the latest DirectX components and updates. Older Windows 11 versions may lack required files, causing DirectX 12 Ultimate features to remain unavailable or undetected. Making sure your Windows build is up to date prevents compatibility issues with advanced graphics features. Follow the steps below to learn how to enable DirectX 12 Ultimate Windows 11:
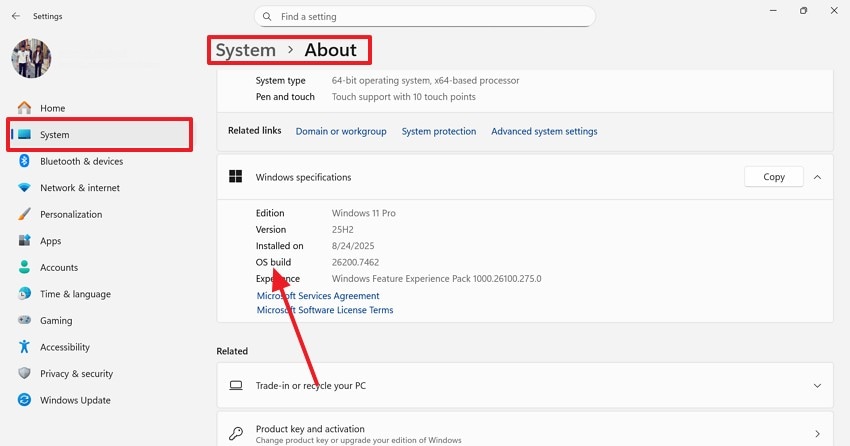
Instructions. Press the "Win + I" keys from your keyboard to open the Settings app. Select the "System" option from the left and choose "About" next. On reaching the Windows "About" page, note your "OS Build." From the left sidebar, enter the "Windows Update" tab and click "Check for Updates" to continue. If any updates are pending, download them on your device.
3. Confirm GPU Support
Confirming GPU support is essential because DirectX 12 Ultimate requires specific hardware capabilities. Even if DirectX 12 is installed, unsupported GPUs cannot access ray tracing, mesh shaders, or other Ultimate features. Knowing whether your GPU supports these features saves time and ensures you get the best visual performance. Continue with the guide below to learn how to enable DirectX 12 Ultimate in Windows 11:
Instructions. Use the DirectX Diagnostic Tool window to note the GPU details and the supported DirectX versions, following the previously discussed instructions. Confirm your GPU and CPU meet DirectX 12 Ultimate requirements on the manufacturer's website. If unsupported, consider upgrading hardware before enabling Ultimate features.
Conclusion
All in all, DirectX 12 Ultimate is a performance booster that is considered a necessity in the gaming community. However, some gamers could struggle to enable it on their devices. This article was a thorough guide on how to enable DirectX 12 Ultimate in Windows 11 through various methods. Before you change the GPU settings to enable it, you must recover your files to prevent crashes or errors.
To get this done, you can use Recoverit. This tool offers an AI-powered file recovery facility that retrieves files effectively and efficiently.
FAQ
-
1. What is DirectX 12 Ultimate?
DirectX 12 Ultimate is Microsoft's advanced graphics API for Windows 11 that enables next-gen gaming features. It supports ray tracing, variable rate shading, mesh shaders, and improved GPU efficiency. -
2. How do I know if my PC supports DirectX 12 Ultimate?
Open "dxdiag" and check the "Display" tab for your GPU and supported DirectX feature levels. Also, confirm your graphics card model on the manufacturer's website for official Ultimate support. -
3. Is it beneficial to recover files before changing graphic settings?
Recovering files before tweaking graphics settings is useful because it ensures important data is safe in case system changes or driver updates cause errors or crashes. You can use Recoverit to retrieve all documents to be on the safe side. -
4. Which tool is the best to retrieve files?
If you are looking for a file recovery tool, use Recoverit on Mac and Windows. This platform supports more than 10,000 formats for effective lost file retrieval.


