


A crashed Windows 7 system can be frustrating and potentially disastrous, especially if you lose important files or data. However, it is noteworthy that in most cases, one can restore the lost data even if the system has failed.
This guide will explain how to recover data from the crashed Windows 7 computer system after it has crashed. There are different ways of doing this, but some of the techniques we shall be discussing include using data recovery software, booting from a recovery disk drive, and accessing the computer from another computer's hard drive.
In this article

3 Different Crashes That Cause Data Loss
Every situation where data is lost is different. However, if you want to get back files from a computer that has stopped working, it's essential to know why the data was lost. There are three main reasons why crashes can cause data loss.
1) Windows OS crash

Blue screen errors: It is common to get a blue screen on your computer often, more so with newly released operating systems such as Windows 11. However, Microsoft keeps updating Windows, so crashes occur less often. Another example of a nuisance is bad computer software called malware, which mainly causes the computer to crash and results in data loss.
When a computer corrupts or becomes unresponsive, it implies that there is an issue with Software. Sometimes, using these components can harm the Software. Another study carried out by Dell and Mozy Enterprise revealed that software damage was among the top causes of data loss, ranking third.
Fortunately, recover data from Windows 7 computers is often trouble-free. Sometimes, when a computer crashes, you can switch it on again, and Windows starts loading. Then, you buy special Software to recover the lost data.
2) Computer crash

When your computer crashes or breaks, it suggests that something is wrong with one or more of its components. This can either cause you to lose data or contribute to the loss of data in another way. For instance, if the battery of your laptop goes off, say, while you are busy saving a file, your computer may shut down, and you might end up losing what you were typing.
A survey has revealed in this case that hardware issues are the leading cause of data loss at the workplace. This is also valid for regular computer users. However, there are measures that one can take to prevent the loss of data; despite this, a problem with the hardware may occur.
The first step is to ensure that the hard drive is functional. This means that if you have a problem with your computer, you can remove its hard drive and insert it into another computer to check on it.
3) Hard disk crash

It's important to know if your hard drive has failed or crashed. You're more likely to lose data if it crashes. Luckily, hard drives are usually pretty strong. A 2020 study showed that they only fail about 0.93% of the time.
Hard drives can crash because of physical problems or Software issues, such as logical errors or firmware issues. Sometimes, you can fix a corrupted hard drive at home, but it's essential to use good complex drive repair software.
How to Recover Data From Crashed 7 After Entering OS
Even if your Windows computer has crashed, you might still be able to get into it and save your data. Here are some ways to do this:
- Safe Mode: This is a unique way to start Windows that uses only the most basic programs. You can sometimes use Safe Mode to fix problems and access your files.
- Last Known Good Configuration: This is a backup of Windows settings that was saved before a problem happened. You can try this to start Windows and see if you can access your files.
- System Restore: This feature can undo changes made to your computer, which might help if a recent update or program caused the crash.
If you can’t get into Windows 7 data recovery, use data recovery software like Wondershare Recoverit to find and save your lost files. Let us explore the different methods to recover data from a crashed OS after entering OS.
Method 1: Attach the hard disk to another running PC

Here are the steps to copy data from a crashed computer.
- Open your laptop: Remove the cover to see the inside.
- Take out the hard drive: Carefully remove the hard drive.
- Put the hard drive in another computer: Connect the hard drive to a working computer.
- Start the computer: Turn it on and ensure it can see the hard drive.
- Copy your files: If the computer can see the hard drive, you can copy important files to a safe place.
Method 2: Restart the PC in Safe Mode
To start your computer in Safe Mode, you should do the following things:
- Turn off your computer.
- Turn it back on.
- Press F8 repeatedly before the Windows logo appears.
- Windows will ask you to choose an option. Select Troubleshoot.

- Under the troubleshoot select Advanced Options > Startup Settings.

- Choose "Safe Mode" or "Safe Mode with Networking" from the Advanced Boot Options menu by pressing number 4 or 5 or F4 or F5.

This will start Windows in safe mode, which can help you fix problems and access your files using the various tools as shown below.
Tool 1: Recover lost files using Windows File Recovery

Windows File Recovery is a free tool to help you find deleted files, even if you've emptied the Recycle Bin. It has worked on Windows 10 computers since 2014 and later. There are two modes: regular and extensive. Since your computer has crashed, you'll need to use extensive mode.
Here's how to use Windows File Recovery:
- Get the tool: Download Windows File Recovery from the Microsoft Store.

- Run it as administrator: Open the tool and choose "Run as administrator."

- Type the command: Enter a command like this: Winfr C: E: /extensive /n \Users\\Pictures\.JPEG /n\Users\\Pictures\.PNG. This will search for picture files in drive C's "Pictures" folder and save them to drive E.
- Wait for it to finish. The tool will search for your files. When it's done, you'll find a new folder called "Recovery_(date and time)" on drive E.
Tool 2: Recover lost files from File History

If you back up your files, you can quickly get them back.
- Go to Control Panel: Find "Control Panel" on your computer.
- Choose File History: Find and select "File History."

- Restore your files: Click "Restore personal files." You'll see a window where you can find and restore your files.
- Find and restore: Click the left arrow to find the files you want, and then click "Restore to original location" to restore them to their original location.
Tool 3: Restore lost files from Windows backup

Here's how to restore files using Windows 7 Backup and Restore:
- Start Windows: Click the Windows button to start your computer.
- Go to the Control Panel: Find and click "Control Panel."
- Choose Backup and Restore: Open "Backup and Restore."

- Restore your files: Click "Restore my files."
- Find your files: Use "Browse for files" or "Browse for folders" to find the files you want to restore.
- Choose a location: Decide where you want to save the restored files. You can keep them in their original location or move them.
How to Recover Data From Crashed Windows 7 Without Entering OS Using Recoverit
Recoverit is a powerful free recovery data software that can help you retrieve lost data from a crashed Windows 7 system even without being able to access the operating system. Here's a step-by-step guide on how to use Recoverit for this purpose:
- Download and Install Recoverit

- Select System Crashed Computer

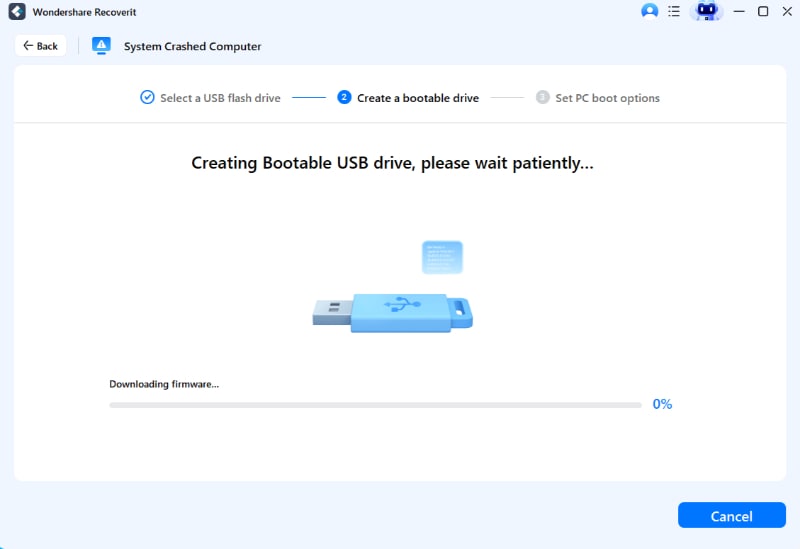
- Create a Bootable Drive
- Recover Data from Crashed Windows 7

- Preview and Recover Files

Download the Recoverit data recovery software from the official website and install it on a working computer.
Open Recoverit on a working computer and select System crashed Computer and then click on Start.
When you opt to create a bootable USB drive, a warning message regarding the formatting of the USB flash drive will appear. Therefore, it’s essential to ensure that you have backed up your important files before proceeding with the formatting.
Click the "Data Recovery" button to initiate a deep data recovery process of the drive.
Preview the recovered files once the scan is complete. Select the files you want to restore and click the "Recover" button to save them to a safe location on a different drive.
Tips to Prevent Data Loss from Windows System Crashes
- Regular Backups: Create regular backups of your important files to an external hard drive or cloud storage.
- Keep Software Updated: Ensure that your operating system and software applications are up-to-date with the latest patches and security updates.
- Protect Against Malware: Use reliable antivirus and anti-malware Software to protect your system from threats that can cause data loss.
- Monitor System Health: Regularly check your system's health for signs of hardware failures or performance issues.
- Unplug Devices Safely: Always use the "Safely Remove Hardware" option before disconnecting external devices to prevent data corruption.
- Avoid Sudden Shutdowns: To avoid abrupt shutdowns, use the "Shut Down" option or wait for the system to finish saving changes before turning it off.
Conclusion
Recovering data from a crashed disk recovery Windows 7 system can be challenging, but it's not impossible. By following the steps outlined in this guide and utilizing tools like Recoverit, you can significantly increase your chances of successfully retrieving lost data.
Remember, prevention is critical—regularly backup your important files to avoid the stress and potential financial loss associated with data loss. By adopting best practices for system maintenance and protection, you can minimize the risk of future crashes and ensure the safety of your valuable information.
FAQ
-
1. Can I recover data from a wholly crashed Windows 7 system?
Yes, it's possible to recover data from a crashed Windows 7 system using data recovery software like Recoverit, even if the system is unresponsive. -
2. How long does data recovery take?
The time required for data recovery depends on factors such as the drive's size, the extent of the damage, and the complexity of the recovery process. It can range from a few minutes to several hours. -
3. Can I recover deleted files from the Recycle Bin if it is emptied?
You can recover deleted files from the Recycle Bin, even after emptying them, using tools like Windows File Recovery or Recoverit.
 ChatGPT
 Perplexity
 Google AI Mode
 Grok
Grok


