How to Fix It Looks Like Windows Didn’t Load Correctly?
"It happened just after I upgraded my Windows 8.1 to Windows 10 Home. Every time I shut down my PC, while starting, sometimes I get the recovery error message: it looks like Windows didn't load correctly. Turning off my PC and restarting it solves the issue for the time being. But I need a permanent solution.
Why does it Appear?
It actually boils down to three possible reasons why your Windows couldn't load correctly. Down below is a list of all the causes and their common symptoms.
1) Blue Screen of Death
As much dramatic it might sound, it's nothing more than just file system corruption. Having corrupted files within the file system, creates the information unreadable. This is common among file formats such as documents, pictures, and videos. The same goes for Windows system files. Under such circumstances, the computer displays a blue screen error.
2) Compromised File Integration
If you want to fix "it looks like windows didn't load correctly", understanding the root is very important. To a certain extent, even we are also responsible for this particular cause. The majority of the times the file system is compromised while turning off the PC, even when the machine was in the middle of writing any crucial data.
3) Corrupted or Missing BCD
This is yet another major problem that can raise the issue. This is caused by either the BCD goes missing or just gets corrupted. Sometimes that happens either during a power outage, disk writing error, or any boot sector virus. Trying to manually configure the BCD can also cause the same problem.
How to Fix "it looks like Windows didn't load correctly" on Your PC?
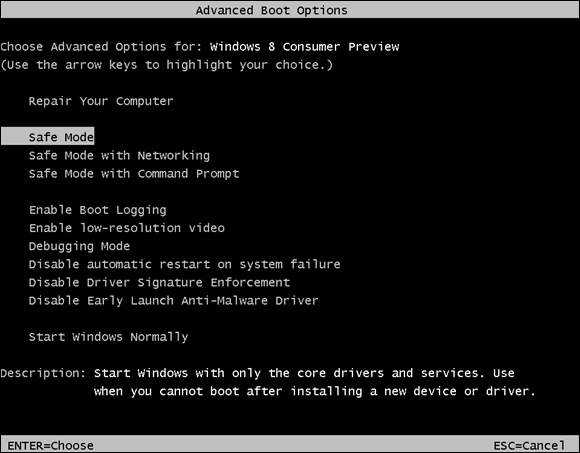
Solution 1: Boot into Safe Mode
There is no point in arguing that using safe mode is by far the safest and most promising option when it comes to troubleshooting your pc. Safe Mode only allows Windows to load all the essential system parts. So in one way or another, it can actually be beneficial to determine the root of what exactly is not functioning properly. Down below is a detailed step on how you can actually boot your PC into safe mode. Just bear in mind, once you get everything right, you can always load your windows normally.
If you want to boot your machine into Safe Mode as Windows didn't load correctly, this is by far the easiest step of all.
Step 1 - First of all, turn on your computer, and as soon as the manufacturer's logo appears, turn it off. Make sure to repeat the step at least three times.
Step 2 - Now, you will be redirected into the "Advanced Recovery Option".
Step 3 - Head over to "Advanced Options" > "Troubleshoot" > "Startup Settings" > "Restart".
Step 4 - Pressing the F4 will enable you to run into Safe Mode
Step 5 - You can even use Safe Mode with Networking by pressing F5
Step 6 - Now, head over to the system and give your machine a quick diagnosis.
Solution 2: Turning Off Hybrid Sleep
Bear in mind that Hybrid Sleep is not applicable if you have already disabled sleep or hibernation in your Windows Machine. To properly disable hybrid sleep, make sure to follow the steps down below:
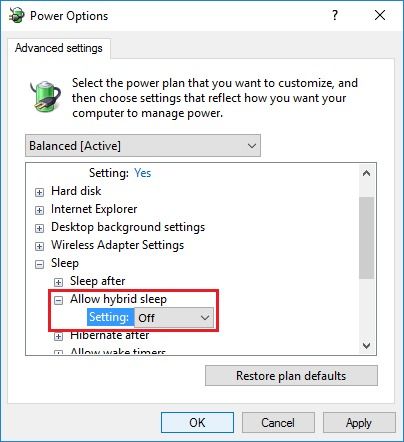
Step 1 - Head over to the Control Panel and select the power settings. If you are using Windows 10, head over to the start menu and select "Power Options."
Step 2 - Select "change plan settings."
Step 3 - Head over to "change advanced power settings."
Step 4 - Under the "Sleep" option, you will find "All hybrid sleep."
Step 5 - All you need to do is change it to "off."
Step 6 - Select "OK" or hit enter
Solution 3: Run SFC (System File Checker) on Your Computer
If it looks like windows didn't load correctly, one of the best resorts is to head over to SFC (System File Checker). This, in turn, enables Windows to scan and restore to the point where everything worked seamlessly. Bear in mind, all the steps down below are very easy to understand and apply.
Running the System File Checker Tool
Step 1 - Head over to the start manager and search for "Command Prompt."
Step 2 - Make sure to type the following command and hit enter
DISM.exe /Online /Cleanup-image /Restorehealth
It is important to understand that running this command is only possible if your Windows Update client has not been corrupted.
Step 3 - DISM.exe /Online /Cleanup-Image /RestoreHealth /Source:C:\RepairSource\Windows /LimitAccess
Make sure to replace the C:\RepairSource\Windows with the right location of repair.
Step 4 - Lastly, use the following command:
sfc /scannow
This command enables Windows to check even the protected file systems. Neither less to say, it is going to change all the corrupted files within the system with their cached copies. You need to have patience. Don't close the command prompt window until you see that the verification process is completed at 100%. Make sure to understand that the entire process is completely automated, and it doesn't require anything than manual instructions.
Solution 4: Do a Clean Install of Windows 10
It is imperative to understand that if nothing works out for you, the best resort is to actually revert to a clean Windows 10 installation. You would be surprised to know that mastering the ability to install Windows on your own is a great life-changer. Down below is a step by step guide on how you can actually reinstall if Windows couldn't load correctly:
Backing Up
It is always one of the best practices to keep a backup of your current Windows. During the installation process, if anything goes wrong, you can always revert to the same. There is also an option to back up to one drive.
Step 1 - Head over the "Settings"
Step 2 - Under the "Update & Security," click on "Backup."
Step 3 - Select "Back up files to OneDrive."

Creating a Bootable USB
Step 1 - Head over to the Windows 10 download page
Step 2 - Install the "Media Creation Tool"
Step 3 - Select the option "Create installation media (USB flash drive, DVD or ISO file)"

Step 4 - Select Next, choosing all the right options, and hit "Finish."
Installing Windows 10
After the initial process of creating bootable USB is done, Windows 10 installation is very straight forward.
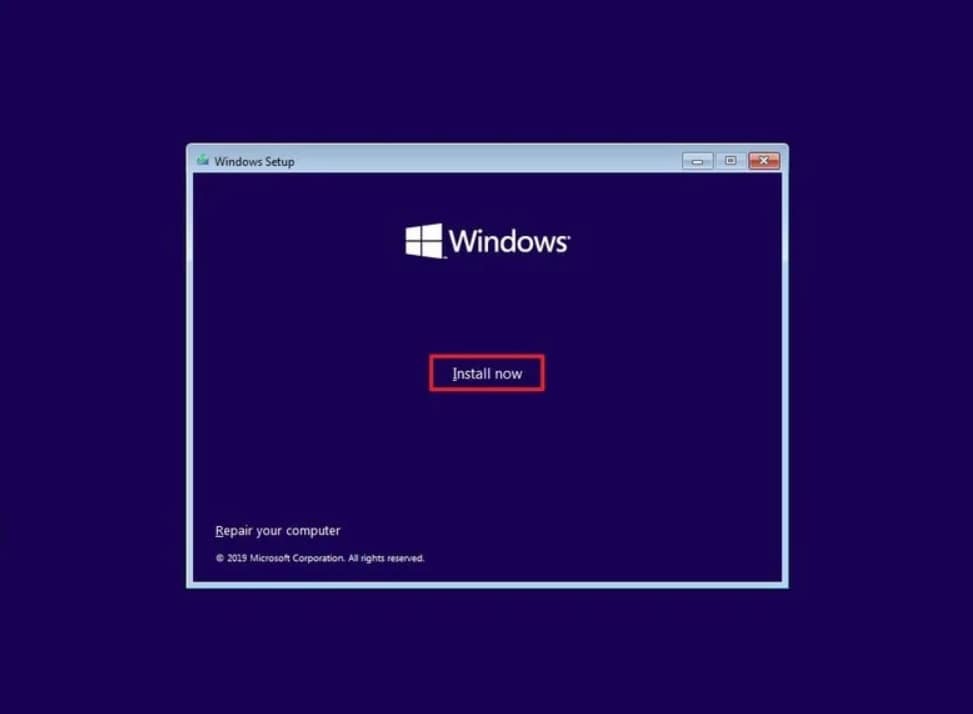
Step 1 - Start your PC with Windows 10 USB
Step 2 - As Windows setup pops, select "Next."
Step 3 - After you have set up your language, hit the "Install Now" button

Step 4 - Choose the right partition and get along with installation
How to Recover Data from the Computer When all Solutions Fail to Fix the Issue?
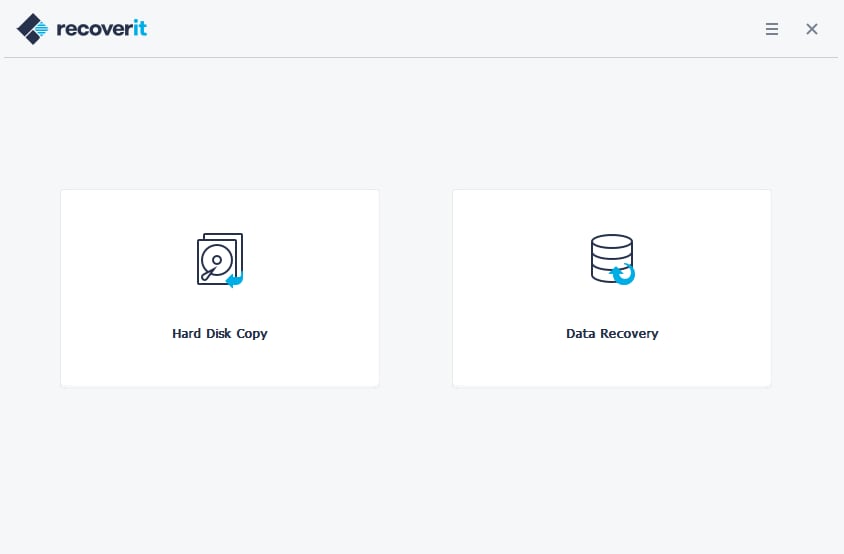
It can really get tedious at times when you are unable to find any reason, and your Windows stops working out of the blue. As we have stated throughout the article, if you are having any issue with booting, it can actually lead to loss of data. Using Recoverit Data Recovery is a great way to keep your data intact. Neither less to say, it is completely free to download. Down below is a detailed overview of how you can recover your data back:
Step 1 - First of all, select the data recovery mode after launching Recoverit. Select the "Recover from Crash Computer" if your Windows 10 is having a hard time to boot.
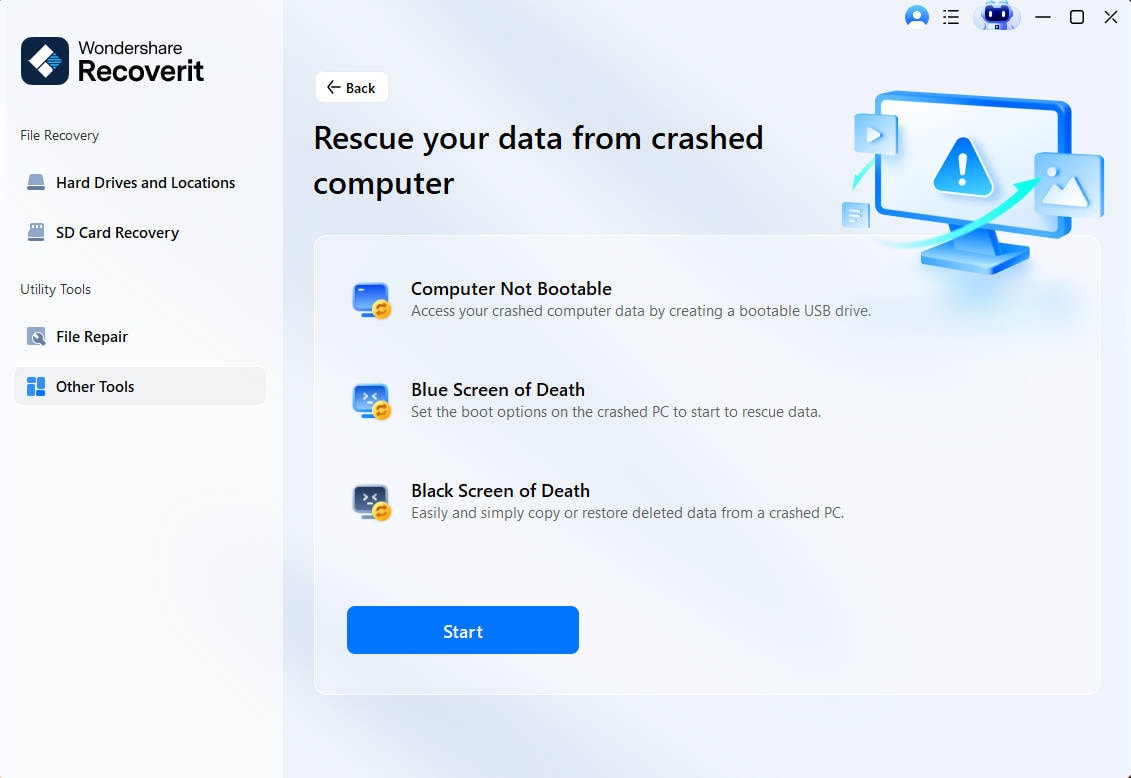
Step 2 - Now, select a mode to create a bootable drive. You can either opt for a USB bootable drive or even go with a CD/DVD drive. Select "Create" and choose "Format now."

Step 3 - Then you will be greeted with a pop-up to format the drive.
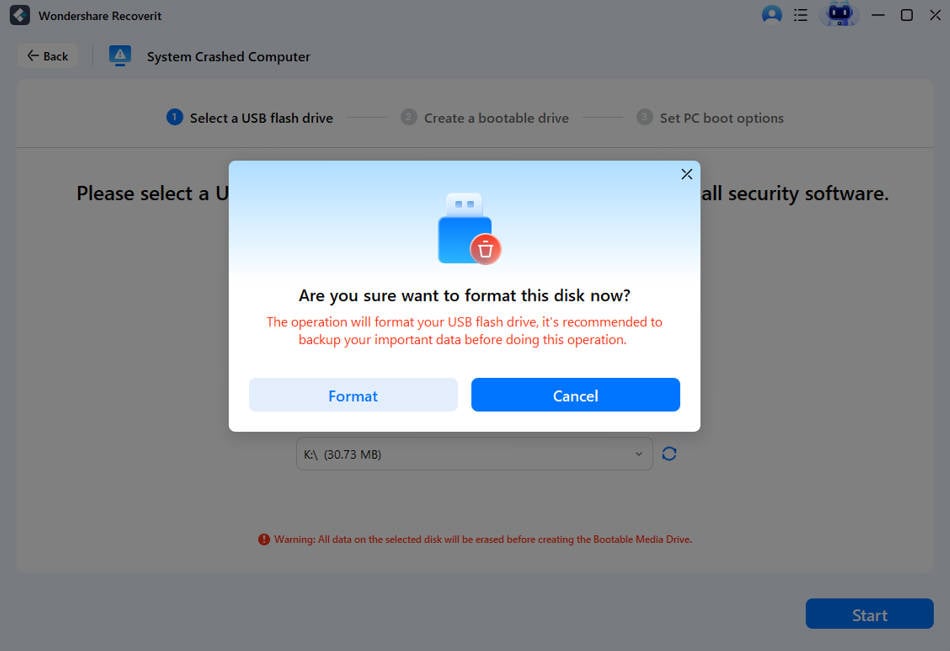
Step 4 - Once Recoverit starts creating the bootable drive, remember, there is no turning back from the same.
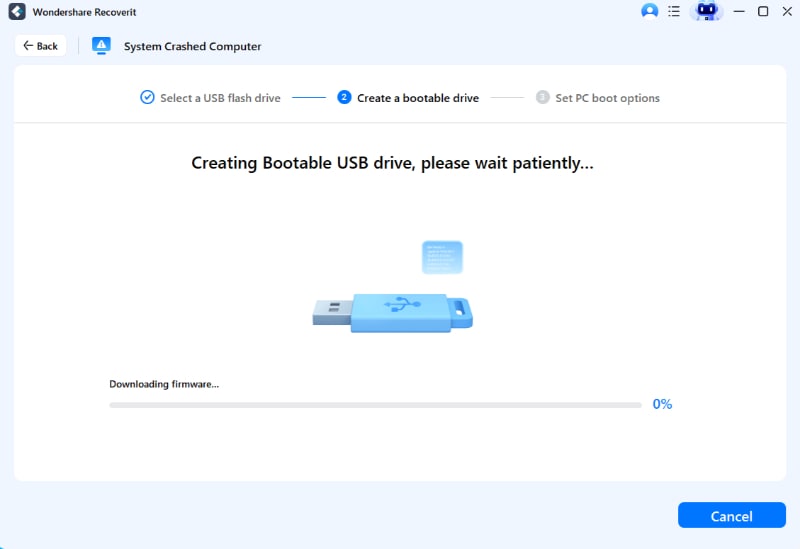
Step 5 - After the bootable USB is created, you will be prompted. In fact, you can even find a complete guide at the end on how to recover your data.
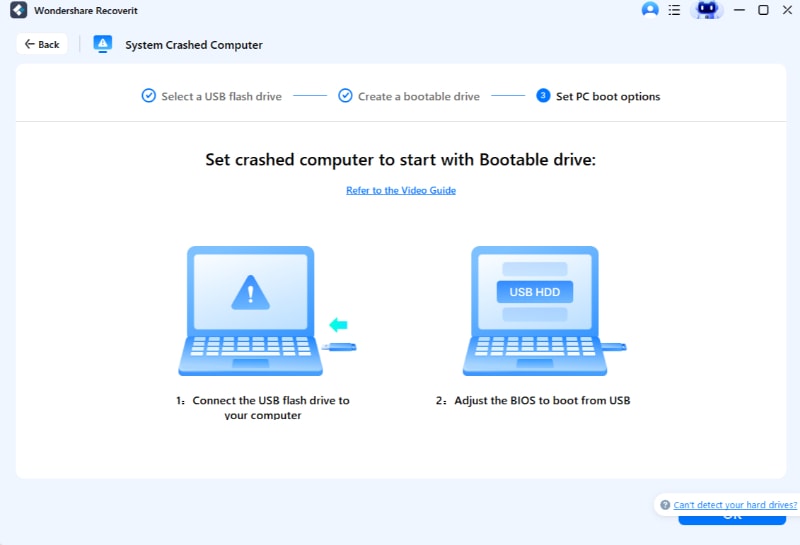
Change the boot sequence in BIOS to boot from the bootable USB. Check out how to set the computer to boot from a USB drive.
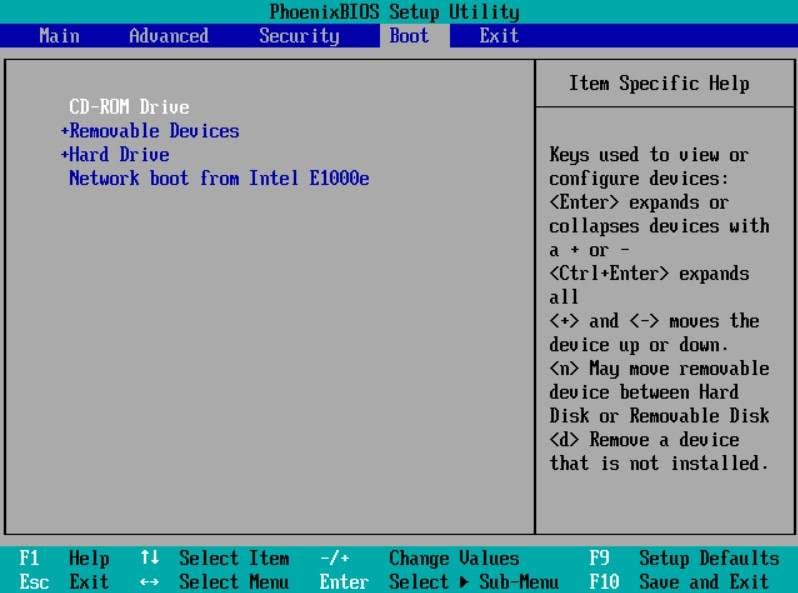
After you have successfully booted the crashed computer, you can recover data with Recoverit.
Video Tutorial on How to Recover Lost Files on Windows
Conclusion
We covered all about Windows didn't load correctly issue. Make sure to go through our step by step guide to fix the issue. Further, including, all the steps are properly curated in such a way that you will clearly understand them. But, always note that there is always a potential risk of losing your data. So, if you are looking forward to the safest way to fix the error, we would always recommend you to go with Recoverit Data Recovery, It is completely free to use and the easiest of the lot.
Computer Troubleshooting
- Win System Crash
- Windows Tips
- Computer Problems
- Blue Screen Errors


 ChatGPT
 Perplexity
 Google AI Mode
 Grok
Grok


Theo Lucia
chief Editor