How to Fix Windows 10/11 Installation Has Failed
This error occurs when a user is trying to install a Windows update. This error does not come with a code or a clue as to how to fix it. However, solutions will be provided on how to fix the Windows 10/11 installation failed error.
The Windows Error "Windows 10/11 installation has failed"- Why Does It Occur?
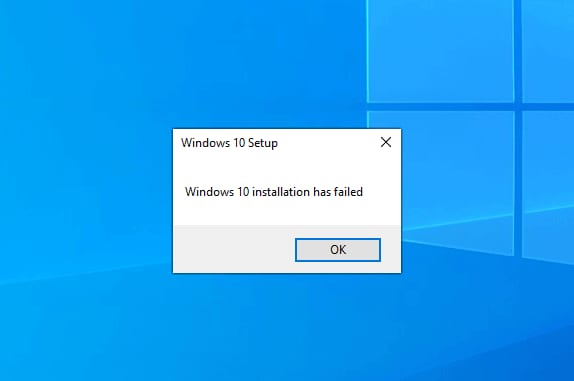
The following are the reasons why the Windows 10/11 installation has failed error occurs:
- A Running Program: If there is a program or service that is still running when you try to do the installation, this error can emerge. Also, a program that has issues within it can interrupt the installation process of Windows and cause the error.
- Double Copying of Files: When performing Windows installation, there is a possibility that a bug found within your Windows Media Creator can make it to copy some files twice. This duplicity is a source of the Windows 10/11 installation failing.
- Boot Manager Corruption: Any errors or issues found in your boot manager could cause this Windows error to occur. Note that the Boot Manager plays a direct role in your Windows installation, as well as updates.
- An Improper File Extension: The file extension (.exe) of your system files plays a great role in the smooth installation and running of your Windows. Thus, if the extension of a file is not correct, it will cause a conflict that will lead to this "Windows 10/11 installation has failed" error.
4 Solutions to Fix the "Windows 10/11 installation has failed" Error
Solution 1: Run a Clean Boot Installation
Several programs can interfere with Windows installation. To ensure that none of these programs cause your Windows installation to fail, you need to carry out a clean boot of your system.
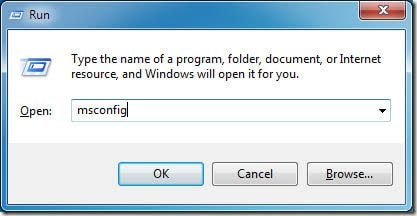
- Open Windows "Run" dialog box.
- Type the instruction: MSCONFIG. Press "OK"
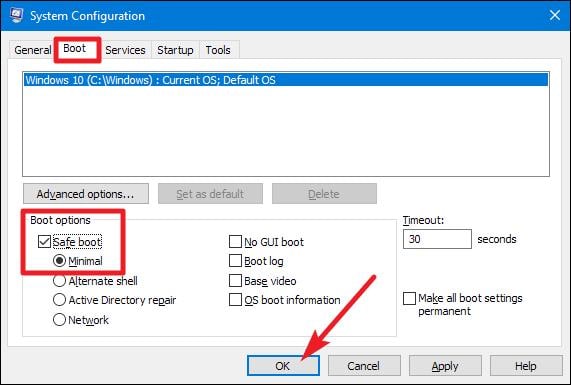
- Tap on the "Boot" option. If the Safe Boot button is checked, click to uncheck it
- Go to the "General" tab and choose the option "Selective startup".
- Ensure the "Load startup items" box is unchecked by clicking to clear it
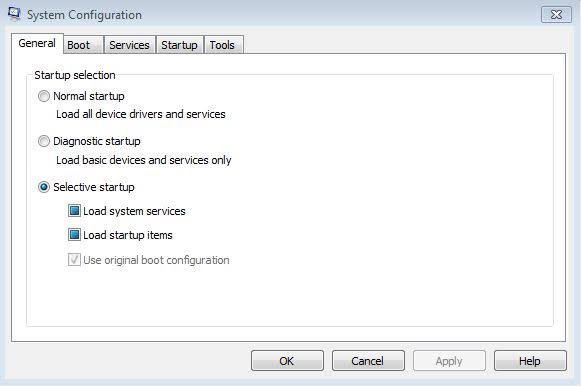
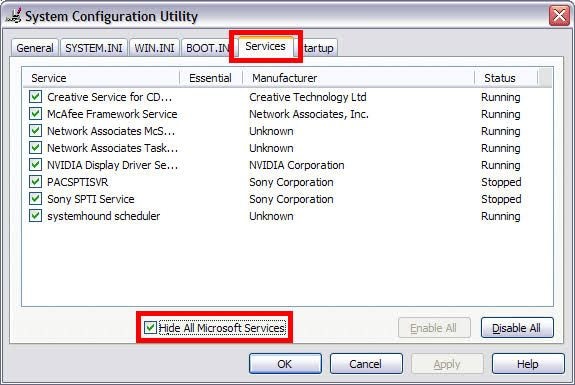
- Tap on "Services".
- Select "Disable all" after you have checked the box beside "Hide all Microsoft services"
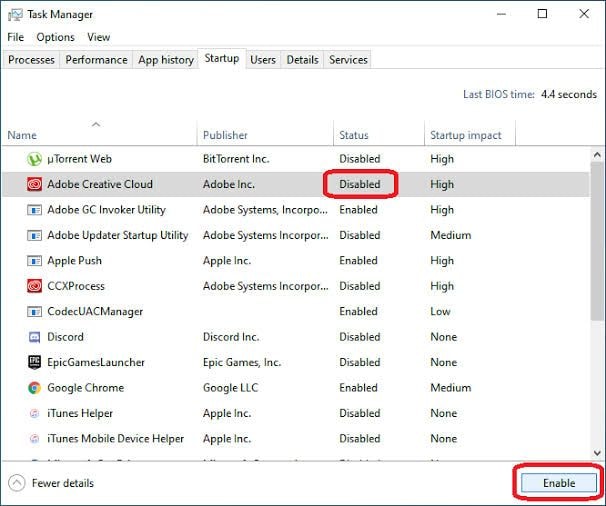
- Move to "Startup" on the menu tab and select "Open Task Manager". Now right-click on all the items on the list and for any item that has been enabled, select "Disable" to change it.
- Enable the startup items individually and reboot your PC.
Solution 2: Create Installation Media and Setup
Before carrying out this solution, first, follow the guidelines below to ensure everything is in check:
- Sign up for the upgrade of Windows 10/11 if you haven't already done that. Opt for the free version by the way.
- Apply the solutions in this section from your Administrator account
- The upgrade has to be installed. This is so that you can be converted to Windows 10/11 license if your Windows is 7/8/8.1 license.
- Free up enough space on your hard drive, depending on the size or capacity of your data. The rule of thumb is to have at least 50% free space on your hard drive
Now, move on to the fix proper:
- Ensure you can view files that have been hidden after the solution one above. Go to the C:\$Windows. ~BT folder. If the BT folder reads as WS or the like, delete that too.
- Go to the manufacturer's website of Windows and download the Media Creation Tool. Choose either the 32-bit or 64-bit version; it is more advisable to go for the 64-bit option.
- Open the program and select "Create installation media for another PC". Note that this option is to be chosen since you will be doing this in a perfectly working PC, unlike yours that has developed a problem.
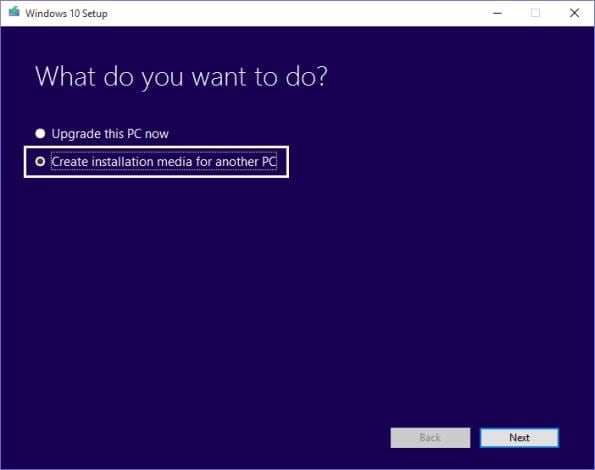
Save your Windows 10/11 version as an ISO file and ensure it is the correct version you have upgraded to.
Solution 3: Solutions by Microsoft Community Center
The following pre-requisite tasks should be followed before trying the solutions that come after:
- Note that when you are making such an important change to your computer like updating the OS, a backup must be done for all your important files
- Uninstall or disable any antivirus program you have installed on your computer. This is to ensure nothing interrupts your Windows installation
- Restart your computer a couple of times.
Now, do the following:
- Disable General USB Devices such as Smart Card Reader.
- Take note of these if your hard disk is SCSI: get the available drivers for your storage device on a thumb drive. Also, ensure this is connected. When doing your Windows 10/11 setup, select the Custom Advanced Option, load the correct driver for the drive using the "Load Driver" command.
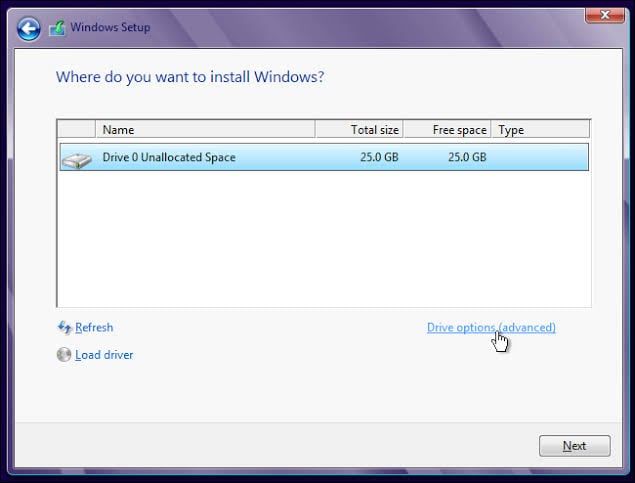
- If you still fail at trying to set up, then try using an IDE based hard disk instead of SCSI.
- Clean boot your system and restart it.
Solution 4: Uninstall the Language Pack
Users have discovered that the error occurs if the language pack of the previous Windows iteration differs from the localization. Follow these steps to uninstall the language pack:
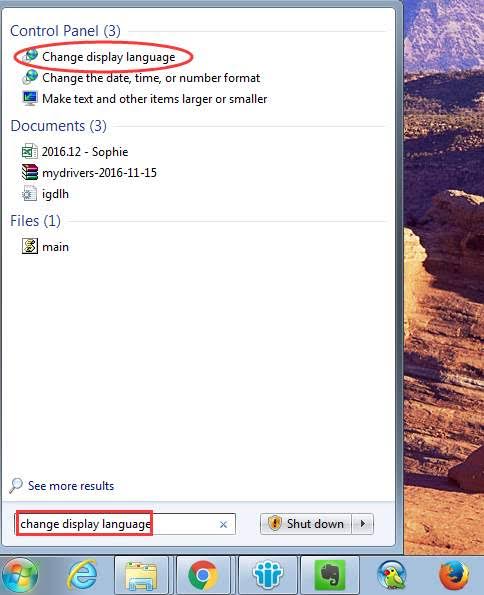
- Go the search bar of Windows and input "change display language". When you see this option, launch it.
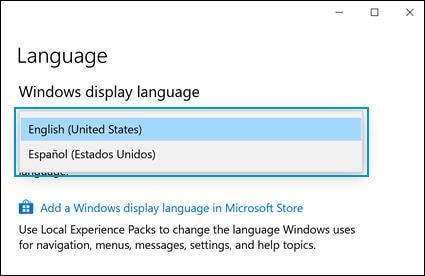
- Click "English (US)", then apply the changes you made
- Return to the search bar and type "Uninstall display language". When you see the option, click to open the "Install or uninstall display languages" tab
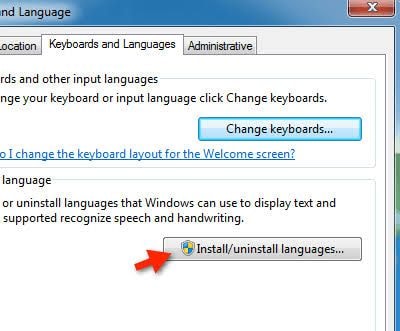
- Select "Uninstall display language"
- Delete the language that served as an alternative. Reboot your computer.
Also, take note of the following:
- Disconnect all peripherals such as USB keys, printers, gaming controllers, external hard disks, and other non-essential devices.
- During the upgrade, when you are asked to pick between keeping only your files or both your file and programs, choose to keep only your files. With this, you can avoid any issues of incompatibility that may arise between your system and third-party apps.
Step-by-Step Guide on Windows 10/11 Installation
Frequently Asked Questions about Windows 10/11 Installation
- How do I fix Windows 10/11 won't install on my computer?
Fix the errors in your drivers by updating them before carrying out a Windows 10/11 installation. Ensure your PC is not disconnected from the source of power supply. Finally, run a Windows 10/11 troubleshooter.
- Why should I upgrade to Windows 10/11?
It has been generally accepted that Windows 10/11 is the safest Windows OS. This is looking at system versions from a security point of view. Also, it is a version undergoing constant development which results in new great features coming out monthly.
Bonus Tip!
A bonus tip for you is the use of Deployment Image Servicing and Management (DISM), an inbox tool built-in Windows. This tool works as a set of commands that make use of Windows Update to provide the necessary files for fixing any corruption in your system.
How to Recover Data from Computer When All Solutions Fail to Fix the Issue?
After trying all the solutions in this article, if you still cannot fix the Windows 10/11 installation has failed error, then you should consider getting a new system. First, you need to retrieve all the files that are in the system with the error. There are many tools available online for this purpose but a tool that has been tested and trusted is provided for you: that is the Recoverit Data Recovery tool.
Recoverit is a professional tool with which you can recover lost data of all formats such as audio, video, zipped images, and other documents. With Recoverit, you can get back files that you lost to system crash, errors, virus infections, formatting, or deletion.
You need to install the Recoverit Data Recovery tool and use it to create a bootable media with which you can recover your lost files.
Step 1: Create a Bootable Drive
Launch Recoverit and select the option "System Crash Data Recovery"
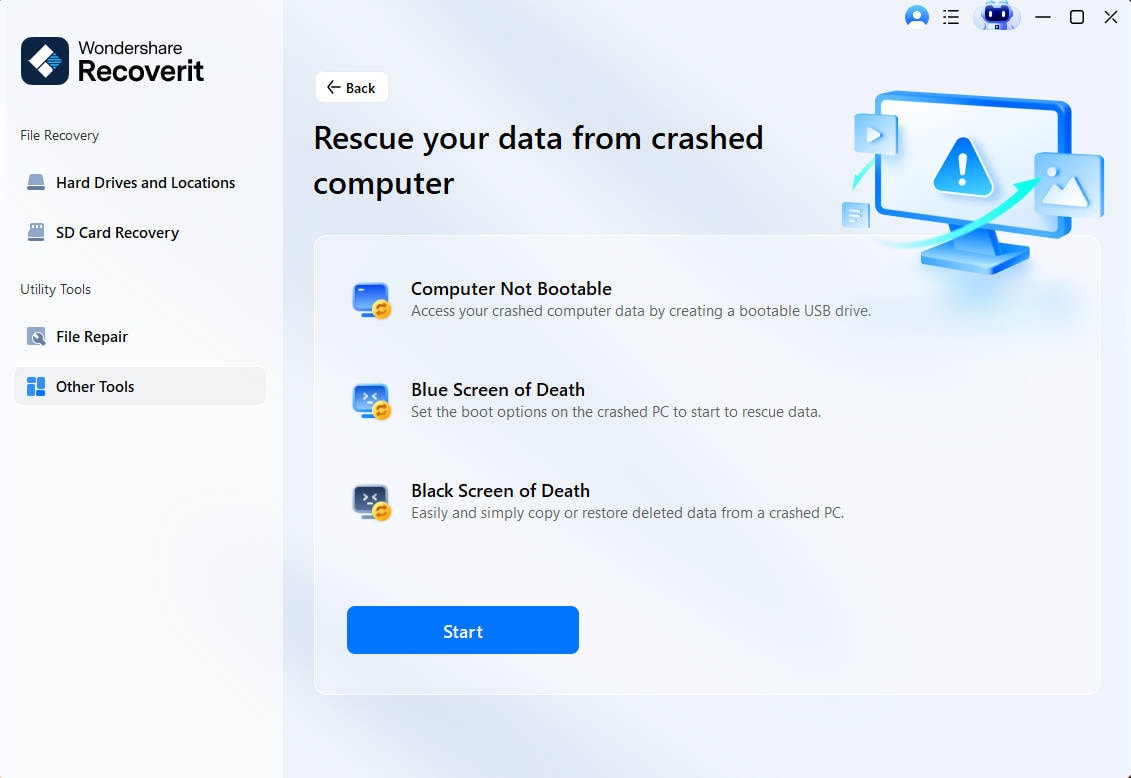
Select the appropriate drive you will use to create the installation media, then click "Create"

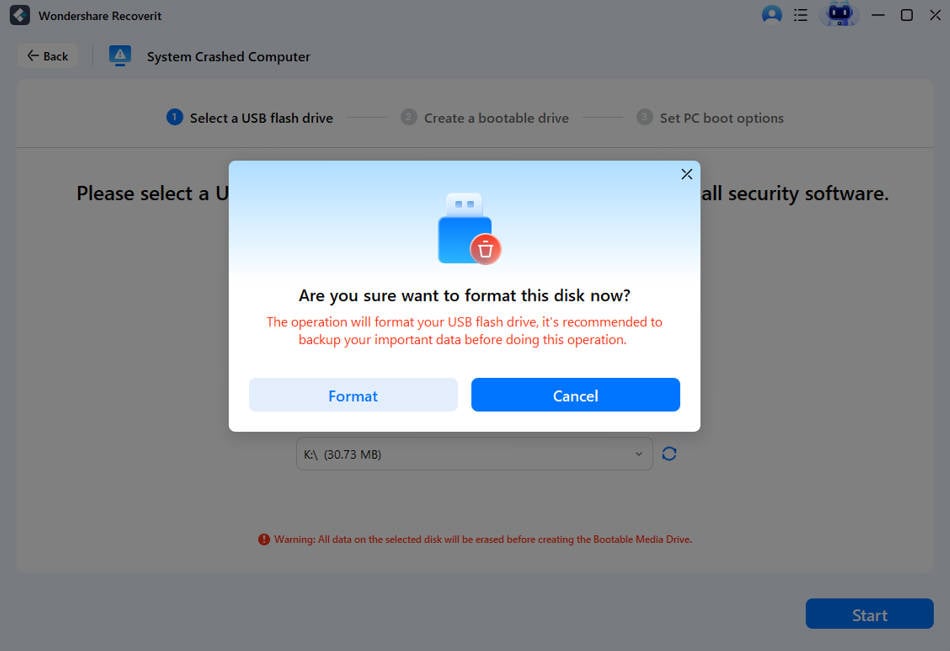
Back up all your drive files when you see the message prompting you to do so. Select "Format now" to clear the drive.
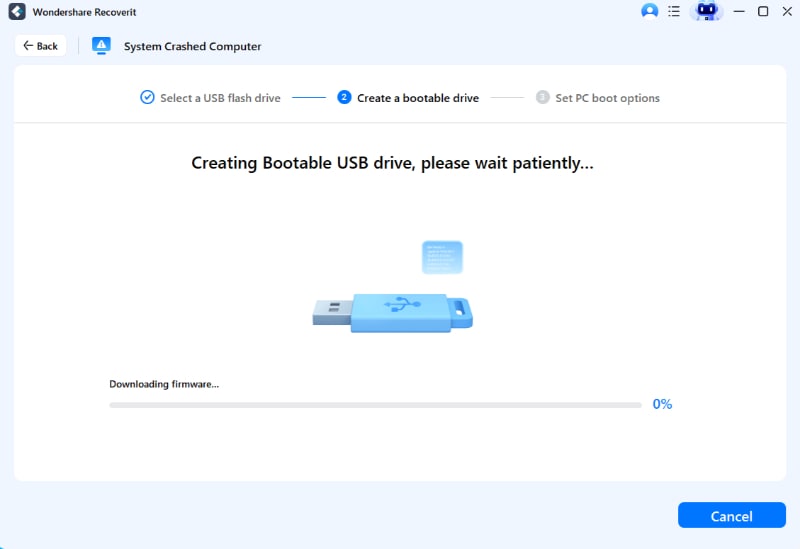
Recoverit will begin creating your bootable drive.
On completion of the creation, you will get three basic steps on how you can recover your lost files using Recoverit.
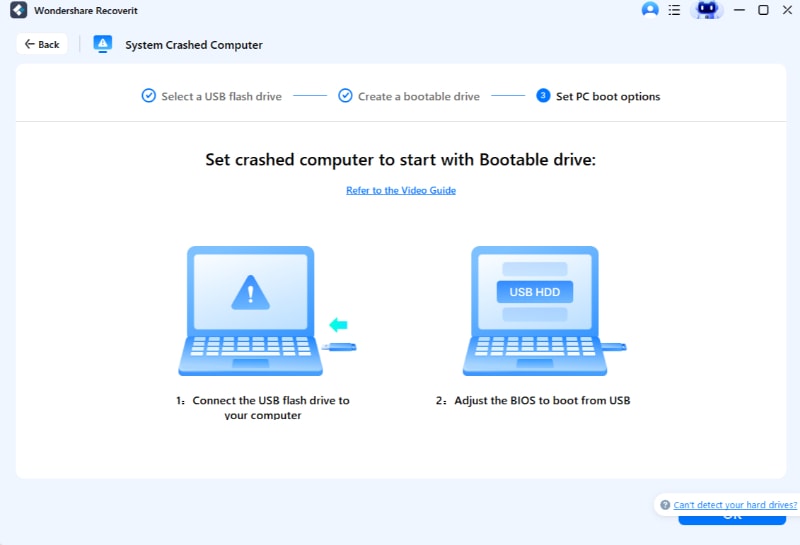
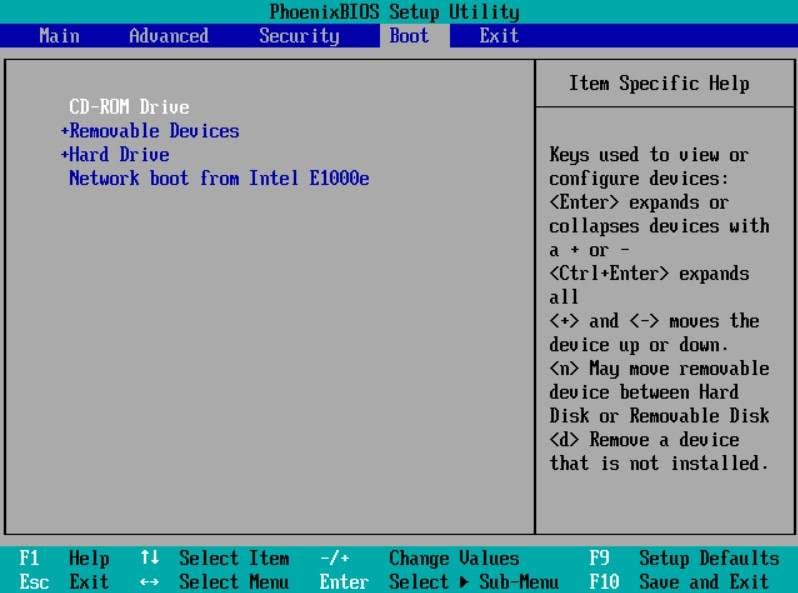
Launch into your system BIOS setup using the key suggested to you by your Windows, then change the boot order to boot from your installation media. For more details, check out how to set the computer to boot from a USB drive.
Step 2: Recover Data from Unbootable Windows 10/11
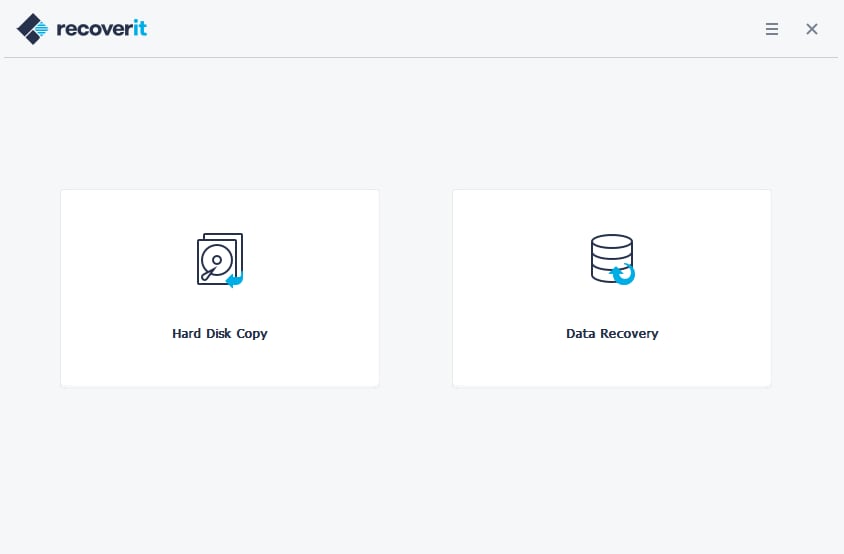
After the computer boots from the created installation media, launch Recoverit and either copy the files from your hard disk or simply recover straight from your Windows 10/11 using the steps provided in the step above.
Why do People Experience this Issue for Different Reasons?
- If there are corruptions in the system, it will be difficult to perform an update of both Windows and the service packs. Such errors are most likely to be found in the system files.
- The computer gets restarted for some reason or the user gets signed out. If this happens, the upgrade process will definitely be interrupted; thereby causing the Windows 10/11 installation to have failed error.
- For users who don't have enough free storage space in their System Reserve partition, they will not be able to install the upgraded Windows 10/11.
Computer Troubleshooting
- Win System Crash
- Windows Tips
- Computer Problems
- Blue Screen Errors


 ChatGPT
 Perplexity
 Google AI Mode
 Grok
Grok


Theo Lucia
chief Editor