
 TL;DR:
Synology Virtual Machine Manager (VMM) allows you to deploy Windows, Linux, and vDSM virtual machines directly on your NAS hardware, provided you use a compatible "+" series model with sufficient RAM to handle the specific operating system loads.
● Creating a virtual machine requires you to first upload your installation ISO or vDSM file into the VMM Image section, and Windows deployments specifically require downloading and installing the Synology Guest Tool ISO.
● The VMM hypervisor operates on two licensing tiers: a Free version for basic setups and a Pro version for business environments that requires purchasing an annual 3-node or 7-node pack license.
Ask AI for a summary
 ChatGPT
 Perplexity
 Gemini
 Claude
 Grok
Grok
Did you know that you could create your DS220+ virtual machine? That’s correct – Synology NAS can host a vDSM without breaking a sweat. Even better, it can support any distro and most Windows versions. However, installing a virtual machine (VM) on Synology NAS could be more straightforward.
To help you out, we’ve created a detailed guide for running Windows, Linux, and DSM on Synology NAS using the most convenient tool for Synology users – the Synology Virtual Machine Manager (VMM).
What Is Synology Virtual Machine Manager?
Synology Virtual Machine Manager (VMM) is Synology’s own hypervisor. In virtualization, a hypervisor helps isolate virtual machines from each other and the host, as well as manage the computing resources of the host device – in this case, Synology NAS.

In simpler terms, Synology VMM allows you to run virtual machines on your Synology device.
That’s exciting news, but it comes with fine print. Before we jump to the installation process, we believe it’s important to mention this deal’s essential requirements and limitations. Here’s everything you need to know about Synology VMM before downloading the app.
You may also be interested in: What is ESXi DataStore, and How to Create a Datastore in ESXI?
Types of VMs You Can Run Using Synology VMM
The question on everyone’s mind is:
What kind of VMs can you set up and run using Synology VMM?
Synology VMM enables you to install Windows, Linux, and Virtual DesktopStation Manager (DSM) virtual machines on your Synology NAS. But remember, Synology VMM works only on behalf of your NAS device. Don’t expect it to do something that your hardware can’t.
In theory, Synology NAS should be powerful enough to host high-maintenance virtual machines such as Windows. Things are slightly different in practice. While most Synology NAS models can run Linux without as much as a hiccup, Synology virtual machine on Windows 10/11 is a heavier burden to bear.
If you want to install Windows 10/11 VM on your Synology NAS, don’t forget to check your device for compatibility first. If you’ve already tried to run it and failed, it might be that your model isn’t compatible or that you need to update it to the latest software version.
Running Multiple VMs on a Synology NAS Device
You found that your device can run Windows? Great!
However, what if you want to install multiple virtual machines?
You can run multiple VMs on your Synology NAS if the model’s RAM allows it. If you know from the start that one VM won’t be enough, do your math to make sure there’s enough space for every VM you’re planning to install – and that they are all compatible in the first place.
Synology NAS Model and VMM Compatibility
Speaking of compatibility, let’s mention another potential problem.
If your Synology NAS is less powerful than the “+” lineup, you won’t be able to run VMM at all. You can solve this dilemma by checking Synology’s official VMM compatibility page.
Virtual Machine Manager Plans & Licencing
Synology VMM offers two tiers – Free and Pro.
Both tiers can be helpful to you in a home lab environment. However, business and enterprise users would benefit from an upgrade.
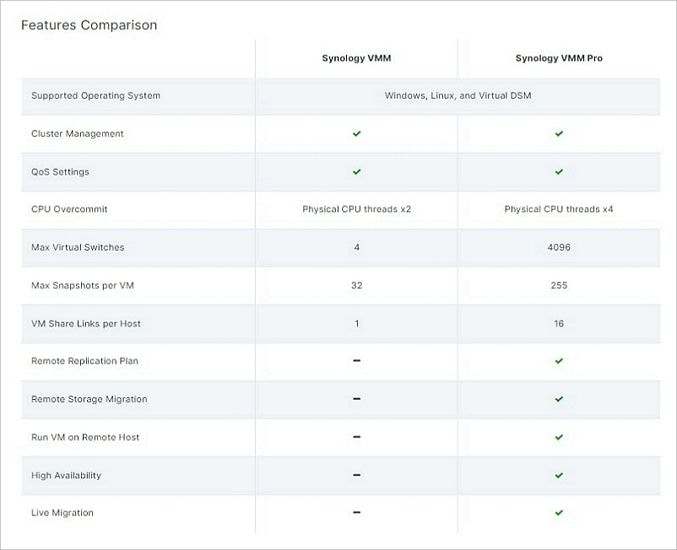
If you go for the Synology VMM Pro tier, you’ll choose between a 3- or 7-node pack. Whichever you pick, you should know that the Pro tier requires licensing and that both node packs are valid for twelve months. You can try the Pro tier for free for thirty days.
How To Install Synology Virtual Machine Manager
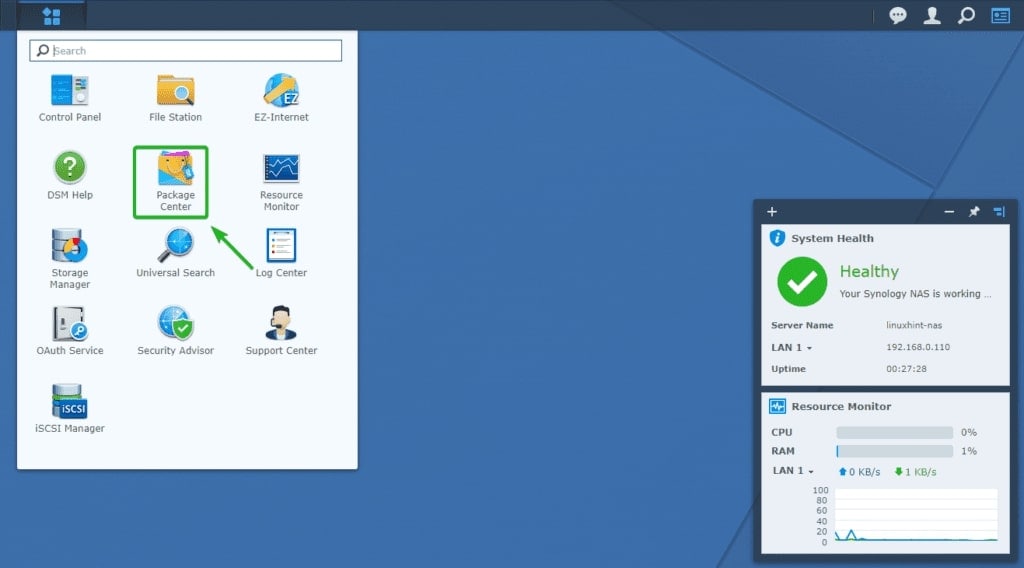
Installing Sinology’s Virtual Machine Manager is a piece of cake – assuming your device can run it. Another quick way to check whether your Synology NAS is compatible with VMM is to find the app in the Package Center. It won’t be there if your device can’t run the app.
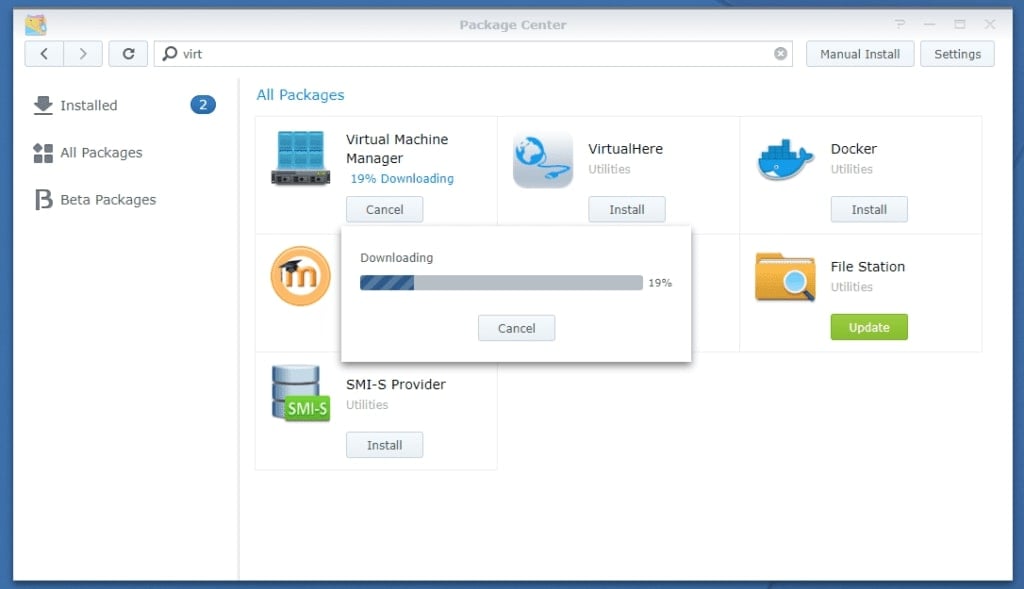
- Step 1: Open the Package Center.
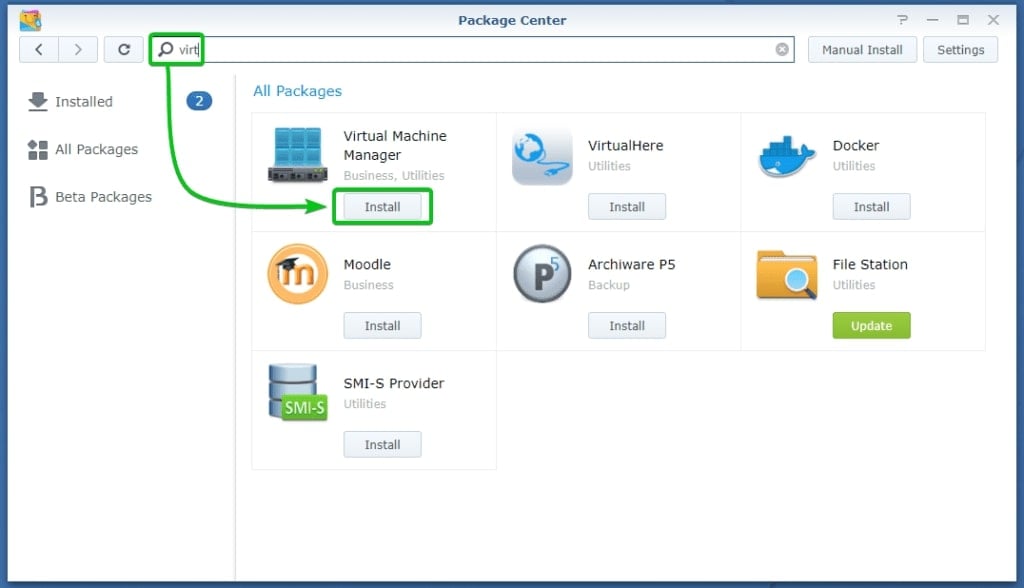
- Step 2: Find the Virtual Machine Manager and click the Install button.
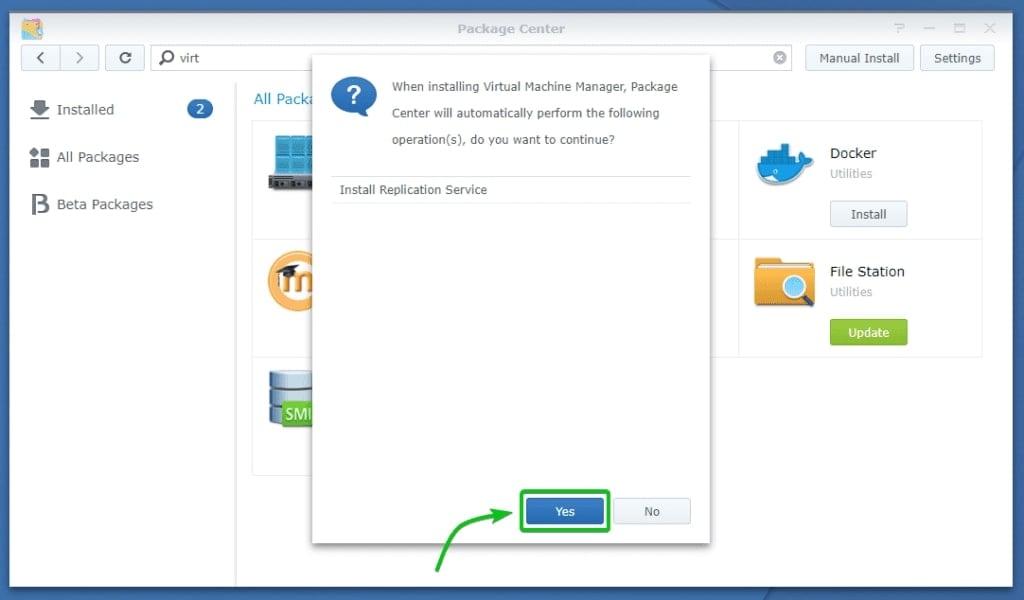
- Step 3: After you click Install, a pop-up window will appear. Read carefully, and if you agree, click Yes.
- Step 4: Sit tight and wait for the app to finish downloading.
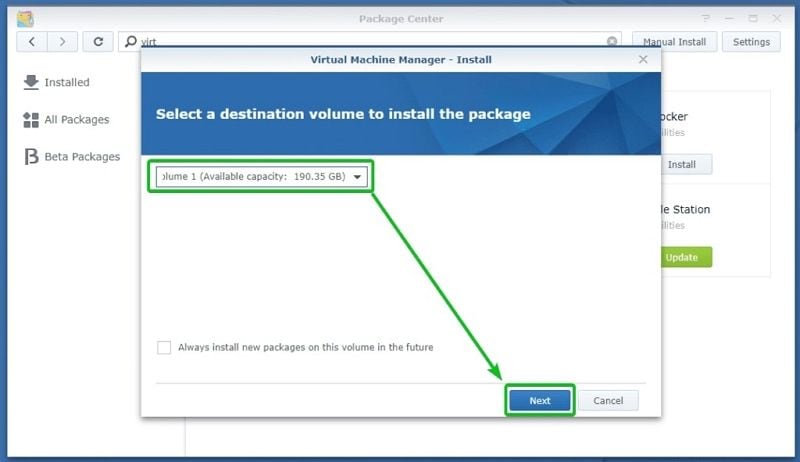
- Step 5: After the app downloads, you’ll need to choose a volume where you will install the VMM. Pick a desired volume from the drop-down menu and then click Next.
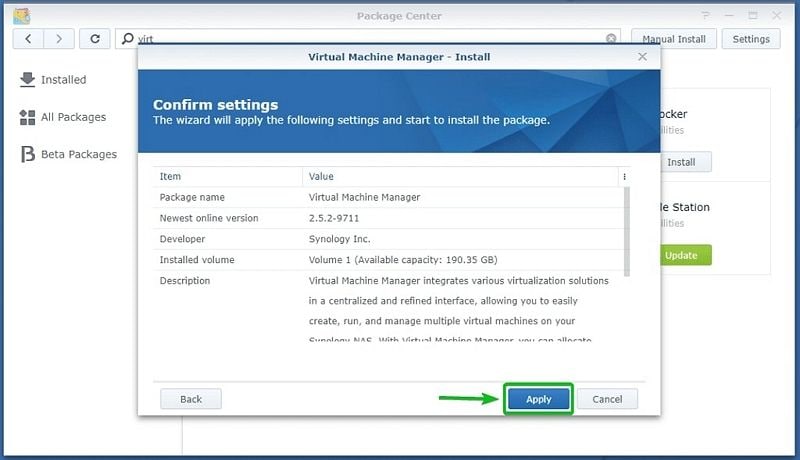
- Step 6: Click Apply to confirm the settings and initiate the installation wizard.
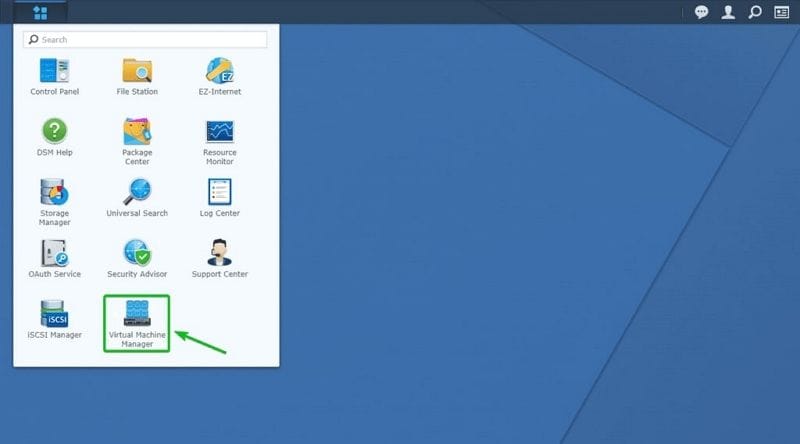
- Step 7: After the installation process, the app in the Package Center should say Open and appear in the Synology Main Menu.
How To Configure Synology VMM
Installing a Synology VMM is easy, but you must also configure it.
Here’s how to configure Synology VMM:
- Step 1: Run the VMM app from the Main Menu. You’ll see a Welcome to Virtual Machine Manager Setup Wizard Click Next.

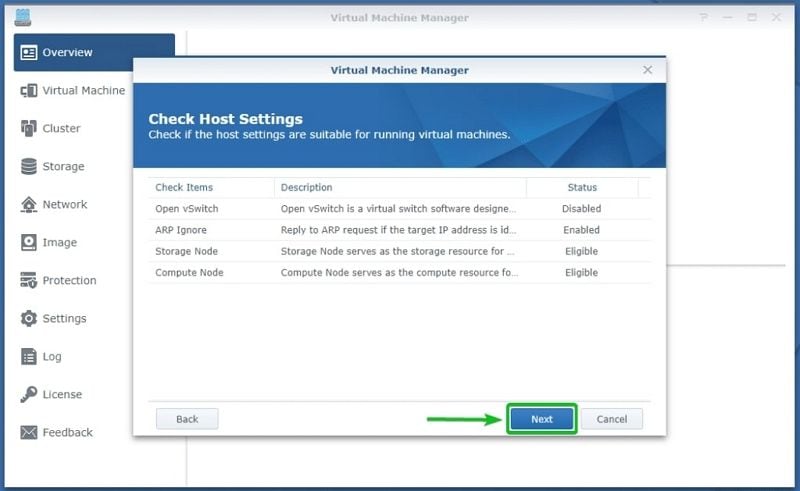
- Step 2: Next, the setup wizard will want you to check your host settings. If everything seems fine, click Next to proceed to the following step.
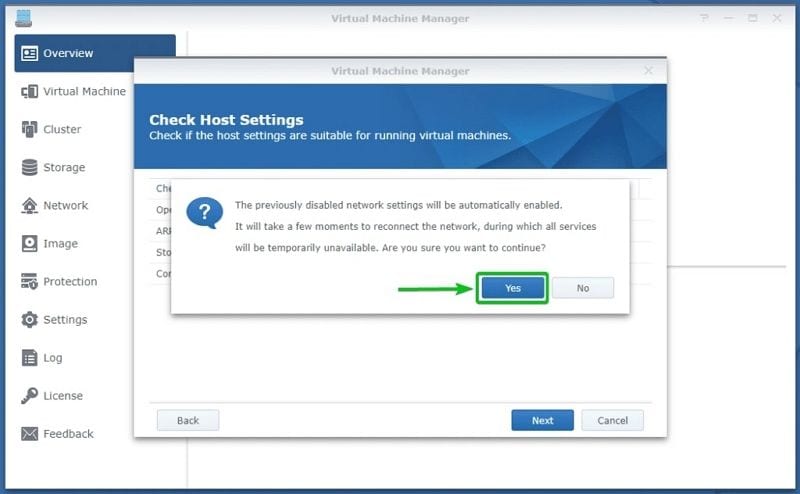
- Step 3: A pop-up window will ask you to confirm that you want to continue configuring the VMM. Read carefully and click Yes if you agree with the terms.
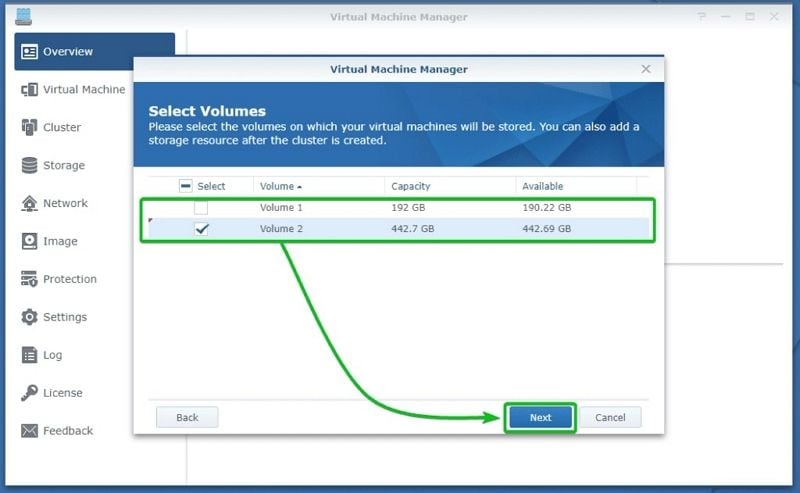
- Step 4: You can install a virtual machine on any volume on your Synology device. At this step, the setup wizard will want you to select the desired volume or volumes. Do that and then click Next.
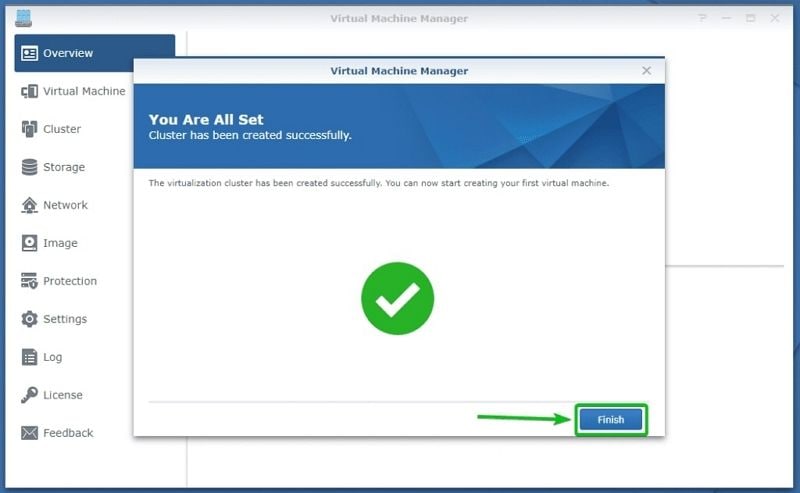
- Step 5: Feel the joy of completion and click Finish.
How To Create a Virtual Machine on Synology NAS via VMM
Congratulations! You’ve successfully set up Synology VMM, but you’re only halfway done. Now, let’s install your Synology virtual machine, too.
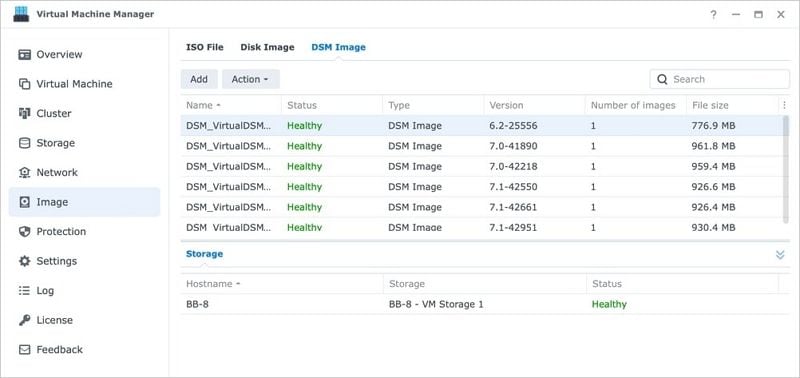
Before starting the wizard, you must upload the ISO or vDSM file. You can do that by opening the VMM app and navigating to the Image section on the left side of the screen.
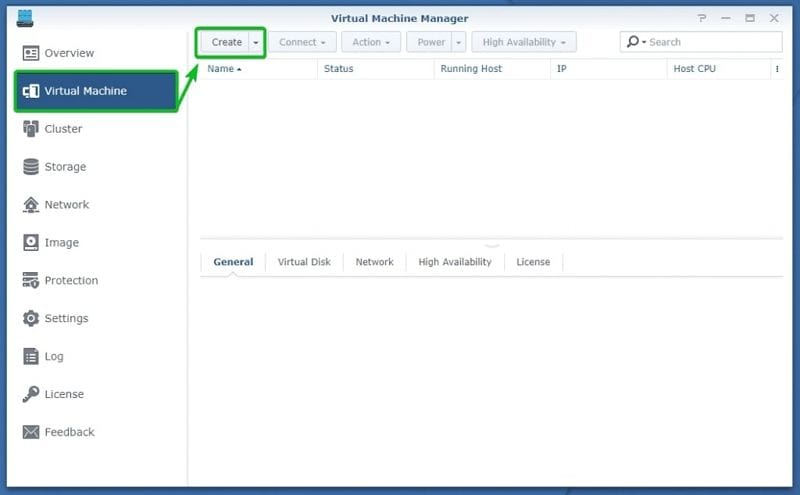
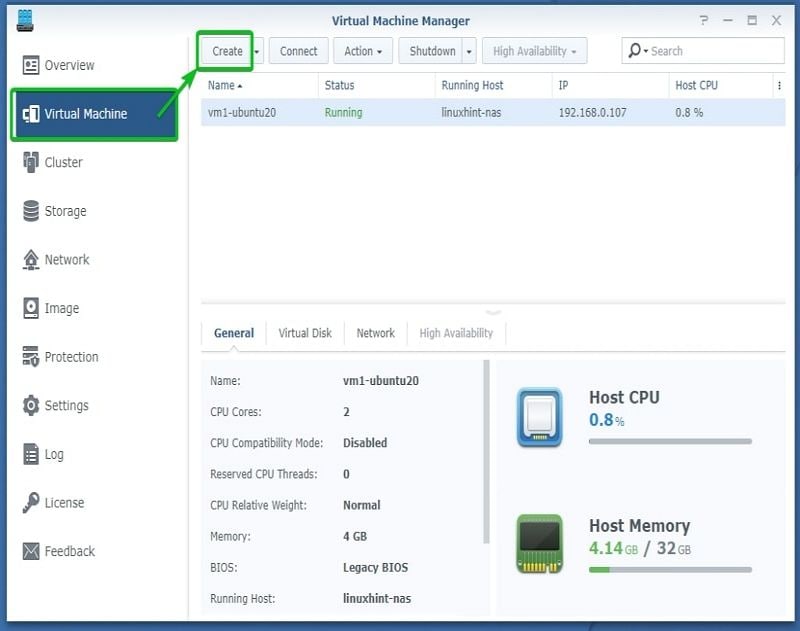
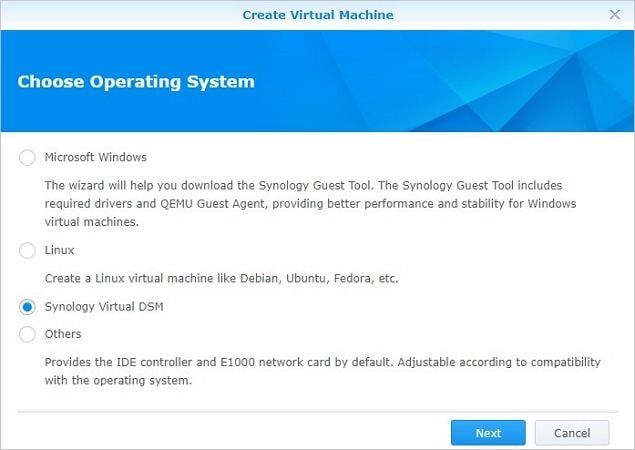
- Step 1: Open your VMM app. On the left side, you’ll see a section that says Virtual Machine. Open it and then click Create.
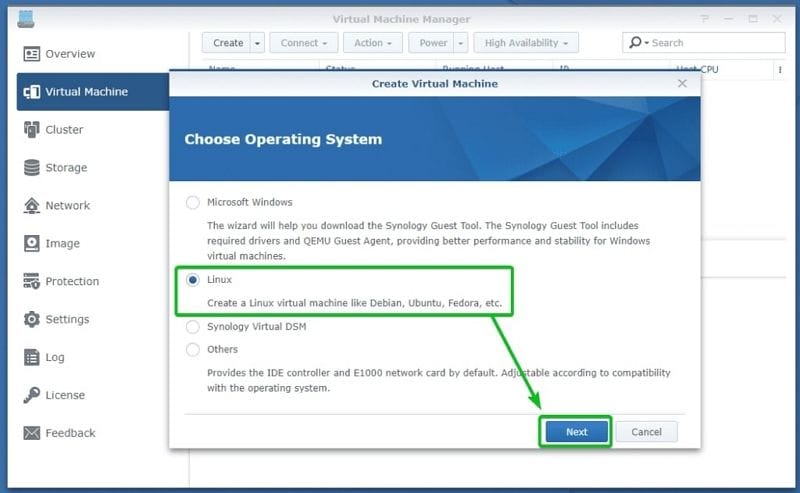
- Step 2: Choose the operating system you want to add and click Next.

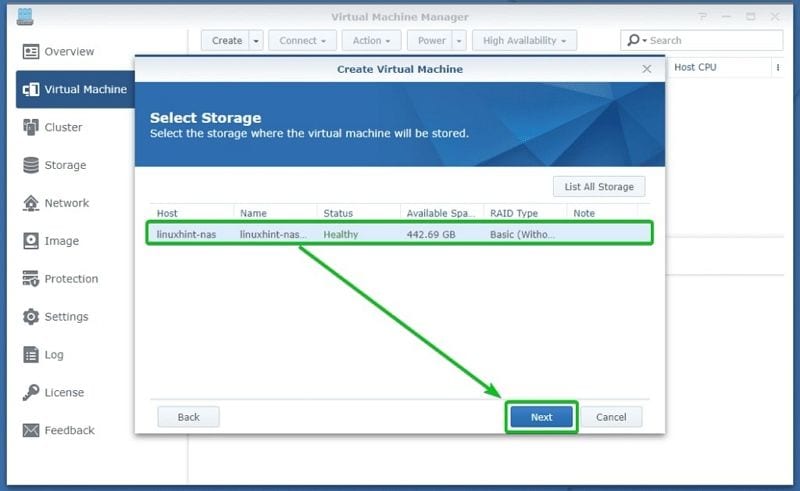
- Step 3: Select the storage volume to store your virtual machine and click Next.
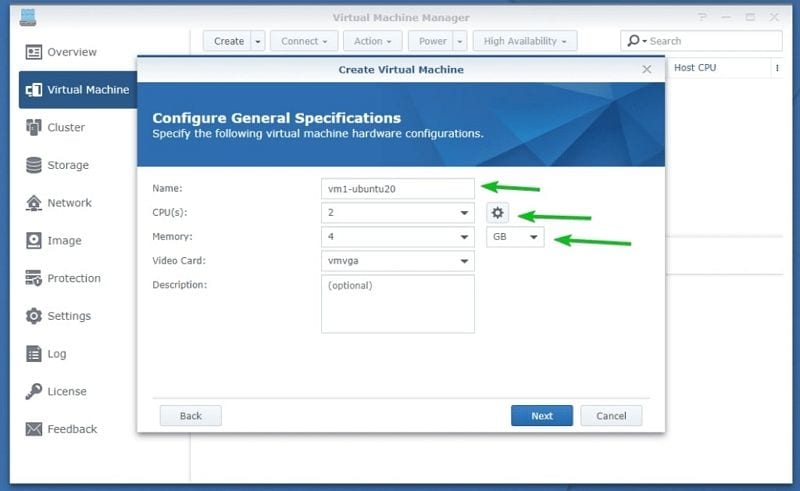
- Step 4: Name your VM and determine how many CPU cores and memory it will use. Then, click Next.
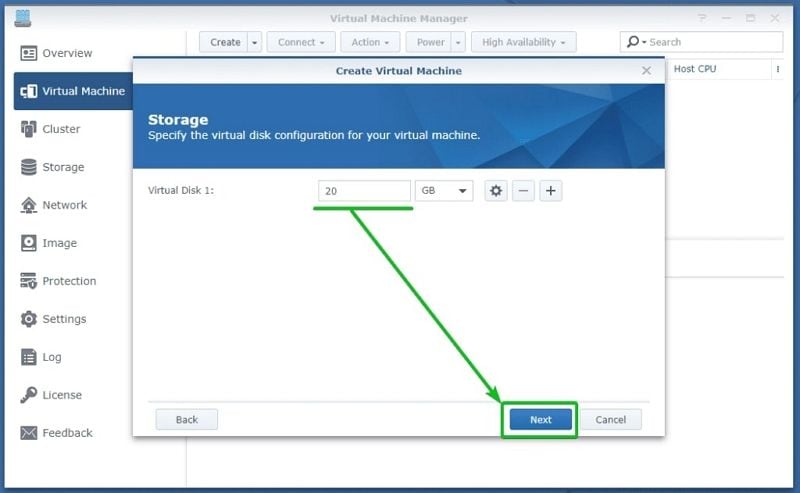
- Step 5: In Storage, decide how much disk space the VM will use and click Next.
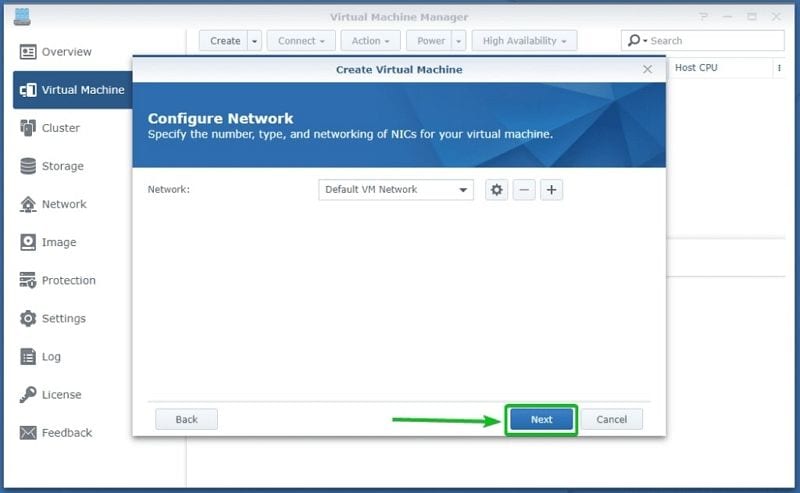
- Step 6: Next, specify the number, type, and networking of NICs for your virtual machine. Click Next.
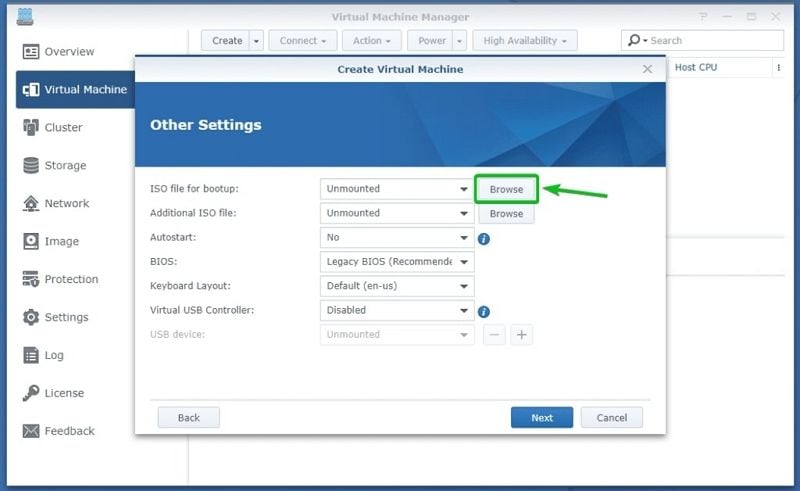
- Step 7: In Other Settings, you must select the ISO installation image file. Click Browse, and choose the appropriate file for your virtual machine from Synology NAS. Click Select. Ensure that all other settings are as you want them, and click Next.
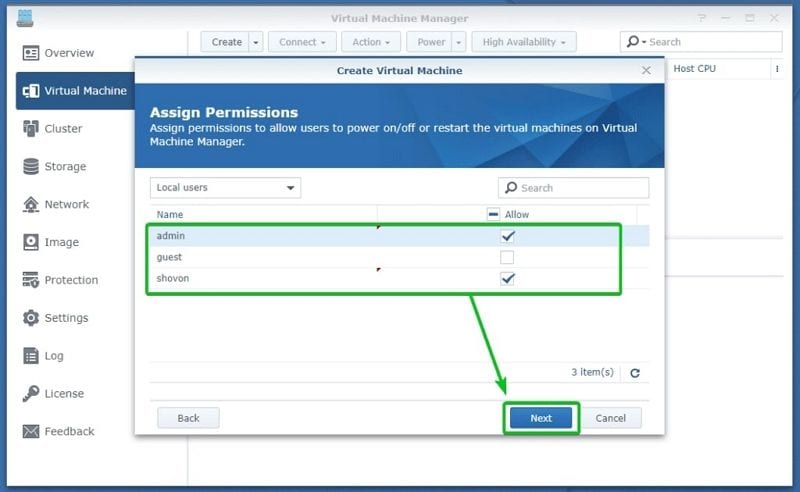
- Step 8: Give permission to users that you want to be able to access the virtual machine and click Next.
- Step 9: At this step, you’ll see a Summary of all specifications and settings you’ve selected throughout the process. Go through it and click Apply if everything is as you desire.
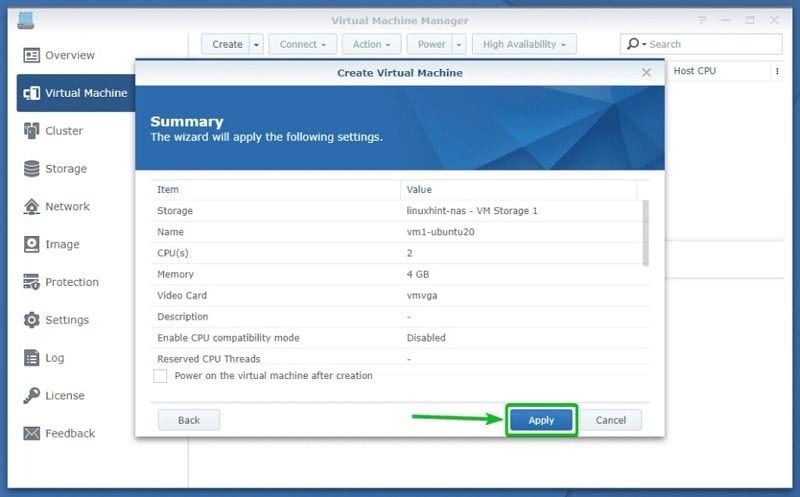
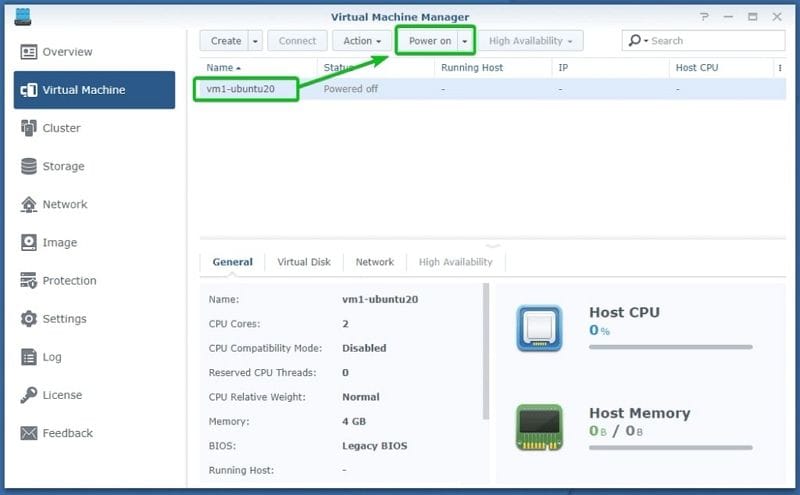
- Step 10: The VMM will now apply your settings and return you to the central dashboard, where you will see a virtual machine you’ve just created. At this point, it will be off. To turn it on, click the Power on button above the list.
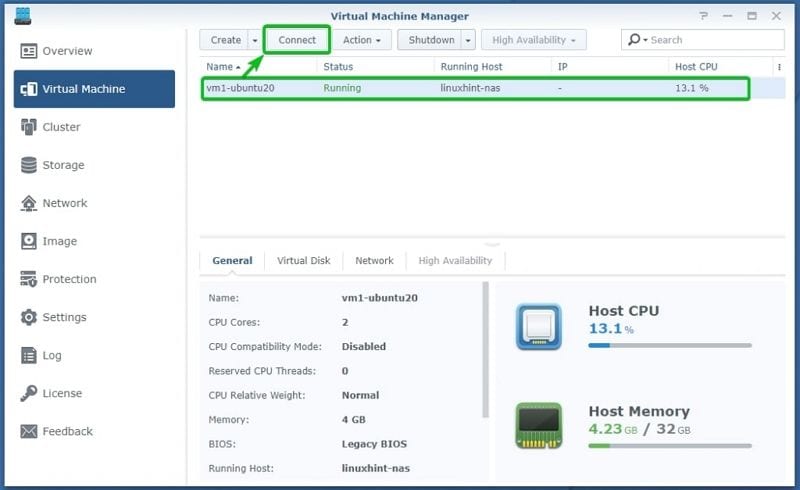
- Step 11: When the virtual machine Status changes from Powered off to Running, click Connect.
Creating a Windows VM
If you want to create a Windows VM using Synology VMM, follow the steps for creating a virtual machine and choose Windows in Step 2.
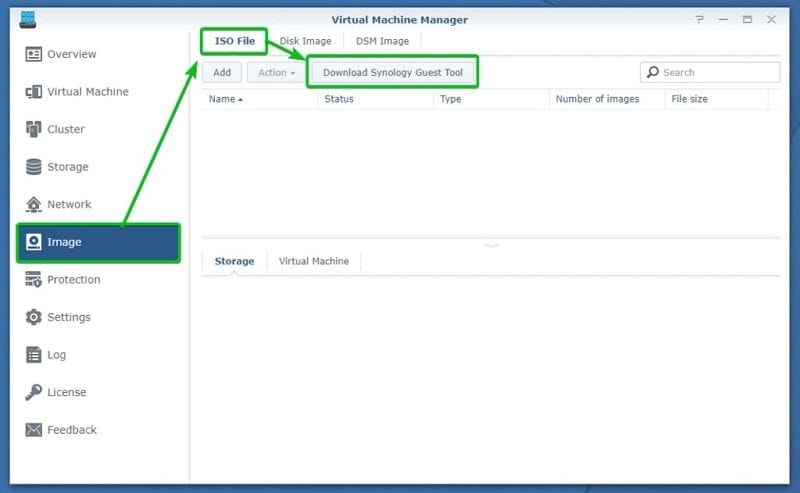
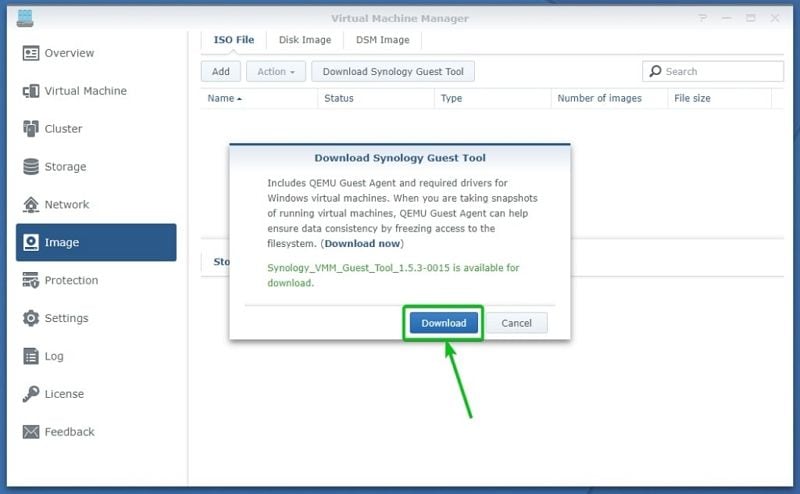
You’ll have to complete a few additional steps before creating a VM. Because Windows VM requires the Synology Guest Tool ISO image, you’ll need to download that first.
Here’s what you need to do:
- Step 1: Run your Synology VMM app and find the Image section on the left side of your screen. Click to open and navigate to the ISO File tab at the top of the window. The option to Download Synology Guest Tool will appear when you click it. Click that option.
- Step 2: Press Download and wait for the VMM to download it.
- Step 3: Once the download is complete, go back to the Virtual Machine section on the left side of the screen. Click to open and then click Create to initiate the VM creation wizard. From now on, the process will be the same as in the previous section.
- Step 4: After successfully creating a Windows VM, you can install the desired version of Windows. Follow the installation steps until the setup is complete.

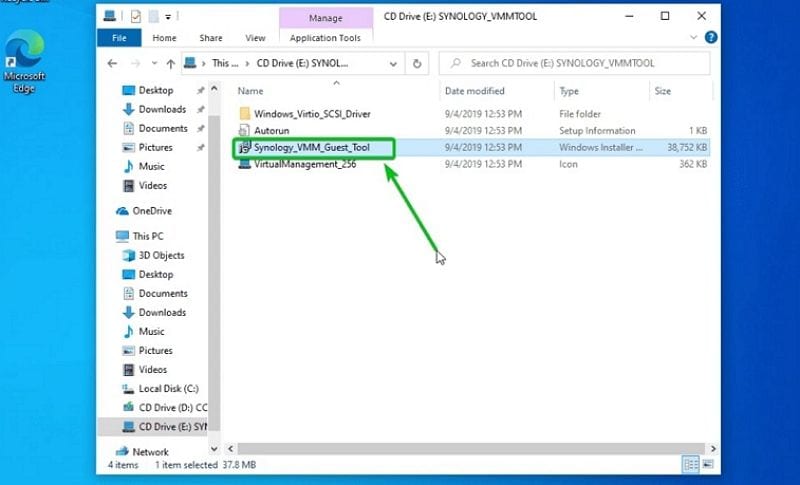
- Step 5: If your Windows is good to go, it’s time to install the Synology Guest Tool. You must find the SYNOLOGY_VMMTOOL CD drive in the File Explorer app and initiate installation. Follow the steps in the installer program.
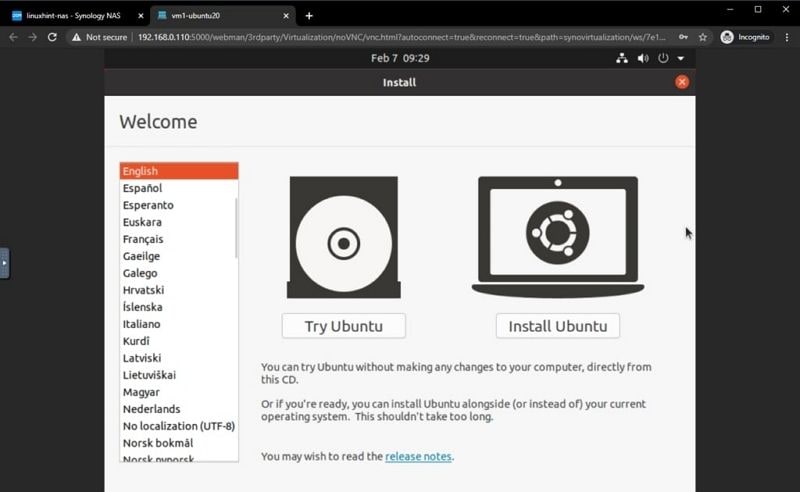
Creating a Linux VM
Here’s what you need to do to install a Linux VM on your Synology NAS device:
- Step 1: Download, install, and open Synology VMM, and then follow the steps for creating a virtual machine. In Step 2, choose Linux.
- Step 2: Install the desired distro.
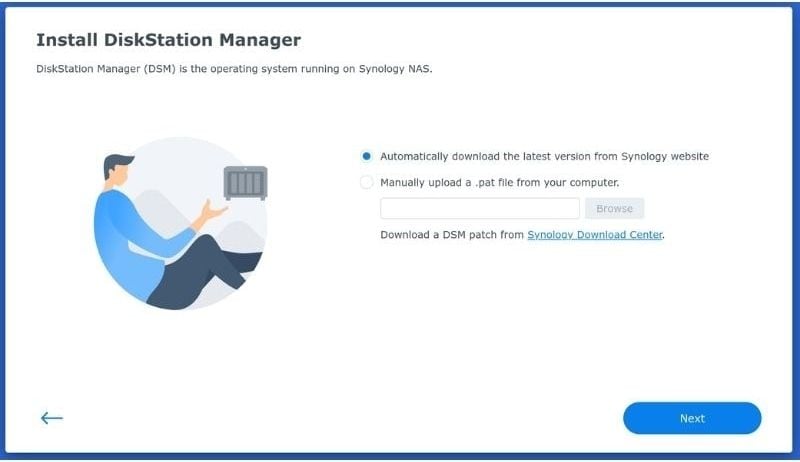
Creating a vDSM
If you want to run a vDSM on your Synology NAS, follow these steps:
- Step 1: Download, install, and open Synology VMM, and then follow the steps for creating a virtual machine. In Step 2, select Synology Virtual DSM.
- Step 2: Now, go to synology.com. When the site recognizes your device, the DiskStation Manager will initiate the installation. Wait for it to finish, and you’re done.
Bonus Tip: Recovering Lost Data on Synology NAS VM
Whether or not you plan to move your VM around, you still need a good data backup. Virtual Machine Manager has many backup features, such as snapshots, remote replication, and the Hyper Backup tool. Unfortunately, there are situations where these mechanisms are of little help.
Is there any way to recover lost data from a Synology NAS VM? Well, you can always try the Recycle Bin method. Wondershare Recoverit is a good alternative, primarily since Recycle Bin rarely works.
Recoverit NAS Data Recovery is an easy-to-use tool that digs deep and can restore files of virtually any type, regardless of how you lost them. If you find yourself needing to recover deleted files from Synology NAS, Recoverit offers a host of useful features such as:

Wondershare Recoverit - Your Safe and Reliable NAS Recovery Software
5,481,435 people have downloaded it.
Recovers lost or deleted documents, photos, videos, music, emails, and other 1000+ file types effectively, safely, and completely.
Compatible with all popular NAS vendors, including Synology, QNAP, ASUSTOR, Western Digital, Buffalo, LaCie, etc.
Facilitates 500+ NAS data loss scenarios, such as deleting, formatting, OS crash, RAID failure, defective controller, power failure, virus attack.
Supports all RAID types, including RAID 0, 1, 5, 6, and 10.
Recovers NAS data through the remote connection without disk pull-out.
The video tutorial below shows you the four simple steps to restore valuable files from your Synology NAS using Wondershare Recoverit.
For Windows Vista/7/8/10/11
For macOS X 10.10 or later
Conclusion
Synology NAS is a powerful device. Not only is it strong enough to host Windows, Linux, and DSM virtual machines, but it’s also backed by the Virtual Machine Manager, which makes running VMs much easier.


