
 TL;DR:
Synology Hyper Backup is a native data management tool that allows users to securely back up and restore NAS files, system configurations, and applications across local storage, external drives, file servers, and cloud services.
● The software strictly requires a Synology NAS running DSM 6.0 or higher, and advanced features like LUN backups or Btrfs Snapshot Replication are limited to specific compatible hardware models.
● While network and cloud backup destinations support multi-versioning and full configuration saves, backing up directly to a USB external drive excludes system configuration and application backups.
● For users seeking a simpler, desktop-based alternative for scheduled incremental backups, Wondershare UBackit can be utilized, provided the NAS device is mapped to the computer before initiating the task.
Ask AI for a summary
 ChatGPT
 Perplexity
 Gemini
 Claude
 Grok
Grok
Storage is essential to IT environments, whether for work or home use. NAS units have made a big difference in storing, sharing, and using data remotely. NAS units can be found in homes today as they’re used by individuals who want to share files, store videos, archive email, or back up their system data.
Not only do their units come with the latest hardware features and capabilities, but they also have the necessary software support that makes backups a breeze. Below, you’ll learn about Synology Hyper Backup and how to use it effectively to back up and retrieve files.
Table of Content
What Is Synology Hyper Backup?
Hyper Backup is Synology’s primary backup solution for all their NAS devices. Hyper Backup can help you create data copies, save system configurations, and restore all the data you’ve saved at any given point.
Hyper Backup lets you back up your NAS data to cloud services, file servers, other NAS devices, external storage like USB drives, and shared folders. Simply put, this data backup tool has a graphic interface and allows you to perform various tasks on Synology devices with DSM.
Things You Need Before You Can Use Hyper Backup
Before you can start using your Synology Hyper Backup, you must consider a few things. First of all, check if your device is compatible with this software. Synology lists all supported models, so check if your device is on. If not, you won’t be able to use Hyper Backup.
Your NAS must also run on DSM 6.0 or higher because the older versions don’t support Hyper Backup. Remember that the LUN backup method is possible only on specific models. If you want to check if your unit can perform LUNK backups check your Datasheet in the Download Center.
Different Backup Options Provided by Synology Hyper Backup
Hyper Backup is very versatile and offers you many backup destination options. The backup process is similar to all backup options. However, they all have unique settings and adjustments you can make depending on the platform. Here are some of the features you can expect.
Backing Up to Synology NAS
Creating a multi-version backup on your local storage gives you many advantages. You can recover data quickly from Synology NAS if the files are accidentally deleted or corrupted. However, this doesn’t guarantee your data will be safe in case of hardware failure or RAID crash.
That’s why creating a multi-version copy is best so that your restore options are flawless. Hyper Backup to Synology NAS lets you store system configurations and applications with incremental backup.
If you have a NAS device that can work with the Btrfs file system, you can even create local copies with Snapshot Replication. It is a quick process that doesn’t require a lot of system resources. Snapshot Replication is more efficient with backups and recovery and can be used with iSCI LUN and shared folders.
Backing Up to USB or Local Shared Folder
Hyper Backup stores system configuration and applications to USBs and other external devices with on-demand restore. These backups give you cross-file deduplication and incremental backup capabilities.
However, backing up Synology NAS to a USB doesn’t support system configuration and application backups. When backing up to an external device, the process starts as soon as you’ve connected the device. The device is ejected when the backup is complete. The data copy backed up to a USB device is readable, but the counterpart in Hyper Backup isn’t.
Backing Up to a File Server
With this backup option, you can use S3, OpenStack, WebDAV, HTTP, and rsync protocols. Remember that backing up to file servers uses more client-side cache storage than the volume used when backing up to other options (Synology NAS).
The multi-version support allows you to protect data, and with cross-version deduplication, you can save up storage space when storing multiple versions. Hyper Backup also supports system configurations and application backups that can be restored to their original settings.
Backing Up to Cloud Services
Hyper Backup lets you copy data to Synology C2 Storage and all the major public clouds, such as Microsoft Azure, Dropbox, Amazon Drive, and Google Drive. You can use the Cloud Sync feature to sync all of your Synology data to the cloud. But you can only keep the current version of files on your NAS. You can create multi-version backups using a cloud service with multi-version support. The file format remains the same when backing up to the cloud.
How To Create Backup Tasks Using Synology Hyper Backup
Hyper Backup lets users monitor, manage, and create backup tasks. All the data can be exported to external storage. Here’s how to create a data backup task:
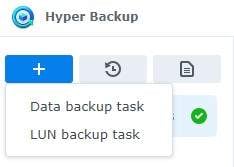
- Step 1: Start Hyper Backup, click the + icon in the upper left corner, and click Data backup task.
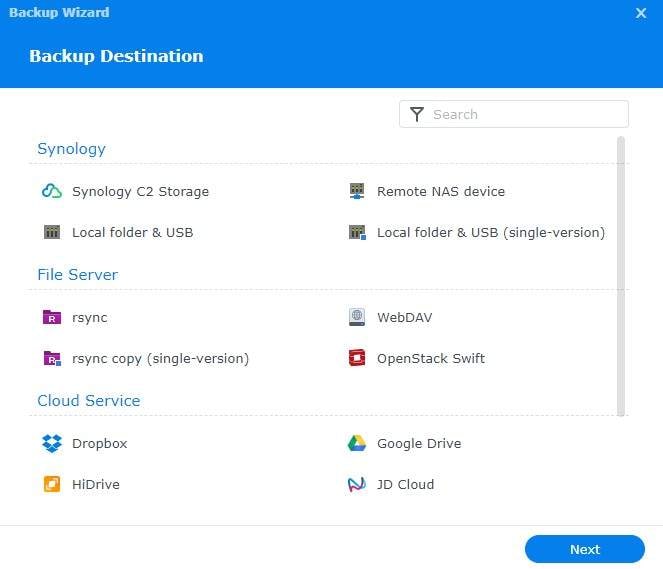
- Step 2: Select the desired backup destination and click Next at the bottom right.
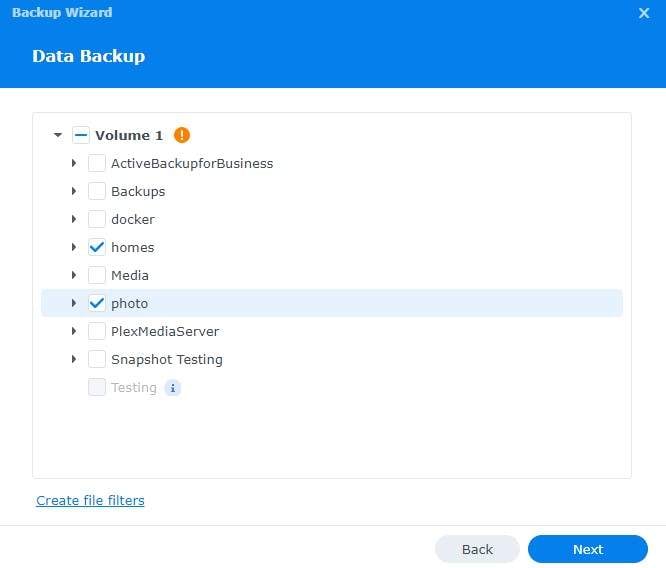
- Step 3: Select the data you want to back up at the Data Backup screen and click Next at the bottom right.
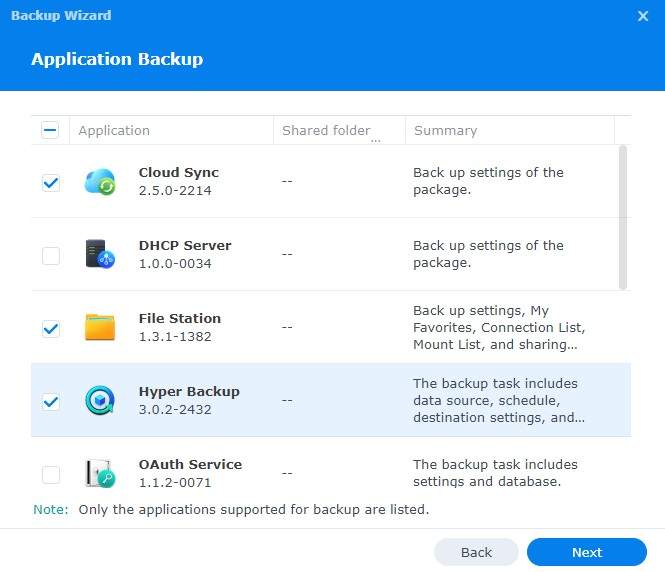
- Step 4: In the Application Backup window, select the applications you want to back up and click Next.
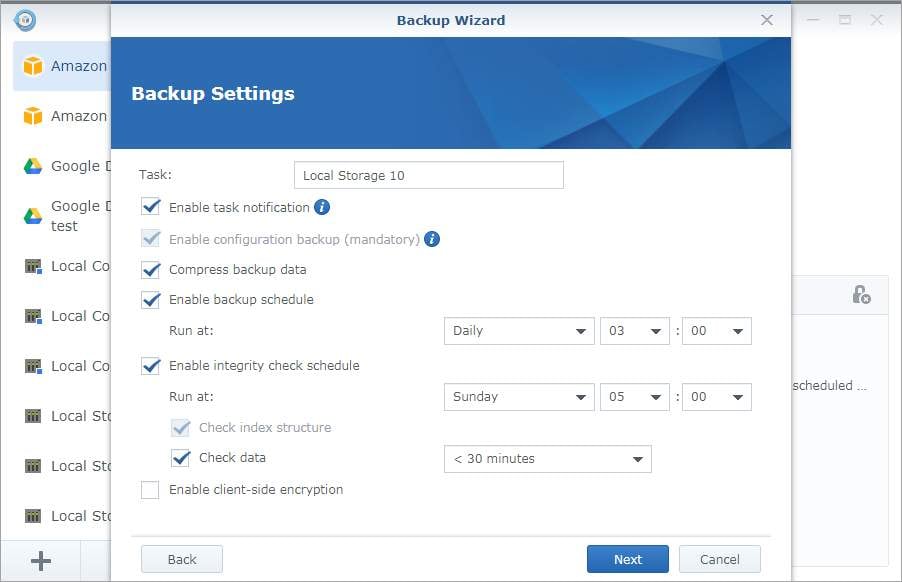
- Step 5: Name the backup task on the Backup Settings page and configure your settings. You can turn on task notifications, backup data compression, set a backup schedule, enable integrity check and set up the interval, and enable client-side encryption. Once you’re done, click Next in the bottom left corner.
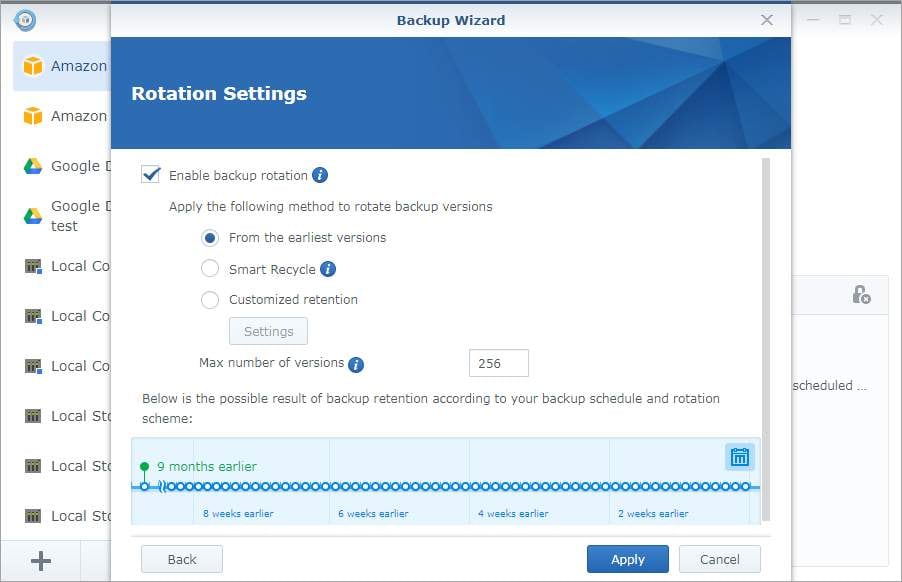
- Step 6: You will be asked to Enable backup rotation. If you do, the Rotation Settings window will start, and here you can set up the earliest version to be deleted, turn on the Smart Recycle option to keep a specific number of versions, and adjust the timeline of your backup rotation. When done, click Apply, and your backup will start.
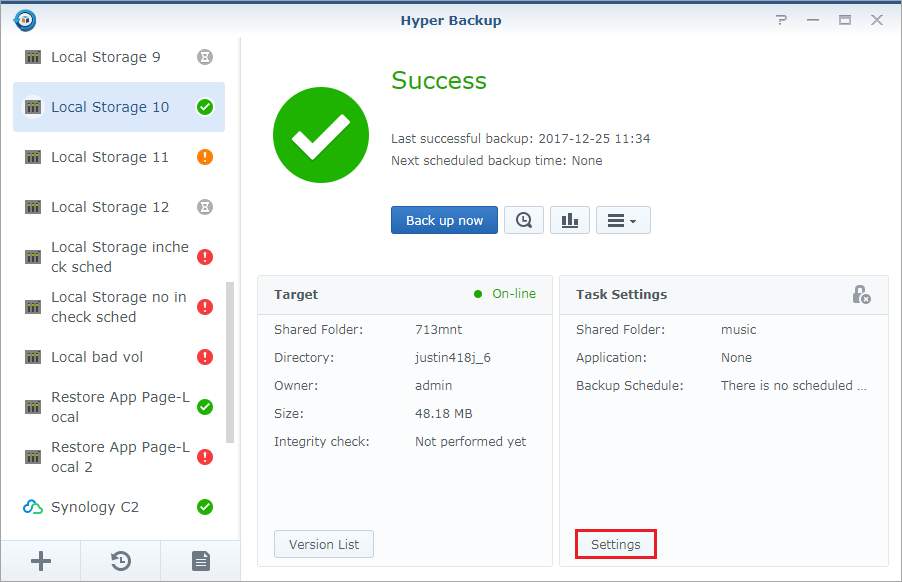
- Step 7: Wait until you get the Success message and your backup is complete.
How To Restore Files From Backup With Hyper Backup
- Step 1: Start Hyper Backup.
- Step 2: In the left panel, click on the backup task you wish to restore.
- Step 3: Click the clock icon to get all the options.
- Step 4: Click Restore to return the backup files to their original location.
Wondershare UBackit: A Simpler Alternative to Synology Hyper Backup
Even though Synology Hyper Backup is a competent tool for creating backups, it can get a bit complicated and overwhelming. That’s why it’s worth considering an alternative backup tool like Wondershare UBackit that simplifies the process and makes it easier to manage backups.
Here’s how you can use Wondershare UBackit to perform NAS backups. Remember that you must map your NAS devices to your computer first.
- Step 1: Download and install Wondershare UBackit on your PC.
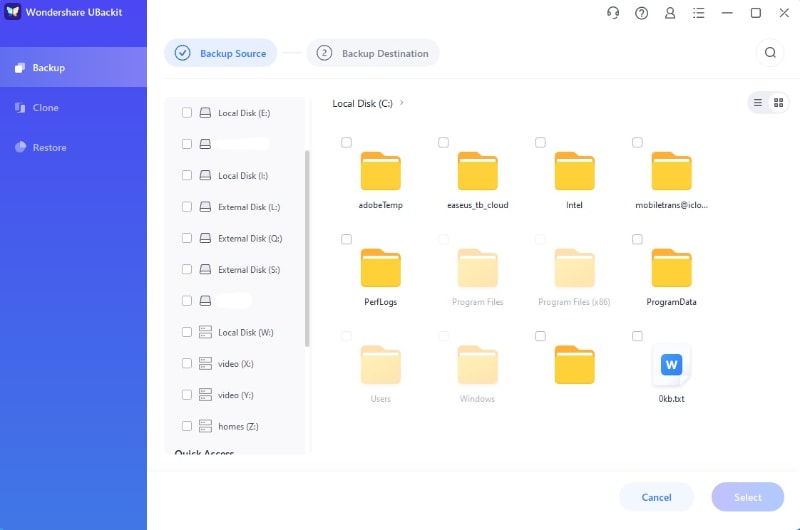
- Step 2: Launch Wondershare Ubackit and select File Backup or Disk Backup.

- Step 3: Select the files, folders, hard drives, NAS, or USB storage you want to back up and click Select.
- Step 4: Select the disk where you want to copy the NAS backup and click Backup. Recoverit can back up data to hard drives, USB drives, SSD, external hard disks, NAS that mounted to your PC, and other devices.

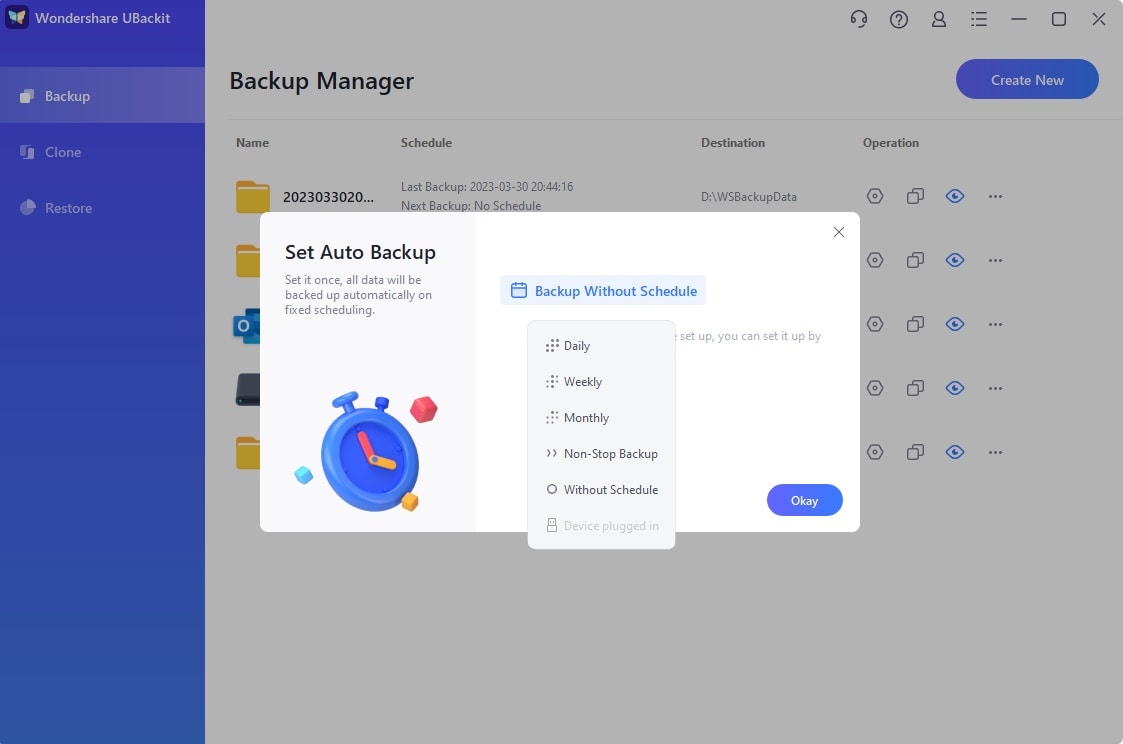
- Step 5: Wait until the process is complete. If you want to set up automatic backups you can do this by clicking the Schedule icon on the right side of your backup.
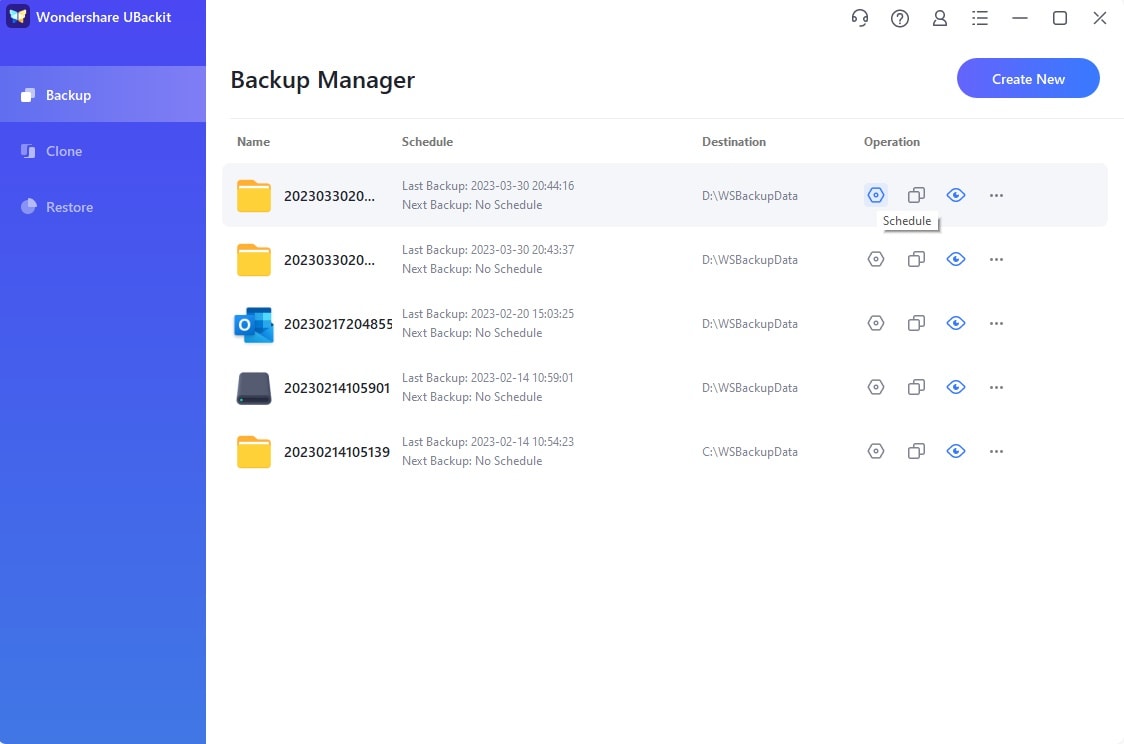
- Step 7: Select the desired type of automatic backup from the drop-down menu and configure your schedule. All of these methods are incremental backups meaning they store new or modified files from the backup source to the destination.
How To Restore Data Using the Synology Hyper Backup Alternative
- Step 1: Launch Wondershare UBackit.
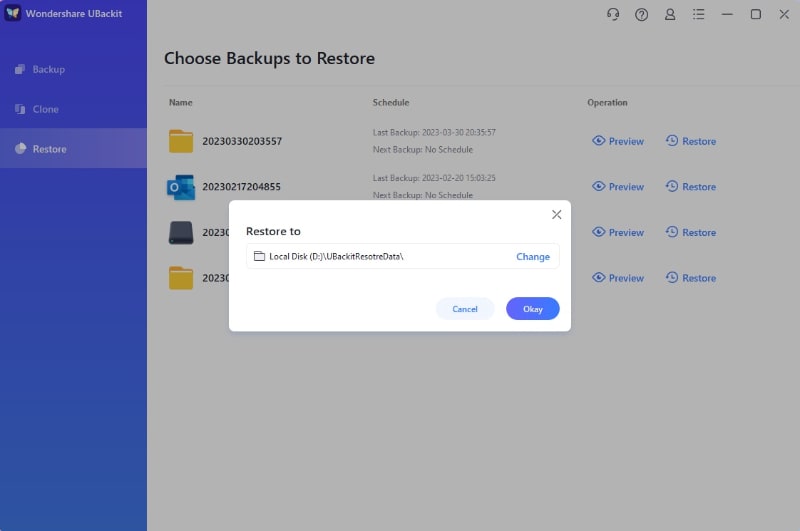
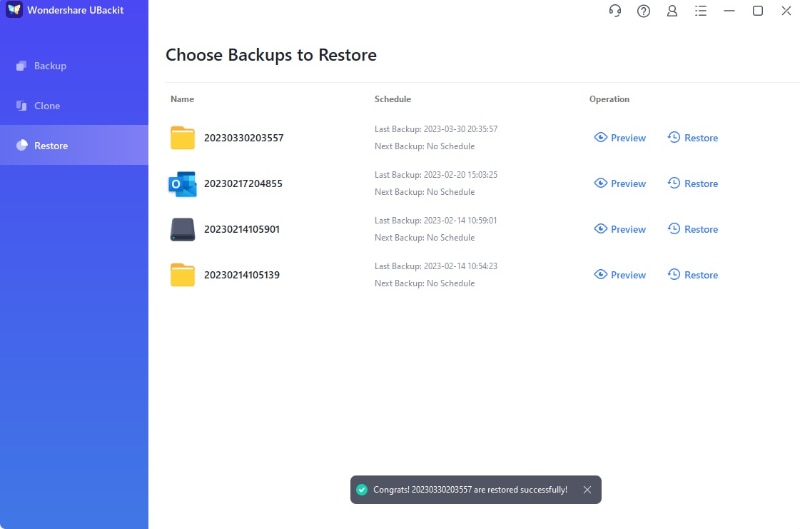
- Step 2: Click Restore on the left panel, select the desired backup, and click Restore next to it.

- Step 3: Select the restore location and click Okay.
- Step 4: Wait until the process is complete.
Conclusion
In conclusion, Synology Hyper Backup is an excellent solution for businesses and individuals who want to keep their data safe and secure. With its user-friendly interface and advanced features, it provides a reliable backup and recovery option that can help you avoid data loss and downtime.
If you want a simple option, try out Wondershare UBackit. It has all the features you might need and even more while keeping the process straightforward. Good luck!


