
 TL;DR:
Installing TrueNAS CORE requires creating a bootable media drive of at least 1 GB, booting the target system to select a dedicated OS installation drive, and finalizing the configuration via UEFI or BIOS.
● System prerequisites mandate a 2-core 64-bit Intel or AMD processor, at least 8 GB of RAM, a wired Ethernet connection, and a minimum 16 GB SSD or two equal-sized hard drives for the storage pool.
● During the setup menu, you must select a dedicated boot device rather than your intended storage disks to avoid data overwriting, which can typically be identified by its smaller storage capacity.
● In the event of data loss, files can be restored remotely without physically pulling out the hard drives by establishing a connection through third-party tools like Recoverit NAS Recovery.
Ask AI for a summary
 ChatGPT
 Perplexity
 Gemini
 Claude
 Grok
Grok
Do you need software to store an extensive amount of data? TrueNAS is a storage software perfect for saving documents, photos, videos, and music. It also allows you to access it from different devices and share it with ease. We’ve prepared a guide to help you install TrueNAS CORE on your device. Moreover, you’ll learn about the system requirements for the TrueNAS CORE setup and how to recover lost data.
In this article
TrueNAS Installation System Requirements

TrueNAS can run on a variety of hardware configurations. However, the system requirements for installing TrueNAS CORE may vary depending on the hardware configuration and your system’s intended use. These requirements include:
- Processor: You’ll need a 2-Core Intel 64-Bit or AMD x86_64 processor.
- RAM: You’ll need at least 8 GB of RAM, but more is better for larger deployments or more demanding workloads.
- Storage: Installing TrueNAS requires 16 GB solid-state drives (SSDs) or at least two hard drives of equal size for a single storage pool.
- Network: An ethernet cord is necessary since it doesn’t support a wireless connection.
- DVD or USB stick: Since CDs don’t work, a DVD or USB stick of at least 1 GB is necessary for TrueNAS installation media.
How To Install TrueNAS?
Installing TrueNAS CORE can seem challenging at first. However, we’ve prepared this guide and explained every step of the process in simple terms. It will help you successfully install TrueNAS with little to no effort. The process consists of the following steps:
Step 1Add the Installer to a Device or Create a Bootable Drive
To start the installation process, you first need to get a copy of the installer and put it on a device you’ve chosen to set up TrueNAS. You can do that in two ways:
- Add it to a device.
- Create a bootable drive.
Adding the installer to a device refers to downloading the TrueNAS CORE installer program and copying it onto a USB stick or a DVD. Then, insert the device into your computer.
Creating a bootable drive means using a tool to copy the installer program onto a USB stick and then configuring the device to be bootable. The second method is usually faster and more convenient than adding the installer manually.
Step 2Reboot the System and Choose the Install Device as the Boot Drive
After you complete the first step, reboot the system.
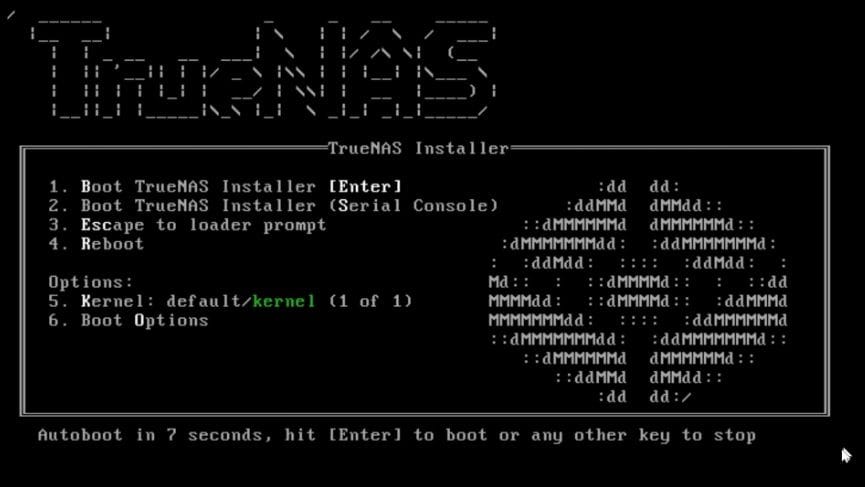
The installation menu will appear. Press Enter or click OK to start the TrueNAS core setup.

Then, you’ll see the TrueNAS console setup menu. Click Install/Update to start the installation of TrueNAS CORE.
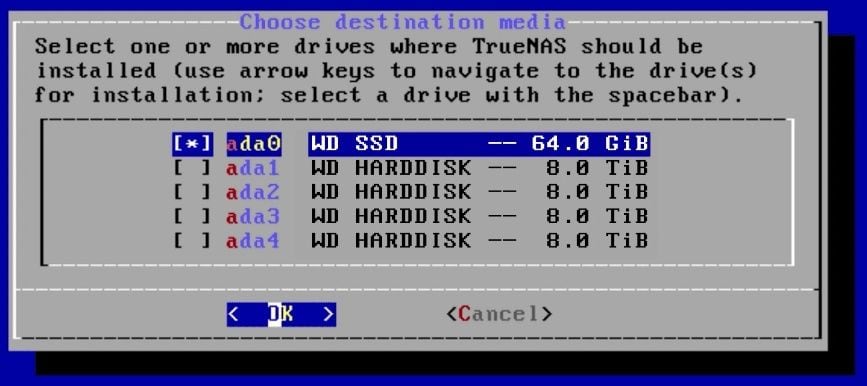
The following menu shows the list of drives you can use for the setup. Select the boot device, not the storage disk. If you’re unsure which of the listed is the boot device, look at the size of the disks. The boot device is usually smaller than storage disks, so navigate to that one using the arrow keys and hit Space.
The warning window will appear. Press OK and Yes to proceed.
Step 3Restart to Start the Installation
The next step is to restart the device to start the TrueNAS CORE setup. The changes you make while setting up TrueNAS won’t apply until the system restarts.
Thus, restarting is necessary because it will apply all the changes you’ve made during the installation process, and the system will start with the newly installed operating system and software components.
Step 4Go Through the Installation
Once you’ve restarted the system, go through the installation and configuration of TrueNAS.
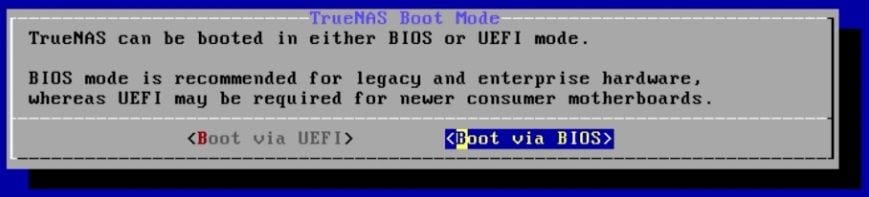
Now you need to boot TrueNAS CORE in either UEFI or BIOS. The system will choose between the two according to your firmware settings. If not, know that BIOS suits older hardware, while UEFI is often better for newer hardware. Also, the choice will depend on the software requirements and operating system.
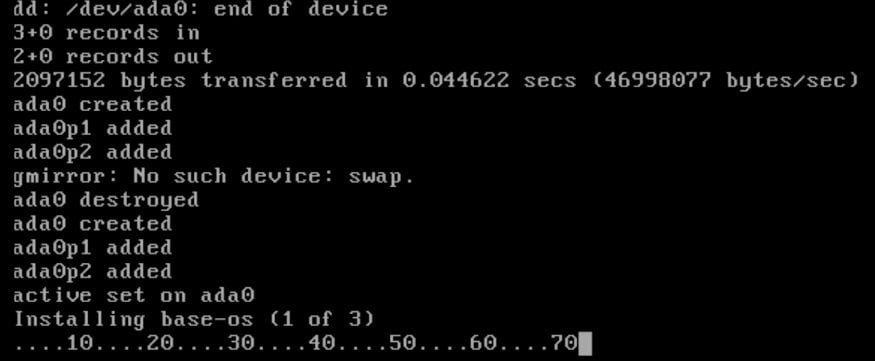
The installation has now started and should take a few minutes to finish.
Step 5Reboot and Remove the Install Media

When the installation process is complete, you’ll see a pop-up window asking you to reboot the system and remove the installation media. Click OK to reboot before removing the installation media from the system, and you’re done.
How To Recover Lost Data on TrueNAS?
Even though there are ways to recover lost data, they may not be helpful in some situations.
Data recovery on TrueNAS CORE depends on many factors, such as the time since you lost the data, the type of data loss, and many more. A good advice is to have regular backups to prevent data loss altogether.
However, you can use third-party recovery tools like Recoverit NAS Recovery.

Wondershare Recoverit - Your Safe and Reliable NAS Recovery Software
5,481,435 people have downloaded it.
Recovers lost or deleted documents, photos, videos, music, emails, and other 1000+ file types effectively, safely, and completely.
Compatible with all popular NAS vendors, including Synology, QNAP, ASUSTOR, Western Digital, Buffalo, LaCie, etc.
Facilitates 500+ NAS data loss scenarios, such as deleting, formatting, OS crash, RAID failure, defective controller, power failure, virus attack.
Supports all RAID types, including RAID 0, 1, 5, 6, and 10.
Recovers NAS data through the remote connection without disk pull-out.
This software is easy to use, and you can recover the lost data on TrueNAS in just a few steps.
- Launch Recoverit after installation and click the NAS Recovery button under the NAS and Linux option.

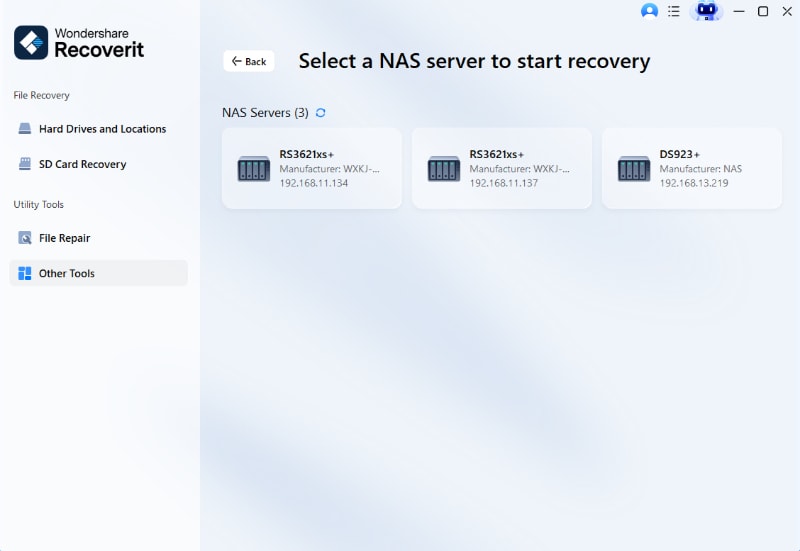
- Recoverit will search for available NAS devices automatically. Then, select the TrueNAS device where you lost the data.
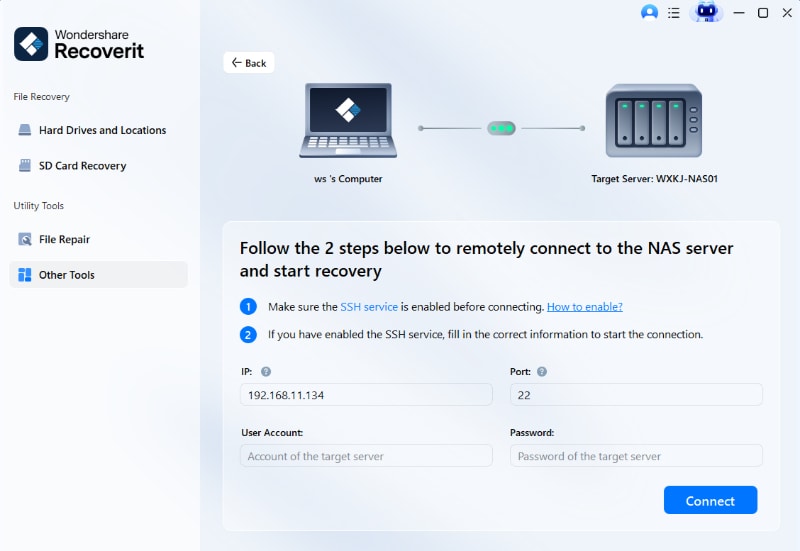
- Fill in the required information for the TrueNAS to establish a remote connection between your TrueNAS and the data recovery program. Click Connect.
- Upon a successful connection, Recoverit will start scanning for deleted or lost files in your TrueNAS. After the scan, select the files you want to recover from the list and click Recover.

- Finally, eelect the location for the recovered data and click Recover.

For Windows Vista/7/8/10/11
For macOS X 10.10 or later
That’s it! You’ve successfully recovered your data from TrueNAS CORE.
Conclusion
If you need storage software to keep all your data, like documents, music, and photos, secure and easy to access, TrueNAS CORE is the best choice for you. It is a storage software platform that can run on various hardware configurations, including dedicated storage servers and virtual machines. The best part is the software is available as a free, open-source edition or a paid enterprise edition.
If you decide to use it, go through its system requirements first, then follow our simple step-by-step guide on how to set up TrueNAS. If you ever need to recover lost data, follow the steps for Recoverit, and your data will be back in no time.


