
 TL;DR:
Running TrueNAS CORE as a virtual machine on Proxmox resolves the virtualization platform's lack of native file-sharing and version control capabilities by creating a unified system for both data storage and virtual environments.
● Allocate at least 8 GB (8,192 MB) of RAM, 2 CPU cores, and 32 GB of local storage when creating the virtual machine, as TrueNAS relies heavily on memory caching for stable performance.
● Direct hardware access is required, meaning you must pass your physical storage controllers to the virtual machine via PCI settings or use SSH to pass individual hard drives by their constant model and serial numbers instead of variable names like sda.
● Boot the virtual machine via BIOS to install the operating system on the allocated 32 GB drive, after which all storage datasets and nested virtual machines are managed strictly through the TrueNAS web IP interface.
Ask AI for a summary
 ChatGPT
 Perplexity
 Gemini
 Claude
 Grok
Grok
Accidentally deleted important files on TrueNAS?
No worries. Recoverit NAS Recovery can get back your lost files within 3 steps. The ultimate and professional data recovery tool is totally reliable and 100% safe.
Being a powerful virtualization software, Proxmox allows users to manage multiple virtual machines and additional containers. Creating, configuring, and managing virtual machines and containers is straightforward. With Proxmox, you can do all of that from a single interface.
However, Proxmox isn’t a perfect file storage or sharing system. It lacks certain features which would make this excellent product complete. Fortunately, by running a Proxmox FreeNAS (now TrueNAS), you can circumvent these problems. Adding a TrueNAS on Proxmox can get you those missing features, and you can have a file sharing, home storage, and virtualization system in one.
Proxmox Isn’t Ideal for Storing and Sharing Files

Proxmox is a virtualization management software, so it’s not ideal for storing or sharing files. The platform helps manage virtual machines and is one of the best virtualization software on the market.
Even though you can use Proxmox as file storage, we wouldn’t recommend it – at least not as the primary use case for Proxmox since it’s not good at storing and sharing files. It lacks file sharing, version control, access controls, etc.
However, you can configure various virtual machines and environments to act as data storage and use your Proxmox virtualization software to store data. You can do it with the help of Installing TrueNAS on Proxmox.
You may also be interested in: Install TrueNAS on Raspberry Pi
How Does Virtualization Help with Disaster Recovery Within a Data Center – Guide to Remember
The TrueNAS on Proxmox Option
Fortunately, even though Proxmox isn’t ideal for file storage, you can create a workaround and use it for storing and sharing files. Of course, that comes with a few extra steps requiring you to install and set up additional software, but it might be worth it if you need a file storage and sharing server.
To do that, you need to install TrueNAS; to learn how to install TrueNAS on Proxmox, follow our guide below. It may seem challenging, but trust us, if you follow the steps, you’ll have TrueNAS up and running quickly.
How To Run TrueNAS on Proxmox
To run TrueNAS on Proxmox, you must go over some additional steps. Fortunately for you, we’ve written a guide below. It should be easy to follow. Just make sure you follow all the steps. Here’s what you must do to get TrueNAS up and running on your Proxmox.
Step 1Download the TrueNAS ISO File
The first thing you’ll need is the installation file. You can find it as an ISO on TrueNAS’s website. What you’re looking for is TrueNAS CORE, and that’s what you should search for on the website. Of course, you can install TrueNAS on a desktop PC or a server, but you can also run it on a virtual machine.
- Visit the TrueNAS website.
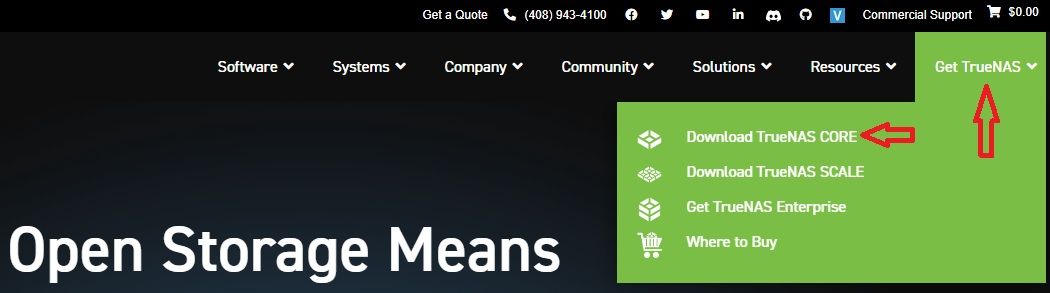
- Click the green Get TrueNAS button in the top right corner and select “Download TrueNAS Core.”
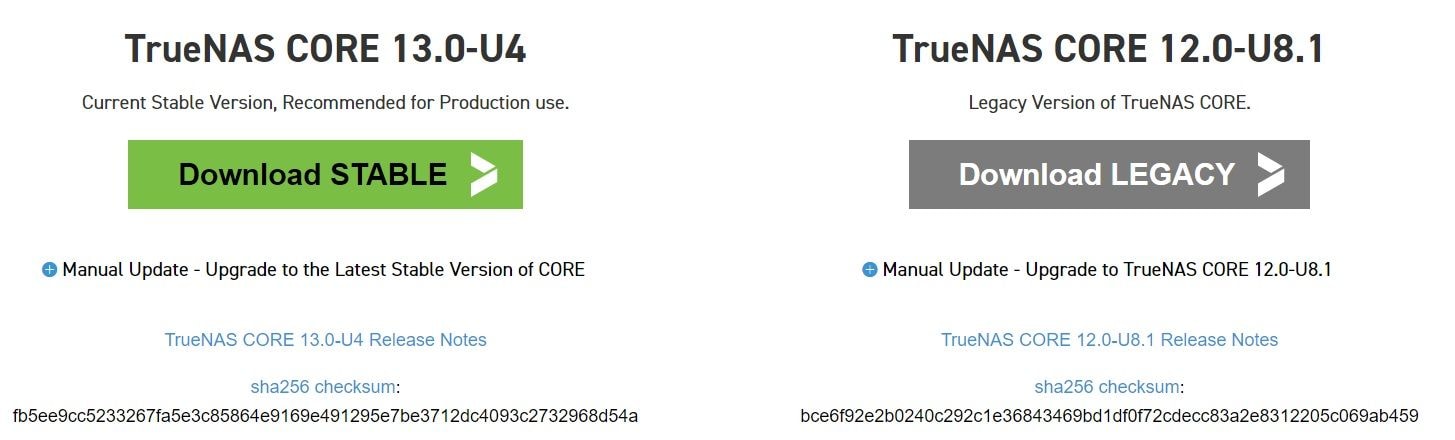
- Download the correct ISO file.
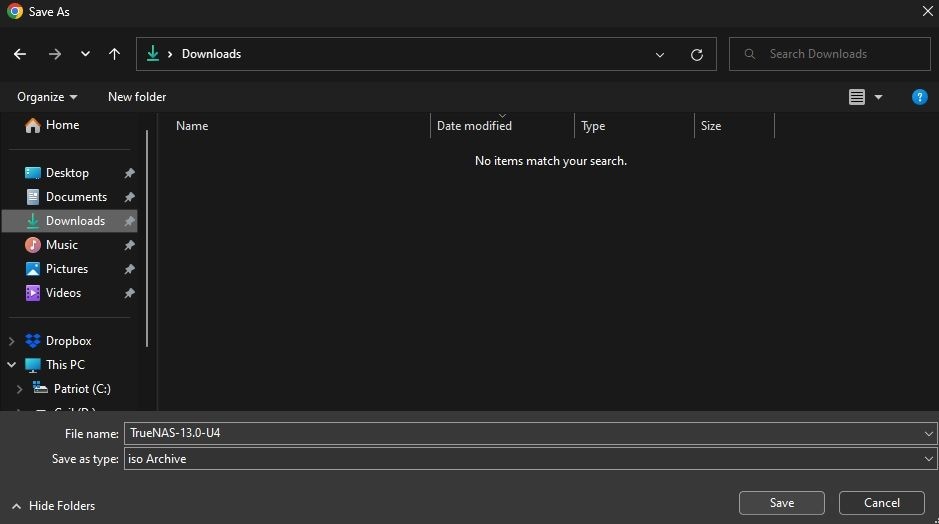
- Save it on your computer.
After downloading the ISO file from the TrueNAS/FreeNAS website, add it to your Proxmox.
Step 2Add the ISO File to Proxmox
After you download the TrueNAS ISO file, hop on your Proxmox to add the ISO file to it.
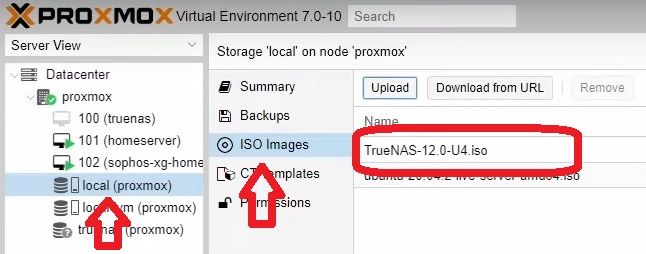
- Go to your local storage in Proxmox.
- Select ISO Images and click Upload.
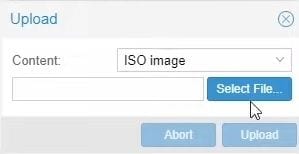
- Select ISO Image under Content, then click Select File.
- After selecting TrueNAS’s ISO image, click Upload.
Now that you’ve added TrueNAS’s ISO image to your Proxmox, you can continue to create a virtual machine.
Step 3Create a Virtual Machine
The following part of the guide is easy if you follow the steps. However, remember that some configurations and options will depend on your hardware, and you should adjust accordingly. Here’s how to create a TrueNAS virtual machine on Proxmox:
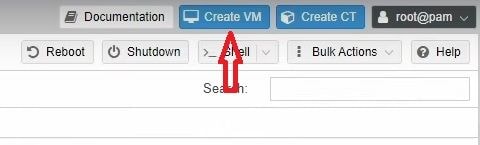
- Click Create VM in the top right corner of your Proxmox server.
- Name the virtual machine however you want, and leave the VM ID as is.
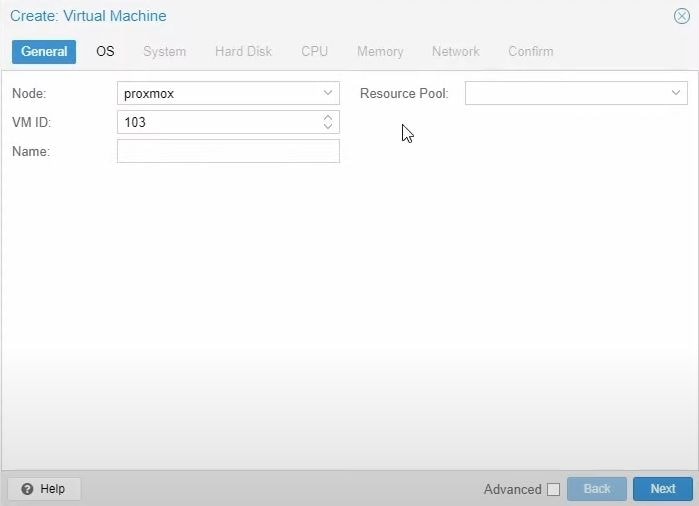
For this guide, we named our virtual machine “truenas-test,” and our VM ID is 103.

- Click Next in the bottom right corner.
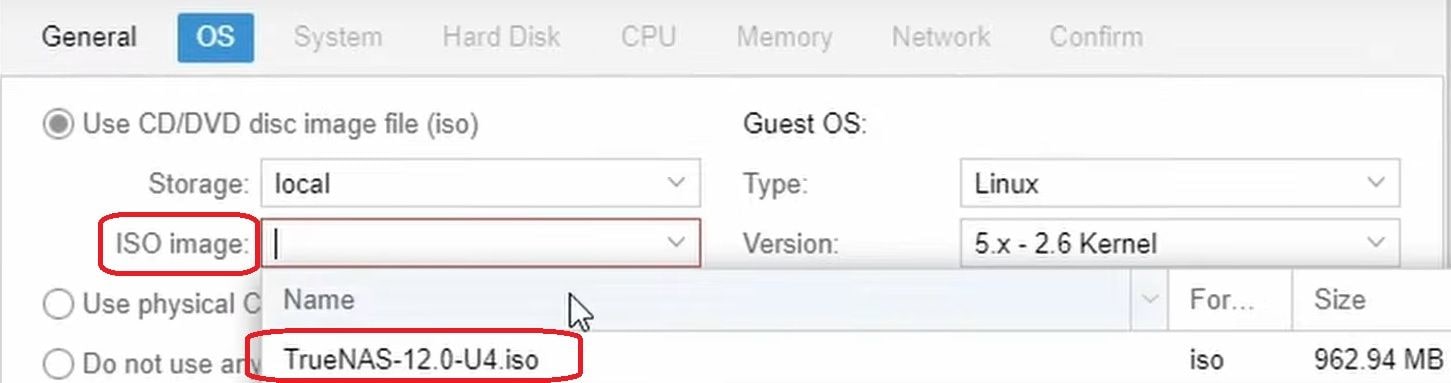
- Under the ISO image option, select the TrueNAS ISO you previously added to your Proxmox and click Next again.
- Under the System tab, you don’t need to change anything, so leave everything as is. Click Next again.

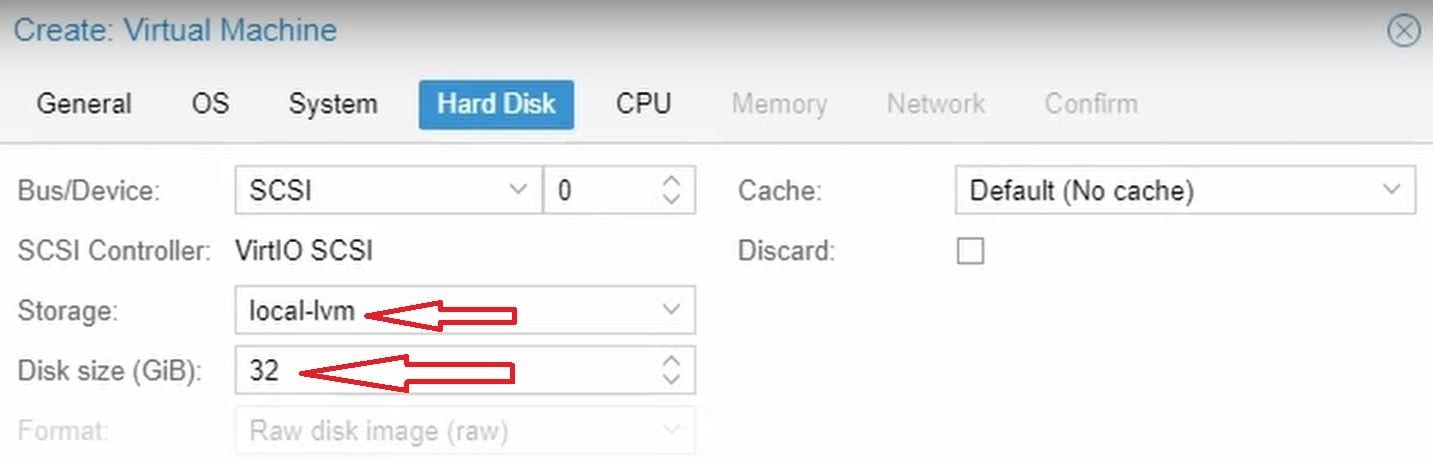
- When you reach the Hard Disk tab, select the local storage for installing the TrueNAS virtual machine. Add at least 32 GB of space (more is better), and click Next.
- Under the CPU tab, select at least two CPU cores, then click Next.

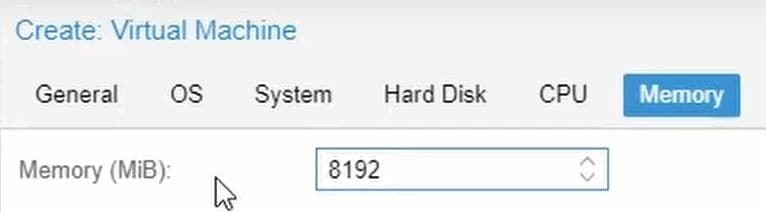
- In the Memory tab, we recommend allowing the virtual machine at least 8 GB (8,192 MB) of RAM, as TrueNAS is memory-hungry and does a lot of caching. However, if you have more RAM, you can add more. When you do so, click Next again.
- Select the appropriate option from the Bridge drop-down list in the Network tab. This part will depend on your hardware, and you should use networking the same as you configured your Proxmox.
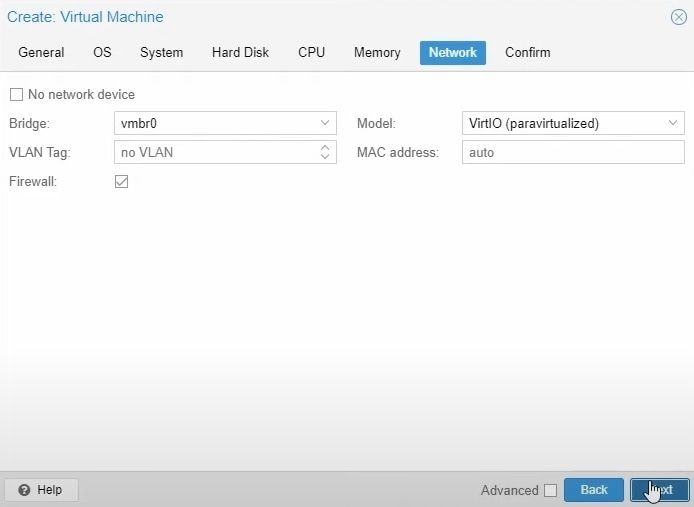
- Click Next, and finally, in the Confirm tab, click Finish.
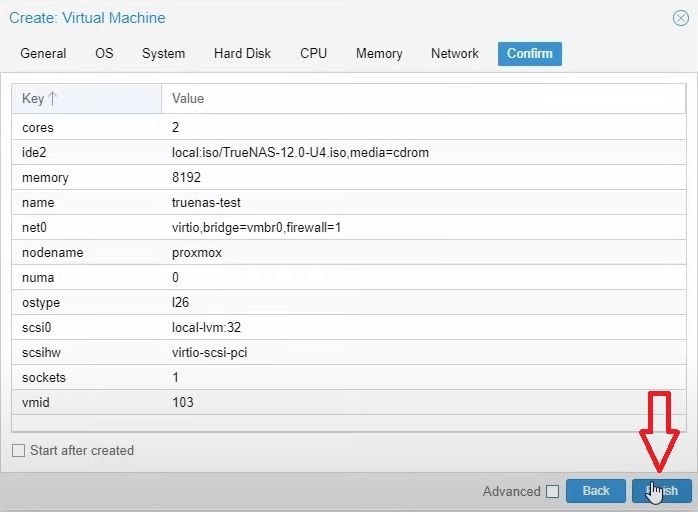
That’s it when creating a TrueNAS virtual machine on your Proxmox. Remember that some options depend on your specific hardware and how you set up your Proxmox.
Step 4Adjust Passthrough Storage Controllers
Now comes the tricky part. After successfully creating a TrueNAS VM on Proxmox, you must pass through your config’s storage controllers to your virtual machine. Here’s how you can do that:
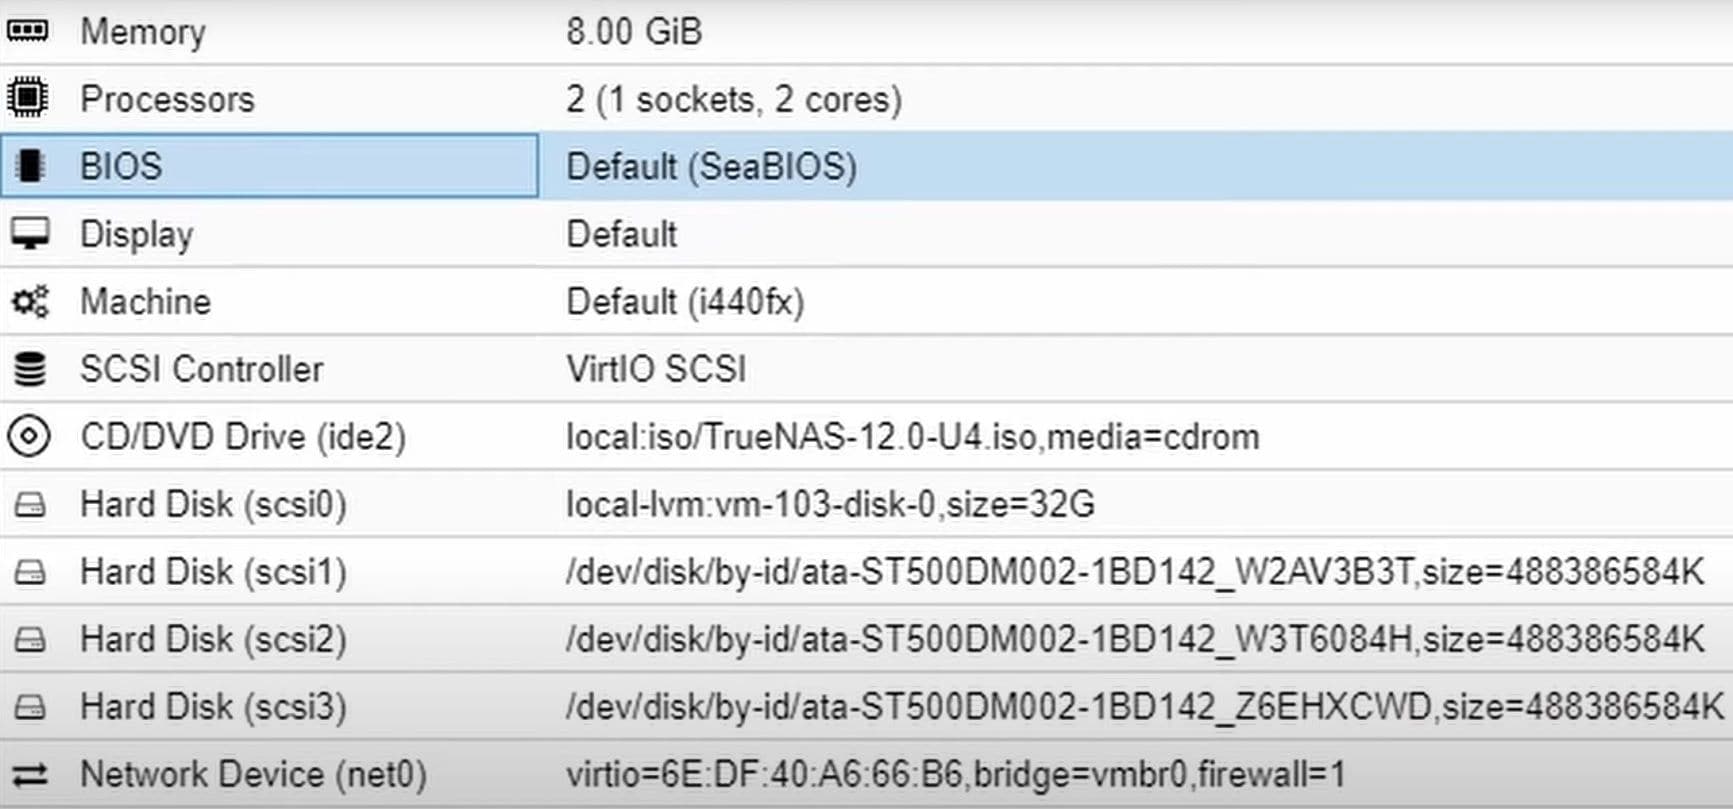
- In your Proxmox settings, select the newly created TrueNAS virtual machine. For you, it’s whatever ID you had and whatever name you chose. For us, it’s “VM” with ID 103 and “truenas-test” as its name.
- Then, select the Hardware option. You should see all the choices you configured when creating the virtual machine.
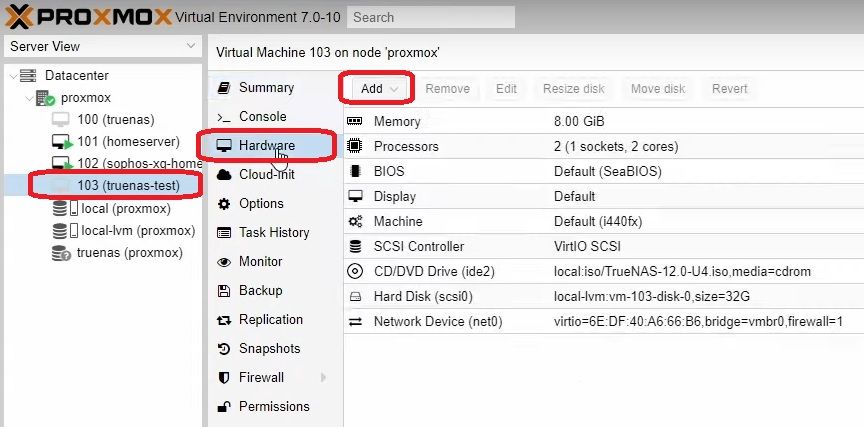
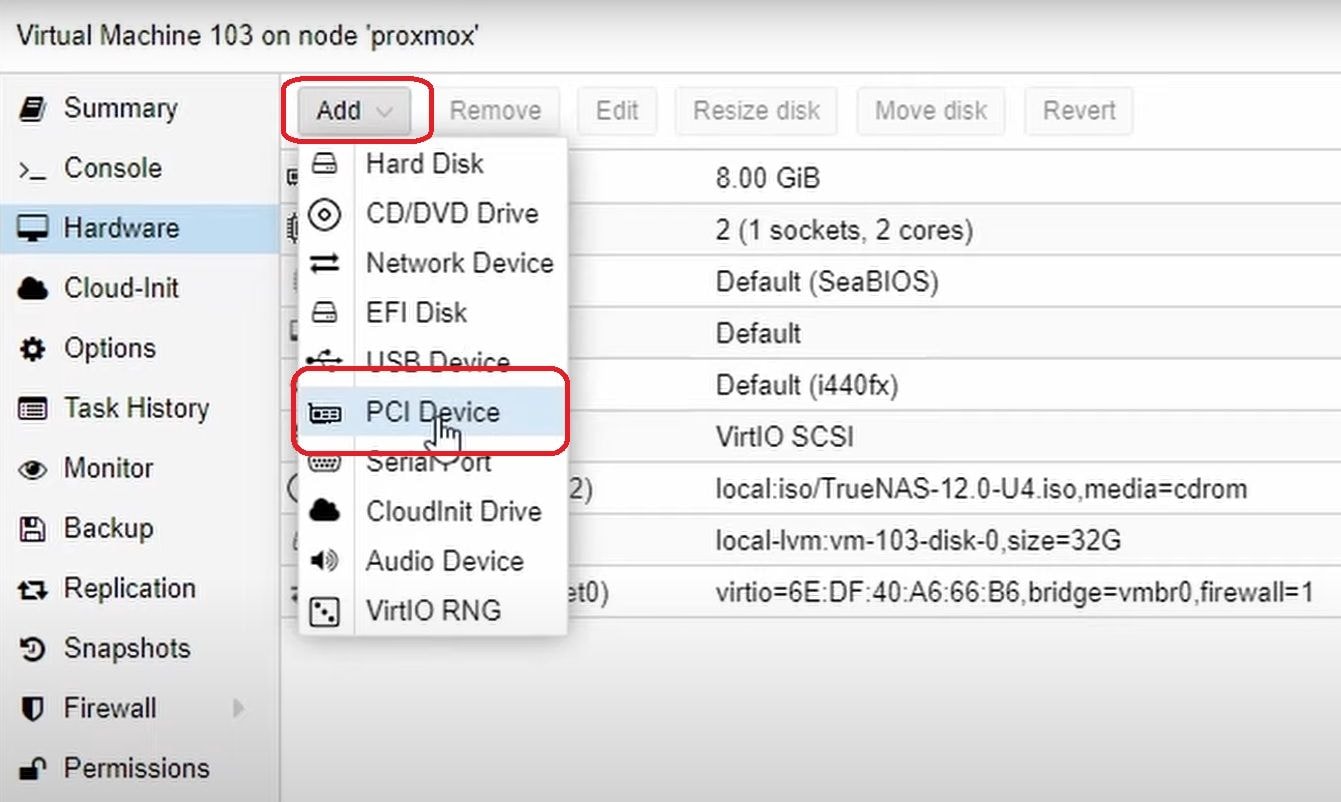
- Click Add in the top part of the window.
- Now select the PCI Device option from the drop-down menu.
- A dialog box should pop up, prompting you to add a PCI device. Here, you can add your storage controllers and give them a passthrough to your virtual machine. It should look something like this:
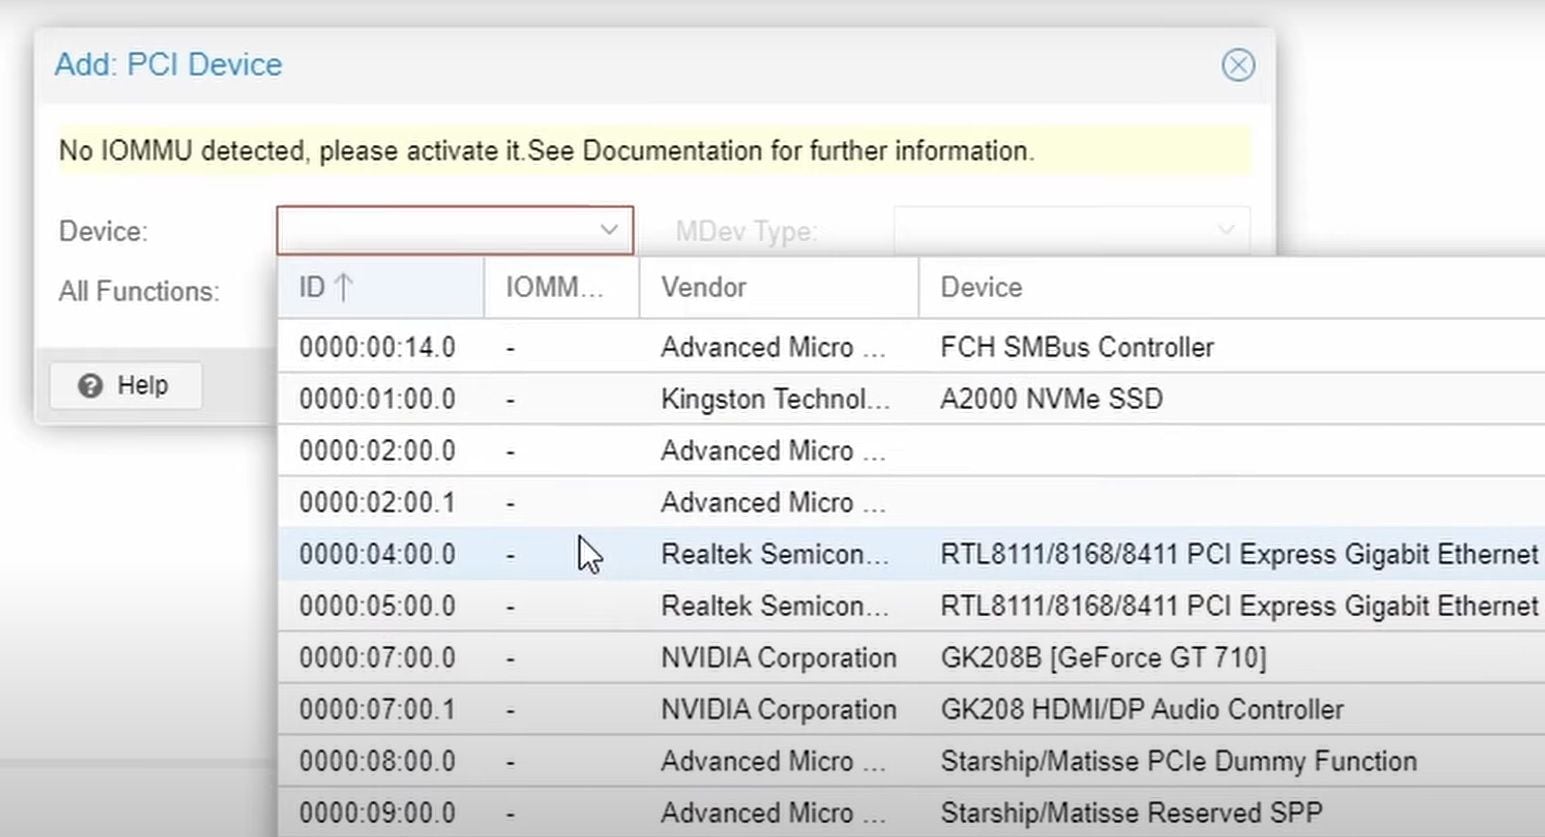
Remember that you should select the storage controllers of your existing configuration. The look of the window will depend on your setup and might look different from the picture. If you need help, search these PCI devices to see which ones are your storage controllers.
Step 5Adjust Passthrough HDDs
Here is the most challenging part. Follow this part if your storage controllers connect to the motherboard and are not additional PCI devices. You only need to go over this part of the guide if you can’t pass through storage controllers the easy way.
- Use an SSH connection to connect to your Proxmox server.
- Input your Proxmox server password.
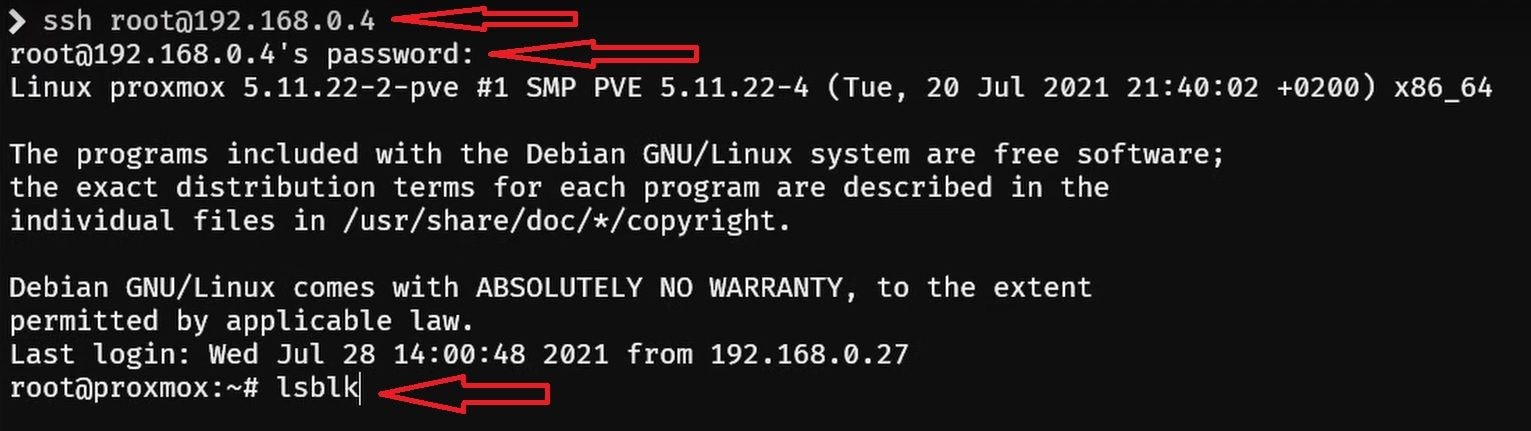
- Use the following command to find the unique storage controller identifiers:
lsblk
- You’ll see a list of your hard drives, where they’ll have names like “
sda,” “sdb,” “sdc,” and so on. It should look like this:
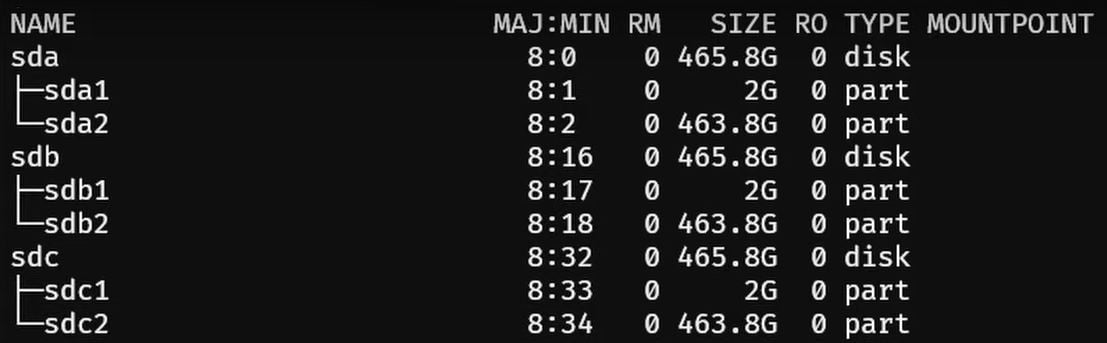
Although you can pass them through to your VM using these names, there’s a more secure way of doing it with their serial numbers.
- Enter the following command:
lsblk -o +MODEL,SERIAL
- You should see a similar list with additional information, such as your hard drive’s model and serial numbers.
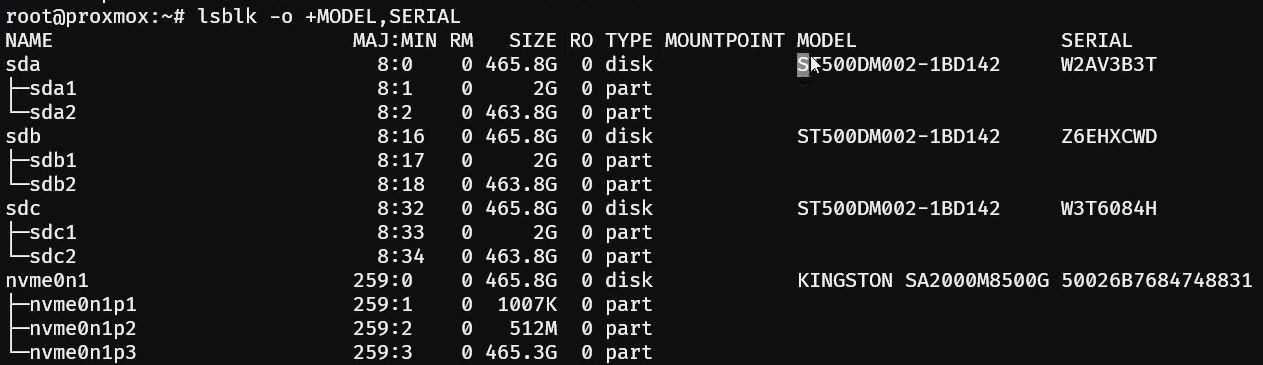
The recommended way to pass through devices that connect directly to your motherboard is to use their model and serial numbers instead of their names. These names can change if you reboot or reset the machine while the numbers are constant.
- Enter this command to see the hard drive data:
ls /dev/disk/by-id
By displaying this data, you can easily copy and paste it to add it to your virtual machine. It should look something like this:

- Enter this command to add your storage devices to the VM. You can use it as many times as you have onboard hard drives:
qm set 103 -scsi1 /dev/disk/by-id/ata-ST500DM002-1BD142-W2AV3B3T
Remember that this part depends on your storage devices.
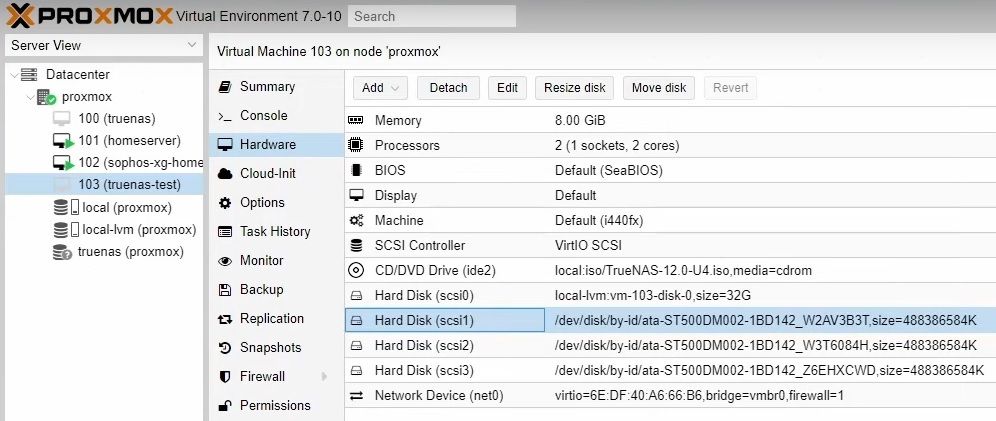
- Copy your hard drive’s model and serial numbers in the command. Here’s what it looks like for our three hard drives.

- Finally, refresh your Proxmox server and see the storage devices you just added.
When you’ve added your storage devices, you can install TrueNAS.
Step 6Install TrueNAS on Proxmox
To install TrueNAS VM on your Proxmox, follow these steps:
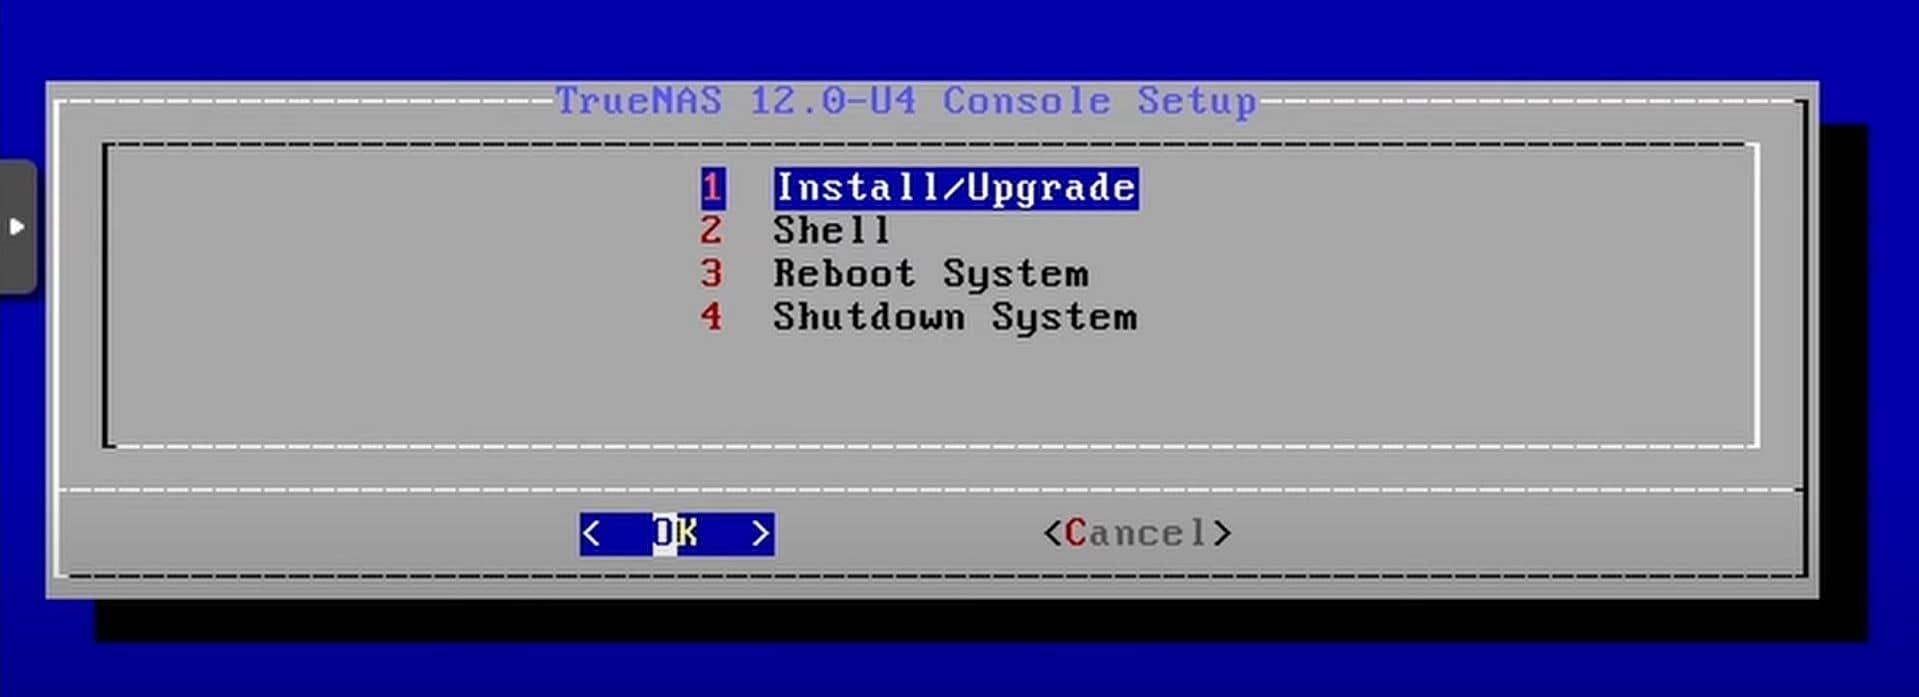
- Click Start in the top right corner.

- Select the Install/Upgrade option.
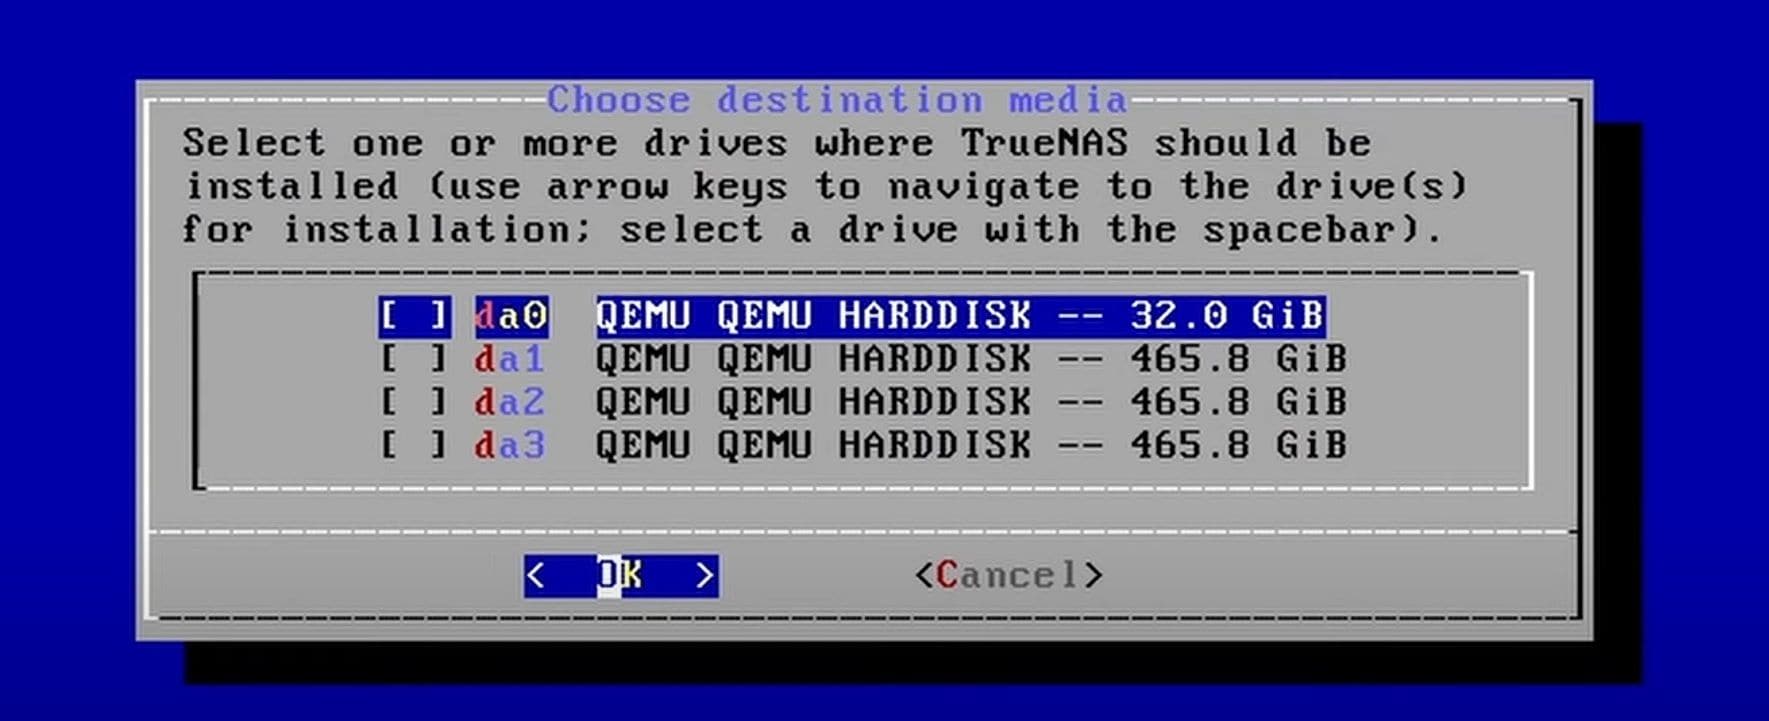
- Select the hard disk on which to install TrueNAS. For us, it’s the 32 GB one, not those we just passed through.
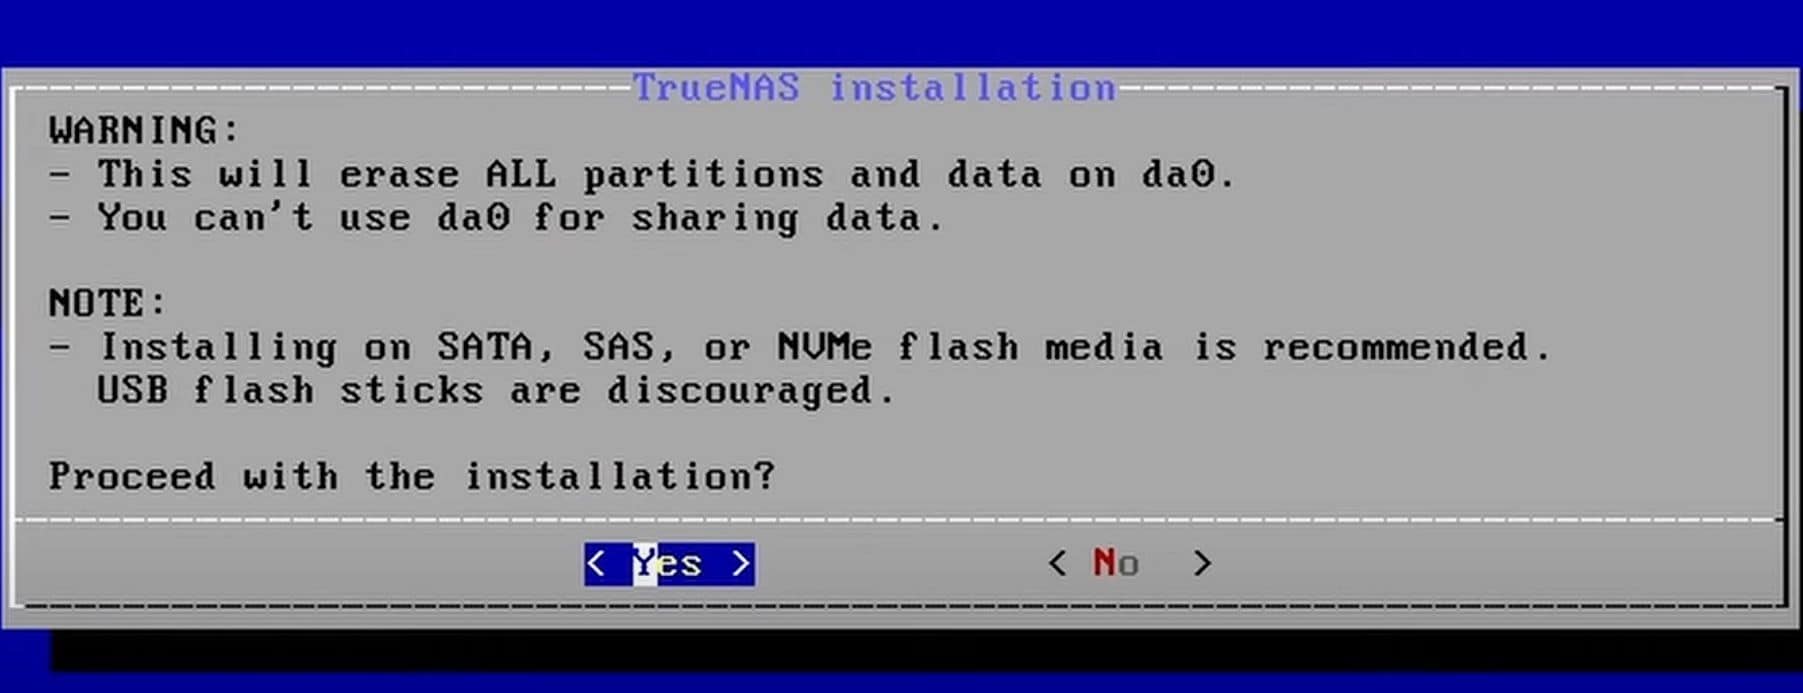
- Select Yes on the following prompt.
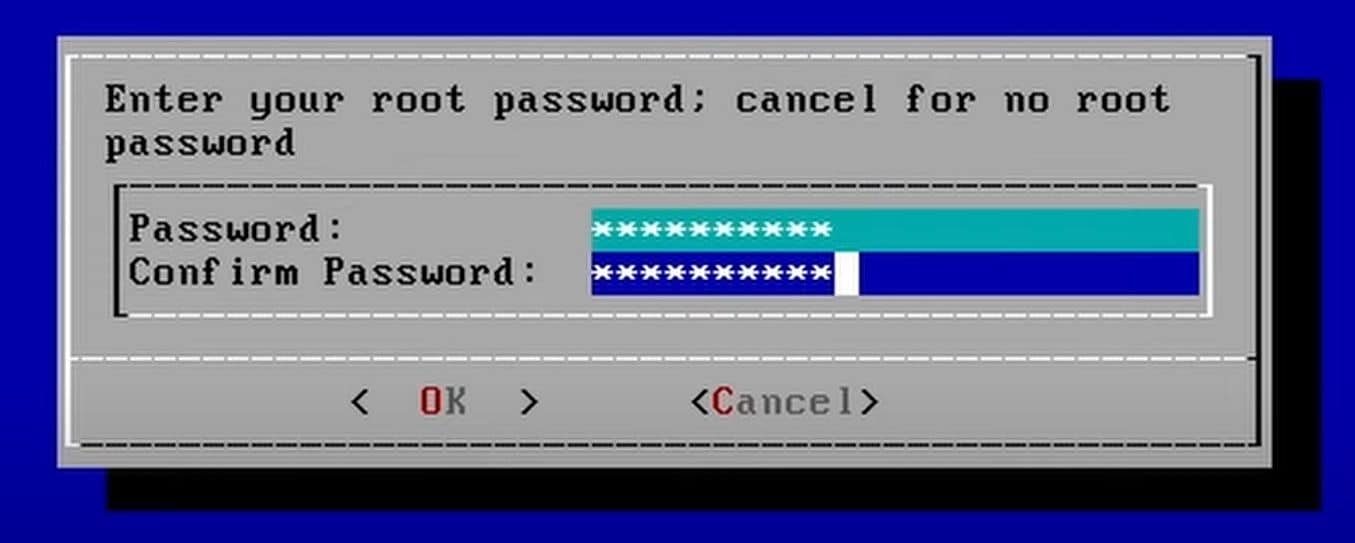
- Add a strong password.
- Select the appropriate booting option. The default option is Boot via BIOS.
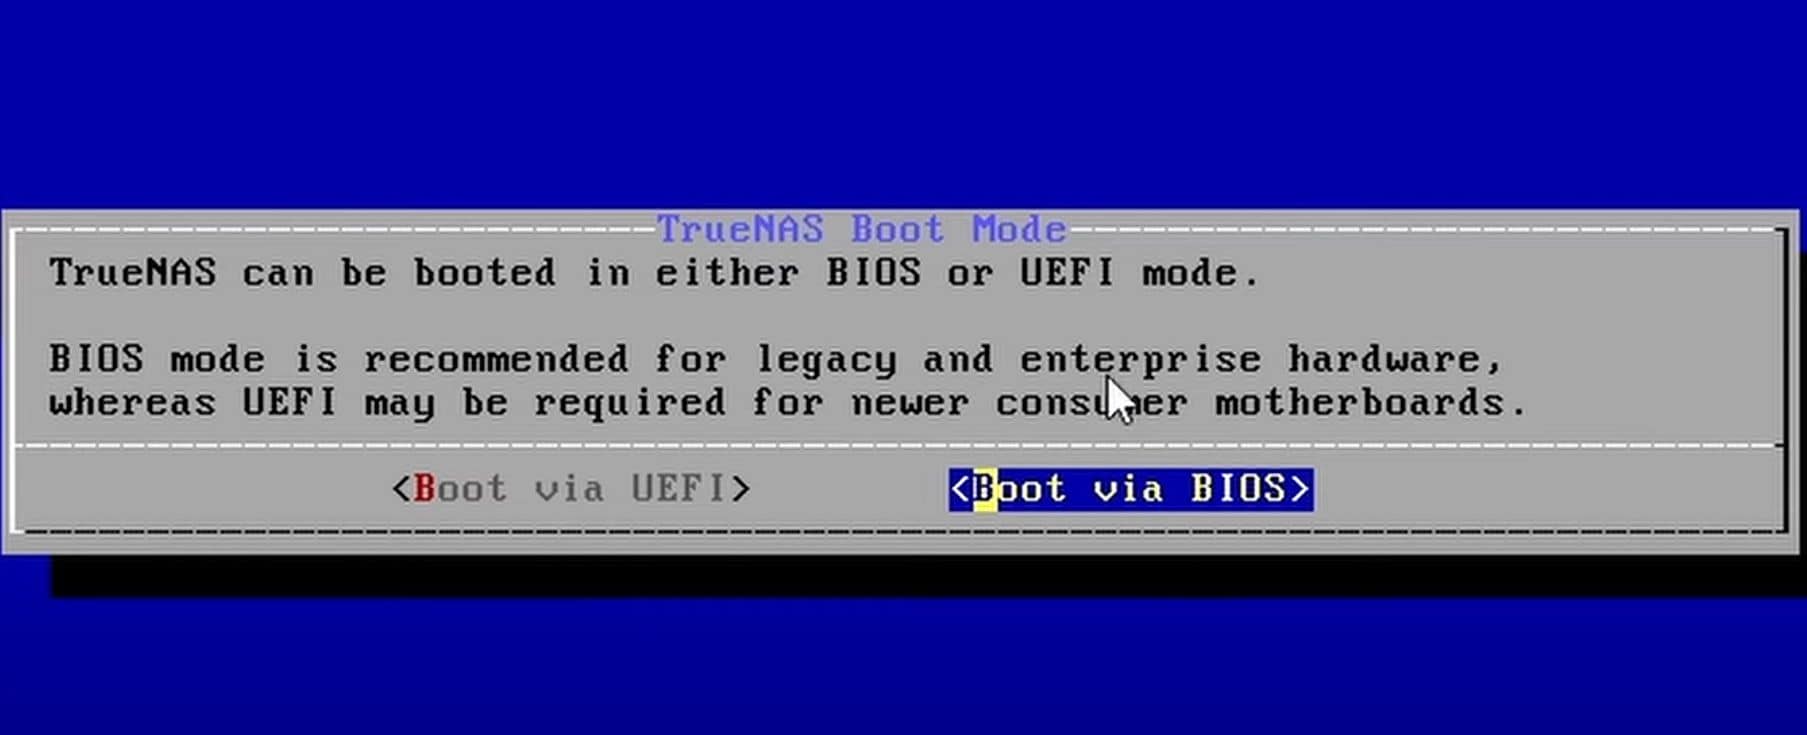
- (Optional: You can check the set boot option in your Proxmox settings. Here’s how it looks.)
- After you boot, you’ll see this window. You can configure additional settings here.
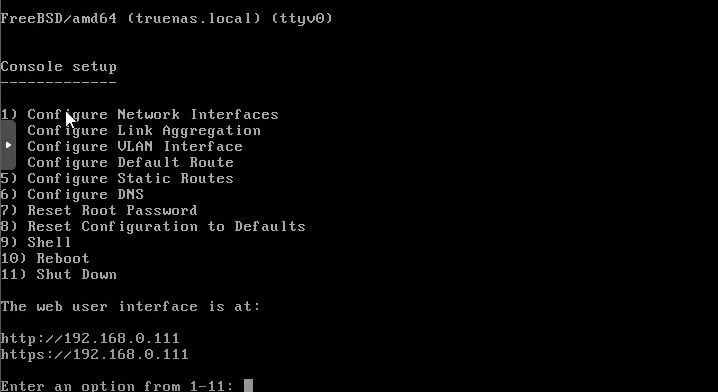
- Use the IP address to access TrueNAS’s web UI. Input the IP address in your browser. You’ll see this window.
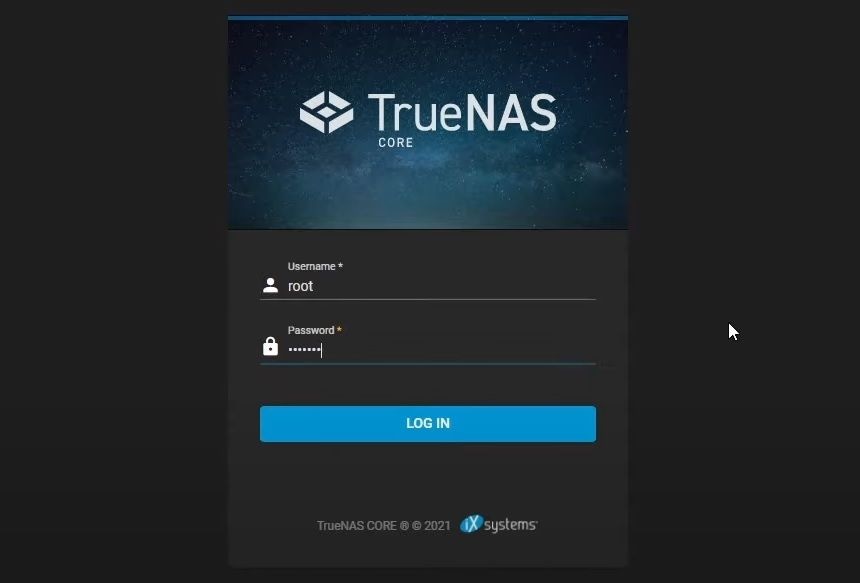
- Input “root” as the username and add your chosen password.
That’s it for installing TrueNAS on your Proxmox server. All that’s left to do is to run virtual machines inside your TrueNAS system on your Proxmox server.
Step 7Run VMs in TrueNAS
In the TrueNAS web interface, you’ll see many options on the left side of the window. However, going through all the options would take too long, and all you need is the Virtual Machines option, which you’ll find in the bottom left part.
- Click the Virtual Machines option and click Add in the top right corner.
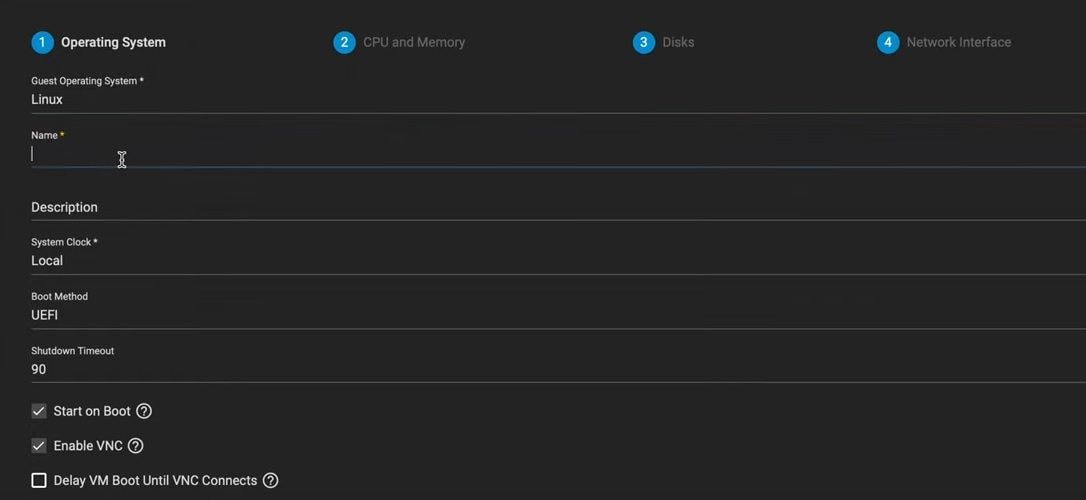
- Choose the operating system type and name it. Click Next.
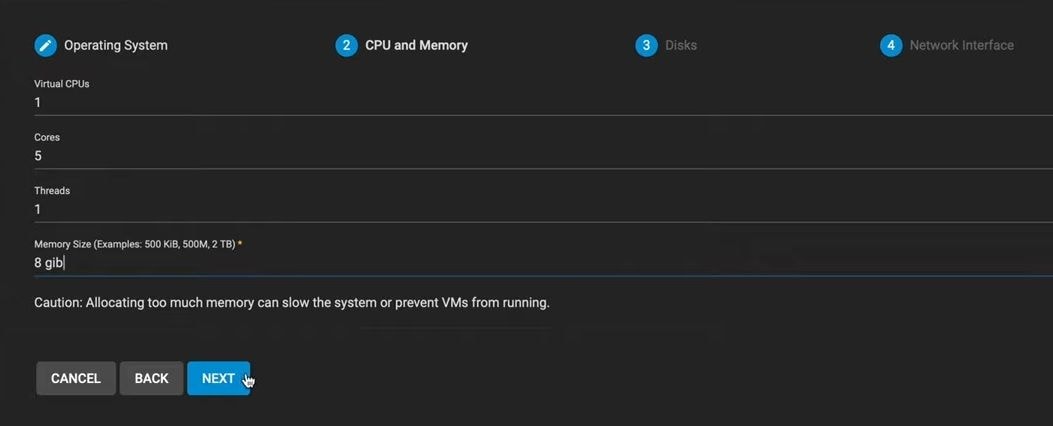
- Give the VM however many cores you want but ensure it’s more than two. We added five. As for RAM, we gave it 8 GB, but you can add more. We wouldn’t recommend less than 8 GB.
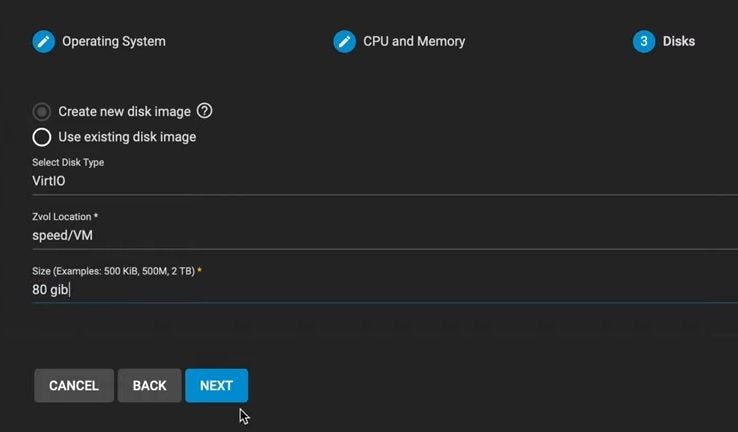
- Select Create new disk image in the Disks tab and choose VirtIO for disk type. Then, select the appropriate dataset that you previously set up. For us, it’s “speed/VM.” We gave it 80 GB of space.
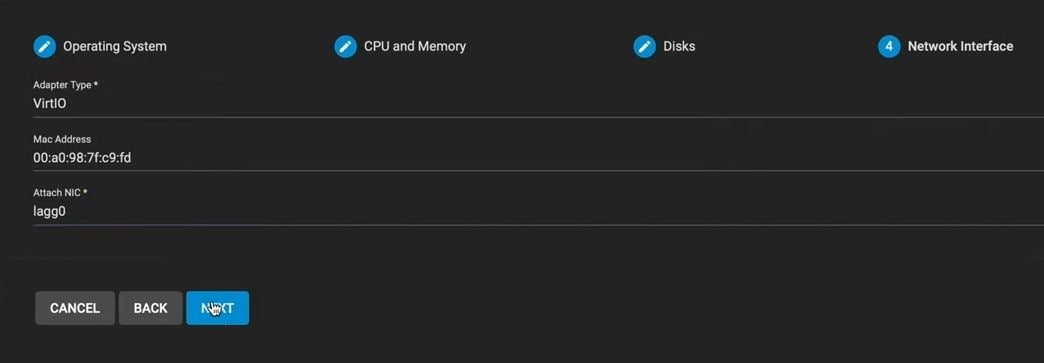
- Choose “VirtIO” for the adapter type in the Network Interface tab. Also, choose your primary NIC.
- On the next screen, choose the ISO file of the operating system you’re installing. It will differ for all operating systems and depend on what you’re installing.
- Finally, click Submit in the Confirm Options tab.
That’s it. You’ve successfully created a VM inside the TrueNAS on your Proxmox server.
Bonus Tip: Recovering TrueNAS/FreeNAS Data
Although TrueNAS is a capable operating system perfect for home storage or a media-sharing server, sometimes something corrupts data, or you accidentally delete it. If that happens, you should know that you’re not powerless.
In this frustrating scenario, you should remember that there are ways to perform FreeNAS data recovery. Whether you accidentally deleted these files, something corrupted them, or there was a power outage, these methods are easy to follow and can bring your files back quickly.
Conclusion
Proxmox is a powerful virtualization software with which you can run multiple virtual machines and containers from a single, centralized interface. However, it lacks features you’d need to use Proxmox as a file-sharing or home storage server.
Fortunately, by adding a TrueNAS virtual machine to your Proxmox, you can gain these features back and employ your Proxmox software to be capable of storing and sharing files. However, it requires installing and configuring additional software, which can be tricky, but you can do it if you follow our guide.
For Windows XP/Vista/7/8/10/11
For macOS X 10.10 or later


