

 TL;DR:
You can recover lost Photo Vault images on an iPhone by checking the native iOS albums, restoring from existing Apple backups, or using third-party desktop software if no backup exists.
● The native "Recently Deleted" album retains deleted photos for a strict 30-day window before permanent deletion, offering the quickest recovery for accidental removals.
● Recovering through iCloud.com or iTunes requires a previously established backup, and using iTunes will overwrite your current device state by restoring the entire selected backup file.
● If backups are unavailable or files are encrypted, third-party tools like Dr.Fone iOS Data Recovery or Wondershare Recoverit require connecting the iPhone to a Windows or macOS computer via USB to perform a direct device scan.
Ask AI for a summary
 ChatGPT
 Perplexity
 Gemini
 Claude
 Grok
Grok
Losing photos can be really frustrating. These memories are precious, and their safety is important. Photo vault apps help in keeping your photos secure. But, what if these apps fail? It's crucial to know how to retrieve photos from photo vault.
Data loss in photo vault apps can happen for many reasons. You might wonder, "how do I recover permanently deleted photos from photo vault?" This guide will help you understand photo vault data recovery.
In this article, we'll look at private photo vault recovery. Different methods to recover your photos will be explained. It's important to know how to recover deleted photos from private photo vault. Keep reading to learn more.
Try Recoverit to Perform Photo Recovery
 Security Verified. 3,591,664 people have downloaded it.
In this article

Part 1: What Is Private Photo Vault?
Private photo vault apps are designed to protect your photos. These apps use security features like passwords to keep your photos safe. If you forget your photo vault password, you might panic. But don't worry; photo vault recovery is possible.
These apps ensure your photos remain private. They are great for keeping sensitive photos away from prying eyes. However, data loss can still occur. Knowing what is private photo vault helps you understand its features.
Private photo vault recovery can be a bit tricky. But with the right methods, you can retrieve your photos. It's important to regularly back up your data to prevent loss. Let's dive into the common reasons for data loss.
Part 2: Common Reasons for Data Loss in Photo Vault Apps
Losing photos in photo vault apps can happen for several reasons. It could be due to accidental deletion or forgetting your password. App crashes or software updates might also lead to data loss. Device malfunctions and virus attacks are other possible reasons.
Knowing these common causes can help you prevent future data loss.
- Accidental deletion: Sometimes, you might delete photos by mistake.
- Forgot my photo vault password: Not remembering your password can cause access issues.
- App crashes: Apps can crash, leading to potential data loss.
- Software updates: Updates can sometimes lead to data loss.
- Device malfunctions: Hardware problems can cause data loss.
- Virus attacks: Malware can corrupt or delete photos.
- Storage issues: Running out of storage can result in data loss.
- Sync problems: Issues with syncing can lead to missing photos.
Part 3: Ways for Photo Vault Recovery on iPhone
Recovering photos from a photo vault can be done through various methods. Each method has its own steps and requirements. Here's an introduction and the steps for each method:
Method 1: Photo Vault Recovery from Recently Deleted Album
Often, deleted photos are moved to the "Recently Deleted" album. This album acts as a safety net for your deleted photos. It retains photos for 30 days before they are permanently deleted. This gives you a window of time to recover any photos you may have deleted by mistake.
You can easily retrieve your photos from the "Recently Deleted" album. This feature ensures that even if you accidentally delete a photo, you still have a chance to recover it. By regularly checking this album, you can make sure that no valuable photos are lost forever. This simple yet effective safety measure helps keep your precious memories intact.
Steps:
- Open the Photos app. Go to Albums. Tap Recently Deleted.
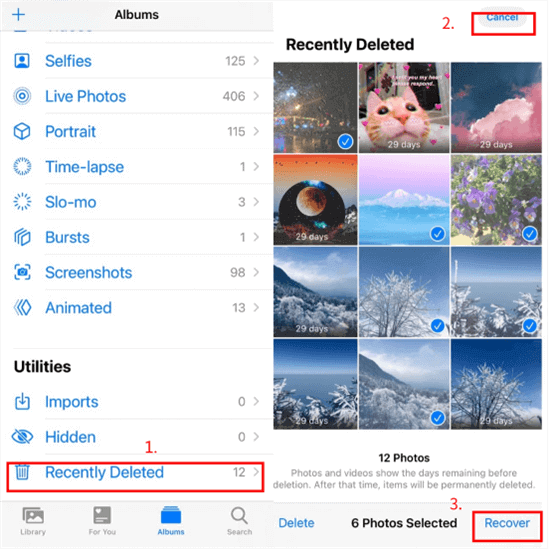
- Select the photos to recover. Tap Recover.
Method 2: Photo Vault Recovery from Hidden Album
Sometimes, photos are hidden instead of deleted. The "Hidden" album is designed to store these photos safely. This way, they are kept out of sight but not removed from your device. It acts as a secure place for photos you want to keep private or out of the main view.
Recovering photos from the "Hidden" album is straightforward. This method is quick and effective, allowing you to easily unhide and access your photos again. By using this feature, you can ensure that your photos are just a few taps away whenever you need them.
Steps:
- Open the Photos app. Go to Albums. Tap Hidden.
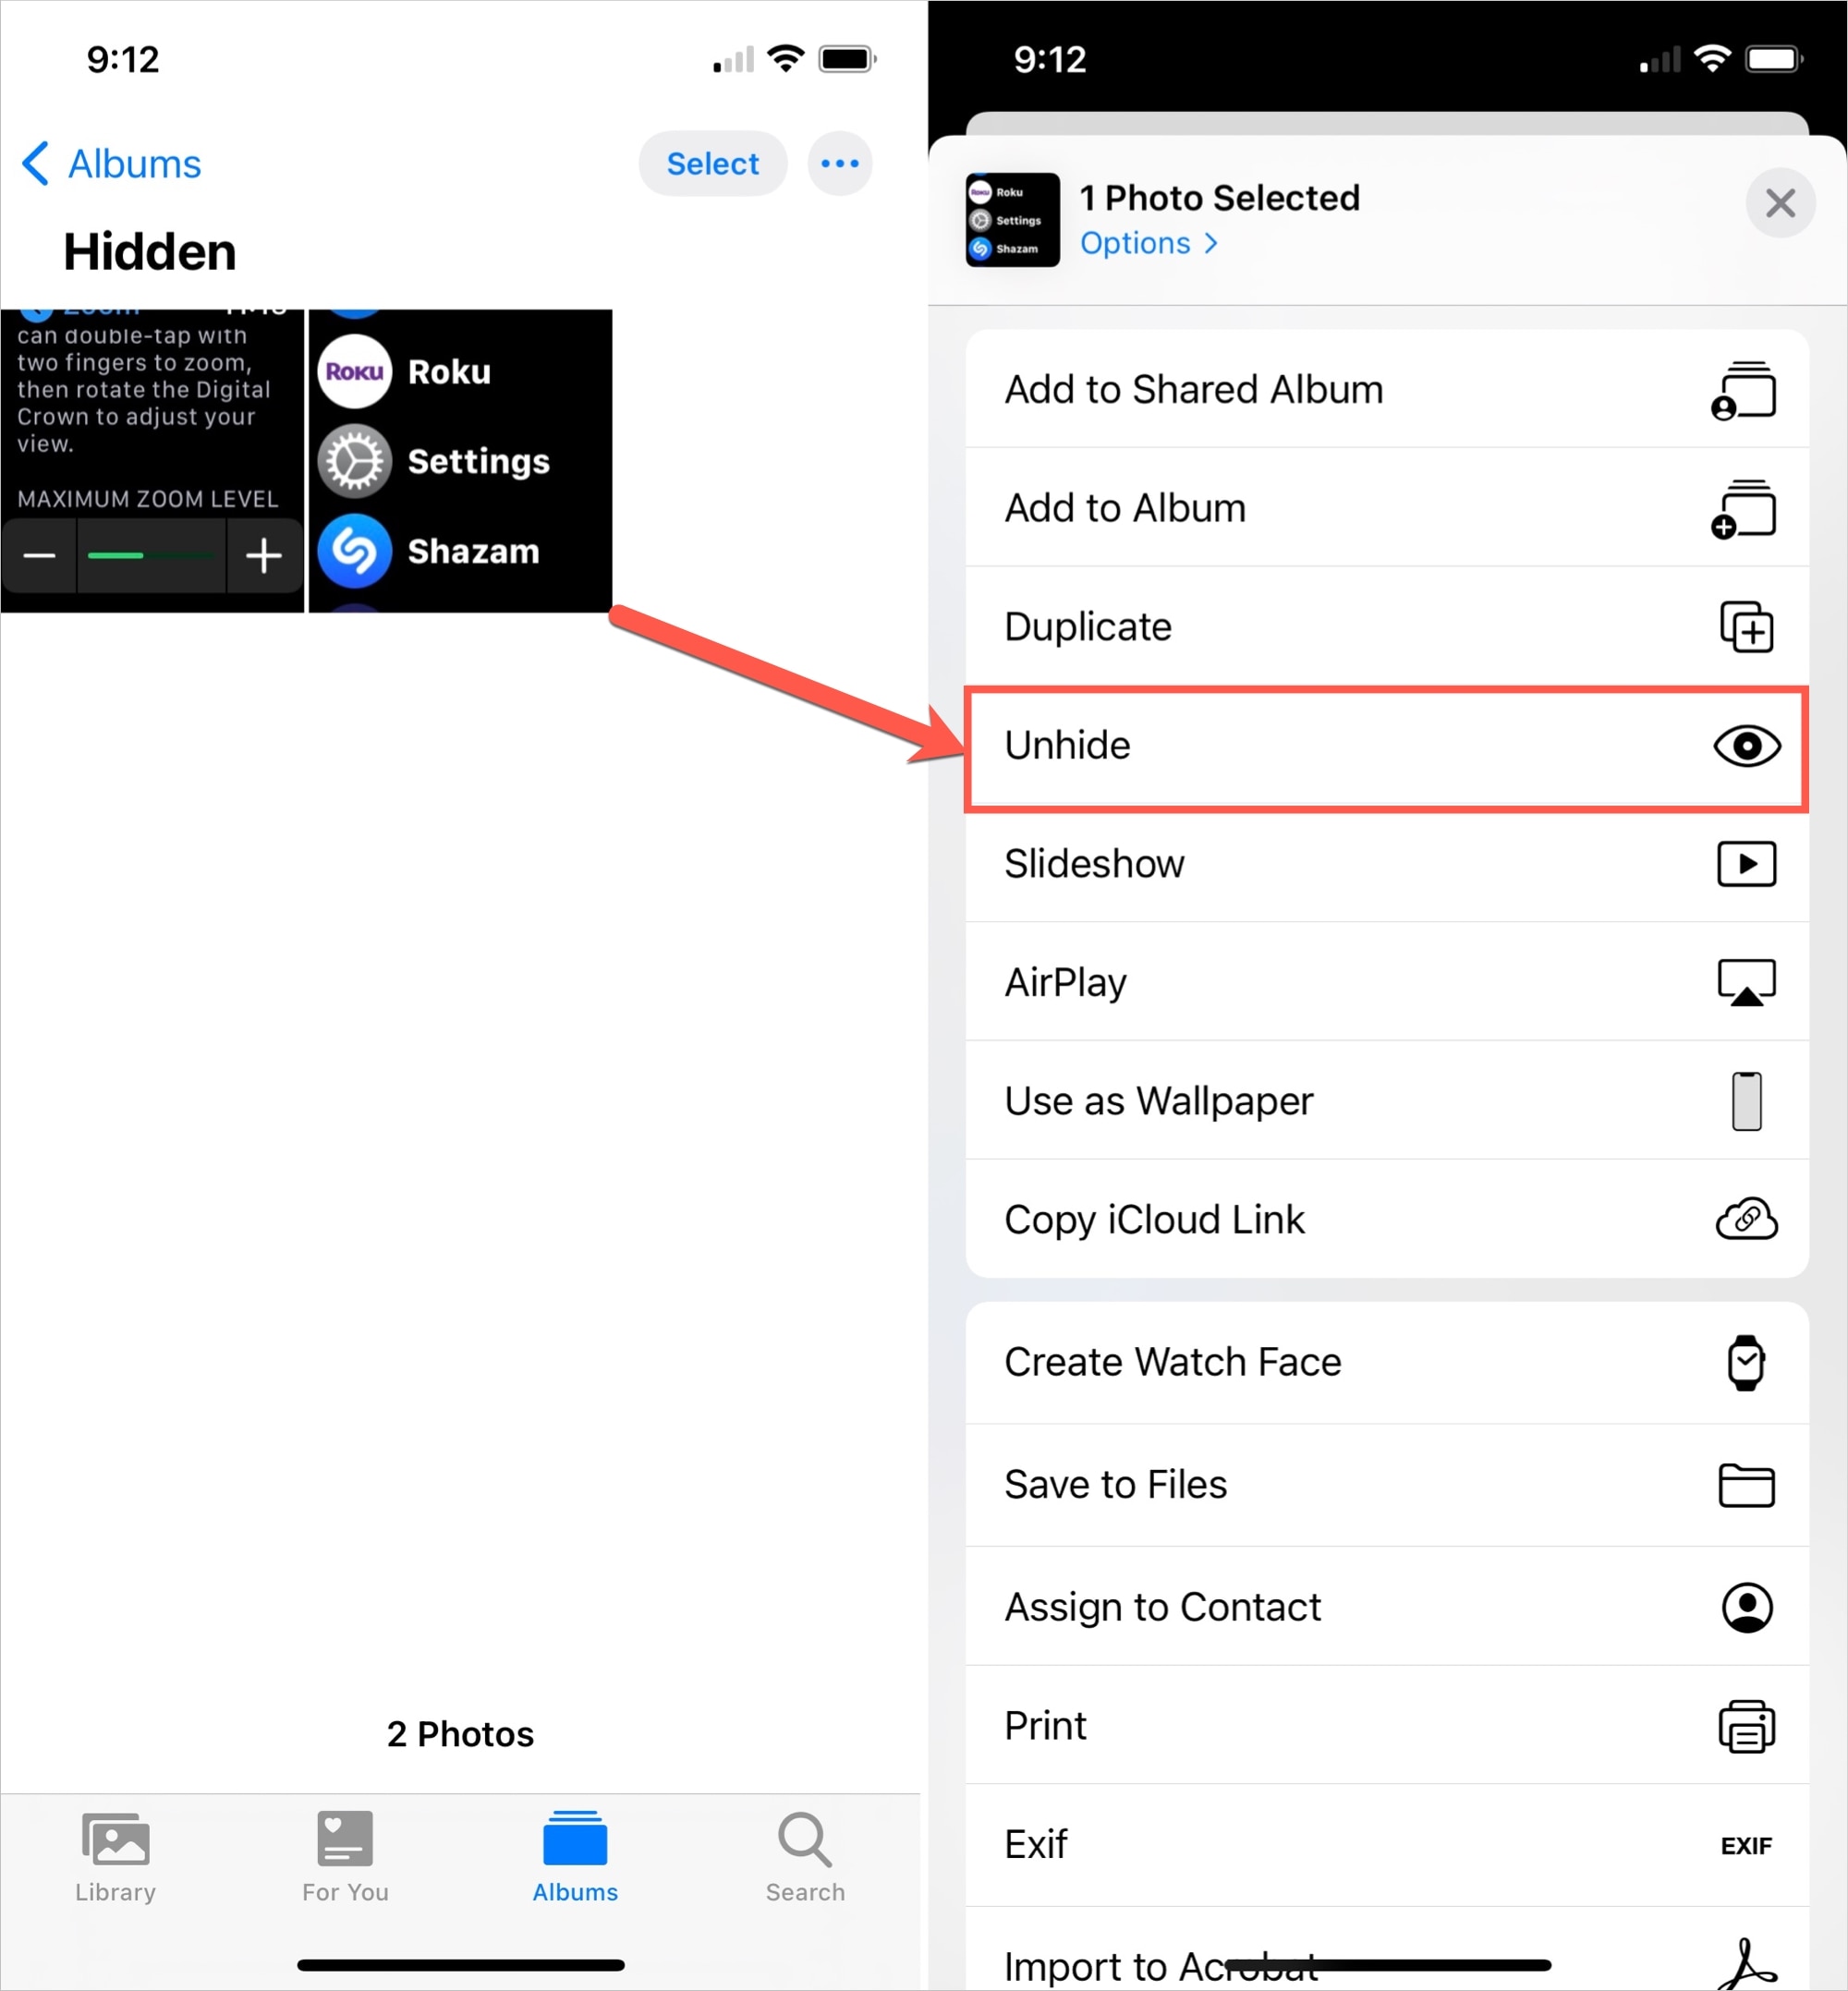
- Select the photos to recover. Tap Unhide.
Method 3: Photo Vault Recovery Without Backup Using Dr.Fone iOS Data Recovery Tool
Losing photos from your Photo Vault on an iPhone can be quite distressing, especially if you don't have a backup. Fortunately, there are methods to recover these photos even without a backup. One effective tool for this purpose is the Dr.Fone, which can help retrieve your precious memories directly from your iPhone.
Dr.Fone offers a reliable solution to recover deleted photos and other data from your device. By following a few simple steps, you can recover your lost photos and bring your cherished memories back to life.
Steps to Recover Photos Using Dr. Fone App:
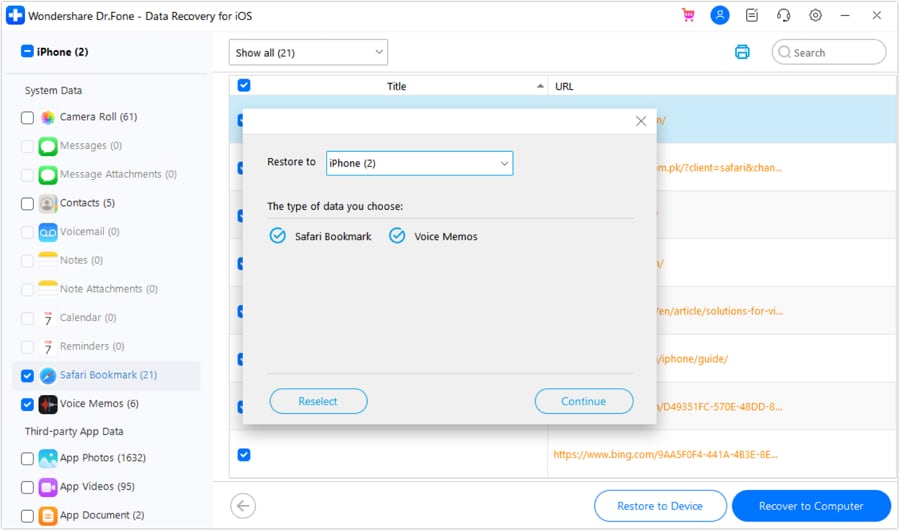
- First, download and install the Dr. Fone app on your computer. Open the Dr. Fone tool and select the Data Recovery option. Use a USB cable to connect your iPhone to the computer.

- Choose the Recover from iOS option and follow the on-screen instructions to enable USB debugging on your device.
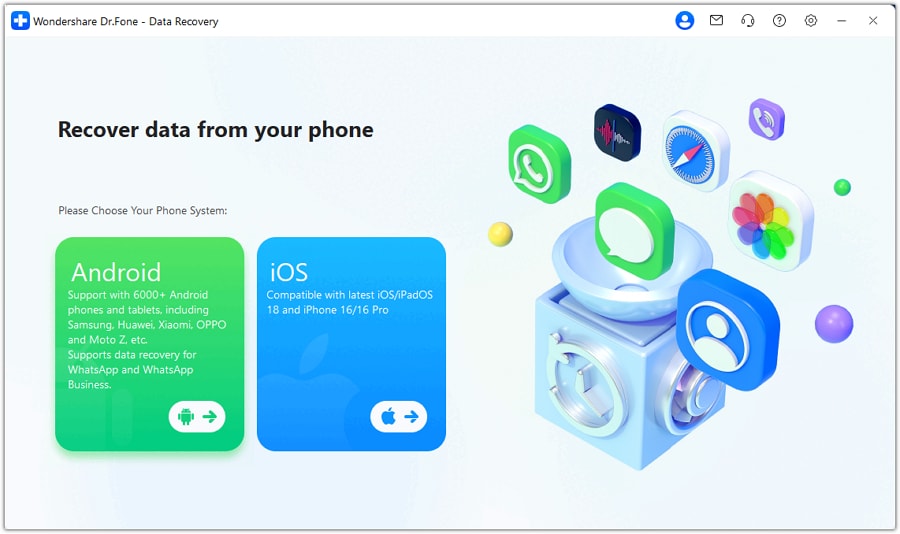
- Now select Recover Data from iOS device option.

- Dr. Fone will scan your device for deleted photos. This process may take a few minutes.
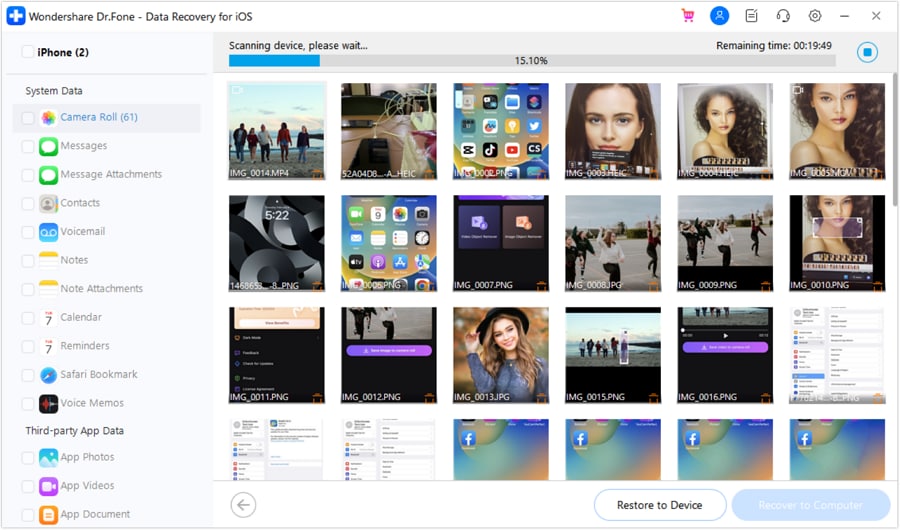
- Once the scan is complete, preview the recoverable photos and select the ones you want to recover. Click the "Restore to iPhone" button to save them to your computer.
You should now have your photos back on your iPhone Photo Vault.
Method 4: Photo Vault Recovery with iCloud Website
iCloud can be a lifesaver for private photo vault recovery. It stores your data securely in the cloud. This means your photos are safe and can be accessed from any device. Even if you lose your iPhone, your photos are not lost forever. They remain stored in iCloud, ready to be recovered when needed.
You can easily access and recover your photos from iCloud. Simply sign in to iCloud.comwith your Apple ID. Once logged in, you can navigate to the Photos section and find your deleted photos. This flexibility ensures you can always retrieve your precious memories, no matter where you are.
Steps:
- Go to iCloud.com. Sign in with your Apple ID. Click on Photos.
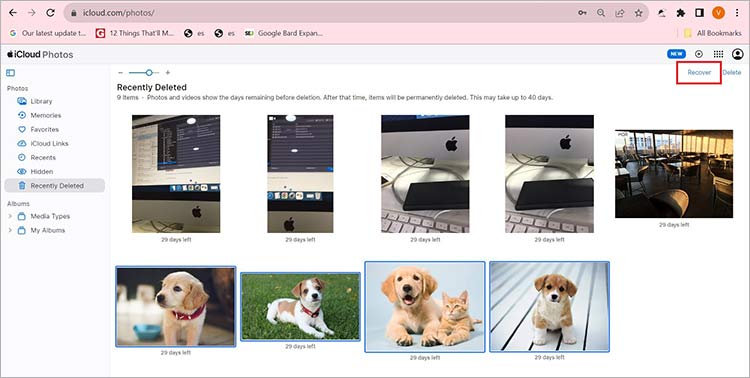
- Find the deleted photos. Download the photos.
Method 5: Photo Vault Recovery with iTunes
iTunes also offers a way to recover your photos. It allows you to restore your iPhone from a previous backup. This method is very useful if you regularly back up your device. By keeping backups, you ensure that your data, including photos, is safely stored and can be retrieved when needed.
To recover your photos using iTunes, connect your iPhone to your computer and open iTunes. From there, you can select your device and choose to restore from a backup. This process will restore all the data from your selected backup, including your photos. Regularly backing up your device ensures that your valuable memories are never permanently lost.
Steps:
- Connect your iPhone to the computer. Open iTunes. Click on the iPhone icon.
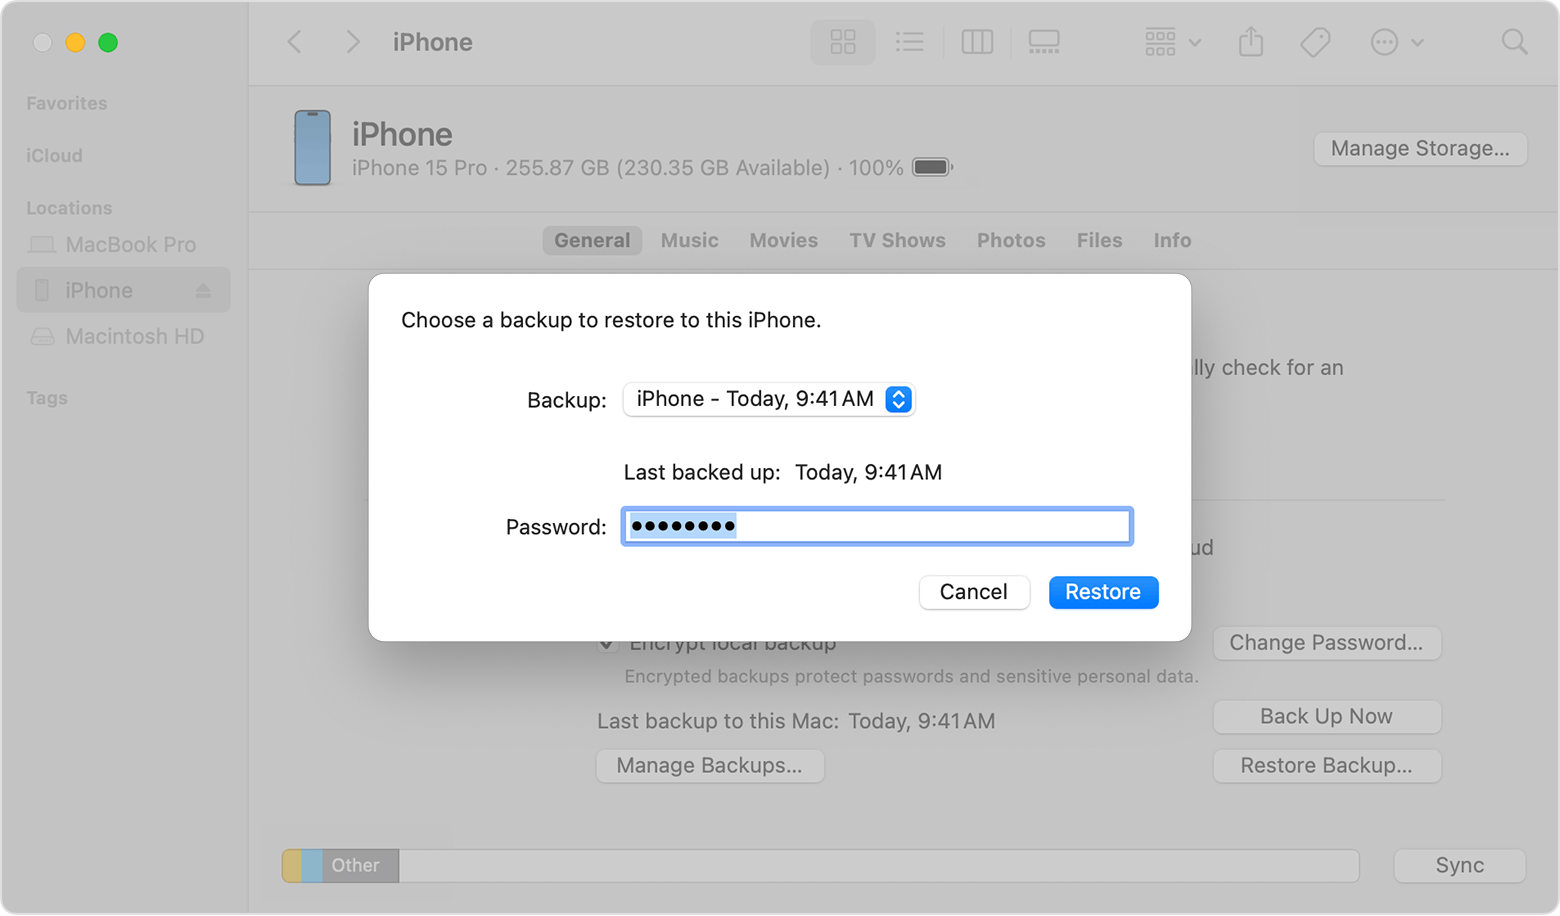
- Select Restore Backup. Choose the backup and restore.
BONUS: Recover Lost Photos on PC Easily: Try Recoverit Today!
Wondershare Recoverit is a powerful tool to recover lost photos on a PC. This software can recover photos without needing a backup. This makes it useful when you don’t have a backup of your photos.
Using Wondershare Recoverit, you can scan your device for lost photos. The tool is designed to find and retrieve these photos efficiently. It works even if you haven't backed up your data. This feature is especially helpful if your photos are accidentally deleted or lost due to other reasons.
The recovery process with Wondershare Recoverit is straightforward. You connect your iPhone to a computer and run the software. It scans the device for lost photos and helps you recover them. This method ensures that your precious memories are not lost forever. The tool is user-friendly and effective in photo vault data recovery.
Here are some key features:
- Wide File Support: Recoverit can recover various file types, including photos, videos, documents, and more. This makes it versatile for different data recovery needs.
- No Backup Needed: It can recover photos without needing a backup. This is especially useful if you haven't backed up your data and need to retrieve lost photos.
- User-Friendly Interface: The software is easy to use, even for beginners. It guides you through the recovery process with simple steps.
- High Recovery Rate: Recoverit boasts a high recovery rate of up to 99.5%.
- Compatibility: It works with various storage devices, including hard drives, SSDs, USB drives, and more. This makes it suitable for different recovery scenarios.
These features make Wondershare Recoverit an effective tool for photo vault recovery.
Steps:
- Download and install Recoverit. Connect your device to the computer. Launch Recoverit. Select the device.

- Scan for lost photos.

- Recover the photos.

Part 4: Precautions to Prevent Future Data Loss
Avoiding data loss is crucial. Here are some simple steps to protect your photos:
- Regular Backups: Always back up your photos. Use cloud services or external drives. Regular backups ensure you have a copy if something goes wrong.
- Update Apps: Keep your photo vault app updated. Updates fix bugs and improve security.
- Strong Passwords: Use strong, unique passwords for your apps. This protects your photos from unauthorized access.
- Avoid Suspicious Links: Don't click on unknown links. They might contain viruses that can harm your data.
- Secure Your Device: Use antivirus software to protect your device. Keep your operating system updated.
- Enable Two-Factor Authentication: Add an extra layer of security. Two-factor authentication makes it harder for others to access your data.
- Monitor Storage Space: Ensure your device has enough storage space. Full storage can cause issues and potential data loss.
By following these precautions, you can keep your photos safe and avoid future data loss.
Conclusion
Photo vault recovery is essential to protect your cherished memories. Losing valuable photos can be distressing, but understanding how to retrieve them can make a big difference. Tools like Wondershare Recoverit, iCloud, and iTunes are invaluable in helping you recover lost data. These tools offer reliable solutions for photo vault recovery on iPhone.
Taking precautions to avoid data loss is equally important. Regularly backing up your data ensures you have a copy of your photos in case something goes wrong. Keeping your apps and devices updated, using strong passwords, and securing your device are critical steps in preventing future data loss. By following these precautions, you can minimize the risk of losing your precious photos.
Knowing how to recover photos from photo vault apps can save your memories and provide peace of mind. Whether you use built-in recovery features or third-party tools, being prepared and informed can make the recovery process easier. Follow the recommended steps and keep your photos safe for years to come.
FAQs
1. Can I recover photo vault password?
Yes, you can recover your photo vault password. Most apps have a password recovery option. This usually involves answering security questions or using your email address. Follow the app's instructions for the password recovery process. It's important to keep your recovery email updated. This ensures you can receive reset instructions.2. How do I restore my vault backup?
To restore your vault backup, you can use iCloud or iTunes. First, make sure you have a recent backup. For iCloud, sign in to iCloud.comand go to Photos. Download the photos you need. For iTunes, connect your iPhone to your computer. Open iTunes and select your device. Click Restore Backup and choose the backup file. Follow the prompts to complete the restore process.3. How do I recover encrypted files from photo vault?
Recovering encrypted files from a photo vault is possible with the right tools. Wondershare Recoverit is one such tool. First, download and install Wondershare Recoverit. Connect your iPhone to your computer and launch the software. Select your device and scan for lost files. Once the scan is complete, you can preview and recover the encrypted files. This tool is effective and user-friendly.


