

 TL;DR:
To resolve video playback issues on a Mac caused by unsupported formats or corrupted files, update your macOS, convert the video to a compatible format, or use a dedicated repair tool like Wondershare Repairit.
● Resolve browser-based playback failures by clearing your caches, disabling unneeded extensions, and verifying that JavaScript is turned on within Safari's Security settings.
● If a video file is severely corrupted and triggers QuickTime or VLC errors, Wondershare Repairit can fix formats like MKV, MOV, and 3GP, utilizing an Advanced Repair mode that requires uploading a working sample video of the exact same format.
● Prevent permanent video header damage by strictly avoiding the manual renaming of file extensions (such as changing an MP4 to a MOV) and by safely ejecting external drives rather than unplugging them abruptly during playback.
Ask AI for a summary
 ChatGPT
 Perplexity
 Gemini
 Claude
 Grok
Grok
Have you been struggling lately with playing videos on a Mac? Do they play partially, or do they not play at all? No matter the situation, it isn't so bad that it can't be fixed.
You can now fix videos that won't play on Mac. By checking some system settings and using a video repair tool, you can fix the issues in no time. Video files are one of your most important requirements, so store them properly to manage your day-to-day activities.
Losing your video files can indeed be a devastating experience. So, let's learn some of the top ways to fix video not working on Mac.
In this article

What Happens When Videos Aren’t Playing on Mac?
When you play too many high-quality videos on your device in different formats, the video file may become corrupted, failing to play on your Mac.
Here are some of the main signs you will notice in case video not working on Mac:
- Late response: In some situations, the video will take more than 10-20 seconds to play on your Mac device. This is a sign that the file has become corrupted and needs to be fixed.
- Frequent Error messages: When you try to open a video, you will receive the error message ‘Can’t open the media file.’ This means that the video file is either corrupted or missing.
- No output while playing the video: If you try to open it and it still doesn’t open, the video becomes corrupted. In some situations, despite multiple clicks, you won’t be able to open the video with your default media player.
- Audio distortion: If you frequently notice that the audio is distorted, it is a sign that the video is not playing properly. Audio distortion can also lead to misalignment of the videos with the audio. As soon as you start noticing this, it becomes evident that the video is damaged and won’t be opening on your Mac device.
- Missing video file parts: When you're playing a movie, you will notice the files moving quickly. You will have skipped around 15-20 minutes of the film or video clip. When an entire clip is lost, there is probably some problem with the video file, and it may be corrupted.
Reasons Why Your Mac Won’t Play Videos
Corrupted video files are one of the main reasons why Mac won’t play MP4 files. When the video isn't playing correctly, you won't be able to hear the audio. This can be a recurring issue if it is not fixed. It usually happens if there is an incompatible codec that may not support the respective audio file.
Another major reason videos won't play on Mac is if the graphic drivers or software have become outdated. Therefore, it becomes extremely important to update the software in such situations. Slow internet connections or weak browsers can also cause significant damage, especially in terms of Mac not playing videos.
How Do You Fix Online Videos that Won’t Play on Mac?
Corrupted video files won't play on Mac. Therefore, you should check other methods before implementing the video repair tool. Here are some of the common yet effective strategies that can help fix the videos:
1. Check Your Internet Connection
When your internet connection is slow, the video buffers. This buffering prevents the video from functioning efficiently, so you may need a more streamlined view of the video.
In fact, in some cases, slow internet can also prevent the video from being played at all. Therefore, you must check the internet connection thoroughly and consider browsing and streaming the videos.
2. Browse in a private window
If you ever face this issue, try to open the video in a private window. Opening the corrupted video in a private window will help you enlarge the extensions and understand the problems.
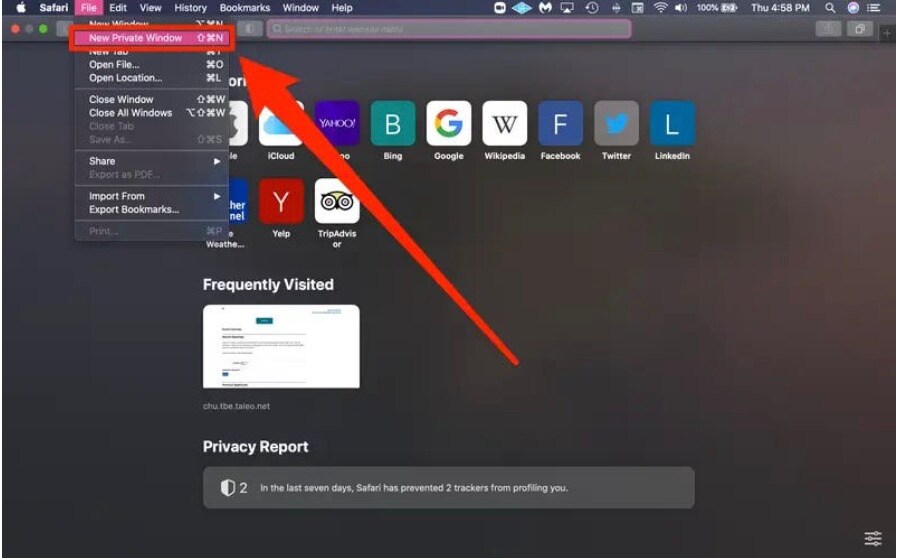
You can open a Private Window in Safari and Incognito Mode in Chrome. Once the windows open, you can browse privately and check if other windows are opening. Browse the windows normally and disable any required browser extensions.
3. Remove unknown or unneeded extensions
If there are any unknown or unrequited extensions, you must get rid of them immediately. These extensions often hamper and prevent the video from playing properly. If no valid sources are available for this video, it will not work.
You can disable all these extensions from the settings of your respective browsers. It is always a good idea to check these extensions occasionally and understand how they hamper the browser's workings. If the problem seems to be better fixed, keep the extensions disabled. Otherwise, you can connect with developers for an update.
4. Update your web browser
Updating your browser can also be a potential solution. Sometimes, a video may not play on the Mac because of problems in your browser. So, if you're using a particular browser to stream or watch videos, change it.
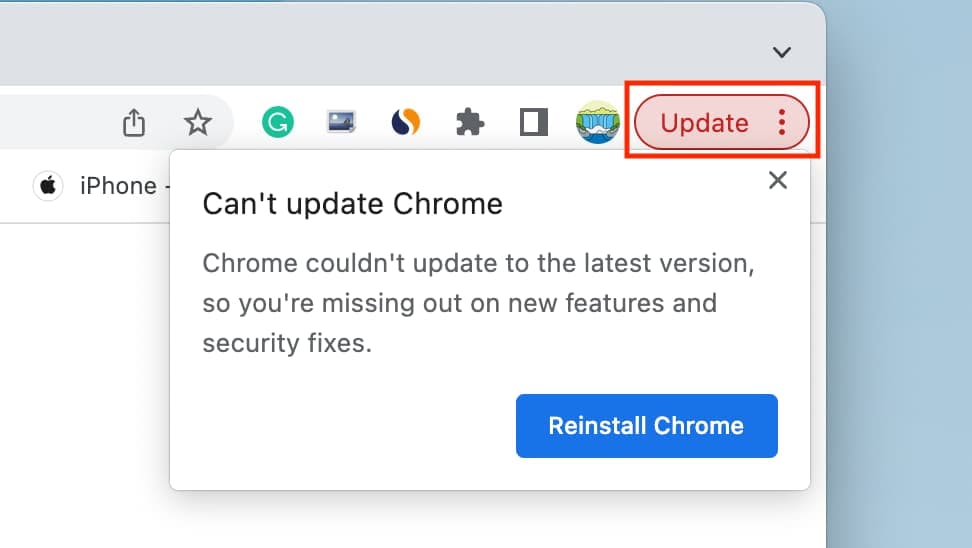
There are different browsers that are compatible with Mac, such as Safari, Chrome, and Firefox. You can either switch to another browser or download the latest version of the current browser you're using. This can help make the necessary changes. Relaunch the browser to update to avoid the Mac won’t play MP4 videos.
5. Convert Video to a Supported Format
Video extensions are important to consider while updating the file. If the video isn't available in a supported format, Mac won't play video. You must check for potentially suitable formats so that the video can function.
Check your player configurations and understand the types of formats that are supported. This will help you gain clarity, and then you can convert the video to a supported format. Online converters are available that will help you convert the video to a supported format.
6. Update MacOS
A major reason the video won't play on the system is outdated software. Outdated operating systems often need to load the latest video formats. Therefore, updating the OS so that the videos function properly is essential.
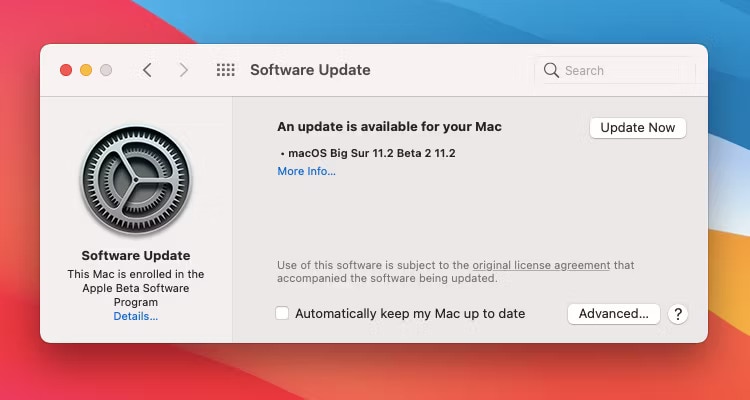
Consider updating MacOS to the latest version. You can update the OS from the settings itself. However, check if the update is compatible with the system configuration before updating. Depending on that information, you can update the videos.
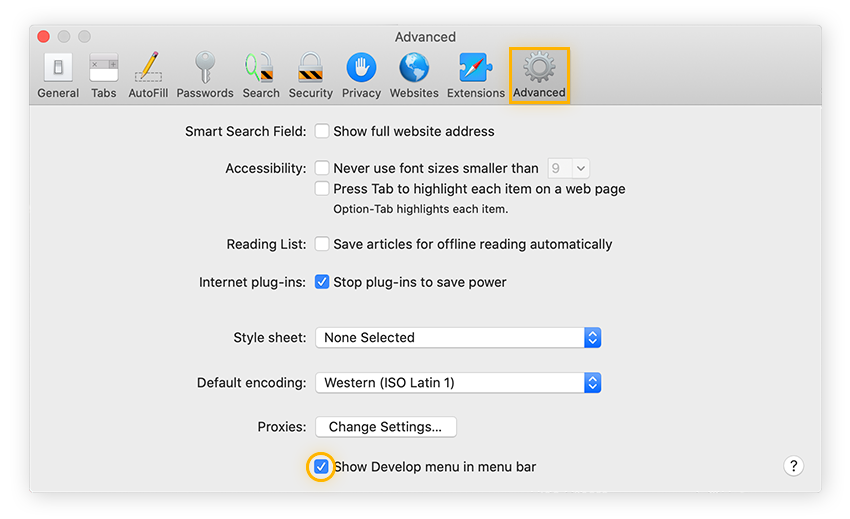
7. Check JavaScript is Enabled
If the videos do not open in your browsers, you must check if JavaScript is enabled. Often, Mac won’t play video because JavaScript is disabled. You can enable JavaScript in your respective browser from the settings.
Here are the steps to enable Javascript in Safari:
Step 1: Open Safari and then settings.
Step 2: Visit the Security tab.
Step 3: Check the Enable JavaScript option and enable it.
You can also enable JavaScript from other browsers in their settings.
8. Clear Your Caches
Clear your caches if you see a video playing error despite the above mentioned processes. Your previous history and caches can interact with your video and prevent it from being played correctly.
Clearing caches and cookies can improve your browsing experience and prevent any interference with media playback. It is advisable to clear caches, cookies, and browsing history regularly.
Follow the steps given below to clear the caches from Chrome to fix MP4 won’t play on Mac:
Step 1: Launch the Chrome browser on the system. In the upper right-hand corner, open the toolbar by clicking on three bots.
Step 2: Open the expanded menu for further details.
Step 3: Select the browsing data option. From the drop-down menu, click the option whose data you want to remove for the given time frame.
What To Do If The Problem Persists?
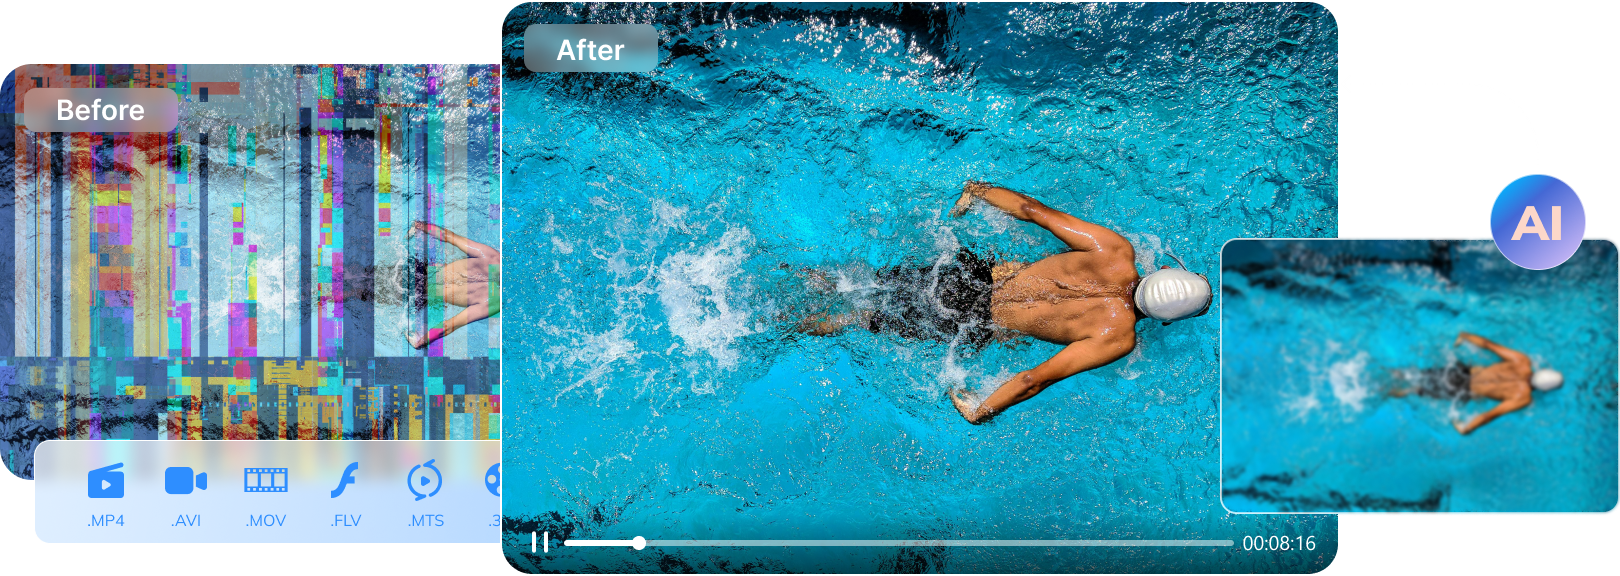
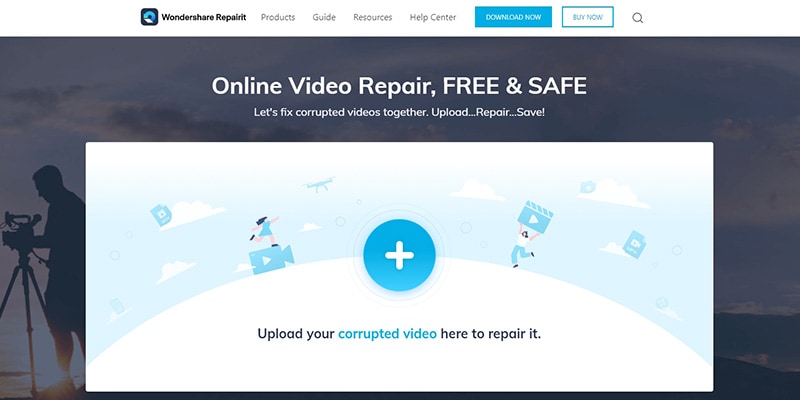
When the videos are not playing on Mac, you may need to turn to a repair tool. These tools are designed to fix your corrupted videos. Wondershare Repairit is one of the most reliable tools. It is a fast and accessible tool that can fix up to ten videos daily. You can install it on your Windows or Mac OS, and the tool will be ready.
If QuickTime shows a 'Corrupted File' error and VLC can't open it either, the file index is likely broken. This is where a dedicated tool like Wondershare Repairit becomes essential. Once you have installed the software on your device, you will need to follow the steps mentioned below to fix the videos on Mac:
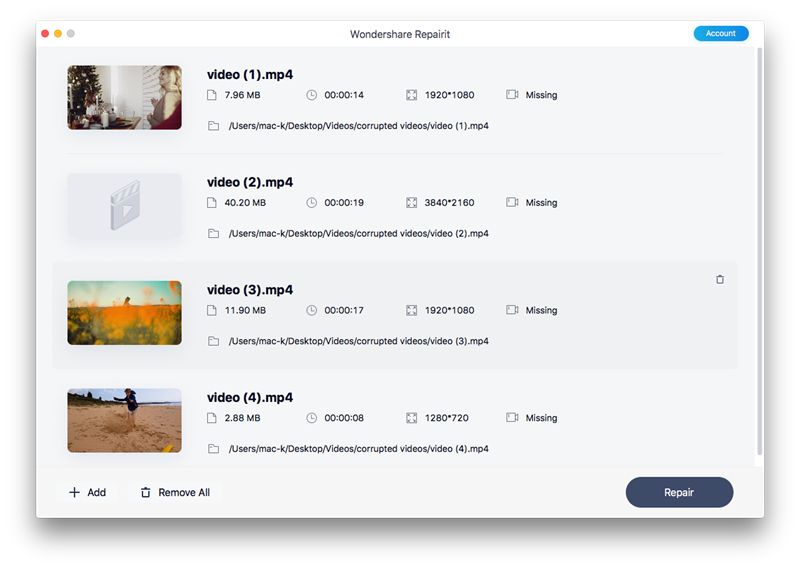
Step 1: Launch the software and click on the (+) sign to upload the corrupted video. You will need to select the video that you want to upload.
Step 2: Click on the Repair button. Wondershare Repairit will analyze the video and start repairing it automatically.
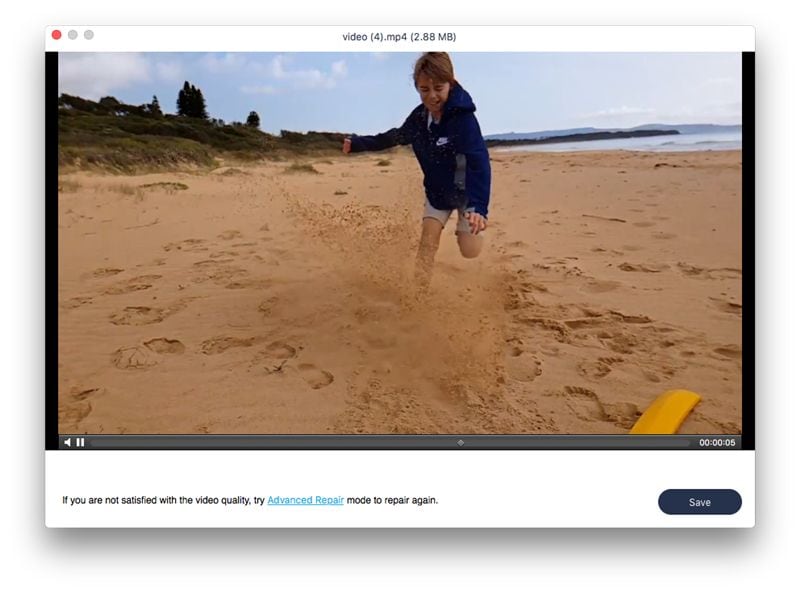
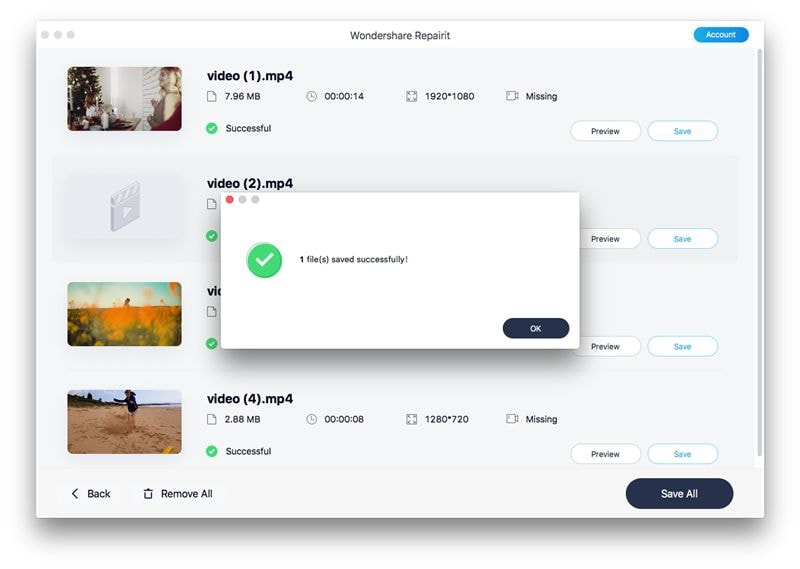
Step 3: Depending on the repaired video, a preview will be available. Check the Preview version. Click on the play button to check the preview, and if it fits your needs, download the video. You need to select the location where you want to save the video.

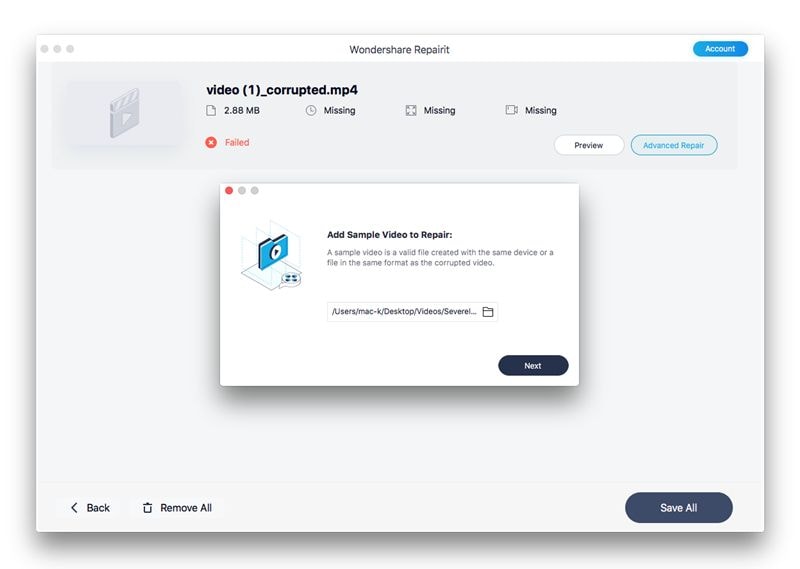
If the video doesn't fit your requirements, you can opt for the Advanced Repair of the version. You will receive the option “Preview failed? Try Advanced Repair” in the preview section. Click on it.
Step 4: In the new pop-up window, you must add a sample video by clicking “Adding Sample Video to Repair.” The Advanced Repair mode will thoroughly check the sample format and try replicating the same to fix the corrupted video.
Step 5: Click the Repair button and check the available preview adoption. Select the Quick Repair and Advanced Repair mode to initiate the process. Click on ‘Yes’ to save the video.
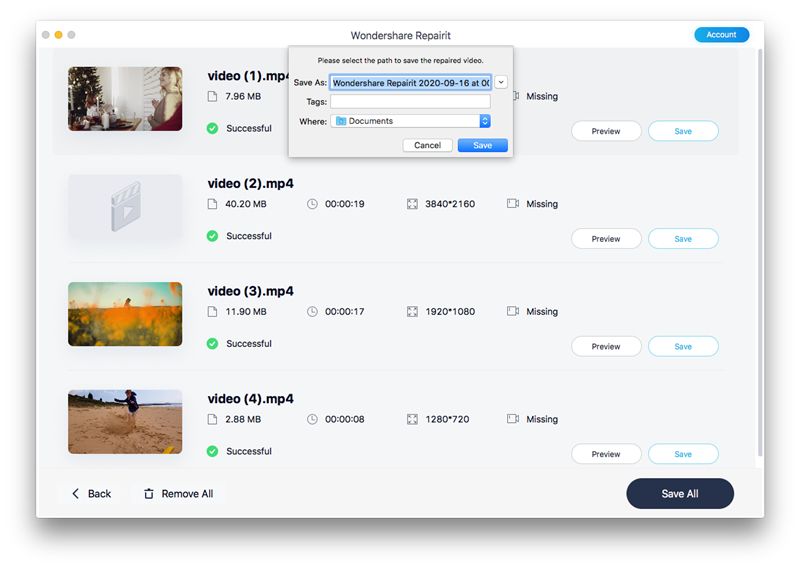
Step 6: Click on the Save option, and a new pop-up window will appear where you must select the location. Choose the right location to save the video.
You must avoid saving the video in the exact location as where it was previously saved. Wait for a few seconds, then select the location to save the video.
Wondershare Repairit is compatible with a wide range of video formats, such as MKV, MOV, MTS, 3GP, and more. Therefore, it can seamlessly repair broken or corrupted videos. It is easy-to-use software that is deeply ingrained with algorithms and can easily fix issues.
General Tips to Prevent Mac Videos from Getting Corrupted
If you are not mindful about the video being played on a Mac, there is a chance that you will lose it, or it will become corrupted. Therefore, it is extremely important to follow the tips below, which can help protect your Mac videos from getting corrupted:
Rename the Video Files Appropriately
Many users do not rename their file extensions properly, which increases the risk of video corruption. As a user, you need to be mindful of the video's format, too.
For example, you must never convert an MP4 extension to MOV or anything else. If you rename the videos properly after being converted, none of the media players will reject it. As a result, your device won’t get corrupted.
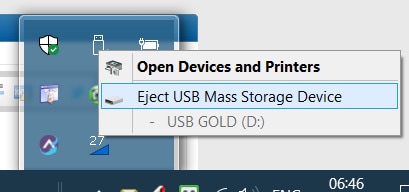
Eject the Drivers Carefully
You may want to just eject the drivers from your device directly without actually following the procedure to eject it. Abruptly ejecting the driver while it is still being used can hamper the software, thereby leading to the corruption of video files.
The software will be constantly reading the files in the driver when it is connected to the system. However, if you are playing any video file from your driver, the system will still be reading it. Abrupt removal can hamper the communication thereby negatively impacting video headers.
Care for the Operating System
The operating system of Mac is one of the most important ones to consider. Therefore, you must take proper care of the OS. It is strictly advisable to avoid any activities in your system that can potentially affect the OS of your system. Take proper care of the MacOS to avoid patches that can potentially harm your device.
Furthermore, it is extremely important to be mindful about downloading any content as well that can harm the system. Frequently updating your operating system can be very useful. Moreover, you must uninstall and delete any suspicious apps from your device. Consider installing high-quality software into your program to prevent the videos from getting damaged or corrupted.
Review and Then Download the Files
Irrespective of the type of files you receive, you must monitor it. There are some files that contain malware which you may download. This can lead to a virus attack on your system thereby contaminating and corrupting the videos.
If you have received any suspicious file for download, do not abruptly do it without reviewing it. Consider checking the properties before installing the same and launching it on your device. In fact, sometimes you may also receive corrupt or poorly encoded files which can be dangerous for the system.
Conclusion
Your videos are extremely important and so is your Mac system. Therefore, it is extremely important to determine the credibility of the same. If some videos aren't playing on your Mac system, adopt the above mentioned ways to fix it. Irrespective of the reason, there's no problem that can't be fixed. If the video not working on Mac, therefore adopt these reasons to be fixed and improve the performance of the system and video.
FAQ
-
Q1: How do I fix corrupted video on Mac?
You can use a third party video repair tool to fix the corrupted videos on Mac. Therefore, it is advisable that you use these tools and check if they're the relevant ones and can help in fixing the videos. -
Q2: Why is my Mac video not working?
Slow internet, outdated OS and corrupted video files are often the reason why your video may not be working on Mac. -
Q3: Why won't videos play on my Mac Chrome?
Mac systems are very particular about safety and security of users. Therefore, the moment they detect any potential threat they block it. As a result, if the video becomes corrupted, it wouldn't play at all.


