How to Repair Corrupted and Damaged System files in Windows 7
Is your Windows 7 system not working in an ideal way? Don't worry – there are plenty of ways to repair corrupted or damaged system files in Windows 7. By taking the assistance of Command Prompt, you can make it work in a trouble-free manner. This guide will provide a step-by-step solution to how to recover corrupted files in Windows 7.
What is a system file?
A system file is a vital part of any computer and is mainly used for its essential operations like protecting system files from deleting unintentionally. Generally, it is switched in a system folder that cannot be deleted either way or with the permissions.
But many times, due to computer crashes, malware, viruses, and bugs, unexpected computer shutdown, the file can be damaged. Hence, error messages appear when you try to open the files, including:
- Cannot open the file because the extension is not valid
- The file Cannot be opened because there are problems with the contents
- The file is corrupted and cannot be opened in Excel/Word
- The file or directory is corrupted and unreadable
If you also have encountered a related query and looking for a solution for "How to Repair Corrupted and Damaged System files in Windows 7," try the below-mentioned methods and try to repair your damaged files in Windows 7.
Part 1: How to Repair Windows 7 Corrupt System Files
Even though Windows 7 is not as advanced as Windows 10 when it comes to system repair, there are still a few options to repair its corrupt files. However, here are some of the methods you can try to fix your corrupted files in Windows 7.
Fix 1. Run the SFC /scannow Command
For instance, you can go to Command Prompt and learn how to repair corrupted and damaged system files in Windows 7.
All you need to do is follow these steps:
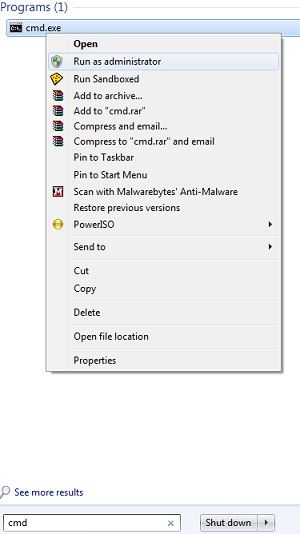
Step 1: Go to the Start Menu and look for Command Prompt by typing "cmd." Once the icon of Command Prompt would appear, right-click it and launch it as an administrator.
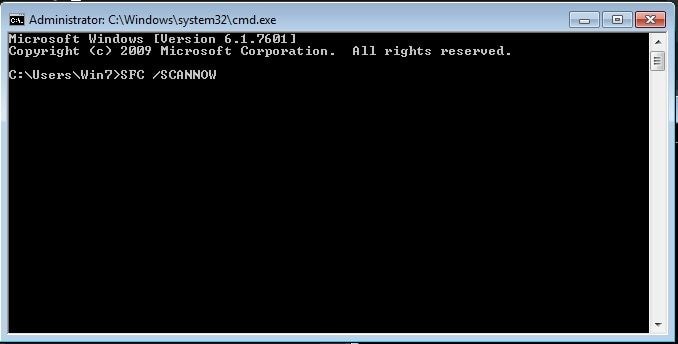
Step 2. You might have to provide the administrator's account password as well (if not logged in as an admin already). Once Command Prompt is launched successfully, provide the command "SFC /SCANNOW" and press Enter.
Step 3. The SFC or the System File Checker command will perform the needed operations to check for any damaged or corrupted Windows files. The process might take a while. Wait until the procedure is accomplished.
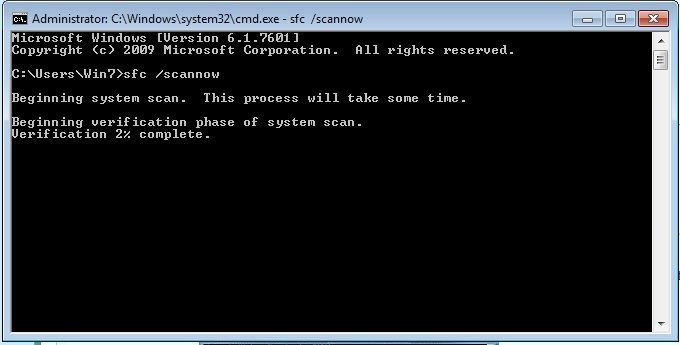
Step 4. Once it is done, you can view the results. For instance, you can know what files were corrupted and fixed by the SFC command.

While the system checks for a corrupted file, you should not close the explorer or restart your system in between. It might cause some unwanted damage to your system instead.
In case you are still unable to fix your hard drive problem, you can try the fixes below methods.
Fix 2: Change the File Format
Sometimes when you open a problematic Excel or Word document, you find there is no data available. Hence, to fix this kind of problem, you can save the file in another format.
Step 1. Open damaged file and go to "Save As." Now select "Web Page" from the possible file formats. Make sure that the whole Excel file is selected, and then click "Save."
Step 2. Find the saved file and right-click on it, select "Open with," and tap on the "Microsoft Office Excel" option.
Step 3. If the file can be opened usually, go to "Save As" and choose an Excel format .xls or .xlsx. Then, it will recover the corrupted Excel.
Fix 3. Restore Corrupted Files from Previous Versions
Another applied method to fix corrupted and damaged system files is to restore from the previous versions.
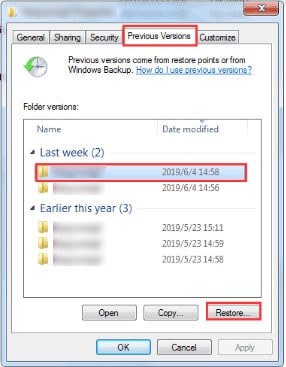
Step 1. Find the damaged file, right-click it, and select "Restore previous versions."

Step 2. If your system permits, find and select the correct version of the same from the list and click on the "Restore" button.
Now hopefully, you know how to repair corrupted and damaged system files in Windows 7 automatically. If you have installed any theme on your system, it will revert to the default explorer.
Part 2: How to Repair and Recover Windows 7 with Bootable Media
Following the above, you would learn how to repair corrupted and damaged system files in Windows 7.
Nevertheless, it is observed that, at times, the SFC feature doesn't yield the desired results. Also, you might not be able to access your content on your Windows system. In this case, you can use Recoverit Pro.
Being one of the oldest and most trusted data recovery tools, it can easily retrieve your lost or deleted content. The latest Pro version has tons of advanced features as well as operating system crash recovery.
Your Safe & Reliable Windows 7 Recovery Software
- Recover lost or deleted files, photos, audio, music, emails from hard disk effectively, safely, and completely.
- Supports data recovery from recycle bin, hard drive, memory card, flash drive, digital camera, and camcorders.
- Supports to recover data for sudden deletion, formatting, hard drive corruption, virus attack, system crash under different situations.
Download and install Recoverit on your computer, get a blank USB drive, and connect to the computer. Launch Recoverit and follow the next steps to recover Windows 7 data.
Step 1: Select the data recovery mode. Launch Recoverit on your system, and select the "System Crash Data Recovery" mode.
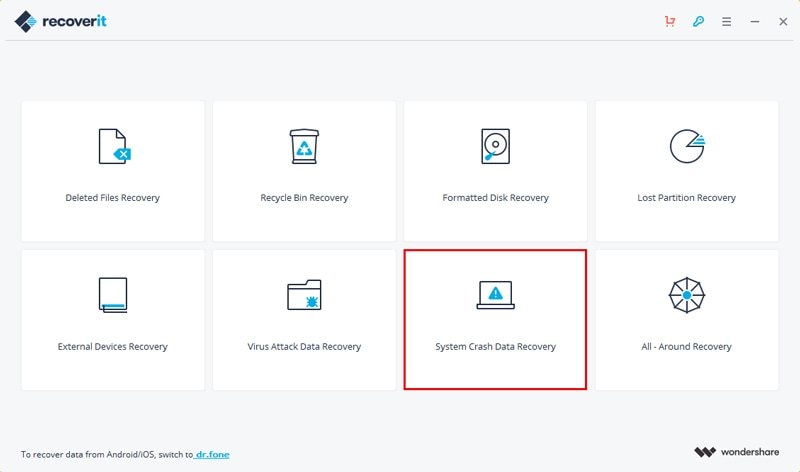
Step 2: Create a bootable media Create a bootable drive to recover data when the Windows system is unable to launch.
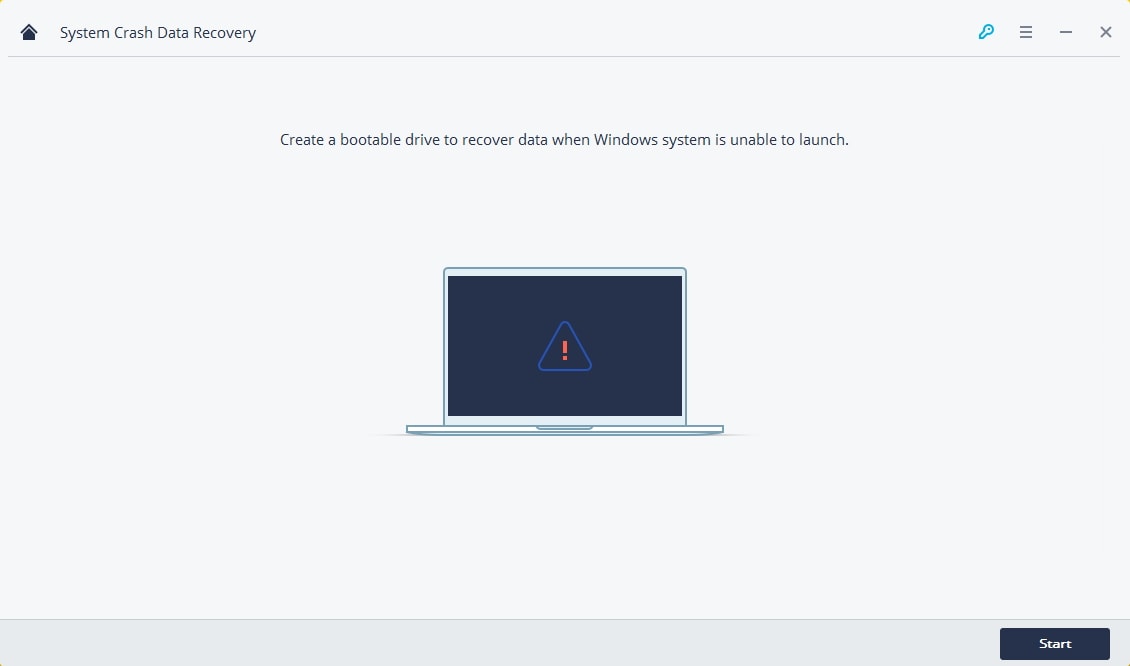
Step 3: Select a USB mode Select a mode to create a bootable drive. You can select a USB bootable drive or CD/DVD bootable drive and click the "Create" button to start.

Step 4: Format your USB Flash Drive Once you choose to create a USB bootable drive, an alert message about formatting a USB flash drive will pop up. Ensure you have backup your important data before formatting the USB flash drive to create a bootable drive. Click the "Format now" button to confirm.

Step 5: Recover Windows 7 with Bootable Media After creating a bootable drive, you can copy Windows 7 and recover data from Windows 7 hard disk. But sometimes, you will need to change the computer boot sequence, restart the computer, enter the BIOS with the function key F12, or check the full solution to set the computer to boot from a USB drive.
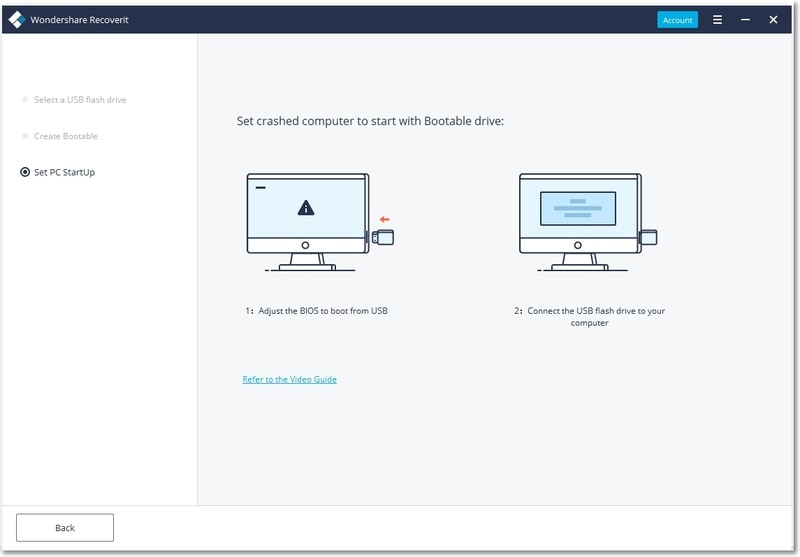
Note: To recover your data from a non-working system, you need to create bootable media at first. If your system is malfunctioning or corrupted, you can install Recoverit Pro on another working Windows computer.
Closing Words
As you have seen, there are various methods that you can use to repair corrupted and damaged files in Windows 7. In case the above methods aren't practicable, or you want to take help from a professional file repair tool, the Recoverit file repair tool is a great option. The tool is loaded with cutting-edge file repair technology and can repair any data file rapidly and effectually.
Furthermore, Wondershare Recoverit Data Recovery is the most trusted brand in the data recovery industry, and it can download its software for free.
Computer Troubleshooting
- Win System Crash
- Windows Tips
- Computer Problems
- Blue Screen Errors


 ChatGPT
 Perplexity
 Google AI Mode
 Grok
Grok


David Darlington
staff Editor